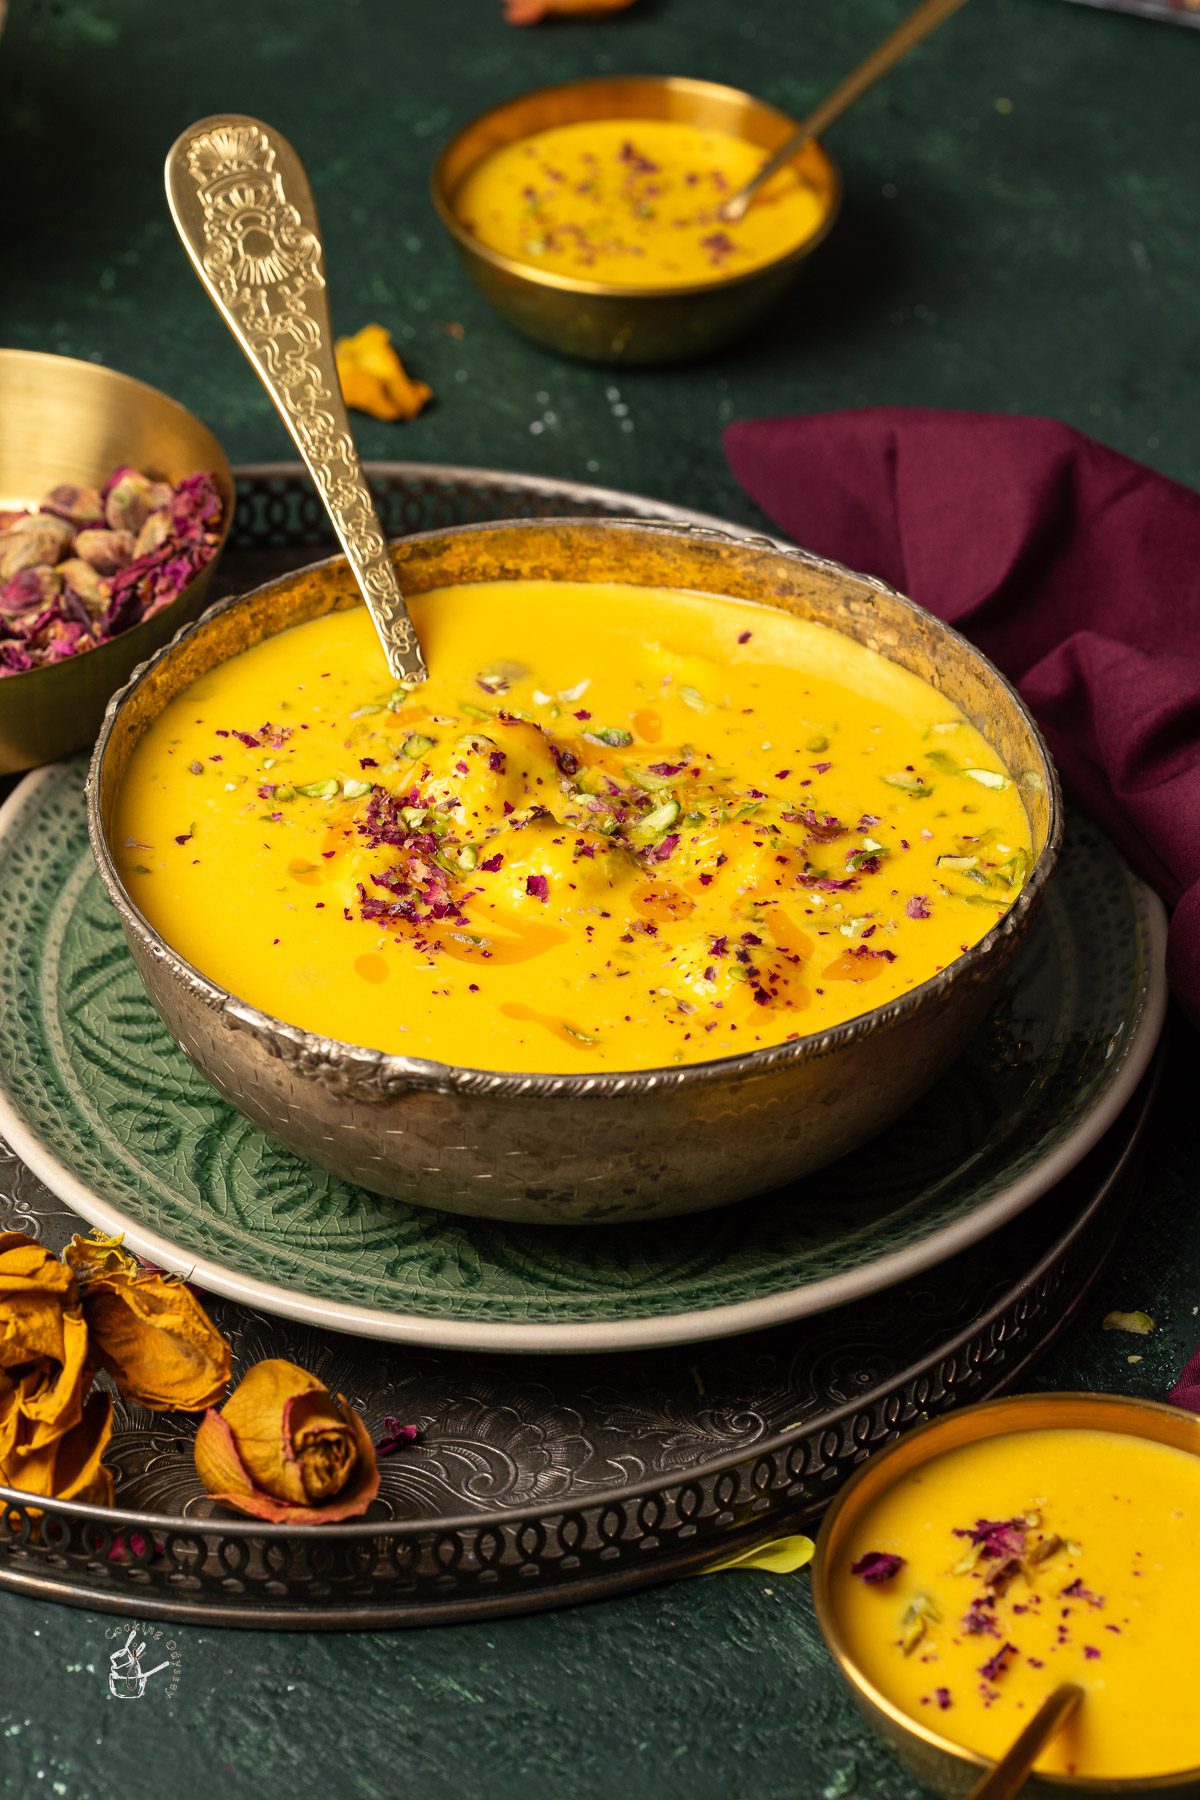
These chilli lime accordion potatoes are an Indian take on the viral TikTok trend! Lattice cut slices of potatoes are coated in a tongue tingly masala then baked or air fried until crispy outside and soft inside.


These chilli lime accordion potatoes are an Indian take on the viral TikTok trend! Lattice cut slices of potatoes are coated in a tongue tingly masala then baked or air fried until crispy outside and soft inside.
Sweets and snacks play an essential role in Diwali celebrations, and families often prepare a variety of delectable treats to share with friends and relatives.
Here is my ever-growing selection of Diwali recipes including both sweets and snacks!
Check out my Diwali Dinner Menu for inspiration to curate your own bespoke menu

Diwali is a vibrant, colourful and joyous festival that is best expressed through the medium of food! It's the time to prepare traditional and innovative sweets and savoury snacks for friends and family.
Add that love, affection and personal touch this festive season.
See our collection of Indian Milk Sweets, Easy Indian Desserts for Dinner Parties or Indian Fusion Desserts.
Recipes in this list range in difficulty - suitable for beginners to advanced. Many in the list can be made ahead and stored.
[feast_advanced_jump_to]Diwali sweets hold a special significance during the Festival of Lights.
These delectable treats are not only delicious but also symbolize the sweetness and prosperity that people wish to share with their loved ones during the festive season.
Families prepare a wide array of sweets, and it's common to exchange them as gifts with friends, relatives, and neighbours.
You can find plenty of easy diwali sweets recipes below!


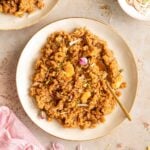


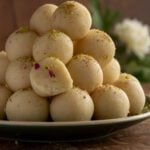
Paneer Gulab Jamun (Bengali Channar Puli)
Shakkarkand (Sweet potato) Gulab Jamun
Barfi is a broad category of sweets made with milk, sugar, and various flavorings like nuts, fruits, and spices.


Peda is a sweetened, condensed milk-based fudge, often flavored with cardamom and garnished with nuts.


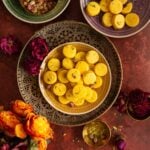


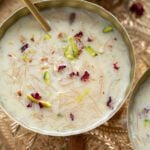
Halwa is a general term for dense and sweet confections made from various ingredients such as semolina, wheat flour, lentils, carrots, and more.


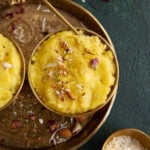


Ladoo is a traditional Indian sweet available in various flavors and forms. It is made from different ingredients like gram flour (besan), semolina (sooji), coconut, and more. Some common types of ladoo include Besan Ladoo, Motichoor Ladoo, Coconut Ladoo, and Rava Ladoo.









Diwali celebrations also include a variety of savory snacks that are equally delicious and popular. These savory snacks are enjoyed during gatherings, family get-togethers, and while celebrating the festival.
Chevdo (also called as "Chivda") is a popular Indian savory snack mixture. There are several variations of Chevdo, and it is a staple snack during festivals like Diwali or enjoyed with tea or coffee during regular days.


Sprouted Beans and Cornflakes Chivda
J Cooking Odyssey wishes you and your loved ones a very happy and prosperous Diwali!
As always if you make this recipe, be sure to leave me a comment, rate this recipe and tag me on Instagram @jcookingodyssey or #jcookingodyssey. I love seeing all your photos of my recipe recreations!
Don’t forget to follow me on social media using the buttons below – I can't wait to see you all there!
Make buttery Gulab Jamun Cookies using store-bought gulab jamun mix and a rose water glaze. This 5 ingredient eggless recipe is easy to make yet makes an impressive sweet treat for special occasions.

Nankhatai is a classic eggless Indian cookie recipe. These Indian buttery shortbread cookies are laced with cardamom and saffron. They have an irresistible rich, crumbly, melt in mouth texture.

Farsi Puri is a traditional Diwali savoury snack recipe from Gujarati cuisine that is crispy and flaky. This traditional Gujarati snack is made with 5 ingredients such as plain flour, semolina and basic spices. It is the perfect and tasty teatime exclusive snack that melts-in-your-mouth with a hot cup of tea.

Farsi puri is one of those Gujarati snacks where the technique matters more than the ingredient list. The dough needs enough ghee for moyan, it must be kept stiff, the puris should be rolled thicker than normal puri, and the frying has to be slow. Rush any of those steps and you lose the flaky, khasta texture that makes farsi puri special.
Farsi puri recipe - crispy flaky Gujarati snack recipe made with plain flour served during Diwali in almost all Indian homes.
It can be made any time of the year in small batches, served as an evening snack with Indian tea along with tikha gathiya, namak pare, sev, chakli/chakri (rice murukku) and nankhatai biscuit.
For Gujaratis, the festival of Diwali is incomplete without these crispy puris. In our house every year it appears on top of the Diwali snacks list!
They are a firm favourite of my mum, and my baby brother as much as I and my dad enjoy Kenyan Chevdo.
We make these batch of puris and store them in airtight container during Diwali season, and family members enjoy with hot tea in the evening or in the morning.
This perfect recipe yields farsi puri that are crispy on the outside, flaky and crumbly texture inside and melts in your mouth!
Farsi Puri or Gujarati Farsi Poori is also known as Rava Menda Puri.
The meaning of farsi puri is simple. In Gujarati language, Gujarati word Farsi means flaky and in Hindi paratdar or Khasta. Farsi puri gets the flaky texture due to addition of ghee (moiyan) in the recipe.
Gujarati Farsi puri come very close to Punjabi and Rajasthani Mathri recipe, and enjoyed during the season of Diwali, Holi, Karva Chauth and Teej.
The main ingredients of Faris Puri are plain flour, semolina (some people skip it), ghee and some basic spices such as black pepper and cumin seeds. You do not need gram flour to make this recipe.
A well done farsi puri should be crispy on the outside, flaky and crumbly inside and neither too soft or hard but just right. When you eat it should not crunch but just melts in your mouth.
My mum has been making these over the past 3 decades and I've made these farsi puris a number of times now and they turn out beautifully every time. Just the perfect snack!

Full ingredients with measurements are available in the recipe card below at the end of this post
Plain flour - This recipe uses plain flour, also known as all purpose flour or Maida in Hindi language. It is important that you read the label on your bag of flour to be sure that it is plain flour and not self-raising flour. Self-flour contains raising agents, and we don't want fluffy or raised puris.
Semolina - We'll need semolina flour, known as sooji or suji to bring crispiness in the farsi puris. Semolina can be 'course' or 'fine' - you'll need coarse for this recipe.
Ghee - I'm using homemade desi ghee. For melt-in-your-mouth texture and flaky farsi puri ghee is must in this recipe.
Flavours - As well as the texture and the unique flavours are so important for farsi puris that lingers after. Traditional farsi puri recipe requires black peppercorn and cumin seeds or caraway seeds.
Oil - To deep fry puris we need oil that is neutral in flavour. Avoid strong flavoured oil such as olive and mustard.
Seasoning - Salt and black pepper
You can skip semolina if you wish.
I prefer to make farsi puris using plain flour, however you can use wheat flour as a healthier alternative.
For crispy masala puris add usual spices such as turmeric, red chilli powder and sesame seeds.
Add fresh or dried methi (also known as kasoori methi) for methi puri recipe.
Add some filling for stuffed farsi puri like these Farsi Khama Puri.
Use any other dried herbs with a twist.
Traditional Gujarati farsi puri made without turmeric powder, but if you wish to do so, you can add it.
For vegan version, skip dairy ghee. Instead use vegan ghee, vegan butter or oil for moiyan.

Measure the ghee after melting for accurate measurements.
To get the perfect flaky and crispy texture, the ratio of the flours and ghee must get right therefore do not skimp on ghee.
Ensure you use melted ghee to make farsi puri.
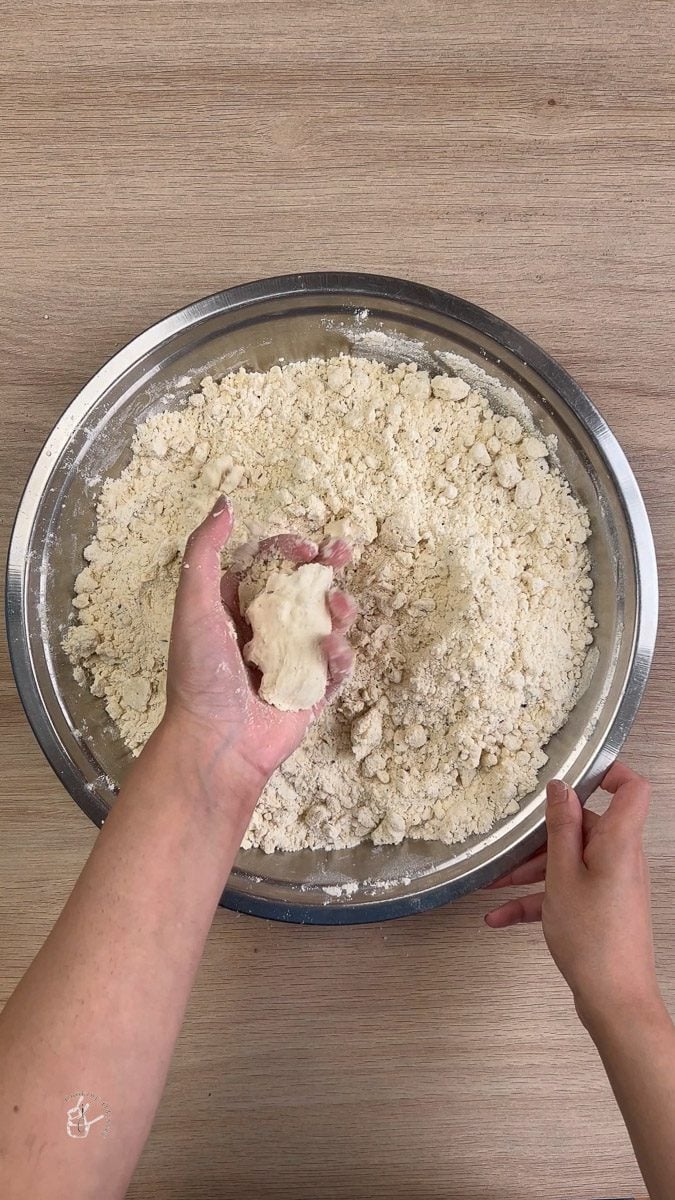
The dough for the farsi puri should be quite stiff and hard. Whilst kneading the dough use little water at a time.
Don't roll the puri too thin, it should be kept thick.
Must prick puris after rolled using a fork or knife to prevent puri from fluffing whilst deep frying. Also this step helps to puris cooked inside too.
Fry farsi puris on low heat and maintain the oil temperature throughout the cooking and don't let them brown.
If puris are fried on a medium-high heat, they will get brown very quickly and will remain uncooked inside.
Gujarati style crispy farsi puri should not be in brown colour.
Full printable recipe in recipe card below.
This irresistible Diwali snack recipe comes together with just a few simple steps
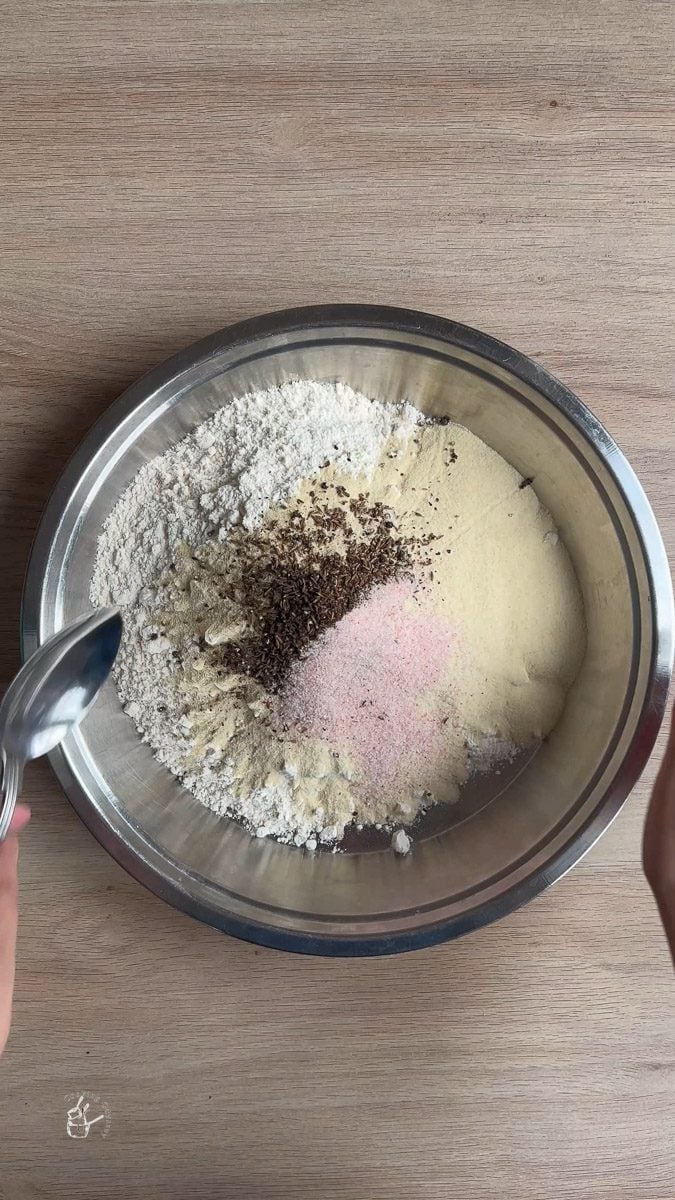
Before you start preparing the recipe pound the black peppercorn and whole cumin seeds (no need roasting) using pestle and mortar. Don't make fine powder, we need it coarse.
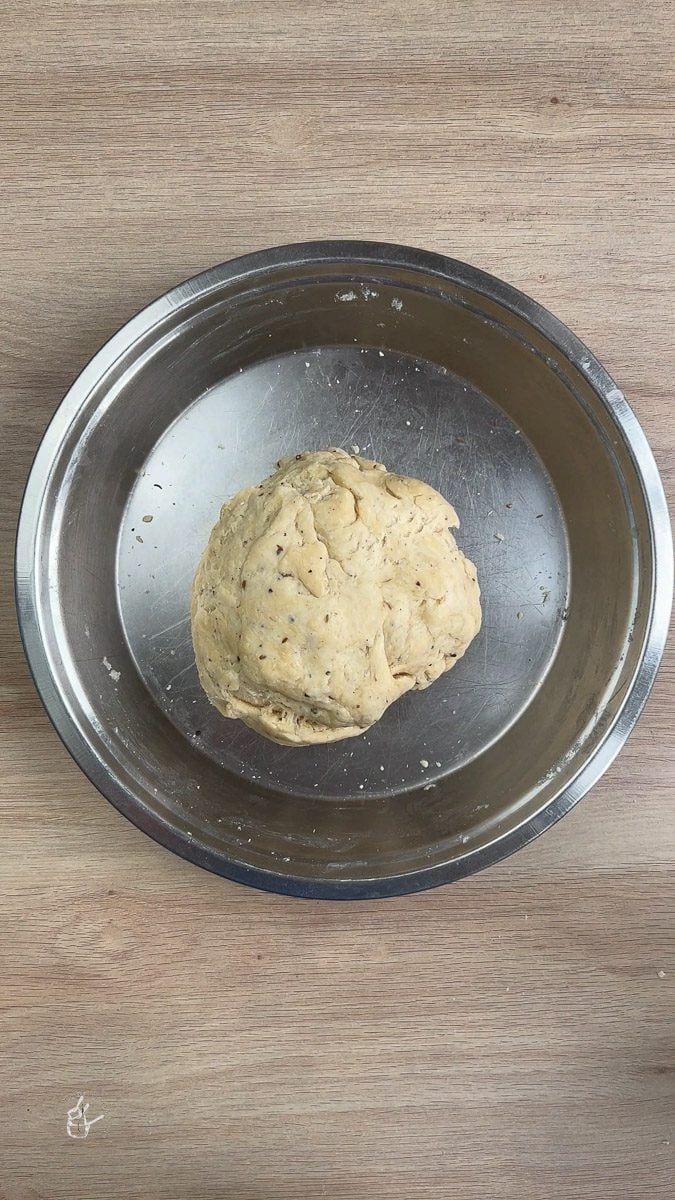
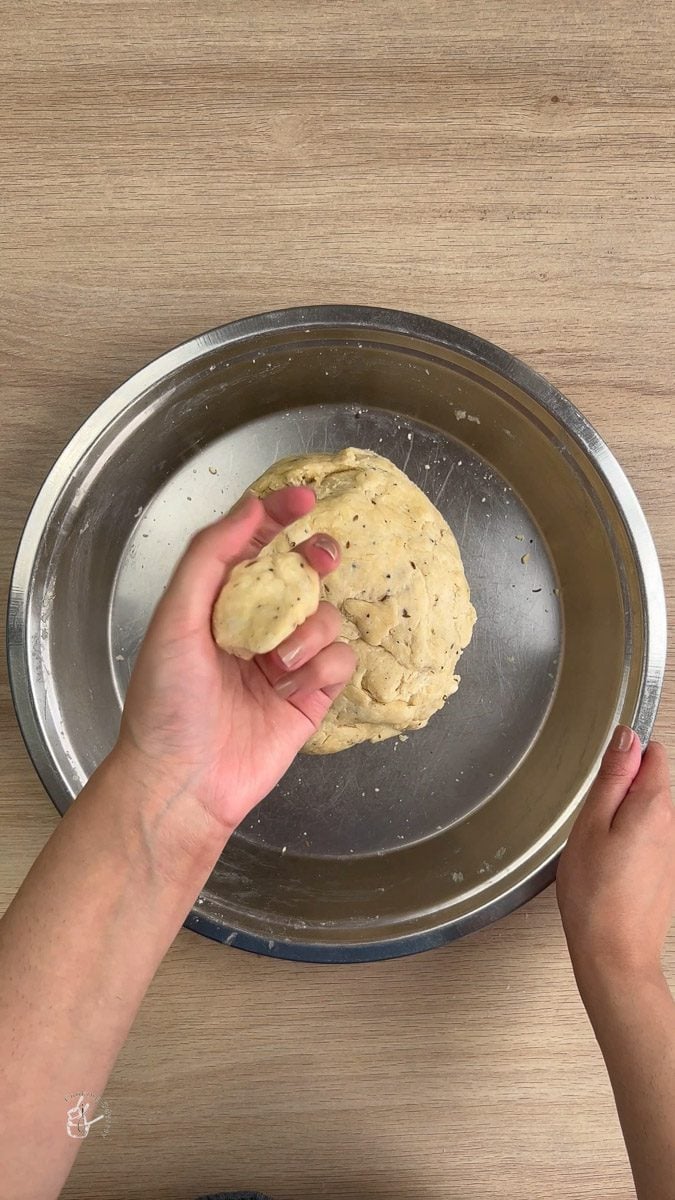

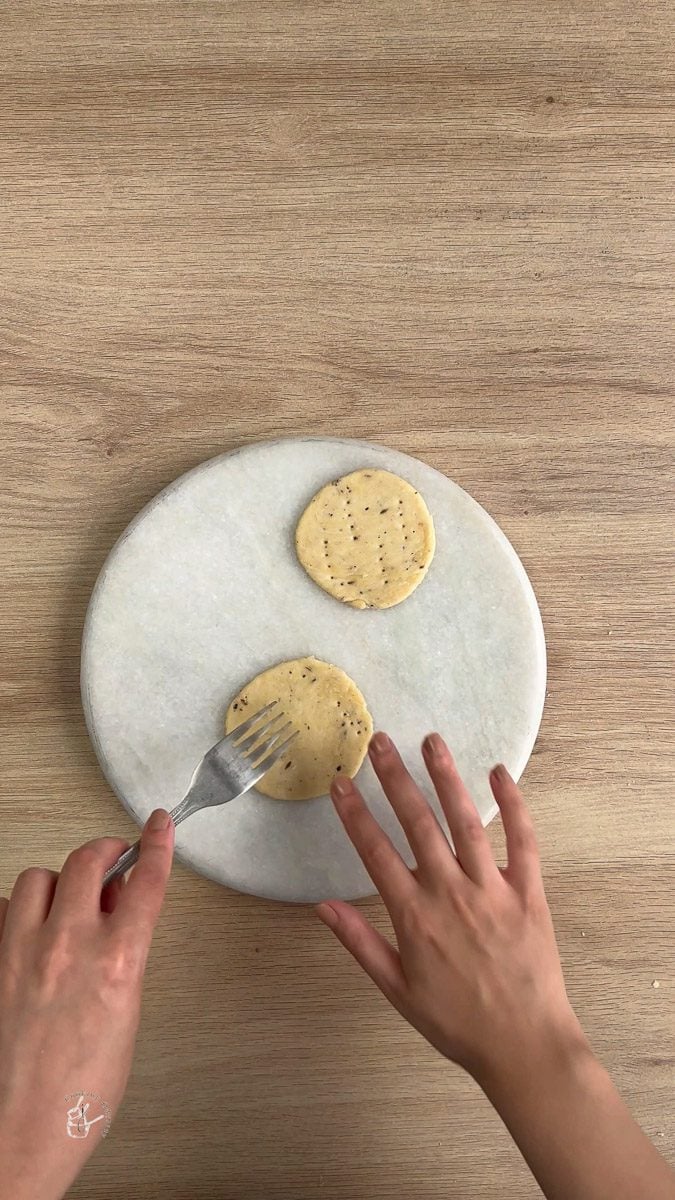
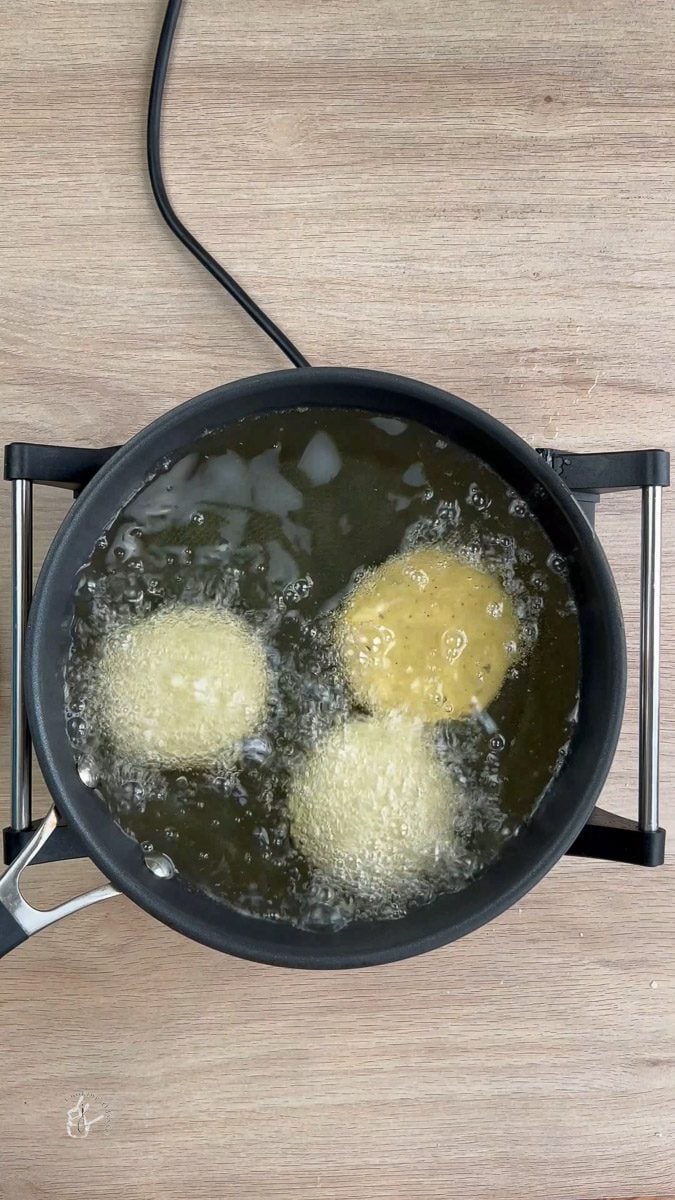
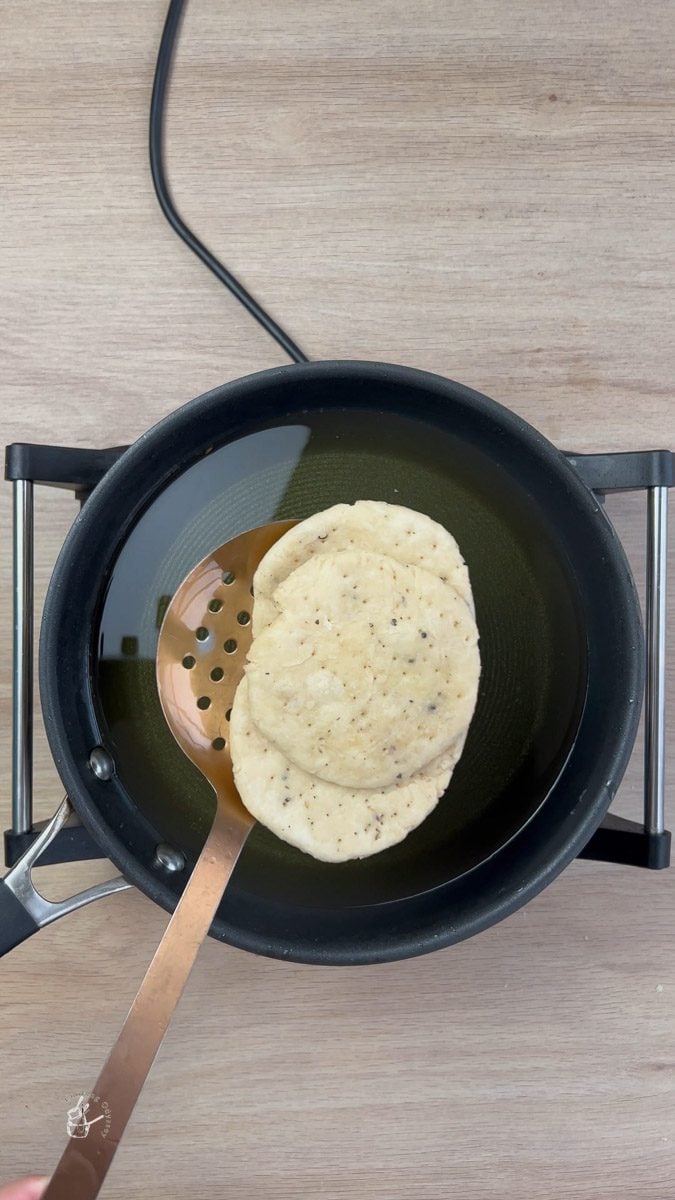
Like any dry Diwali snacks, these Gujarati farsi puri can be made in advance as they have a longer shelf life.
They stay fresh up to 15-20 days or long time at room temperature. Once, totally cooled and crispy, carefully arrange them in the air-tight container.
Do not store in the refrigerator. They are not suitable for freezing.
Gujarati Farsi puri is a great snack teatime snack that pair so good with masala tea , karak chai, cardamom tea or coffee.
In my family we enjoy them at breakfast, mid-morning or afternoon, basically any time of the day.
As well as tea and coffee, these puris are eaten with aathela marcha and sambharo.
My grandma in India used to add in making Bhel Puri. Once all the diwali snacks are are close to finishing by mixing poha chevdo, ratlami sev and chaat chutneys for evening snacks.
Make in small sizes and serve as an appetizer with raita, kachumber salad, chutneys and dips. These are perfect for sev puri or sukha puri.

As always if you make this recipe, be sure to leave me a comment, rate this recipe and tag me on Instagram @jcookingodyssey or #jcookingodyssey. I love seeing all your photos of my recipe recreations!
Don’t forget to follow me on social media using the buttons below – I can't wait to see you all there!
PLEASE NOTE: Nutritional values are estimated by a computer and may vary based on ingredients and portion sizes. For personalised dietary advice, please consult a qualified healthcare professional.
Share on Facebook Pin This RecipeNote - This recipe has been updated from our recipe archives with new images and content, but the recipe remains the same. First time published in February 25th, 2012.
This papaya sambharo is a spicy stir fry made out of raw papaya and green chillies! It is a super quick recipe made with unripe grated papaya and a simple tempering of mustard seeds. Serve it with fafda and kadhi chutney.

Make the freshest kadhi chutney for fafda with homemade papaya no sambharo. Fafda is a much loved Gujarati snack recipe.

These eggless pistachio cupcakes are flavoured with cardamom and topped with a silky saffron buttercream frosting. The perfect bake for special occasions or the festive season.

This simple Eggless Bakery Style Honey Cake requires minimum effort but yields amazing results! A simple, delicious sponge cake that is perfect with a morning coffee, afternoon tea or for any happy occasion.
Pairs beautifully with a cup of Karak Chai.

Black Chickpea Hummus is a smooth dip made with black chickpeas instead of regular chickpeas. It has a nuttier and earthier flavour compared with regular hummus that you just have to try! Naturally vegan and gluten-free, it takes just 5 minutes to make.

This Black Chickpea Curry or Kala Chana nu Shaak is a Gujarati style curry. Black chickpeas are simmered in a sweet and tangy tomato tamarind gravy. Naturally vegan and gluten-free.

Paneer Kali Mirch is a creamy paneer curry that is flavoured with freshly cracked black pepper. The creamy gravy is a rich combination of cream, thick yogurt and cashew.

Khatta Mag is a green moong bean curry cooked in a spiced yogurt gravy. Prepare this delicious Gujarati dish for a quick mid week meal.

These Kesar Pista Coconut Ladoo are so easy to make at home with condensed milk. They have a divine melt in the mouth finish and are not dry. Perfect for Diwali, Navratri and other occasions.

This instant mawa with ricotta cheese is my shortcut for making soft, crumbly homemade khoya without boiling milk for hours. In fact, it takes less than 20 minutes. Full-fat ricotta, milk powder, cream and ghee are cooked down until thick, rich and grainy - perfect for Indian sweets like halwa, barfi and ghughra, and useful in rich savoury dishes too.
You can also make homemade khoya with milk powder.

SUMMARIZE & SAVE THIS CONTENT ON
Note – This recipe has been updated from our recipe archives with further recipe testing. First published in June 2012.
Mawa, also known as khoya, is one of those ingredients that appears again and again in mithai and Indian desserts. Essentially, it's a cooked down milk solid traditionally made by simmering whole milk slowly until most of the water evaporates and the milk solids are left behind.
Mawa adds richness, milkiness and that slightly grainy texture you cannot get from cream alone.
I use homemade mawa in so many J Cooking Odyssey recipes, either made from ricotta cheese or from milk powder. It is part of how I build Indian sweets at home, especially when fresh shop-bought mawa is not easy to find.
This instant ricotta mawa recipe gives you a practical homemade version using full-fat ricotta, milk powder, double cream and ghee. It is not exactly the same as traditional slow-reduced mawa, but it gives you a very useful soft, crumbly khoya for sweets and rich Indian dishes.
On my blog, I use two main homemade mawa methods: this ricotta mawa and my homemade khoya with milk powder.
Both are useful, but I do not use them in exactly the same way.
Ricotta mawa is softer, crumbly and slightly grainy. I like it best for sweets where that texture works in your favour, such as gajar halwa, milky dodha barfi, soft and creamy coconut barfi, aate ka halwa with mawa and mawa ghughra.
Milk powder mawa is smoother, stickier and more interchangeable. I use it when I want a smoother base or a richer dough-like texture, such as in mawa peda, gulab jamun with khoya, kesar mawa na penda and kala jamun.
Some recipes can use either, depending on the texture you want. For example, eggless mawa cake works well with homemade mawa, but the mawa should be fairly dry and crumbly so it does not add too much moisture to the cake batter.
If I need mawa for a sweet and I am not sure which version to use, milk powder mawa is usually the more flexible option. If I specifically want a grainier, crumbly texture, I choose ricotta mawa.
Full-fat ricotta cheese
I only use full-fat ricotta for the best texture. Lower-fat ricotta can be more watery and less rich, which means the mawa may take longer to cook down and will not taste as creamy.
I use fresh, creamy full-fat ricotta cheese - the kind sold in supermarket tubs. It should look soft, moist and spoonable, almost like a grainier mascarpone.
Avoid very dry, crumbly or heavily grainy ricotta-style cheese for this recipe. Some Turkish and international grocery shops sell ricotta-style or lor-style cheese that is much thicker and drier. That type is lovely for other uses, but it will not cook down into the same soft, creamy mawa texture here.
Use any leftover ricotta to make Ricotta Cheese Peda, this Instant Kalakand with 2 ingredients or One Pot Ricotta Lemon Pasta.
Milk powder
Milk powder helps absorb moisture from the ricotta and gives a stronger milky flavour. Use full-cream milk powder if you can.
Double cream
Double cream adds richness and helps the ricotta mawa taste more like khoya rather than just cooked cheese. US readers can use heavy cream.
Ghee
Ghee adds flavour and helps the mawa cook into a soft, rich mass. I tend to use homemade ghee (I'm sure you can sense a theme here) or shop-bought ghee.
The stovetop gives you the most control because you can see the ricotta mixture changing from loose and creamy to thick, grainy and crumbly.
The microwave method is still useful, especially when you want less hands-on stirring.
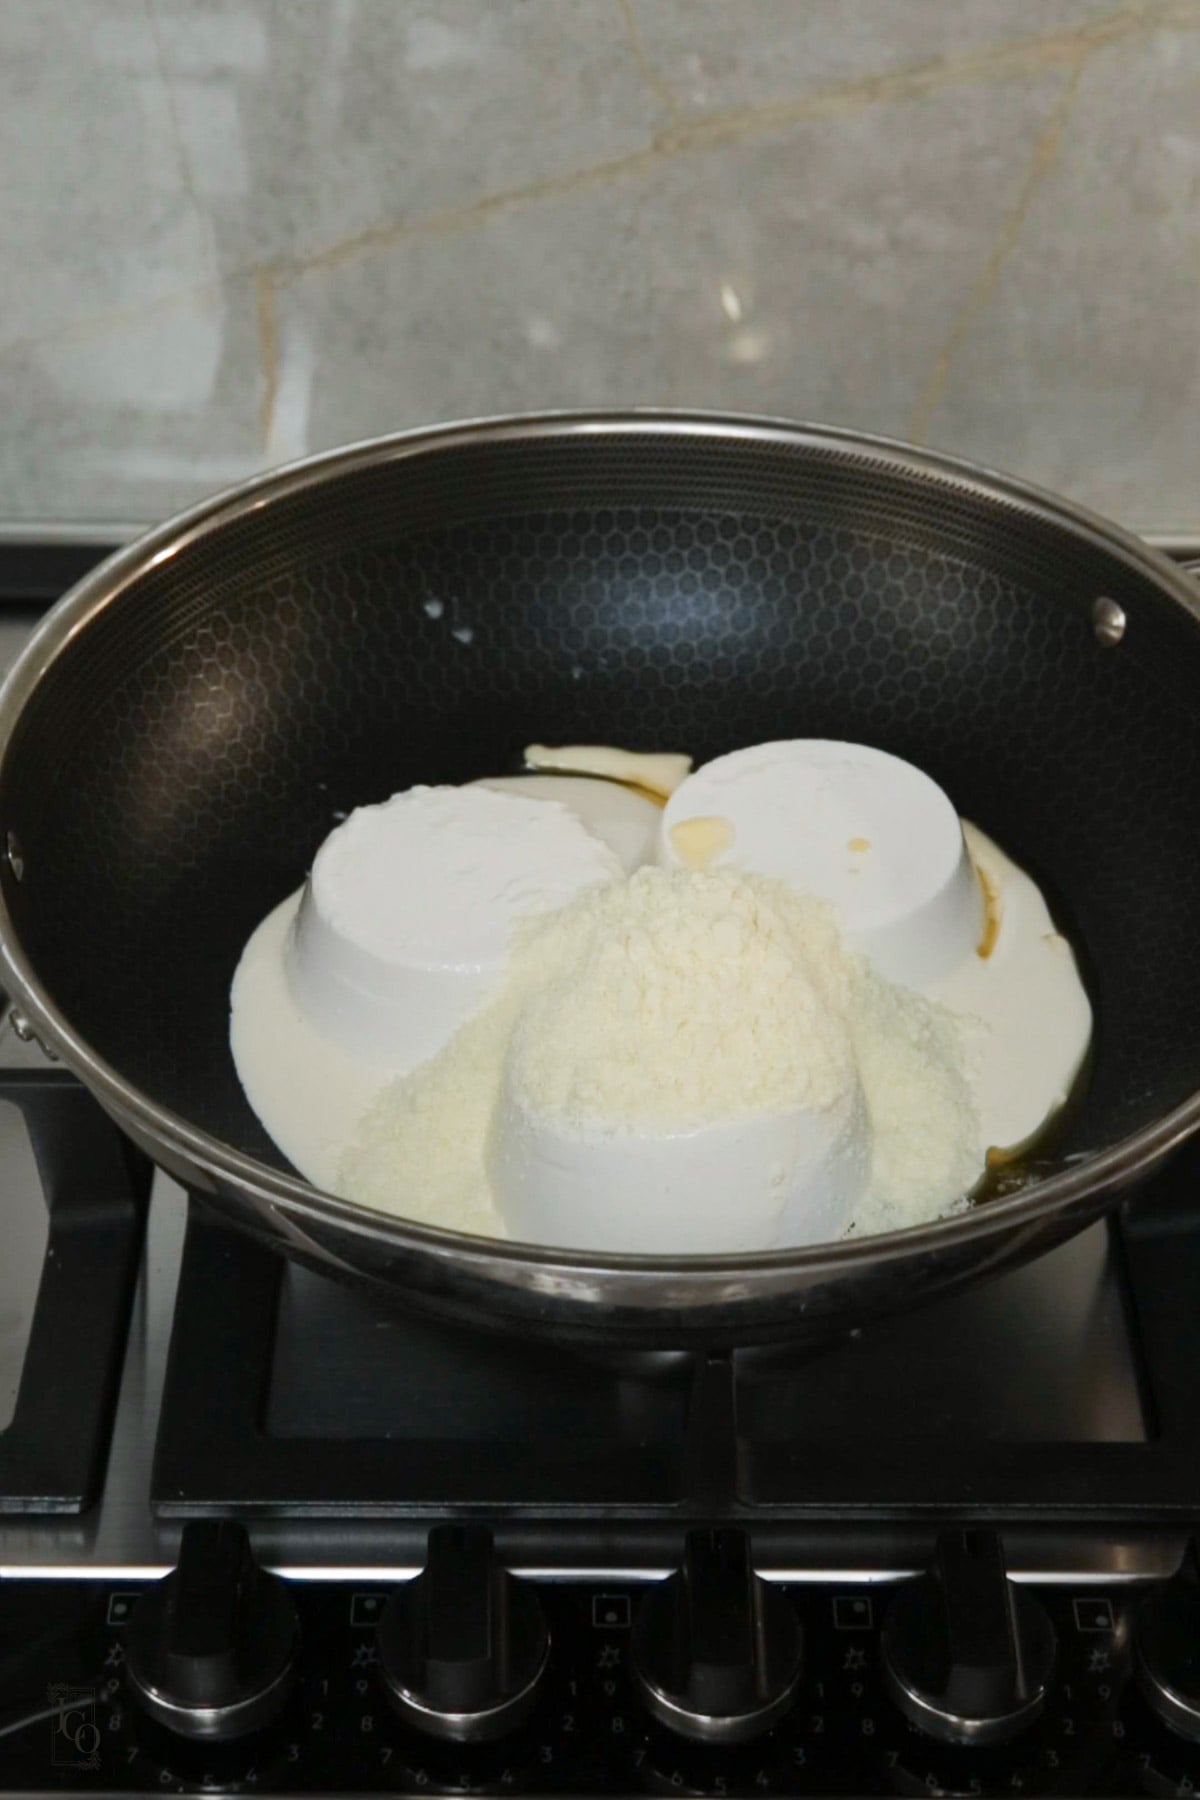
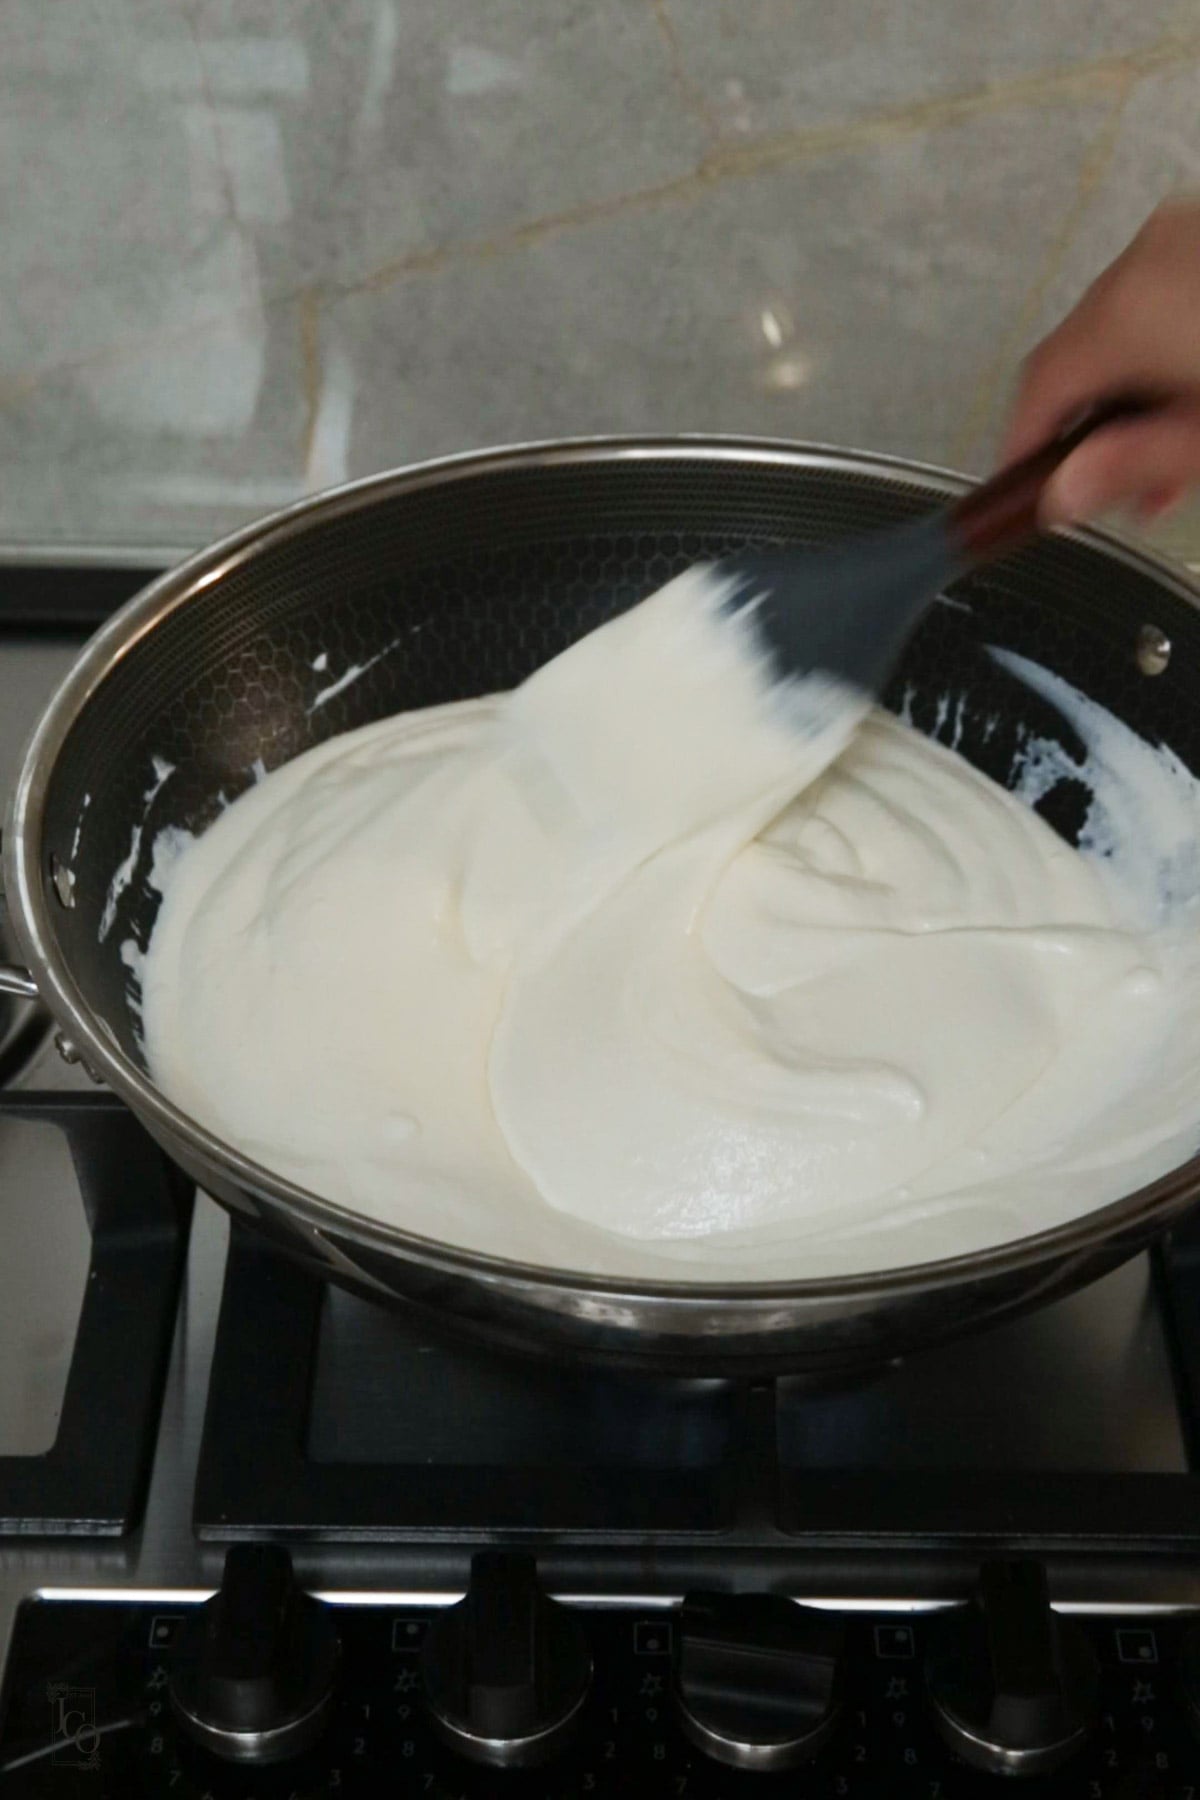
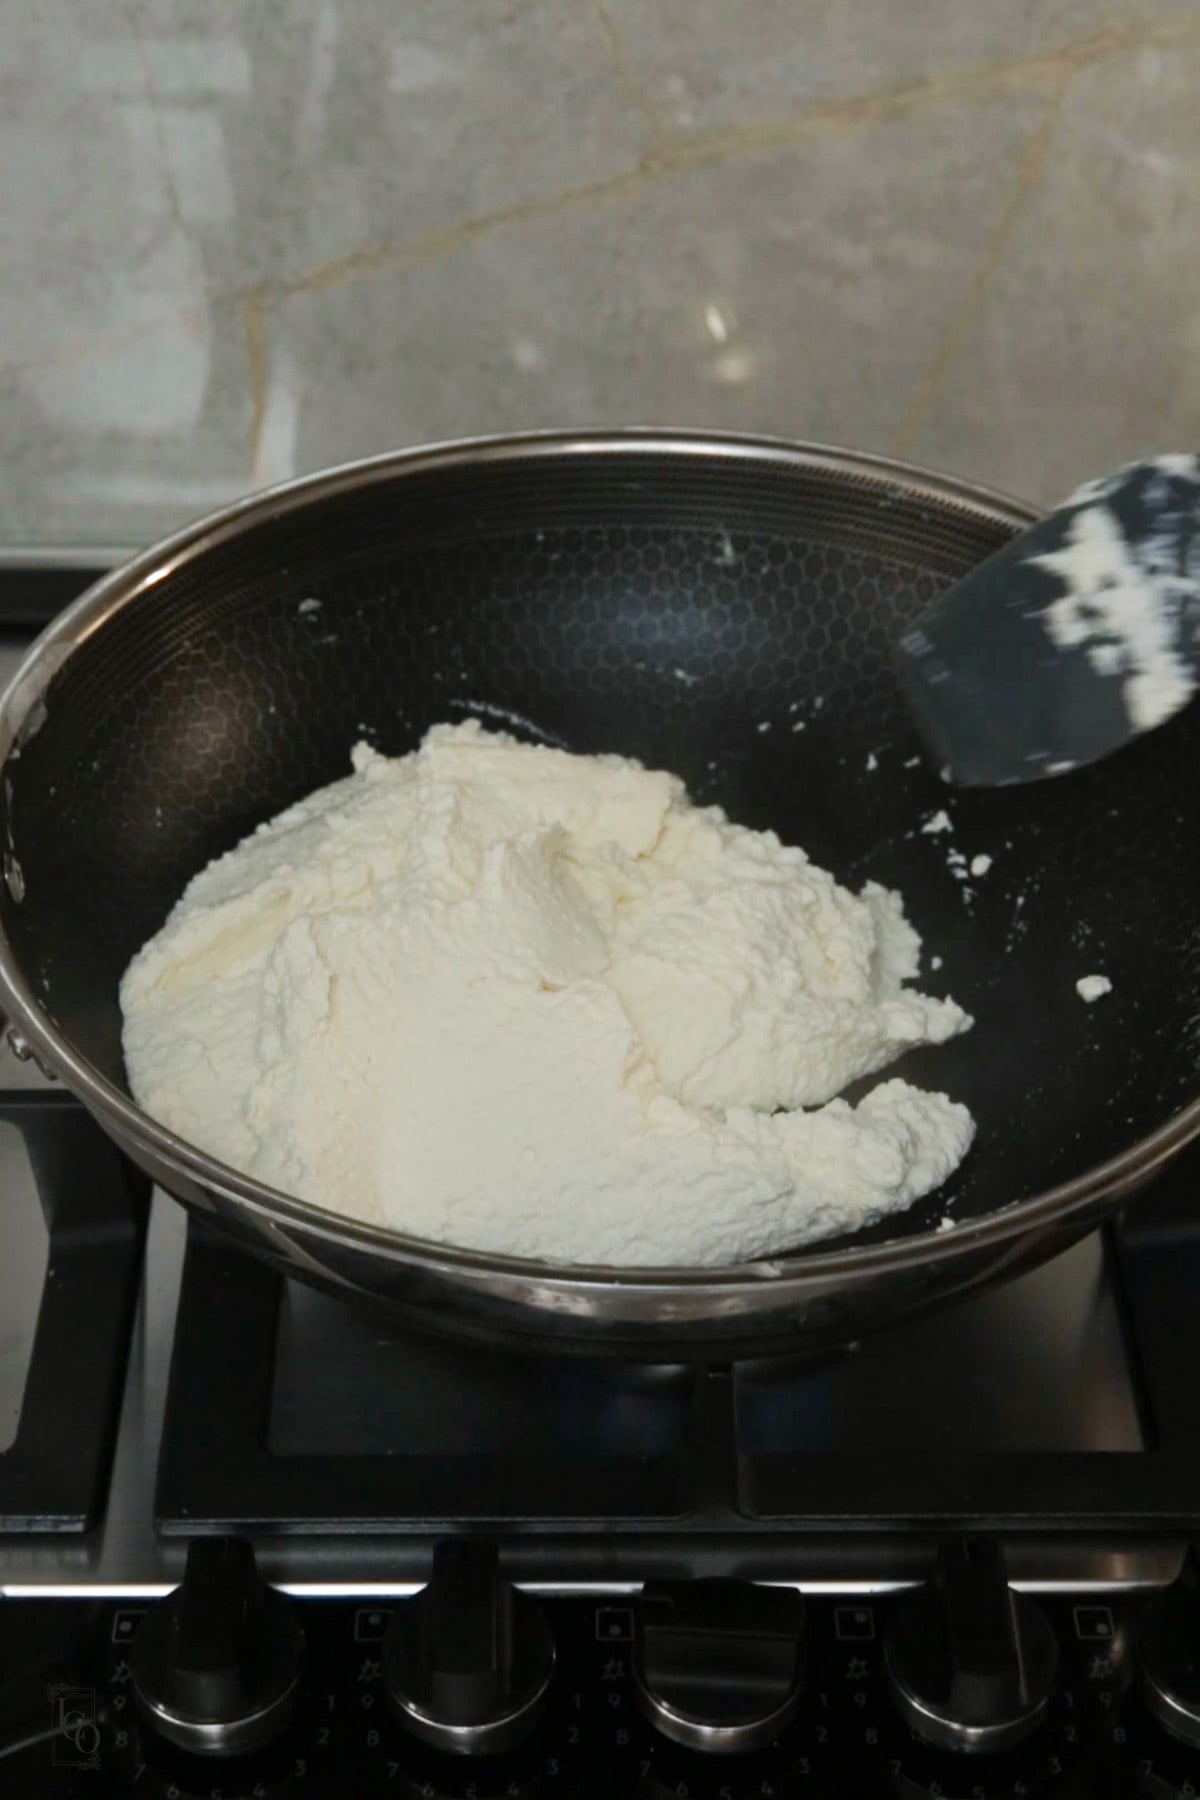
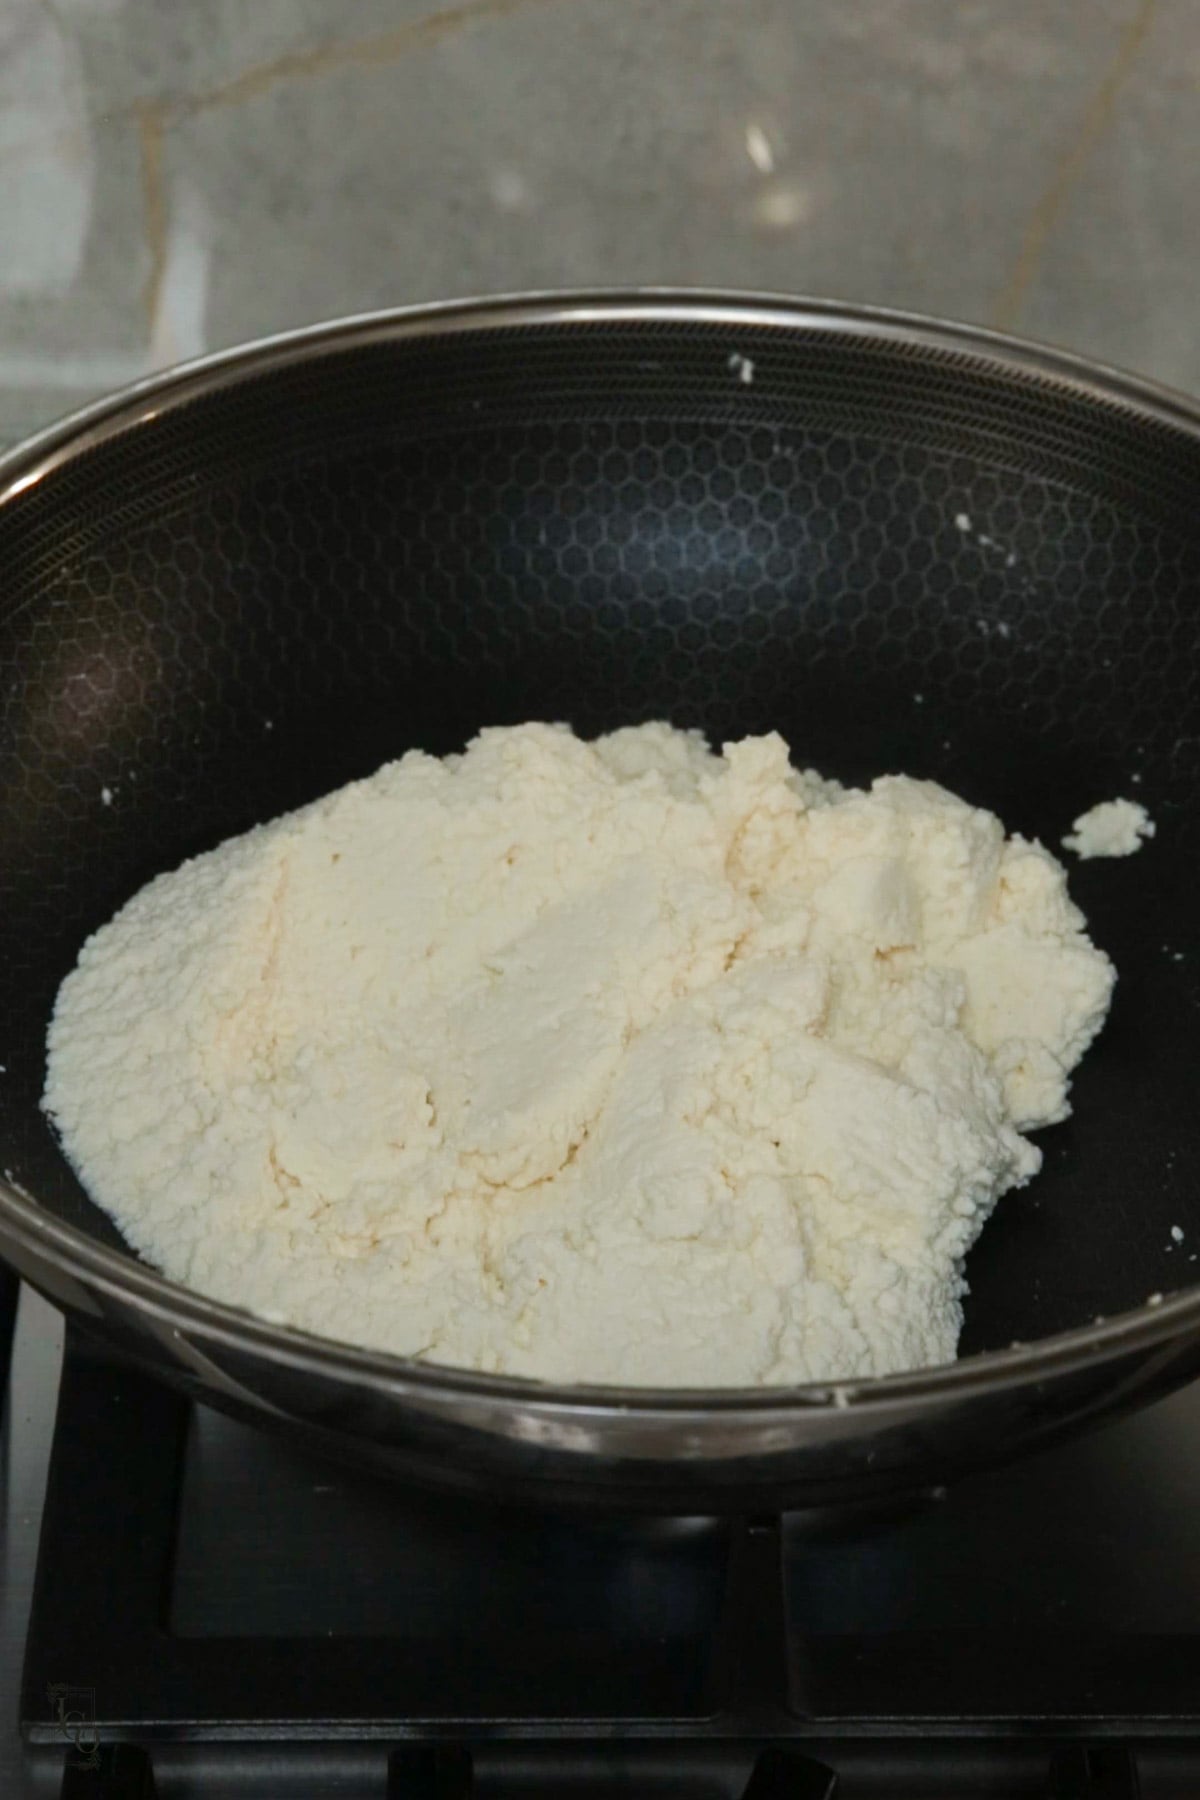
The finished ricotta mawa should be soft, thick, crumbly and slightly grainy. It should not be runny or wet but it should not be completely dry and hard either.
Cool the ricotta mawa completely before storing.
Store in an airtight container in the fridge for up to 1 week.
You can also freeze it for up to 3 months. Defrost in the fridge before using.
If the mawa feels slightly moist after chilling, cook it for a few minutes in a pan before adding it to a recipe.
Ricotta mawa is useful anywhere you want soft, crumbly khoya texture without spending hours reducing milk.
I especially like it in recipes where a slightly grainy dairy texture works in your favour. It can add richness to Indian sweets, body to festive bakes, and a gentle milky creaminess to special-occasion savoury dishes.
For sweets, think of ricotta mawa as a good choice for recipes where the texture does not need to be completely smooth. It works well in halwa-style sweets such as rajgira sheera, where mawa adds a subtle graininess to the soft halwa texture.
It is also useful in paneer and mawa sweets where a dense, rich texture is part of the charm, such as pistachio paneer rolls or beetroot kalakand.
For Gujarati mithai, ricotta mawa can work in recipes where you want richness and a crumbly finish, such as mohanthal or dhilo mohanthal. Just make sure the mawa is not too wet before adding it.
Mawa is not only for sweets either. A small amount can make savoury curries feel richer, thicker and more luxurious.
Use it in dishes such as khoya kaju, where khoya is part of the main gravy, or stir a little into rich paneer curries such as paneer tikka masala, shahi paneer or Punjabi matar paneer when you want extra body and creaminess.
For savoury recipes, use ricotta mawa sparingly. It should make the gravy feel richer, not sweet or heavy.
As always if you make this recipe, be sure to leave me a comment, rate this recipe and tag me on Instagram @jcookingodyssey or #jcookingodyssey. I love seeing all your photos of my recipe recreations!
Don’t forget to follow me on social media using the buttons below – I can't wait to see you all there!

PLEASE NOTE: Nutritional values are estimated by a computer and may vary based on ingredients and portion sizes. For personalised dietary advice, please consult a qualified healthcare professional.
Share on Facebook Pin This RecipeDodha Barfi (Doda Burfi) has a soft, grainy texture and is made with gently roasted mawa and a simple sugar syrup. Popular in Punjab, it's perfect for Indian festivals and special occasions. It's made with 3 main ingredients, plus cardamom powder and nuts for extra flavour.
You will love these other Indian Milk Sweets and Desserts.

Make homemade Chinese takeaway style Salt and Pepper Chips within minutes. Thick cut chips are tossed with crunchy vegetables and an irresistible five spice salt and pepper seasoning.
Naturally vegan and gluten-free.

These badam malai peda are flavoured with sticky sweet caramel. The perfect fusion dessert for special occasions and festivities.
You'll love these incredible Indian fusion dessert recipes.

I love the flavour of caramel, the sweet, buttery richness is unmatched! It's so good with cream based desserts such as Caramel Mousse and Caramel Pannacotta.
It goes so well with Indian sweets too - I used caramel in this Caramel Lassi, Caramel Fada Lapsi, Caramel Phirni and Vanilla Caramel and Chocolate Barfi.
Creating Badam Malai Peda with a caramel twist introduces a delightful fusion of traditional and modern flavors.
Badam Peda are penda that have the addition of almond meal and this version incorporates caramel, allowing it to meld seamlessly with the nutty almond essence and creamy texture. This addition of caramel not only imparts a luxurious, buttery sweetness but also adds a subtle, sophisticated complexity to the peda.
Shape the mixture into small, bite-sized pieces and garnish with slivers of almonds for an elegant finish. This innovative twist on Badam Malai Peda creates a delectable treat that marries tradition with a hint of indulgent modernity.
You may like these other Barfi and Peda recipes.

Full measurements of the ingredients, instructions and recipe video is available in the recipe card below.
The peda will stay fresh and have a shelf life for 1 week if kept in an airtight container. This prevents them from drying out.
You can also freeze these peda in freezer safe containers for up to 1 month. They will need defrosting at room temperature. Note that the texture is not the same.
If you plan on gifting these in a mithai box, you might also like to add in these easy to make chocolate peda with condensed milk for complementary flavours.

Kesar Peda (Instant recipe)
As always if you make this recipe, be sure to leave me a comment, rate this recipe and tag me on Instagram @jcookingodyssey or #jcookingodyssey. I love seeing all your photos of my recipe recreations!
Don’t forget to follow me on social media using the buttons below – I can't wait to see you all there!
PLEASE NOTE: Nutritional values are estimated by a computer and may vary based on ingredients and portion sizes. For personalised dietary advice, please consult a qualified healthcare professional.
Share on Facebook Pin This RecipeNote – This recipe was first published on 17th February 2015. This post has since been updated with helpful content and new images. The recipe remains the same.
Make a creamy and silky Strawberry Fool with the addition of rose. It is a sublime and delicious English summer dessert. My version is made with a creamy blend of Greek yogurt and double cream.

Amritsari Paneer Bhurji is a delicious paneer curry made in a thick onion tomato gravy and a special dhaba style masala.

Take the classic biscotti, flavour it with exotic mango pulp and make it vegan. Twice baked, it is just as crisp as the original recipe.

Tofu Bhurji or Indian style Tofu Scramble is a delicious breakfast recipe. Naturally vegan and gluten-free.

Tandoori Halloumi and Mushroom Skewers - a delightful fusion of smoky, spiced goodness perfect for BBQ season. Marinated in a rich blend of yogurt and aromatic spices, these skewers are grilled to perfection.

Make the best tikka at home with this homemade tandoori marinade or tandoori sauce recipe. Use this paste for paneer, veggies, tofu, chicken, burgers and even pizza!

This delicious nutty Pistachio Halwa is made with semolina, milk, sugar and crushed pistachios. It is an easy to make Indian dessert, perfect for a quick treat or as a delightful Diwali or Eid mithai.

In this Chili Tofu recipe, crispy tofu and chillies are tossed in a garlic chilli sauce. The recipe is a plant-based twist to my Indo-chinese chilli paneer recipe.

This eggless Mango Mousse is light, creamy and packed with the flavour of ripe mangoes. Made with just two ingredients - mango pulp and fresh cream, it's one of my favourite easy make-ahead desserts that's perfect for summer, parties and special occasions.

SUMMARIZE & SAVE THIS CONTENT ON
Imagine the flavour of a ripe Indian mango folded into softly whipped cream. I'm reminded of the tropical Solero ice creams I loved growing up!
Light, creamy and full of sunshine, it's one of those party desserts I make that always disappears quickly!
Every summer our house fills with Indian mangoes. Some become a smooth mango lassi with pulp, some creamy mango shrikhand and others end up as mango ras. But when I need an effortless dessert that still feels special, this mango mousse is usually the first thing I make.
[feast_advanced_jump_to]It can't get any easier than this! Full quantities are in the recipe card below.
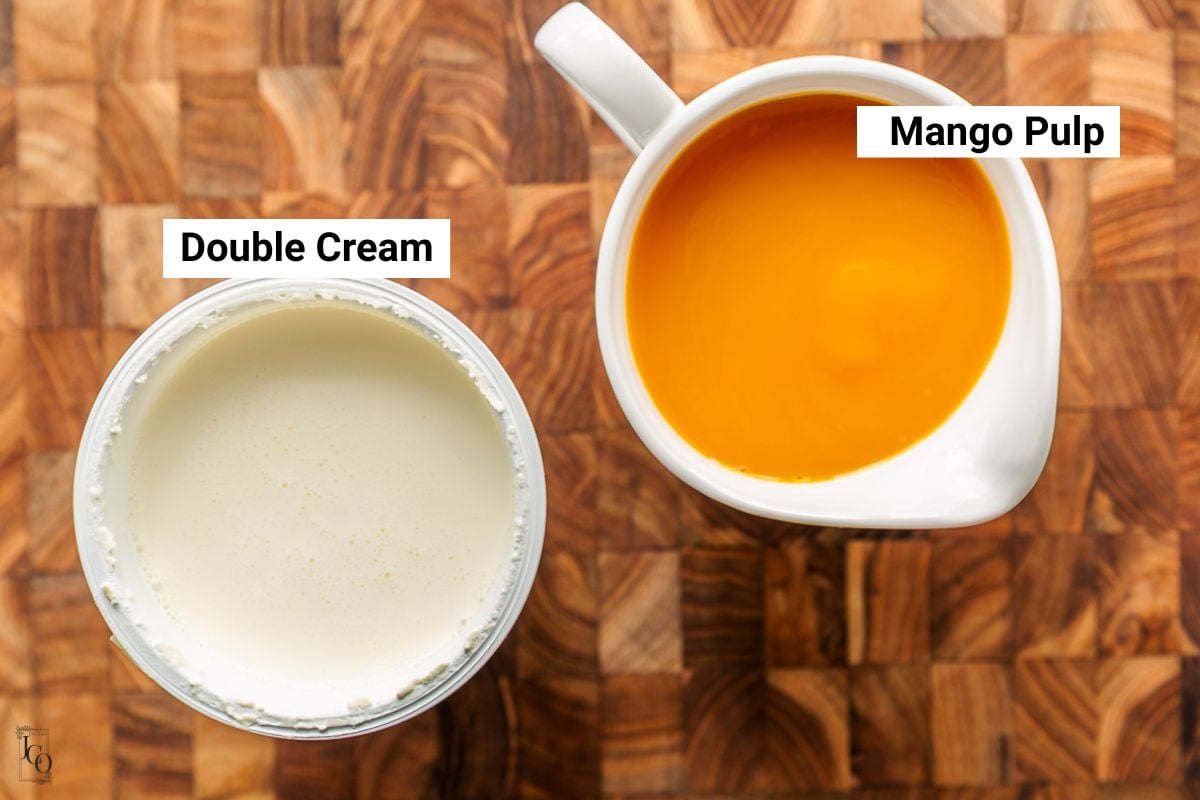
Mango pulp — I prefer making fresh mango pulp at home from ripe plump mangoes. Fresh Indian Alphonso or Kesar mangoes are equally delicious when they're in season. Alphonso is richer and more intensely flavoured; Kesar is slightly sweeter and more golden.
If you're using supermarket mangoes, choose ones with deep orange flesh and a rich, fragrant aroma. The better the mango, the better the mousse.
When I don't have fresh mangoes, I usually reach for Natco Alphonso or Kesar mango pulp because it's consistently sweet, deeply flavoured and available all year round.
I often use leftovers to make a quick mango mocktail.
Cream — Double cream (heavy whipping cream if you're in the US), whipped to medium soft peaks. I found that whipping chilled cream gives the lightest texture.
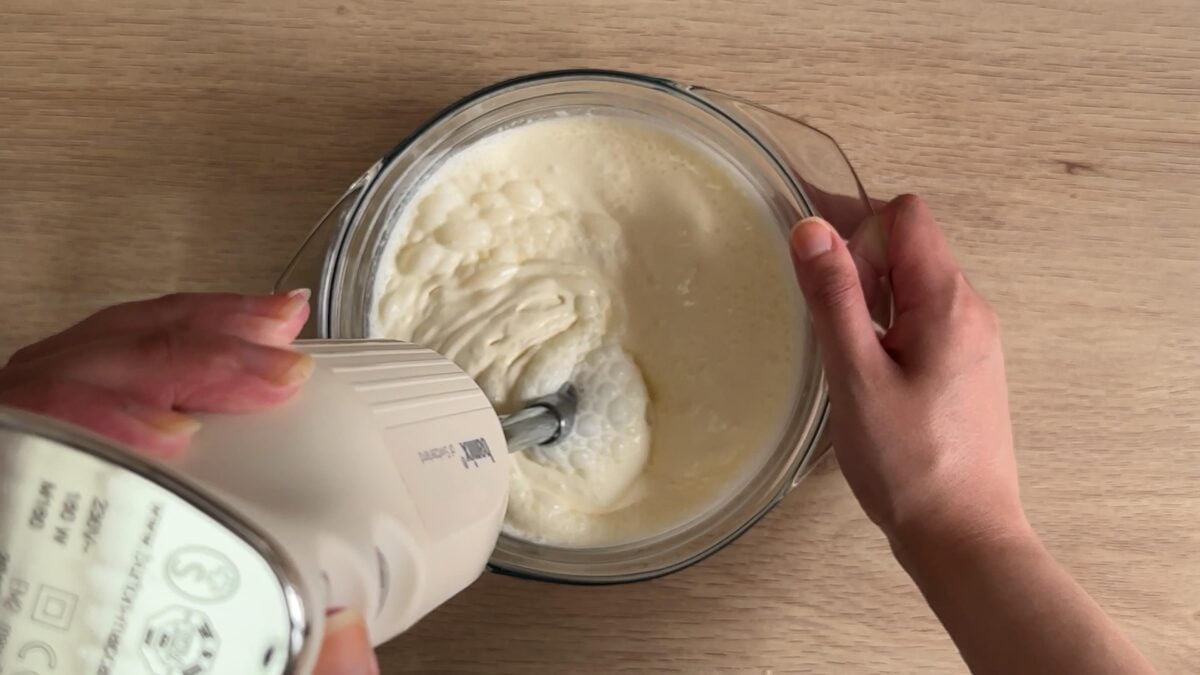
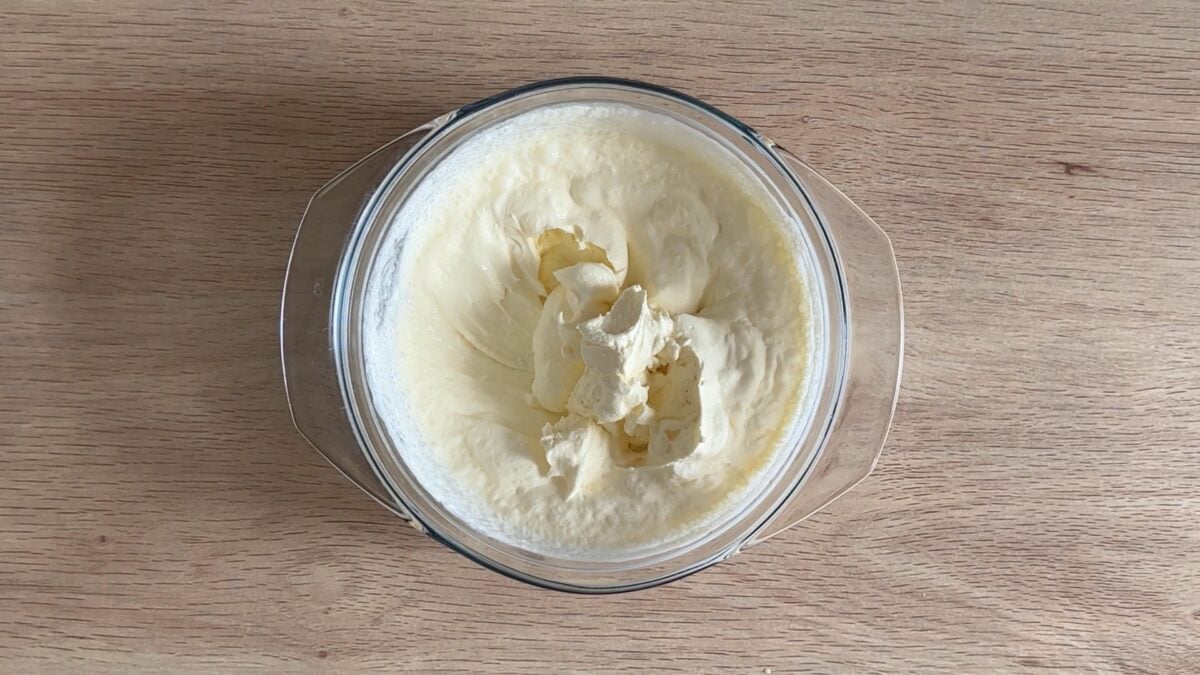
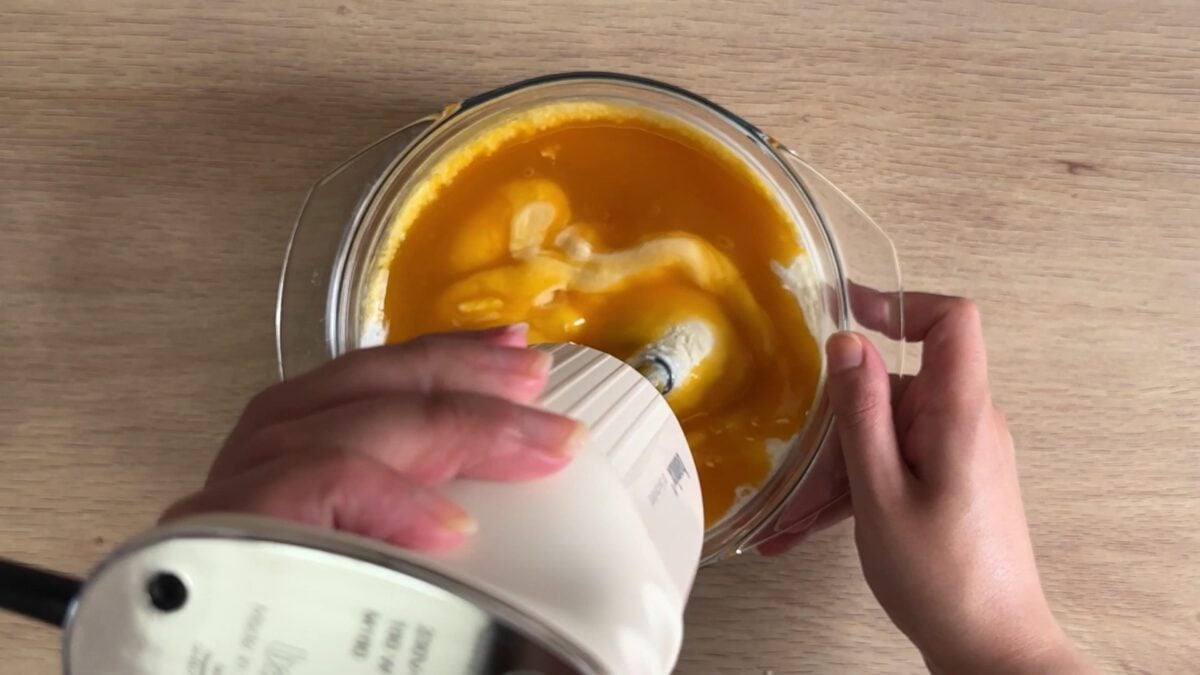
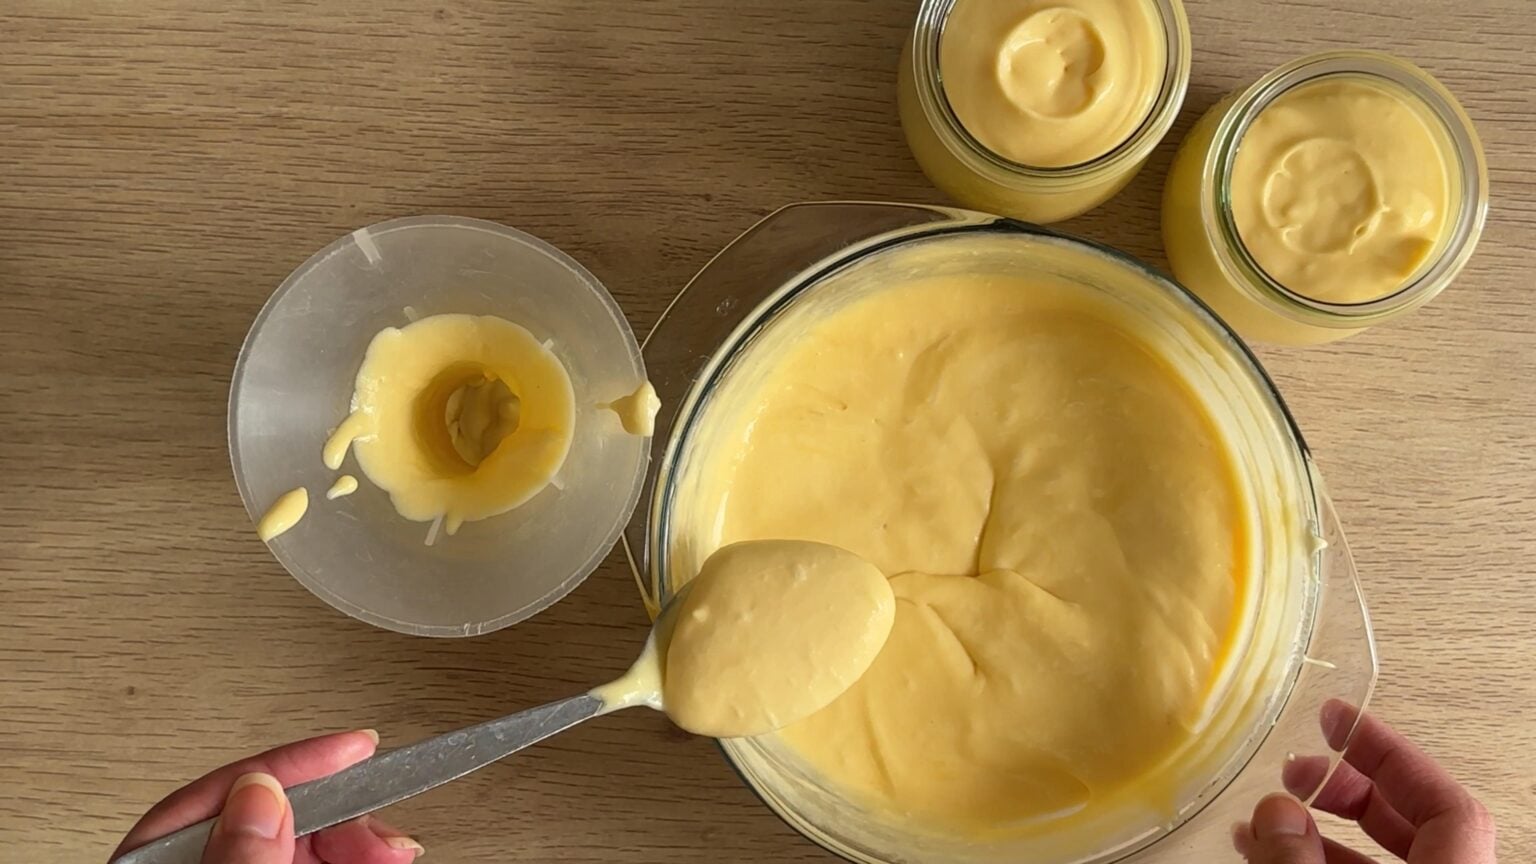


I usually spoon the mousse into individual glasses and top each one with fresh mango cubes and chopped fruit, a little extra mango pulp, and a small sprig of mint.
If I'm entertaining, I'll often add a swirl of whipped cardamom cream as well.
If you're putting together a summer dessert table, serve it alongside my Mexican fresas con crema.
This is one of those desserts that's actually better made in advance. I nearly always prepare it the day before serving and leave it to chill overnight.
The texture becomes even silkier, and all that's left to do is add the garnish before serving.
I recommend using fresh cream (double cream in UK or heavy whipping cream in US).
I've found ripe Alphonso and Kesar mangoes are naturally sweet enough. If I think the mango needs a little extra sweetness, I only add icing sugar.
The cream was probably overwhipped. Stop at soft peaks and fold the mango through gently.
Yes. I love eating it straight from the freezer after a few minutes on the worktop. It reminds me even more of a tropical ice cream.
I wanted this recipe to celebrate the flavour of mango, so I kept testing ways to simplify it rather than adding more ingredients.
All my dessert recipes on the blog are eggless, so I needed an ingredient that would still give that airy mousse like finish. I settled on fresh cream that's whipped as it worked perfectly in my eggless white chocolate mousse, 2 ingredient caramel mousse and this eggless peanut butter mousse.
I tested hung yoghurt, which works in my eggless chocolate mousse, but it softened the mango flavour and added an unnecessary step. Cream cheese produced a slight tang that I love in my no bake mango cheesecake, but not in this mousse. Condensed milk created a denser dessert that reminded me more of mango kulfi.
Both fresh Indian mangoes and good-quality Alphonso or Kesar mango pulp work beautifully.
As always if you make this recipe, be sure to leave me a comment, rate this recipe and tag me on Instagram @jcookingodyssey or #jcookingodyssey. I love seeing all your photos of my recipe recreations!
Don’t forget to follow me on social media using the buttons below – I can't wait to see you all there!

PLEASE NOTE: Nutritional values are estimated by a computer and may vary based on ingredients and portion sizes. For personalised dietary advice, please consult a qualified healthcare professional.
Share on Facebook Pin This RecipeNote – This recipe was first published in April 2023. This post has since been updated but the recipe remains the same.
This beautiful floral Rose Mocktail is made with 2 simple ingredients - rose syrup and lemonade. It's a gorgeous pink non-alcoholic drink that is perfect for Valentine's Day, baby showers, and other special occasions.

Padvali Roti, also known as Be Padi Rotli, is a Gujarati specialty. It is a very thin double layered roti that is best enjoyed with fresh Gujarati Keri no Ras.

These eggless Oatmeal Whole Wheat Cookies have a irresistible crunchy edge and a soft, chewy centre. They're made with whole wheat flour, oats, chopped mixed nuts and finished off with an extra sprinkling of nuts.

Strawberry Avocado Salsa. Fresh sweet strawberries, the creamy goodness of avocado and spicy jalapeno create a zingy salsa that's perfect for summertime.
Vegan, gluten-free and ready in 5 minutes!

Dudhi Muthiya are a delicious tea-time snack from Gujarati cuisine and are made with grated bottle gourd and whole wheat flour. Perfect served with masala chai.

Dudhi na muthiya (lauki muthiya) is a traditional Gujarati dish made from bottle gourd (also known as dudhi or lauki), flour and various spices. It's a steamed snack or side dish that's nutritious and flavorful.
Muthiya are called so because "muthi" means fist in Gujarati, and the dumplings are traditionally shaped by hand, resembling small fistfuls.
To make dudhi na muthiya, grated bottle gourd is mixed with flour (usually wheat flour or gram flour), spices like turmeric, coriander, cumin, and sometimes chili powder, along with other ingredients like ginger, garlic, and sesame seeds.
The mixture is then shaped into cylindrical or oval dumplings and steamed until cooked through.
After steaming, the dumplings are often tempered with mustard seeds, curry leaves, and sesame seeds in oil for added flavor.
Dudhi na muthiya can be served as a snack or as part of a meal, often accompanied by a cup of tea.
Steaming hot muthiya can be eaten without any vaghar with some lemon juice drizzled over. You can dip the muthiya into peanut oil with some red chilli powder.
Other Gujarati snacks we love are:
There are many variations of the popular Gujarati snack as you can use different vegetables, flours and grains.
You can swap in veggies such as:
You can also swap out different flours or grains:
Deep-fried muthiya are mostly made with fresh fenugreek leaves. These methi muthiya are added to shaak such as surti undiyu. Simply tempering uses less oil than deep frying.

Full ingredients with measurements are available in the recipe card below at the end of this post
Dudhi - use a fresh and firm bottle gourd.
Whole wheat flour or chapatti atta - use coarse wheat flour if you can find it
Dhokla flour - or an equal mix of rice flour and gram flour (chickpea flour). Note that if you have leftover rice, you do not need rice flour.
Semolina or sooji - use coarse semolina
Oil - use mild flavored oil such as sunflower oil or vegetable oil.
Green chilies and ginger paste - optionally add finely sliced green chillies.
Yogurt - I have used plain yogurt, full fat and low fat both work
Carom seeds - known as ajwain seeds or ajmo in Gujarati.
Spice powders: Red chilli powder, Ground turmeric powder, Ground cumin and coriander powder, Garam masala
Dry mango powder also known as amchoor powder. Alternatively use lemon juice.
Kasoori methi
Achaar masala - optional but so good. Achaar masala is a blend of spices used in pickles. Adjust the quantity based on your preference for tanginess and spiciness.
Bicarbonate of soda - the baking soda helps the dumplings to rise during steaming.
Sugar - sugar gives this recipe that special Gujarati flavouring.
Salt
You will need for tempering
Oil
Mustard seeds
Cumin seeds
Hing
Sesame seeds - provides a nutty taste and crunch.
Curry leaves - They are commonly used in South Indian and Gujarati food for their fragrance and taste.
Desiccated coconut
Fresh Cilantro/Coriander leaves for garnish.
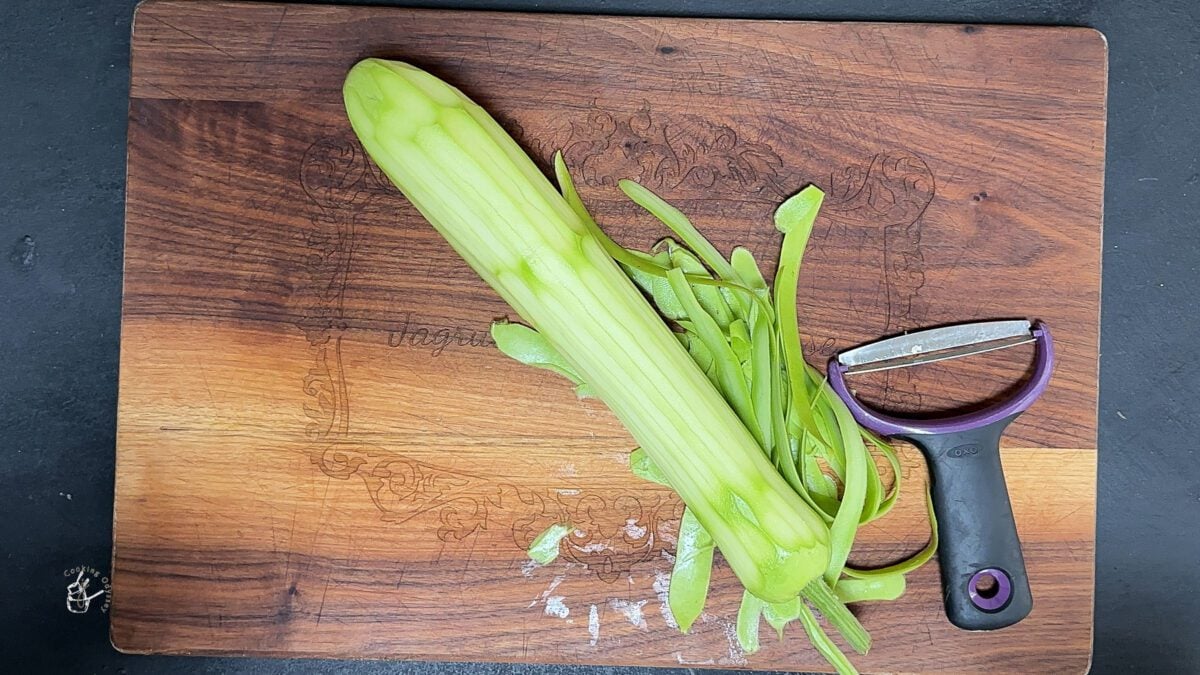
Peel and grate the doodhi.
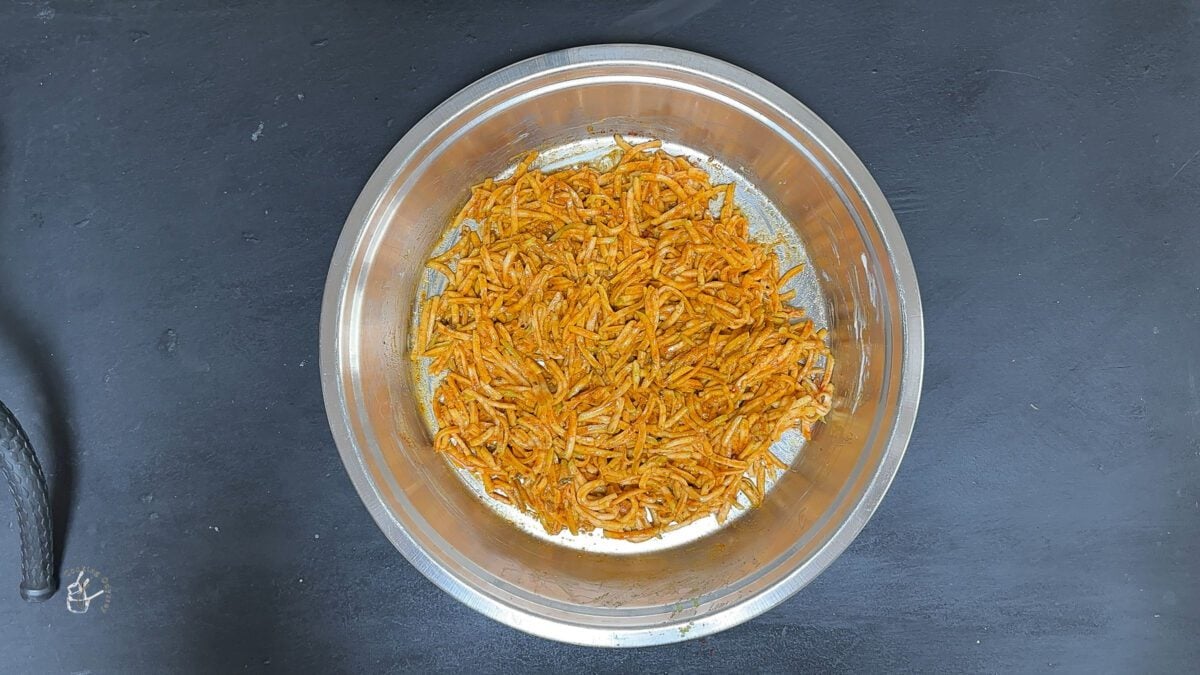
In a wide plate or large bowl, mix together the grated doodhi, all the spices, yogurt, green chilli ginger paste, salt, sugar. Mix together well.
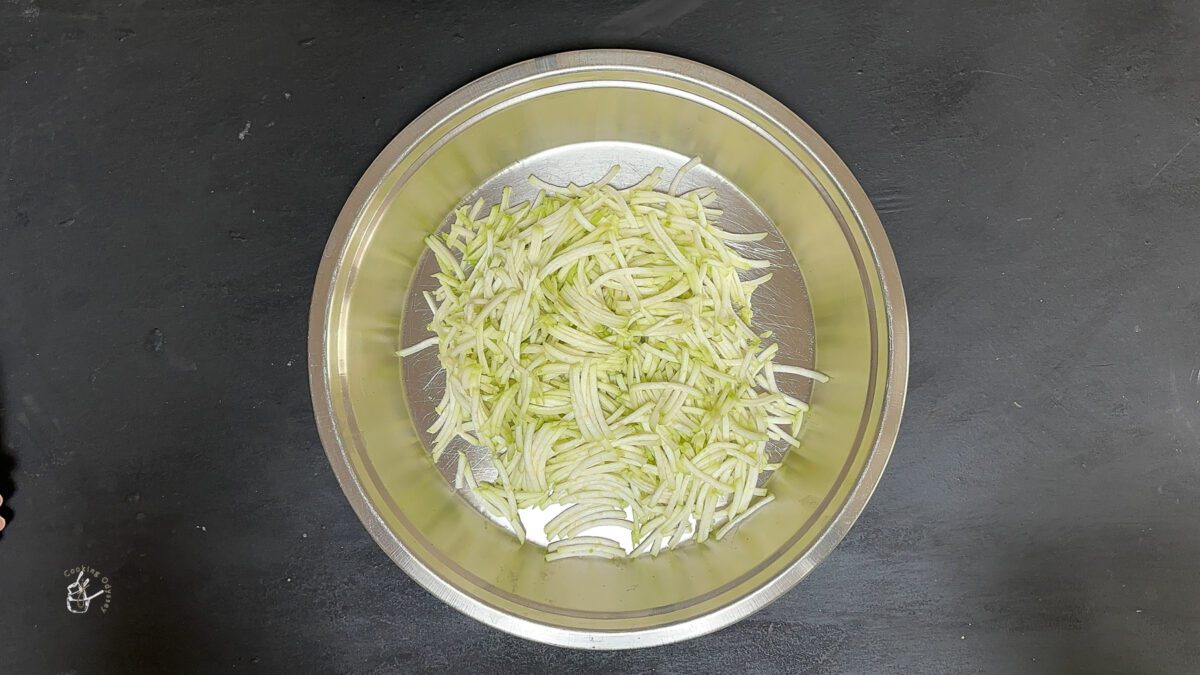
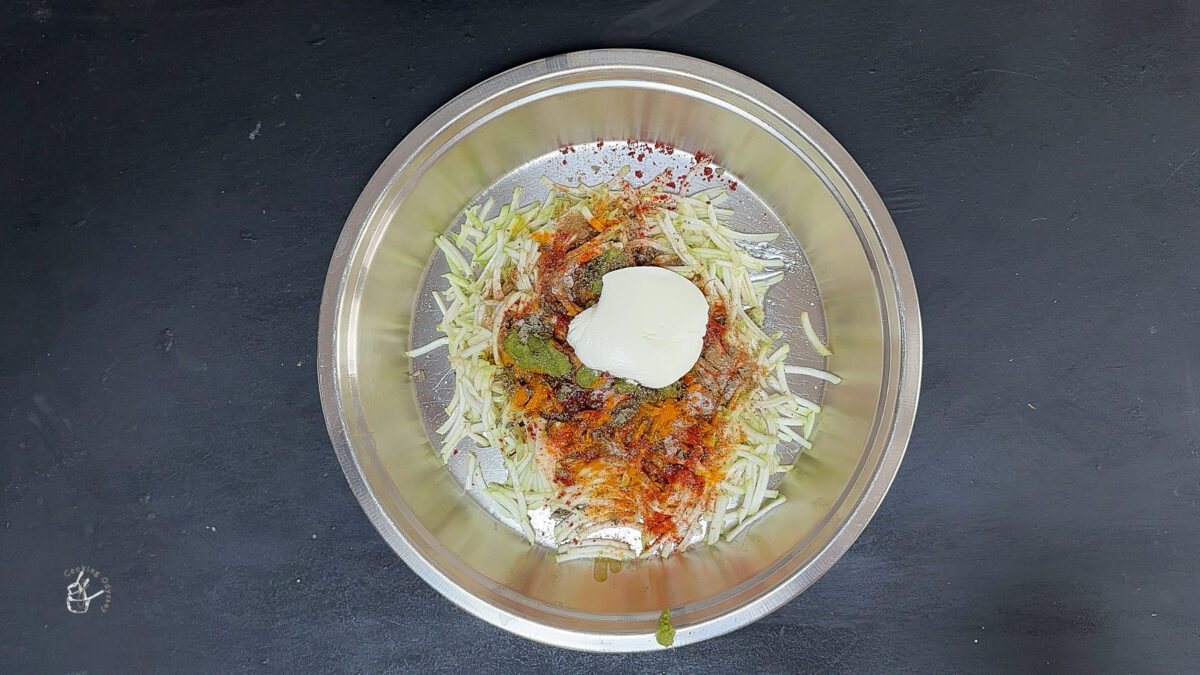
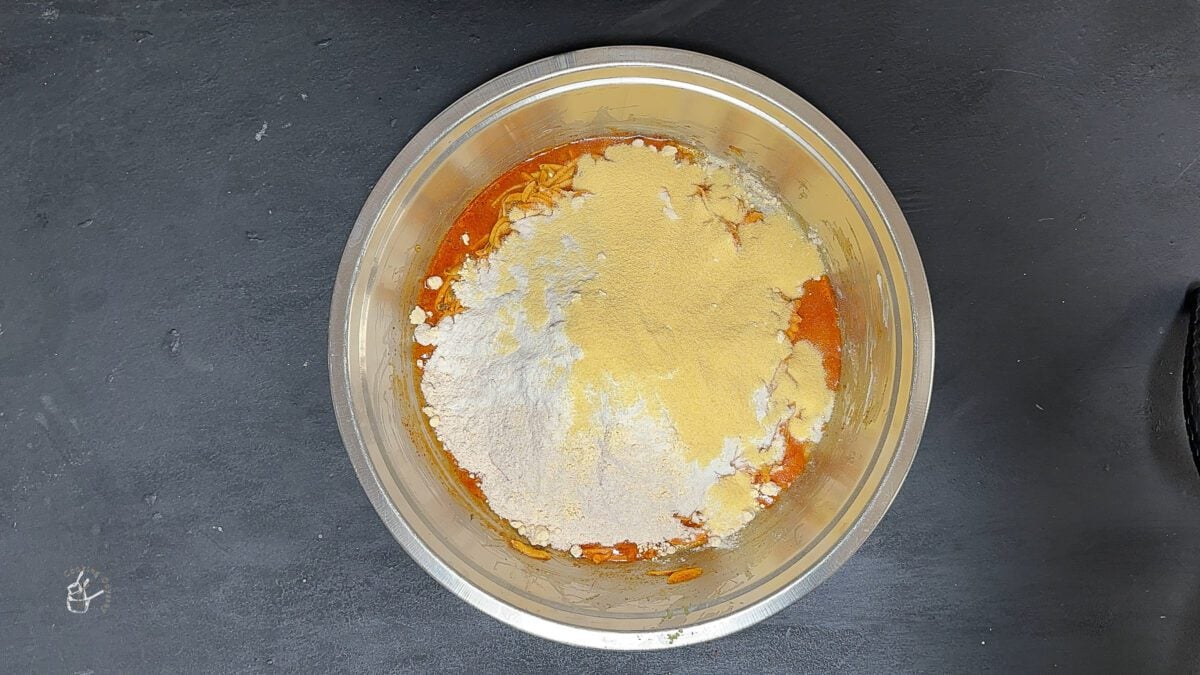
Add in the flours and baking soda and knead to make a soft dough that is slightly sticky. Add water as required. You may only need little water as dudhi releases excess water.
Apply a few drops of oil on your hands and divide the muthiya dough into smaller parts. Then press the dough in your fists to form a cylindrical roll.
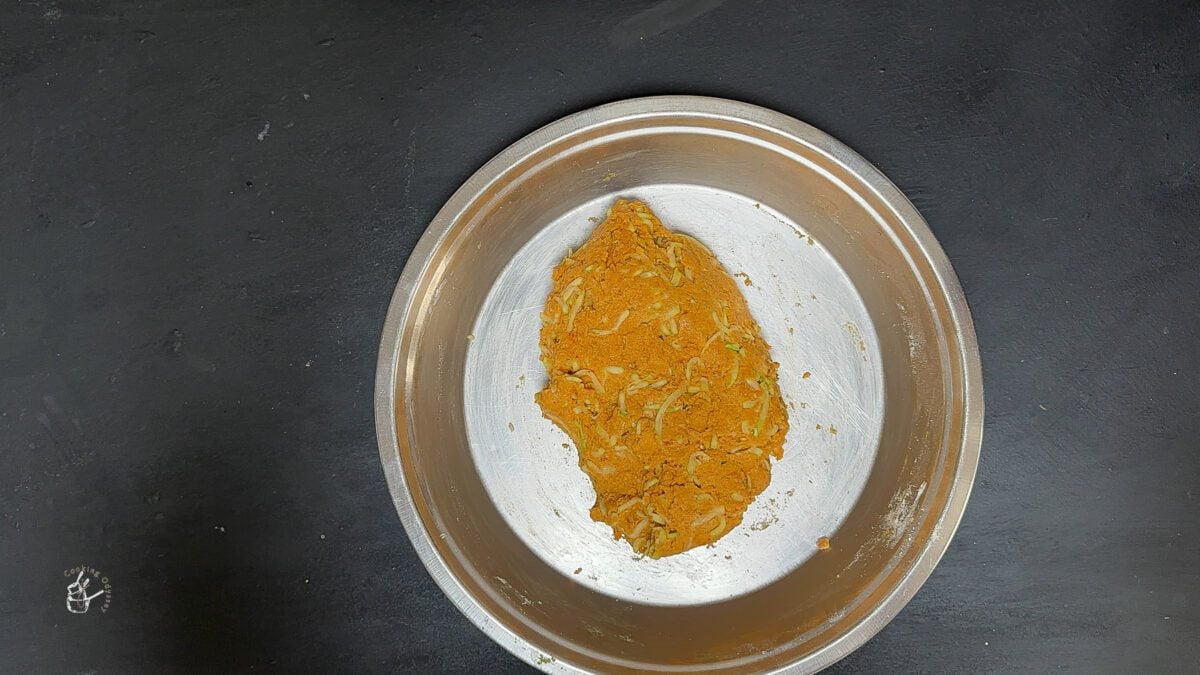
Place muthiya in a greased plate that has holes. Leave a small gap between the rolls to allow for expansion.
Prepare your steamer by adding water to the base and bring to a boil.
Steam them on medium-high for 15 minutes or until a knife inserted into the centre comes out clean.
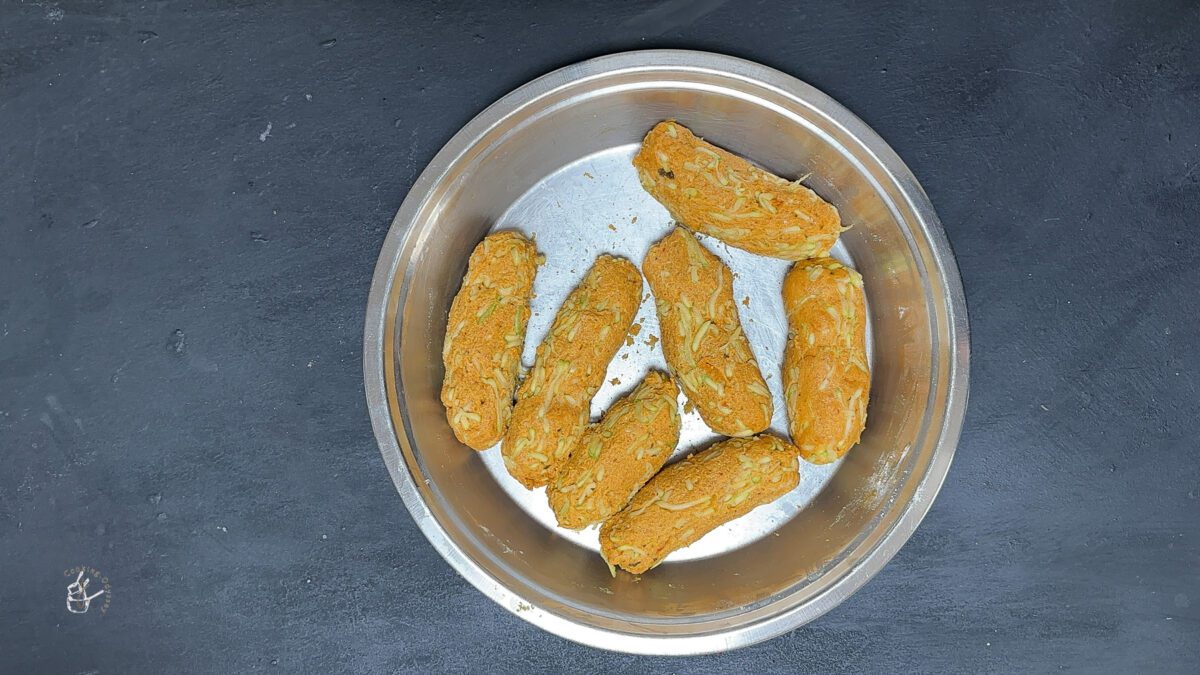
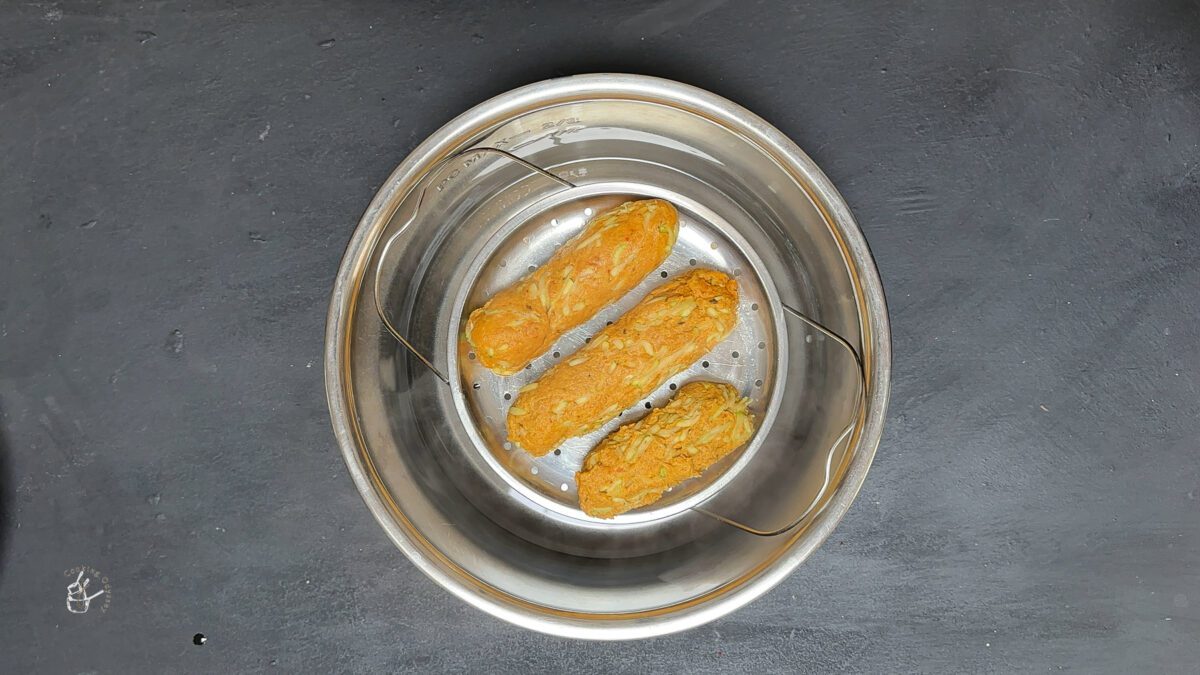
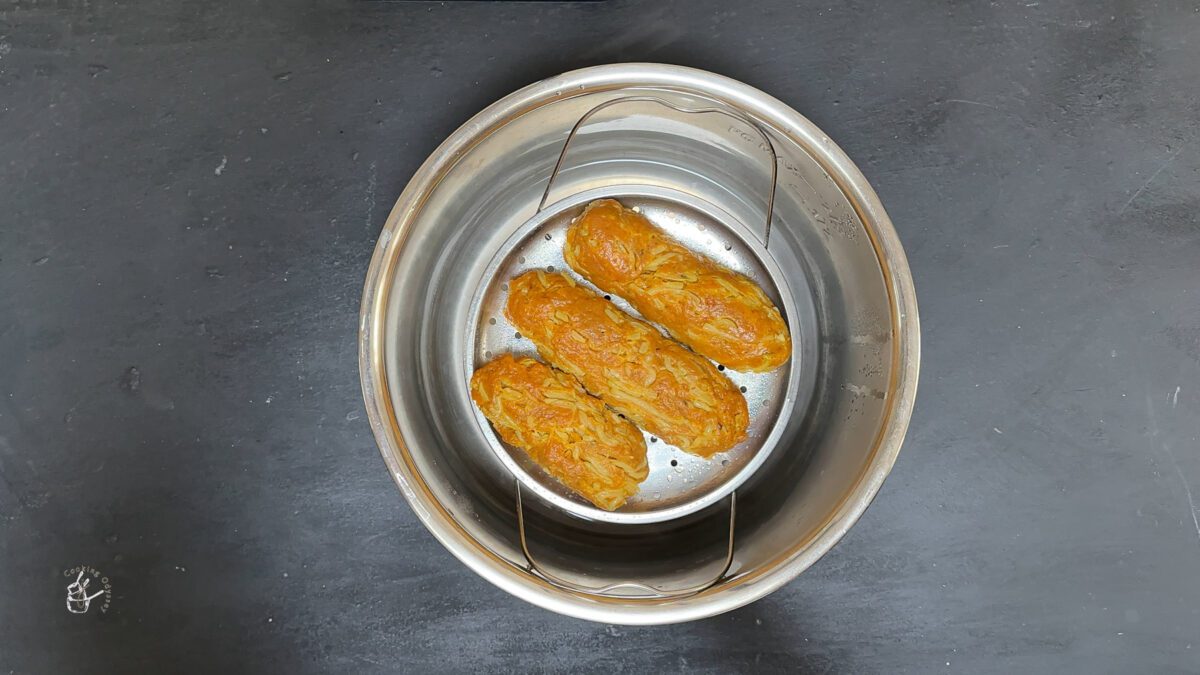
Let the steamed muthia cool in the tray for 5-10 minutes before removing.
Slice each roll into thin oval-shaped pieces.
Heat oil in a frying pan for tempering and the mustard seeds, cumin seeds and hing. When they start spluttering, add the curry leaves.
Tip in the steamed muthiyas and sauté them for few minutes or until they become golden brown and crispy at the edges.
Sprinkle over sesame seeds, desiccated coconut and coriander leaves.
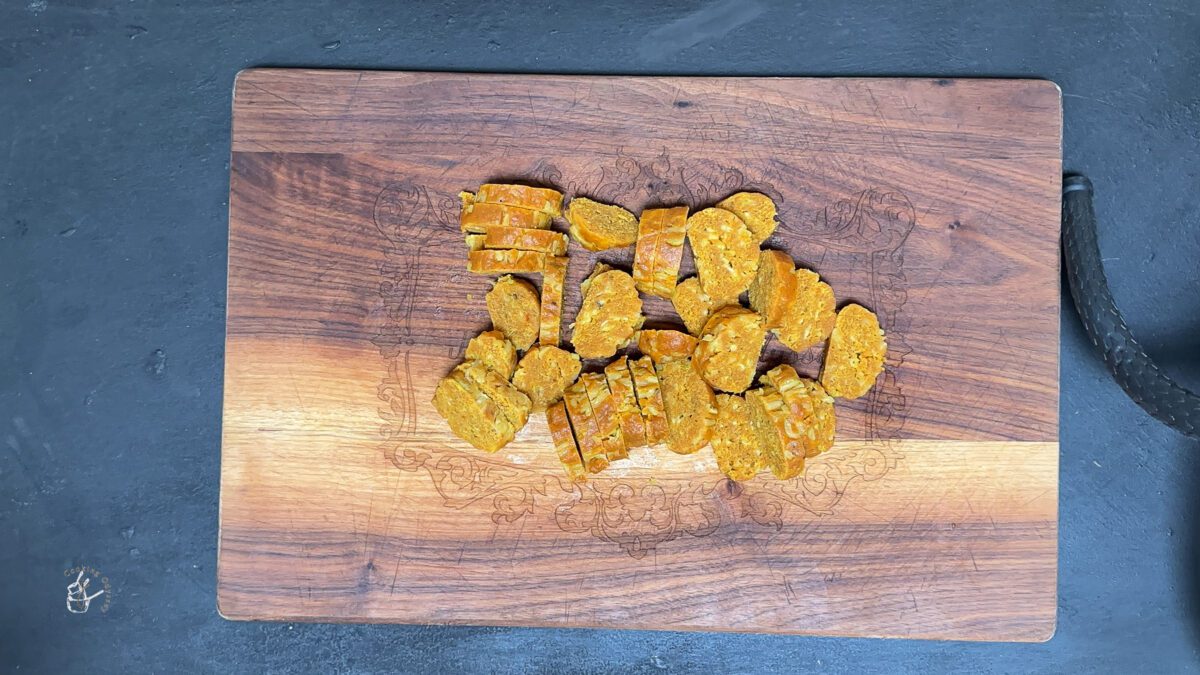
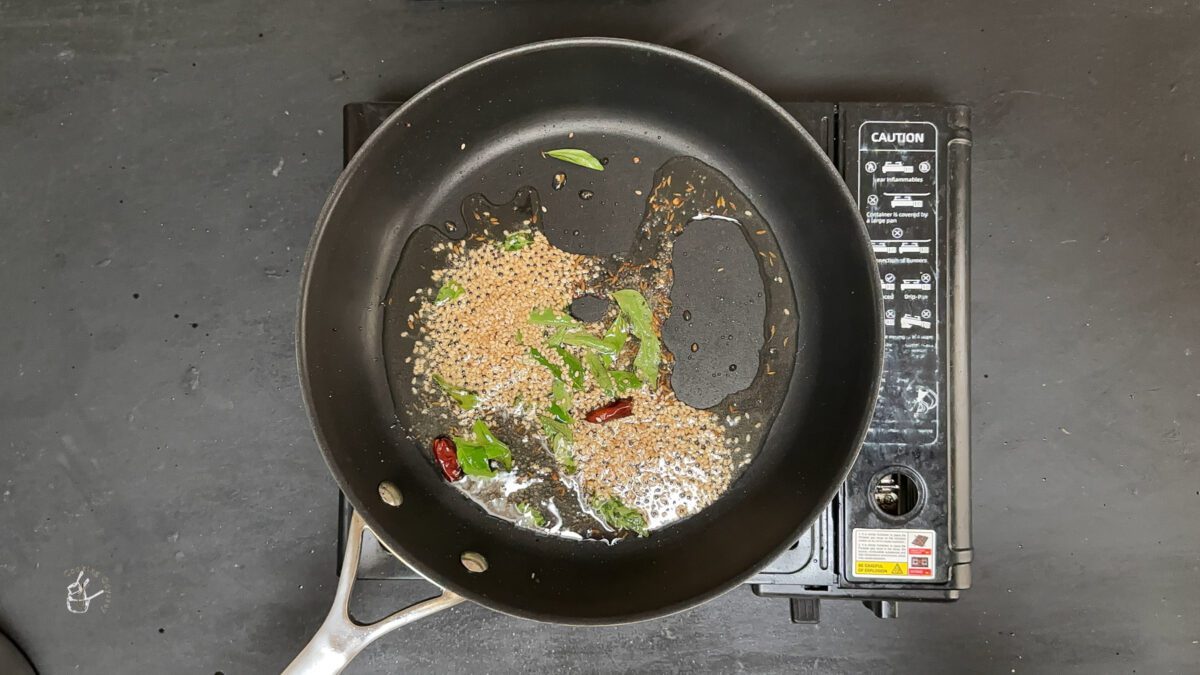
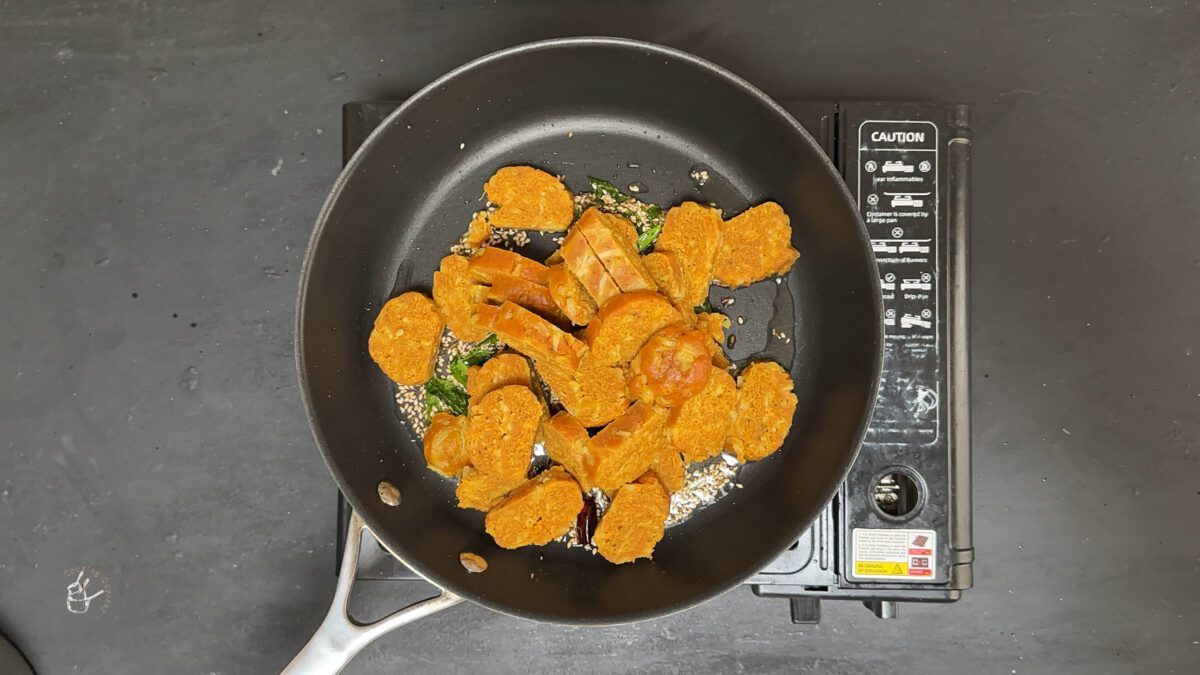
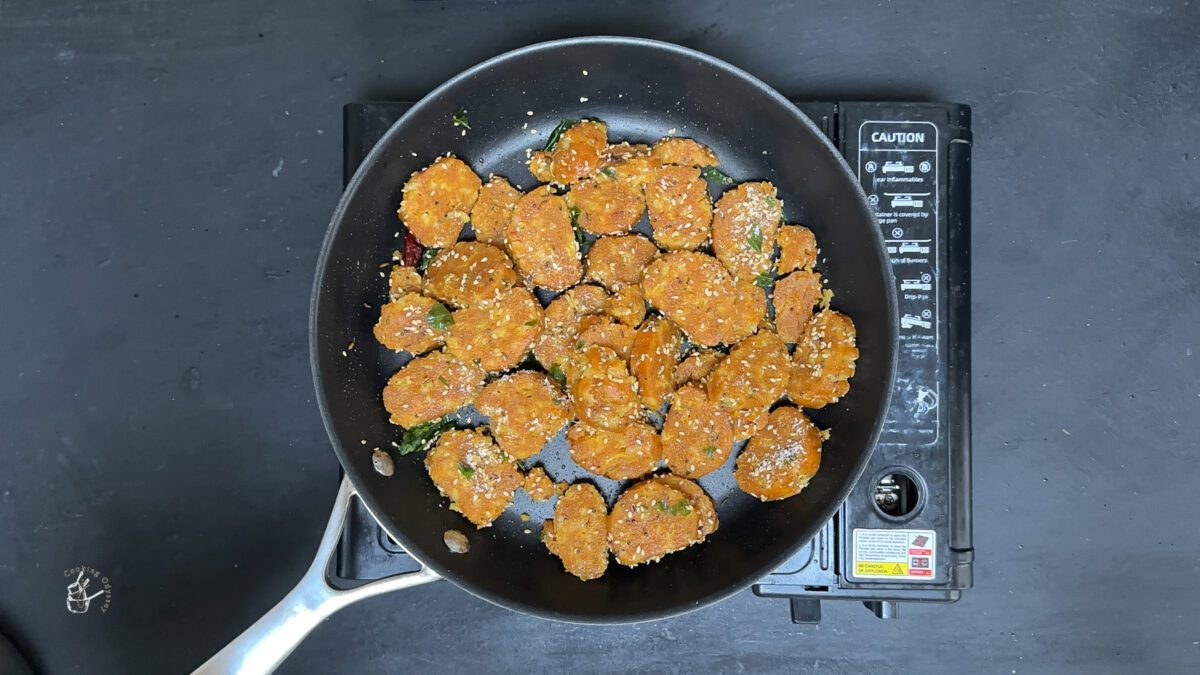

Mixing the dudhi with the spices and salt first allows water to be released from the dudhi before adding the flour. You can better control how much water you need to add. You may need to adjust this based on the water content of the dudhi.
Either add sugar into the dough or sprinkle it after the vaghar.
For soft muthiyas, make a soft but sticky dough that can easily be shaped. Hard dough will lead to hard muthiya.
Ensure you are steaming on high heat the whole time.
Let the muthiya sit for a couple of minutes before slicing as they will fall apart if cut when they are still hot.
Muthiya are always eaten in our house with a cup of masala tea or karak chai.
You can also serve them with green chutney - this green coriander chuntey or raw green mango chutney both work.
A traditional way that my Mum taught me is to dip them in a bowl of peanut oil (groundnut oil) and pickle masala or red chilli powder.
Kids might like them with tomato ketchup.
For a light dinner, make Rasiya Muthia.
Refrigerator:
Store in an airtight container for 2-3 days. To reheat, either add them back into a pan with a spoon of water to create steam or microwave in a plate and sprinkle a little water on top.
Freezer:
When selecting a bottle gourd, consider the following tips:
Pick a fresh and firm bottle gourd. The skin should be vibrant green and shiny and is free from blemishes, bruises, soft spots, or leaking juices.
Size: Opt for a medium-sized bottle gourd. It should feel heavy for its size, indicating freshness and juiciness.
Avoid Extremes:
Too Small: Smaller bottle gourds may be immature and lack flavor.
Too Large: Overly large bottle gourds might be overripe, resulting in a fibrous texture and less desirable taste.
Use the doodi as soon as possible in your cooking after purchasing.

Dudhi Halwa (Lauki ka Halwa)
As always if you make this recipe, be sure to leave me a comment, rate this recipe and tag me on Instagram @jcookingodyssey or #jcookingodyssey. I love seeing all your photos of my recipe recreations!
Don’t forget to follow me on social media using the buttons below – I can't wait to see you all there!

PLEASE NOTE: Nutritional values are estimated by a computer and may vary based on ingredients and portion sizes. For personalised dietary advice, please consult a qualified healthcare professional.
Share on Facebook Pin This RecipeNote – This recipe was first published in June 2012. This post has since been updated with helpful content and new images. The recipe remains the same.
Aam ki Launji is a sweet and spicy raw mango chutney that tastes great with Indian meals. It is made from raw mangoes, jaggery and some spices, giving it a sweet and sour flavour.

Kanda Keri nu Kachumber, also known as Kachi Keri nu Kachumber is a Gujarati style raw mango and onion relish. You only need 5 ingredients and 5 minutes.

Goda Masala is a unique Indian spice blend from Maharashtrian cuisine. It is also known as kala masala and has a slight sweet taste. Ready within 5 minutes.

Whole wheat roti, also known as chapati or phulka, is an Indian flatbread enjoyed across South Asia. Whether served with curries, vegetables, or lentils, this versatile bread complements any meal perfectly. In this recipe, I'll guide you through the process of making soft roti right in your own kitchen.

These masala peanuts are the perfect snack as they are or goes great with kutchi dabeli or a chaat recipe. With simple ingredients commonly found in Indian grocery stores, you can whip up this delicious treat in no time. For a recipe without frying, you can easily use your oven or air fryer.

This tangy and sweet dabeli chutney is made with fruit jam and spices. It is perfect for Kutchi Dabeli and is similar to the chutney used by street food vendors in India.
It takes less than 5 minutes to prepare and it's a no-cook chutney recipe.

Keri No Chundo is a classic Gujarati sweet and sour mango pickle. It's prepared with raw mango, specifically rajapuri mango, sugar and basic spices. Our sweet, spicy and tangy instant chunda can be made in 20 minutes on the stovetop or Instant Pot.
There are 2 ways of making chundo - the traditional sun drenched way and the instant version. I have included both methods along with an Instant Pot method. Now you've got no excuses, you have to give this one a go!
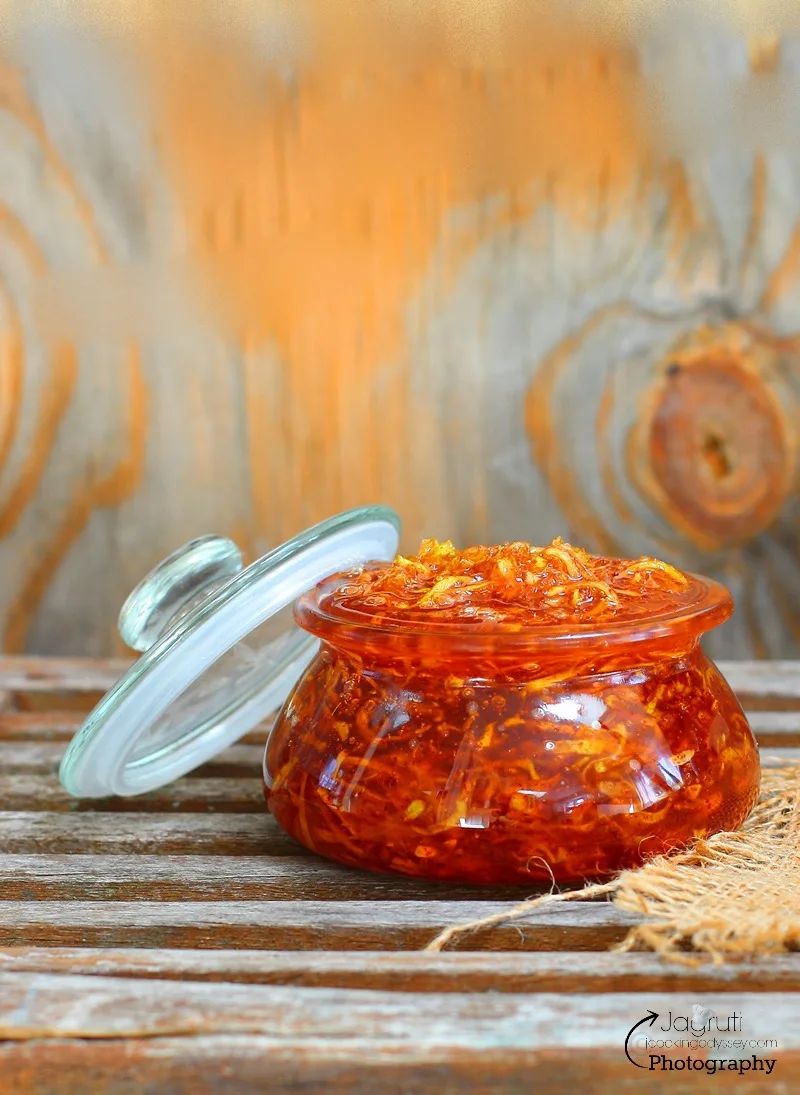
This fluffy and moist mango and coconut cake is made with a vegan sponge and topped with a sweet lime drizzle. It's eggless, dairy-free and has no butter.

My Indian Mango Lassi is similar to the lassi found in Indian restaurants. Deliciously thick and creamy - a restaurant style meal isn't complete without it!

Prepare authentic Gujarati kutchi dabeli at home from scratch with dabeli masala, chutneys and crunchy toppings. This recipe tastes just like the street style version found in Gujarat, India.
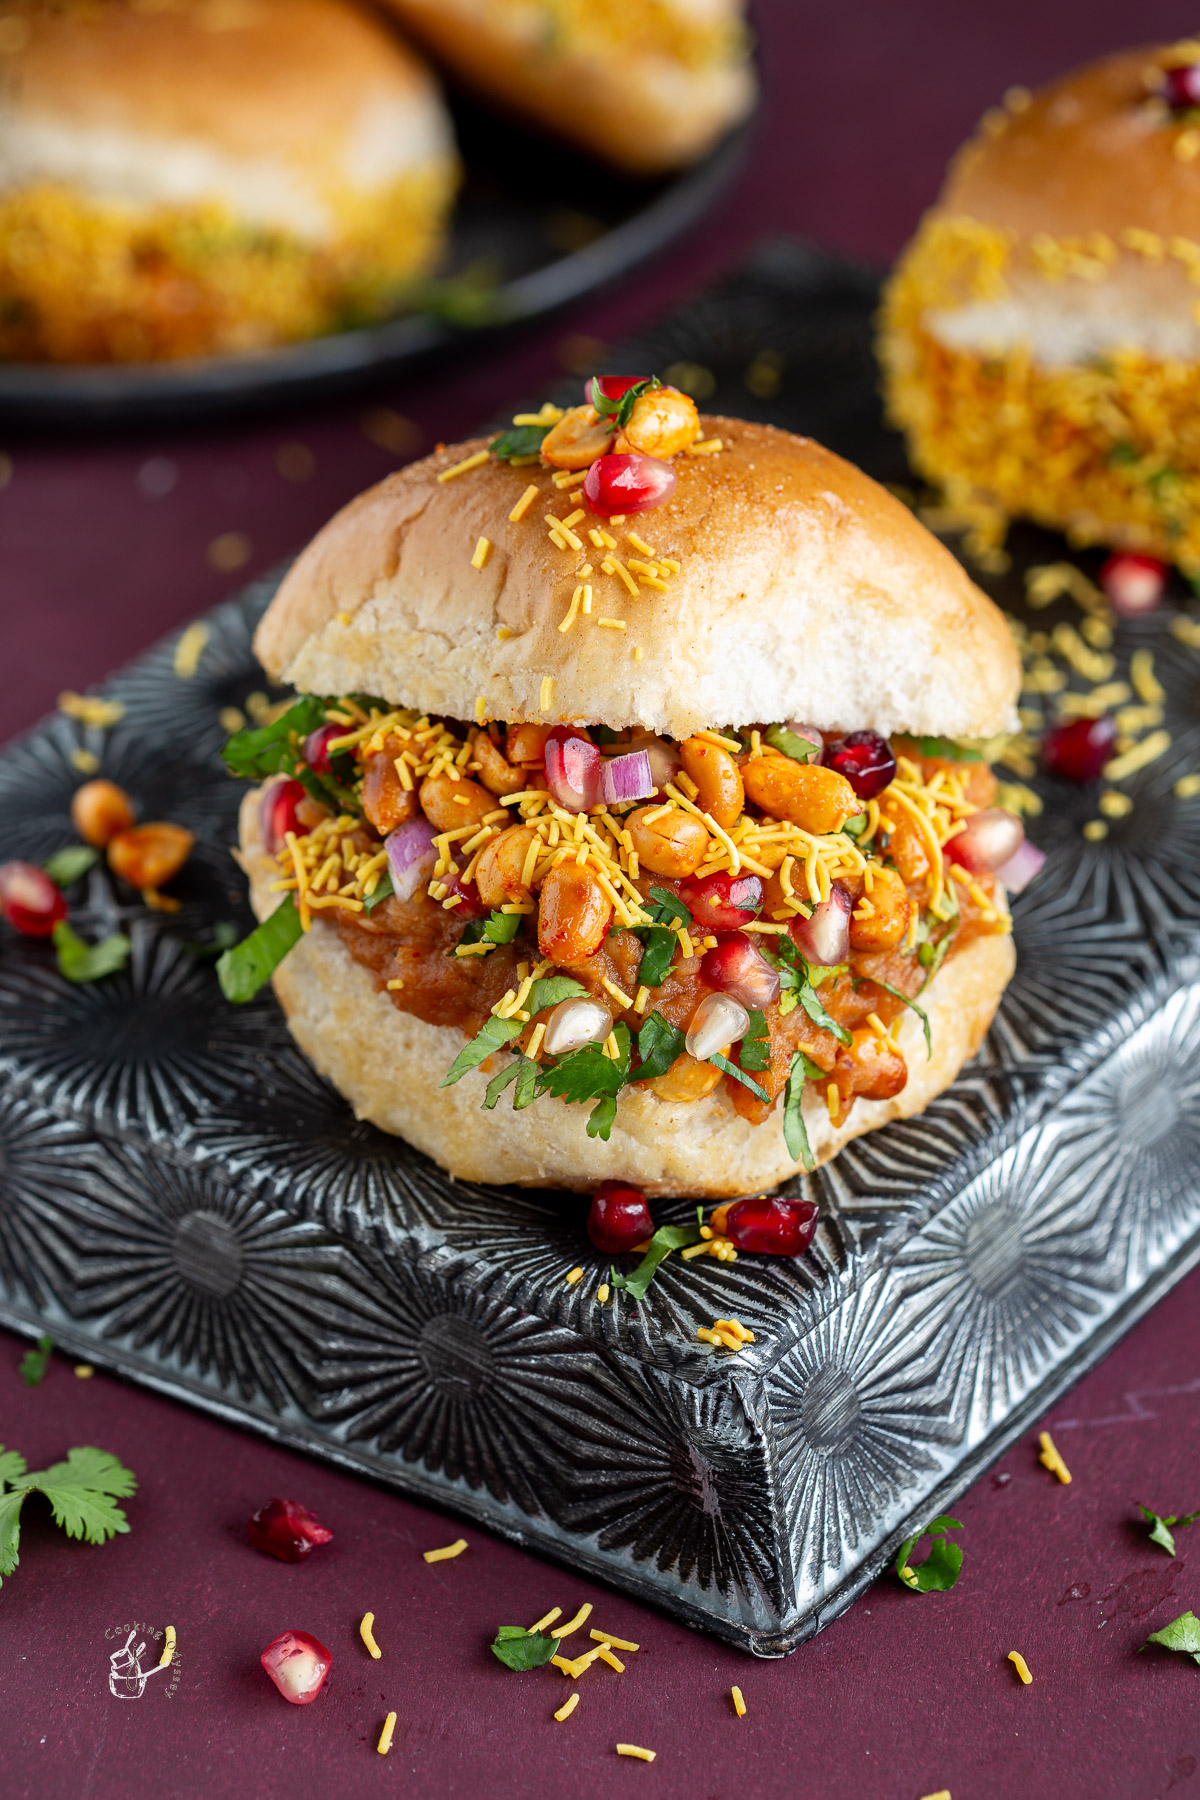
Dabeli, a street food delicacy originating from the vibrant state of Gujarat, is a tantalizing snack that has an unsurpassed taste!
This savoury treat features a medley of mashed potatoes seasoned with a special blend of spices known as dabeli masala, all nestled between soft pav (buns) and adorned with an array of delightful toppings.
Like many Gujarati recipes, it has the perfect balance of spicy, tangy and just a bit sweet. The word "dabeli" loosely translates to "pressed" as the potato filling is pressed in the buns. It has similarities to vada pav and tawa burger.
Making the best dabeli at home requires time and patience but the end result is so worth it! You need to prepare the filling or stuffing, chutneys, masala peanuts, chopped onions and sev.
You can make the filling ahead of time if it helps as it keeps well in the fridge.
Other Gujarati snack recipes we love are: khichu, lilva kachori with garlic and gujarati shakkarpara.

Full ingredients with measurements are available in the recipe card below at the end of this post
To recreate this iconic snack at home, gather the following ingredients:
Buns or pav - soft white bread rolls similar to that used in vada pav or pav bhaji. I have used soft white baps as they are easily available in the UK.
Butter - alternatively use vegan butter or oil
Mashed potato filling:
Boiled potatoes - floury potatoes are better
Oil
Sugar
Red chilli powder - I used kashmiri for colour but no spice
Dabeli Masala - I use homemade always but you can use shop bought as well.
Toppings:
Pomegranate seeds
Freshly chopped coriander leaves
Imli chutney (tamarind chutney)
Masala spicy peanuts (roasted peanuts)
Nylon sev but if I don't have it, I make quick plain sev at home.
4-5 tbsp. Red onion finely chopped
Optional - toasted dry coconut can be added to the filling

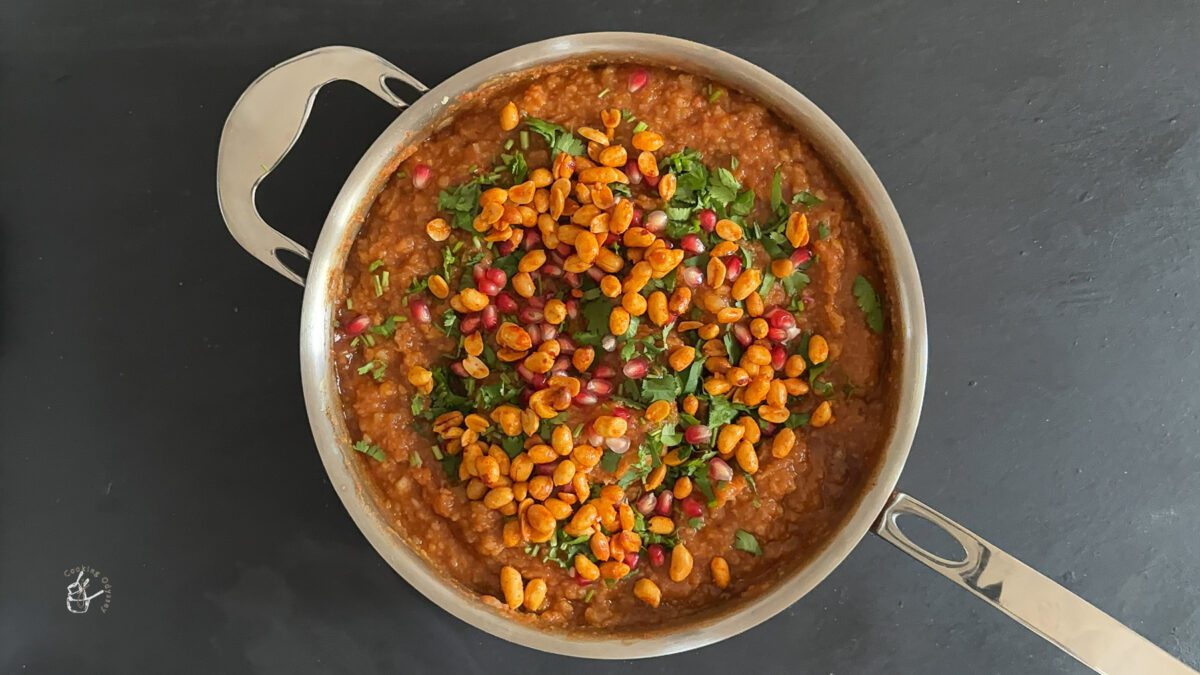
Prepare the filling:
Mash the boiled potatoes and set aside.
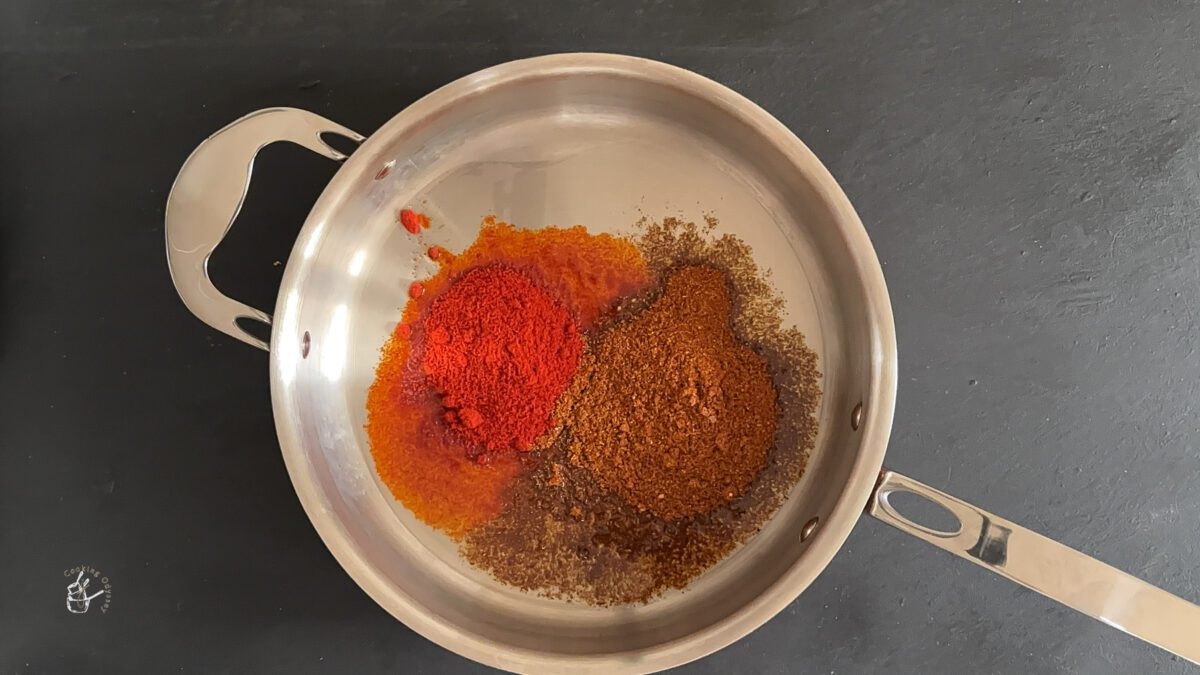
Heat oil in a pan, add the red chilli powder and dabeli masala.
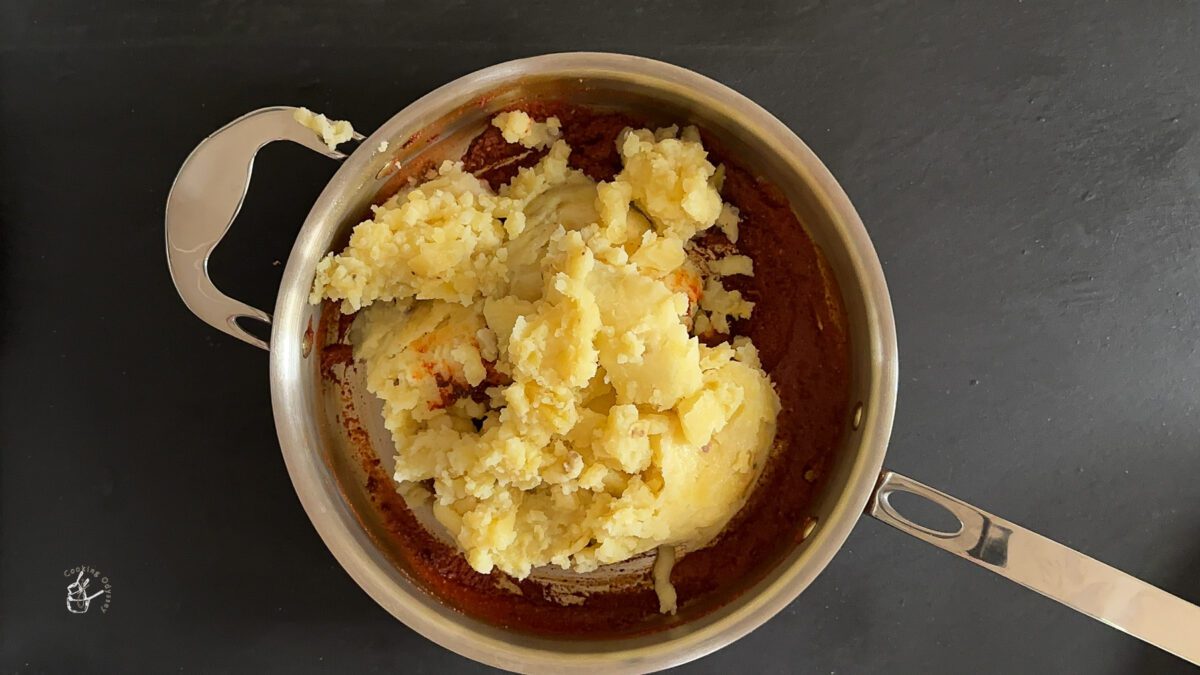
Add a splash of water and tip in the mashed potatoes and keep mashing and mixing.
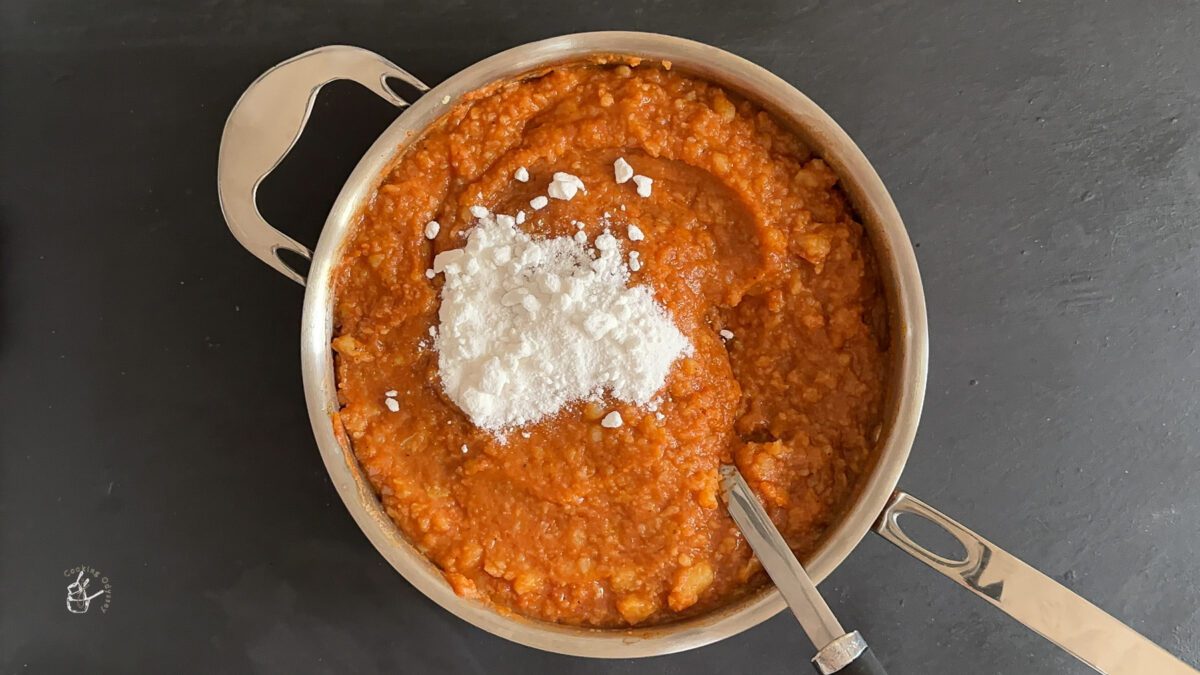
Add salt and sugar, keep stirring till sugar melts and add more water to loosen the mixture.
Cook the potato mixture for another 2-3 minutes.
If the mixture is too dry, add a couple of tablespoons of water.
Transfer the potato mixture into another bowl, let it cool.
Add ⅓ of the pomegranate seeds, coriander leaves and some masala peanuts.
Assemble the Dabeli:
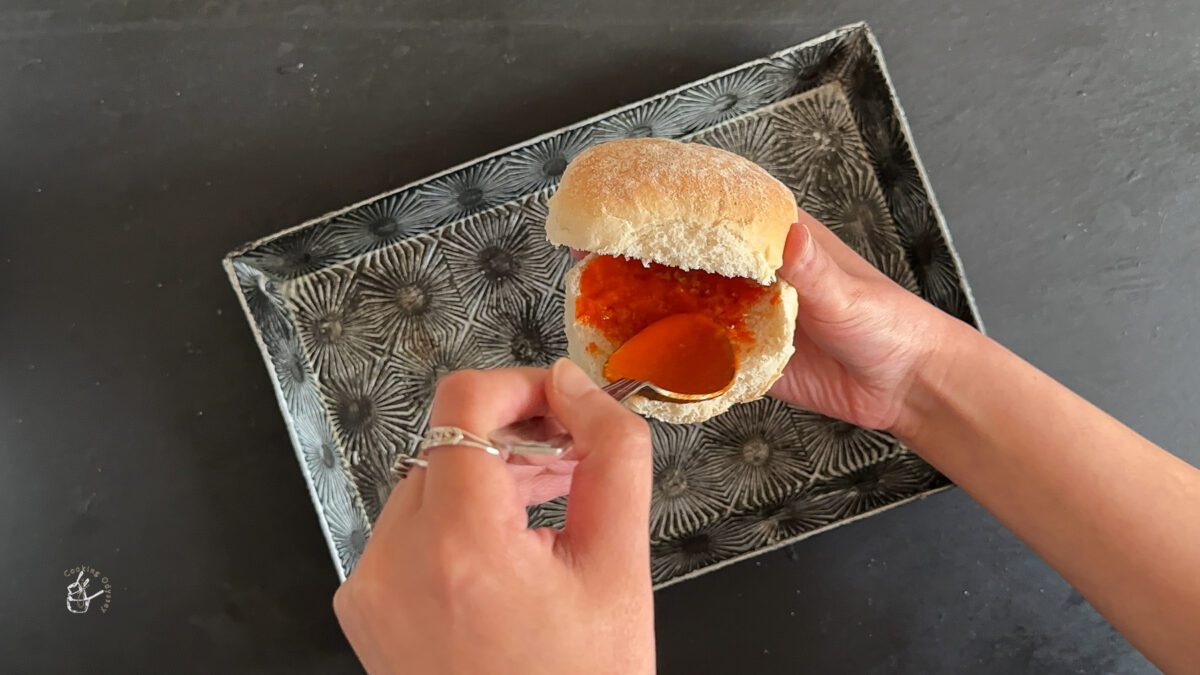
Slice the pav horizontally from one corner without cutting all the way through.
Spread garlic chutney and sweet jam chutney on both sides.
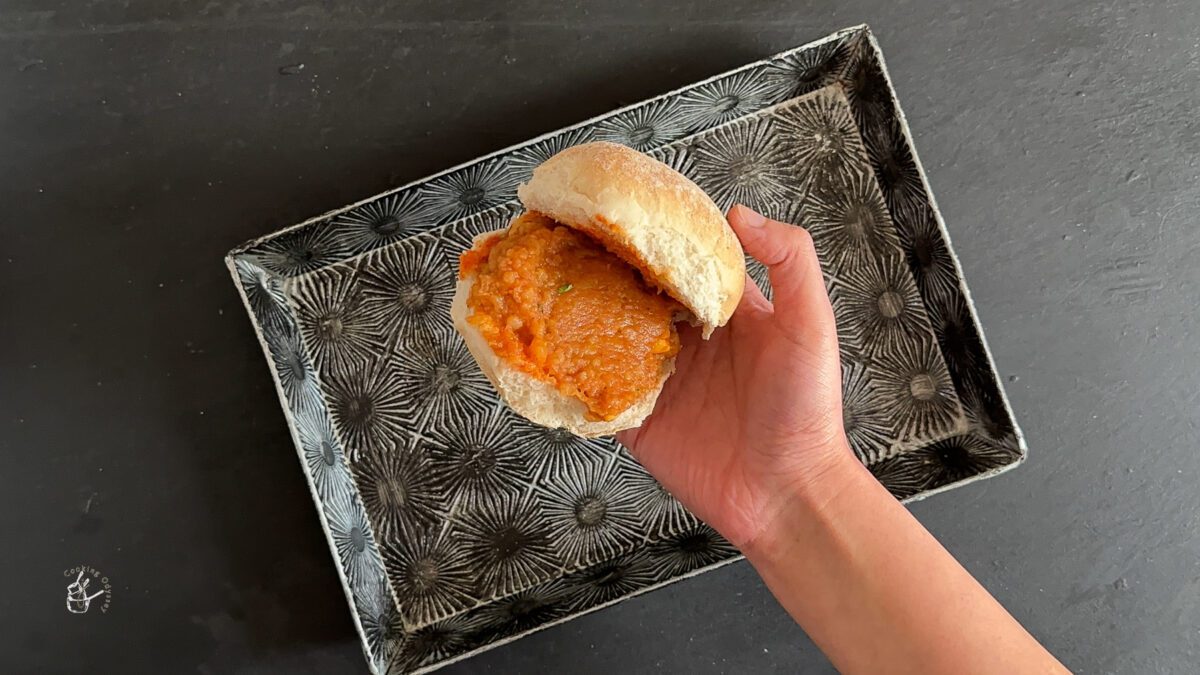
Place a generous amount of the potato mixture inside the pav.
Top with chopped onions, roasted peanuts, and pomegranate seeds.
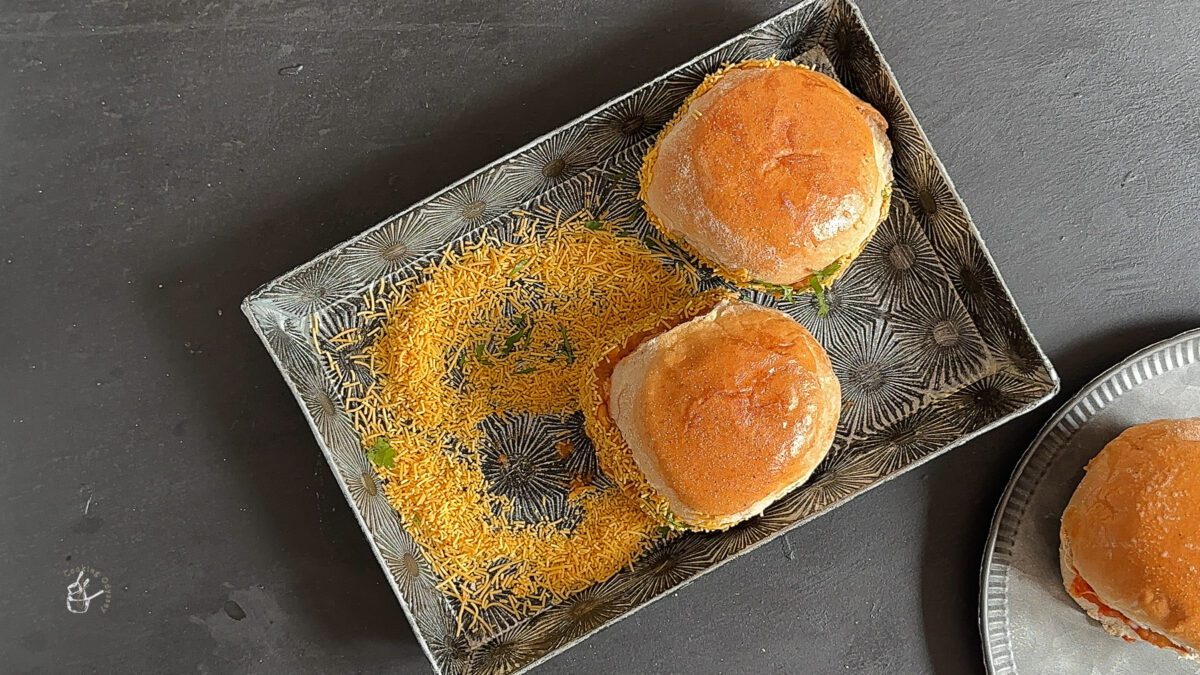
Heat flat tawa or griddle and add butter or oil.
Heat the filled buns on both sides and press down.
Coat the filled side with nylon sev
Serve with more chutneys.

If you have any leftovers (which is rare!), store in an airtight container in the refrigerator. Reheat gently in a pan or microwave.
Use leftover filling to make a dabeli sandwich, dabeli pinwheels, dabeli bruschetta or puffs.


As always if you make this recipe, be sure to leave me a comment, rate this recipe and tag me on Instagram @jcookingodyssey or #jcookingodyssey. I love seeing all your photos of my recipe recreations!
Don’t forget to follow me on social media using the buttons below – I can't wait to see you all there!

PLEASE NOTE: Nutritional values are estimated by a computer and may vary based on ingredients and portion sizes. For personalised dietary advice, please consult a qualified healthcare professional.
Share on Facebook Pin This RecipeNote:- This post was originally posted on May 31st 2015 but I have updated the post since with helpful content.