This homemade dabeli masala powder is a must have for homemade dabelis, a popular Gujarati street food snack also known as Kutchi Dabeli. You just need whole spices and a spice grinder.


This homemade dabeli masala powder is a must have for homemade dabelis, a popular Gujarati street food snack also known as Kutchi Dabeli. You just need whole spices and a spice grinder.
This Indian Dill Leaves Curry, also known as Suva ni Bhaji or Shepu Bhaji, is a dill stir fry made with garlic, green chillies and few spices.
It is naturally vegan, gluten-free and comes together in just 15 minutes.

This fiery raw mango, red chili and garlic dip is packed full of flavour. It is spicy, tangy and sweet and tastes delicious with a variety of dishes.
Ready in less than 10 minutes, it's naturally vegan and gluten-free.

This vibrant and spicy green mango chutney recipe is made using raw mangoes, garlic, green chilli and mint. It's spicy and tangy, making it the perfect condiment for Indian meals.
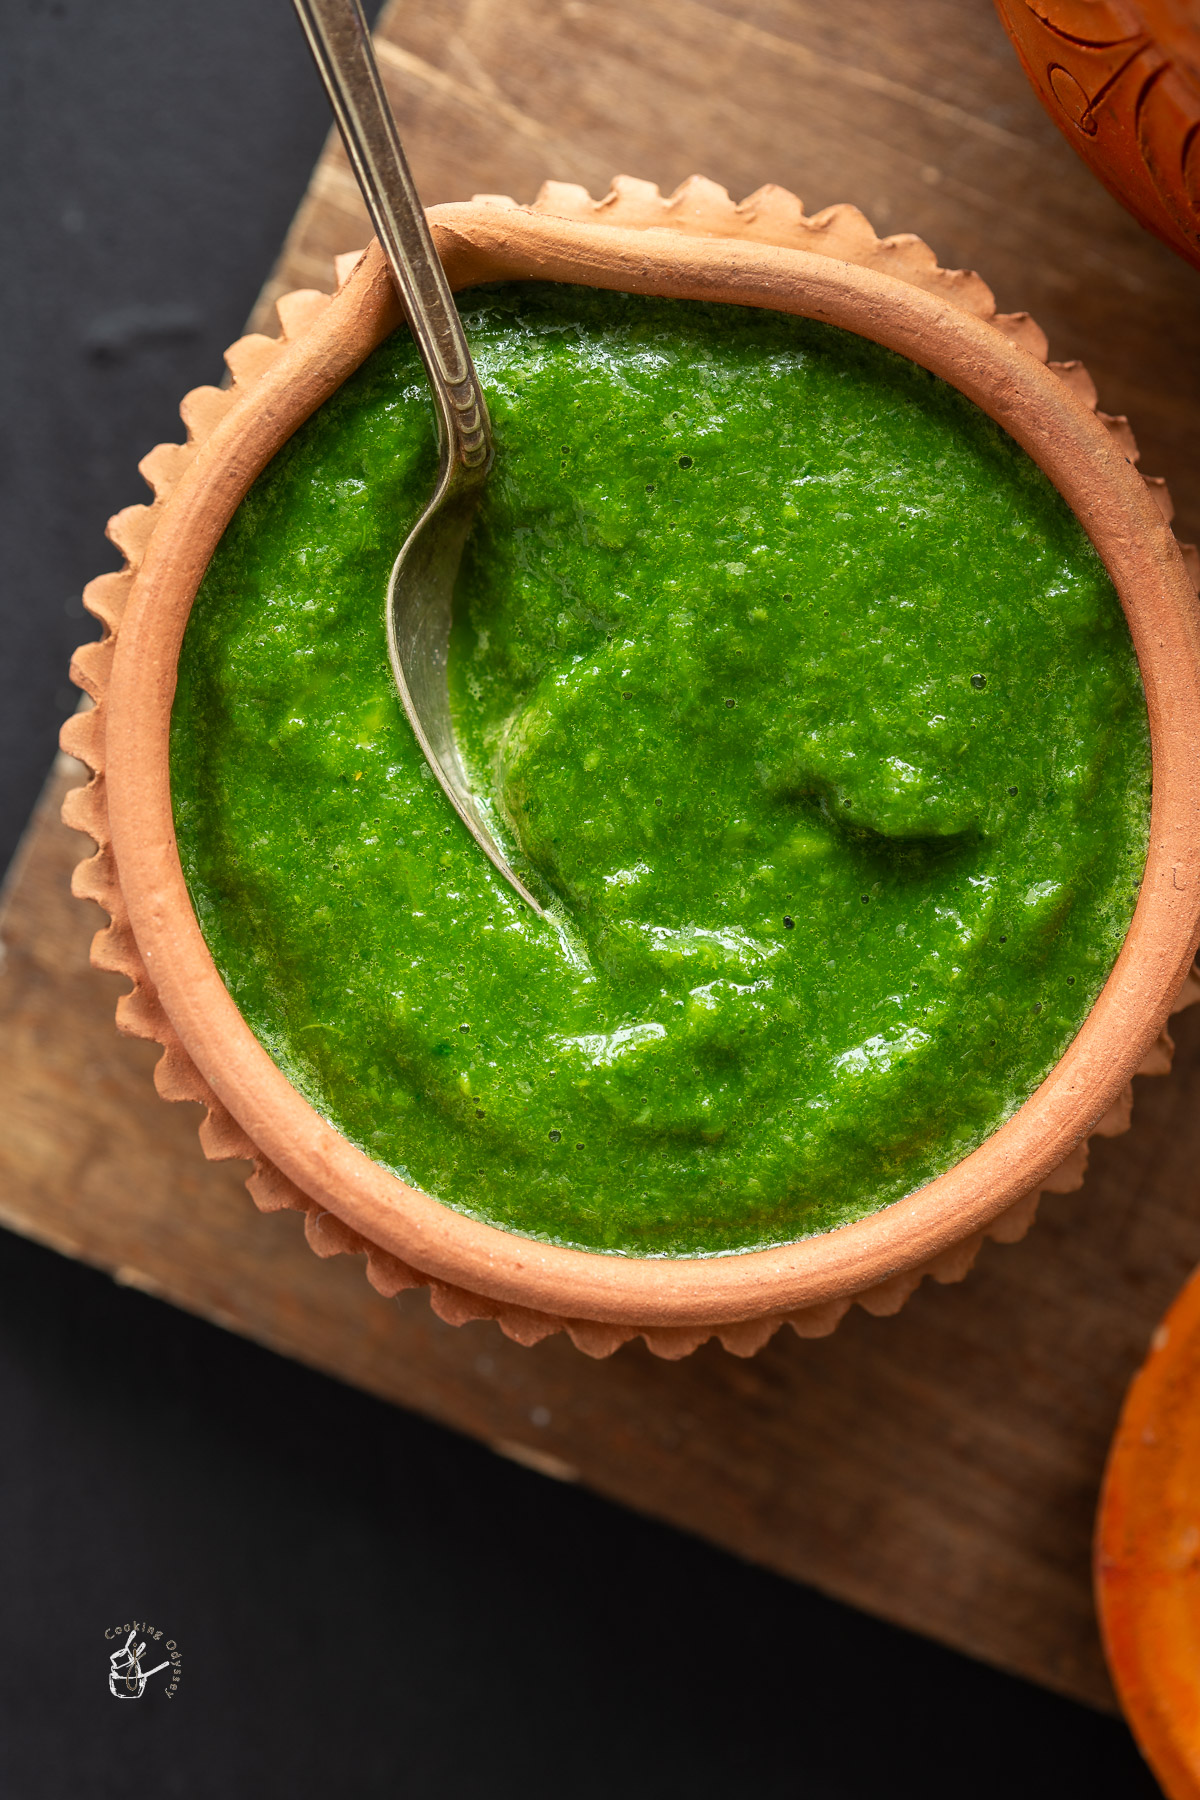
This easy Green Lentil Curry also known as Green Lentil Dhal uses Indian spices to create a flavourful and nutritious plant-based meal that's easy on the pocket. Great for batch cooking and easy weeknight meals.

Here is my collection of the best vegetarian recipes that you can serve with basmati rice. These recipes range from and work for white and brown basmati rice.

Indian Fried Rice is an easy and straightforward recipe using leftover rice taking just 5 minutes. This particular recipe is made to a Gujarati style rice known as Vagharelo Bhaat, with rice, a simple vaghar and green chillies.
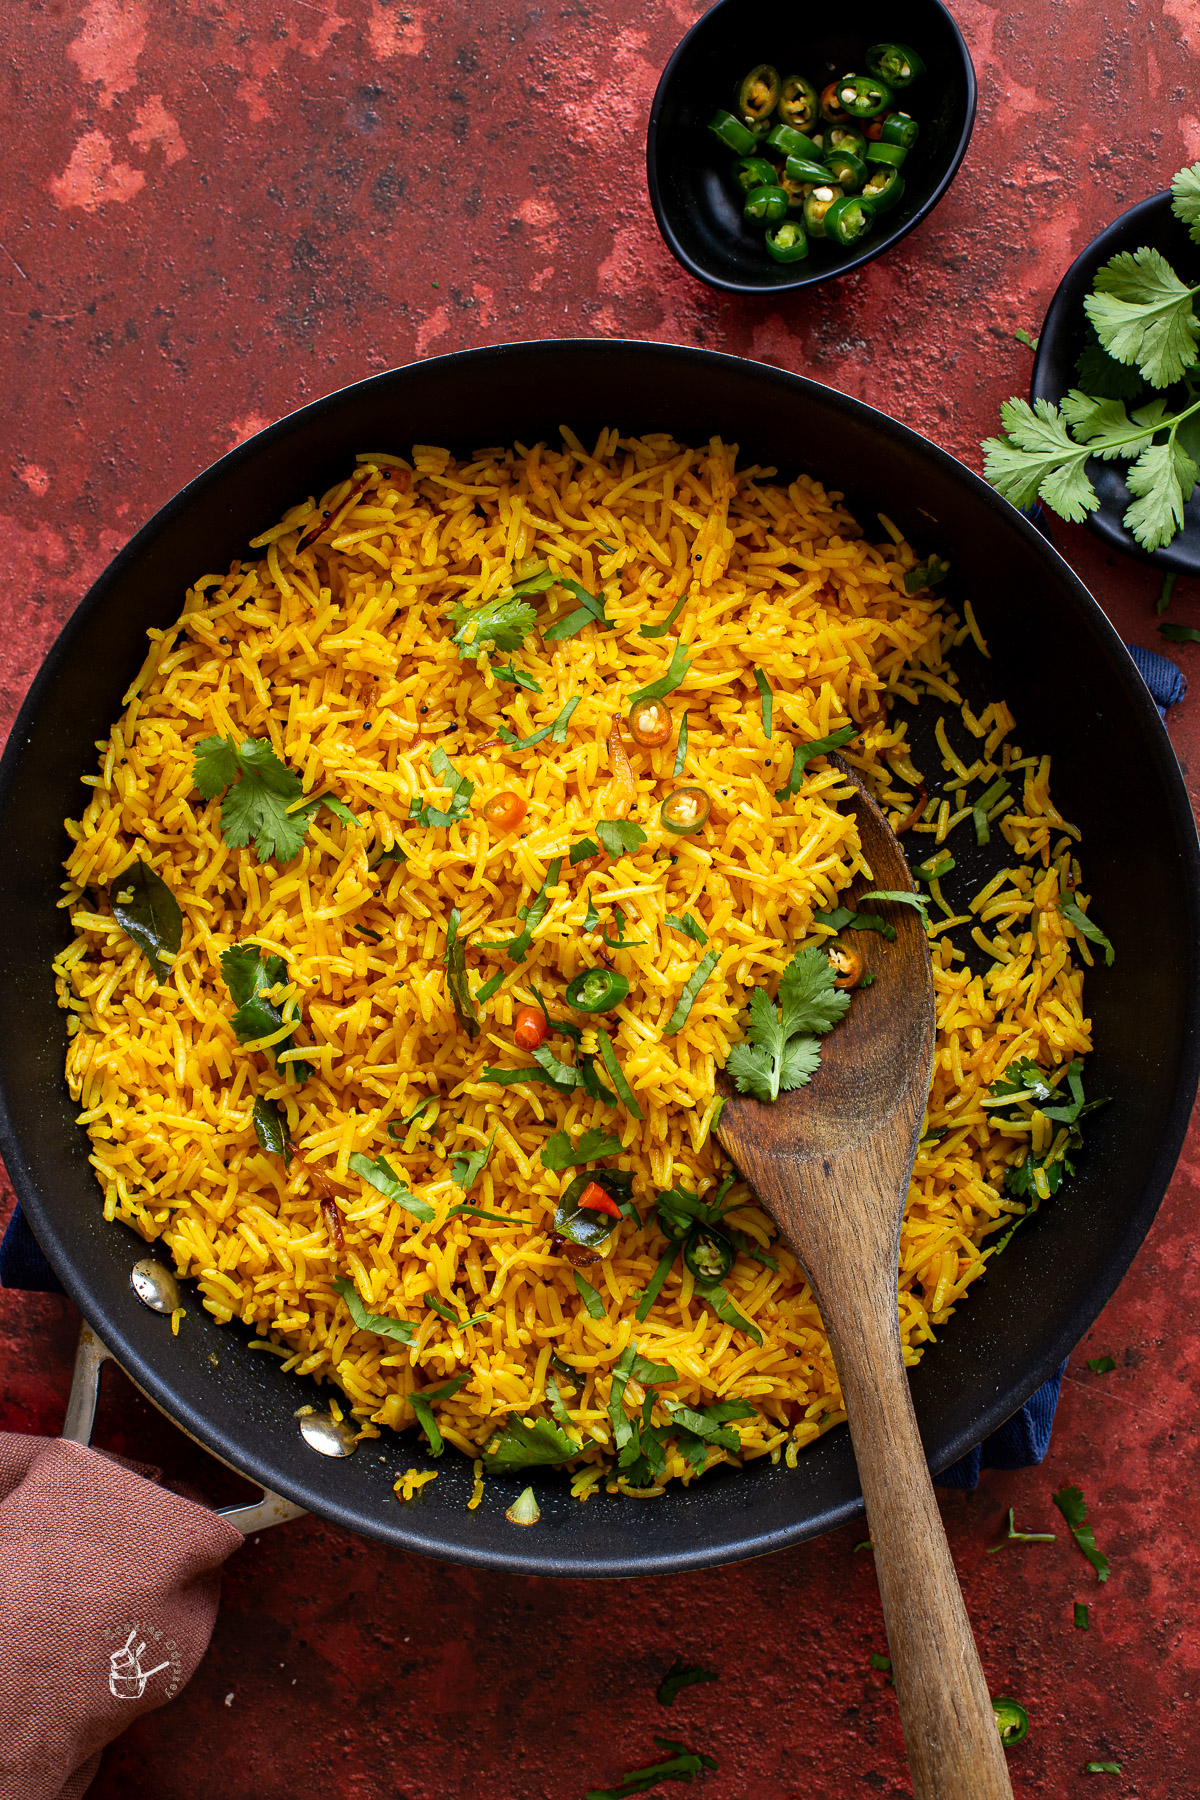
This plain boiled Basmati Rice recipe is my go-to side dish with Indian meals. You can make perfectly fluffy basmati rice with separate grains with an option to drain or not drain the water. I use a ratio of 1:2 rice to water.

This luxurious creamy saffron pasta recipe, made with tagliatelle, saffron cream sauce and asparagus, is perfect for a special occasion. It is quick, easy to make and you can customise the veggies in this pasta dish to make it your own!

These shallow-fried wholewheat Punjabi-style Ajwain Paratha are crispy and flaky, making perfect for dipping into Indian curries or these side dishes for paratha.

If you're preparing piping hot parathas, you're probably what to eat with paratha! These are the best vegetarian Indian side dishes for paratha ranging from simple dips to delicious veg side dishes.

Paratha are a pan-fried Indian style flaky flatbread made with whole-wheat flour and can be enjoyed alongside any type of Indian meal. Prepare perfect parathas every time for breakfast, lunch or dinner.
In this post, you can learn the techniques for the best super flaky whole wheat parathas, also known as tawa paratha, with lots of layers.

This Indian Fruit Custard recipe will become one of your favourite desserts for the summer. Chopped up seasonal fruit is served in an eggless light custard milk cream.
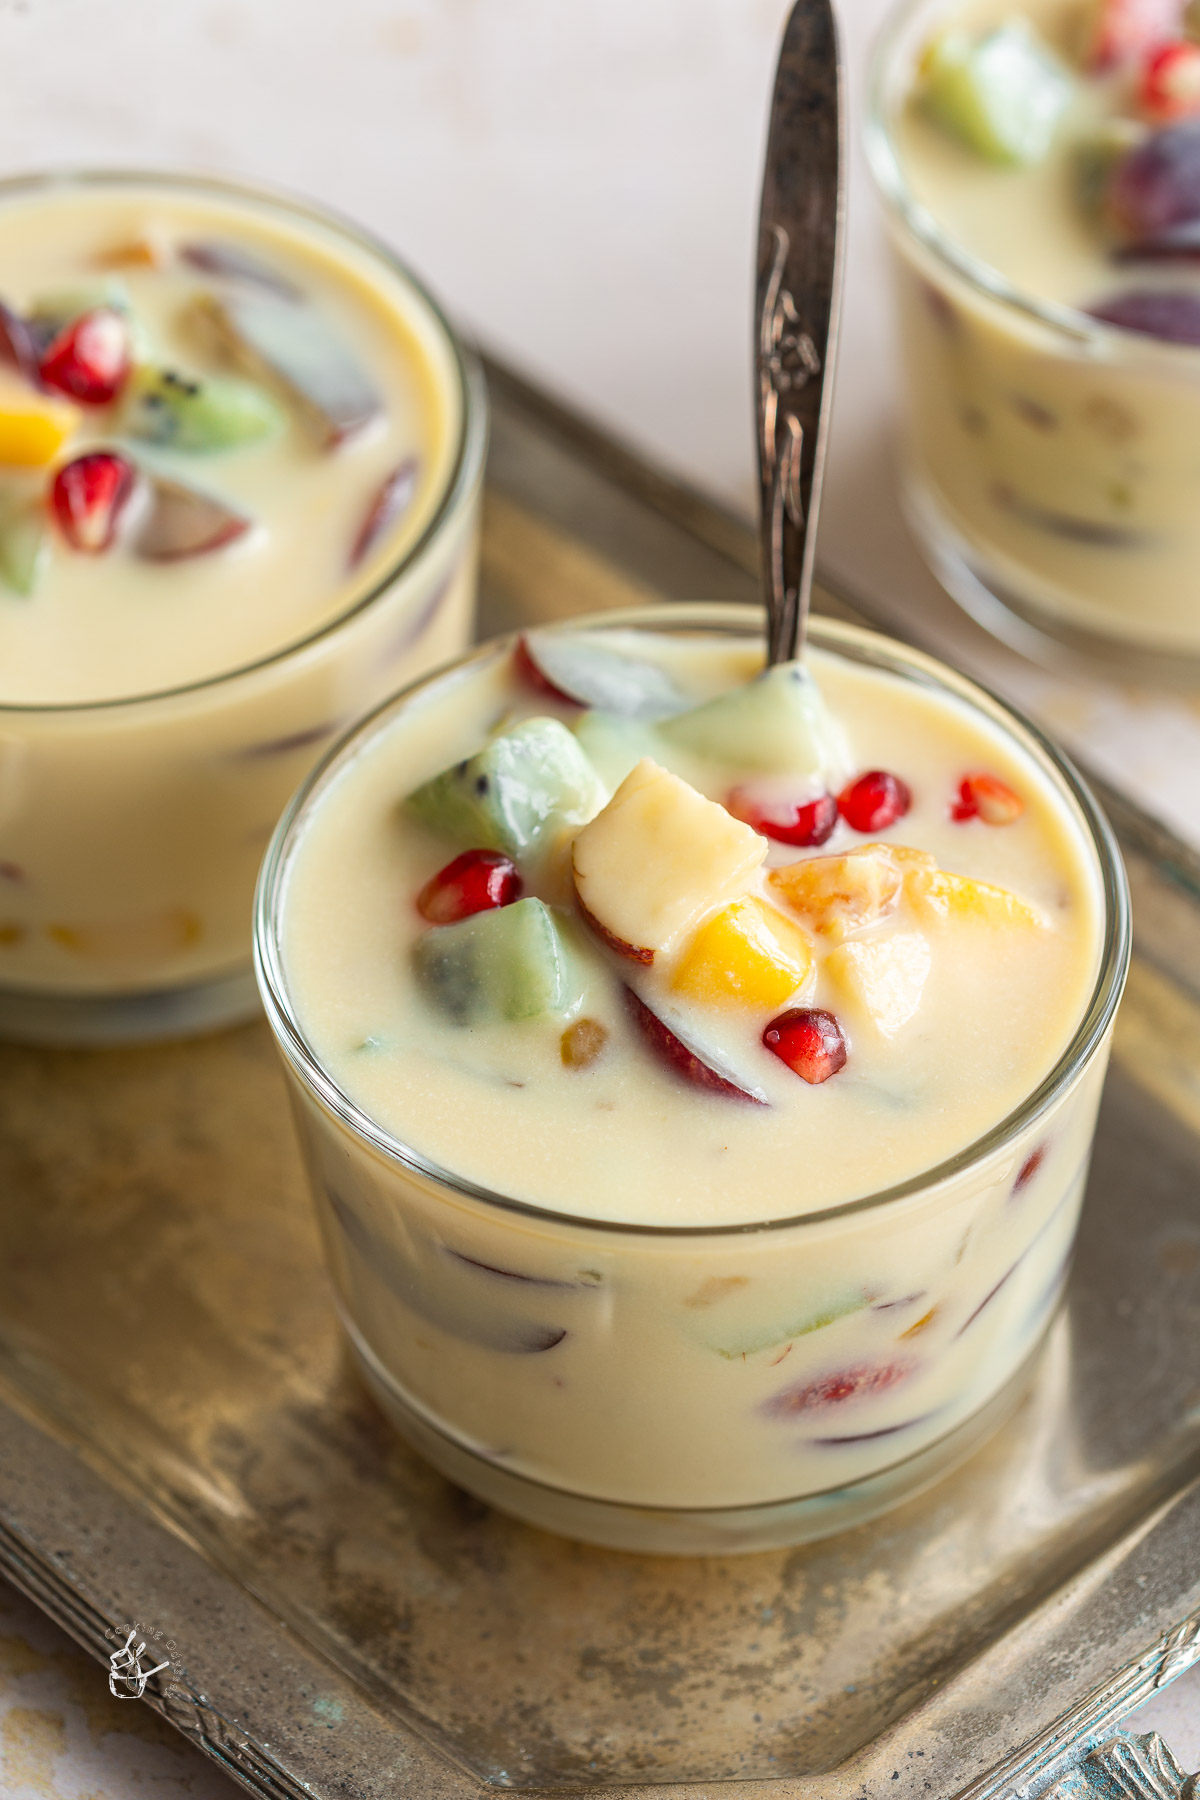
This Fruit Salad with Condensed Milk recipe is so easy to put together. Chopped fruit, sweetened condensed milk and cream are mixed together for the perfect sweet treat. You can easily customise this fruit salad to make it your own.
No cook, vegetarian, gluten-free and ready within 10 minutes.

Serve this cooling Mixed Fruit Raita along with your favourite pulao and biryani recipes. It takes only 5 minutes to make, is vegetarian and gluten-free.

Fruit Raita has the perfect balance of sweet and chatpata flavours. Chopped fruit is mixed with yogurt, mint and chaat masala for a delicious side dish that is good enough to eat up with a spoon.
The sweetness of fruits, cooling effect of the yogurt make this a great condiment in hot weather.
The great things about this recipe is that you can choose whichever fruit is in season and what suits your taste buds. I also use a mix of fruit in this Fruit Salad with Condensed Milk and Fruit Custard.
The variety of colours and flavours in this raita also make it a great option for Holi or Diwali parties.
It is one og my go-to raita recipes in the summer along with Baby Potato Pulao or Indian Vegetarian Curry Recipes.
Other raita recipes we make on rotation is Cucumber Raita, Boondi Raita, Tomato Raita, and Butternut Squash Raita.
Full ingredients with measurements are available in the recipe card below at the end of this post
Plain yogurt (curd)- full fat yogurt tastes super creamy but you can use low fat too. I use thick yogurt for raita.
Fruit of your choice:
Apple
Pear
Banana
Grapes
Mango
Pomegranate
Mint leaves
Chaat masala
Red chilli powder - this is optional
Salt
Sugar - you may want to add some sugar to sweeten the raita further.
I like to add in nuts sometimes to make Fruit and Nut Raita. Good options are toasted and chopped almonds, cashews, or walnuts.
I personally would not add citrus fruit to raita but prefer stone fruit.

If you do not have chaat masala, you can add a pinch of spices such as red chilli powder, cumin powder (jeera powder) and black pepper powder. Another option is black salt (kala namak) instead of regular salt.
Optional herbs instead of mint include coriander.
You can also add in rose syrup and serve for Valentine's Day or Mother's Day.
Chop up fruit of choice into bitesize pieces.
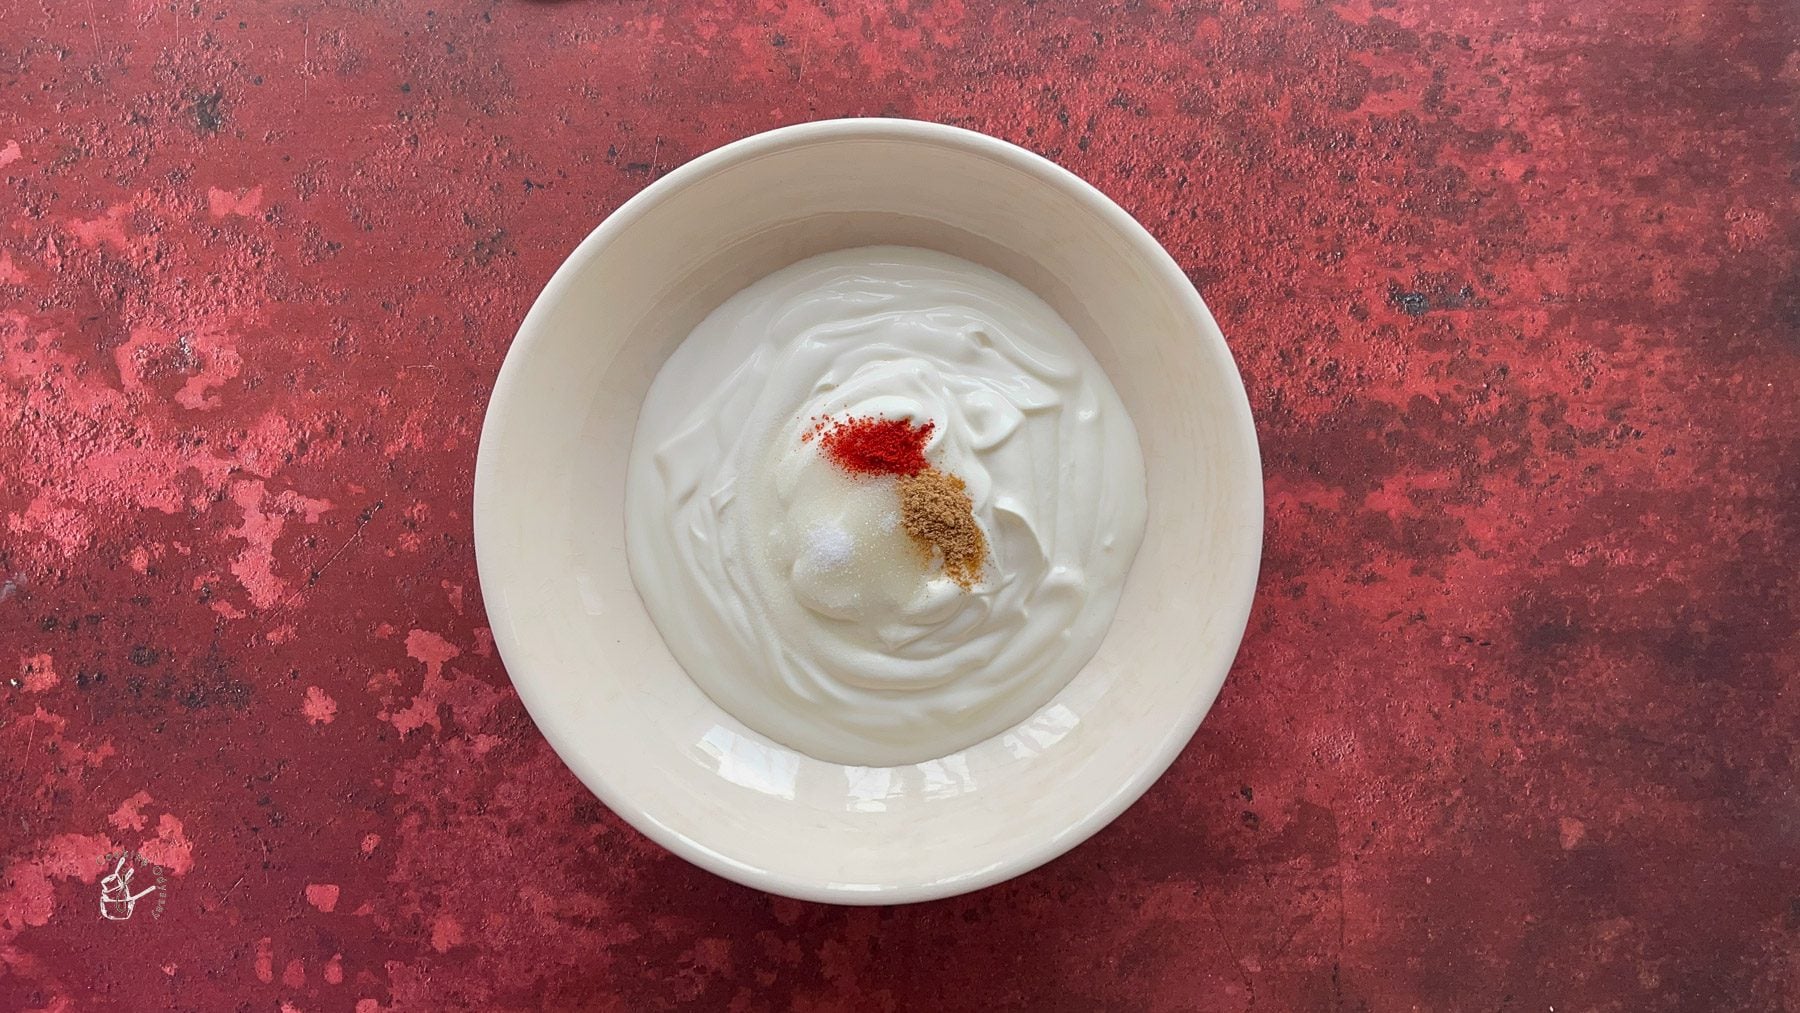
Whisk yogurt in a bowl, sprinkle over spices of choice and mix in the fruit and herbs.
If serving at party, garnish with more pomegranate pearls.

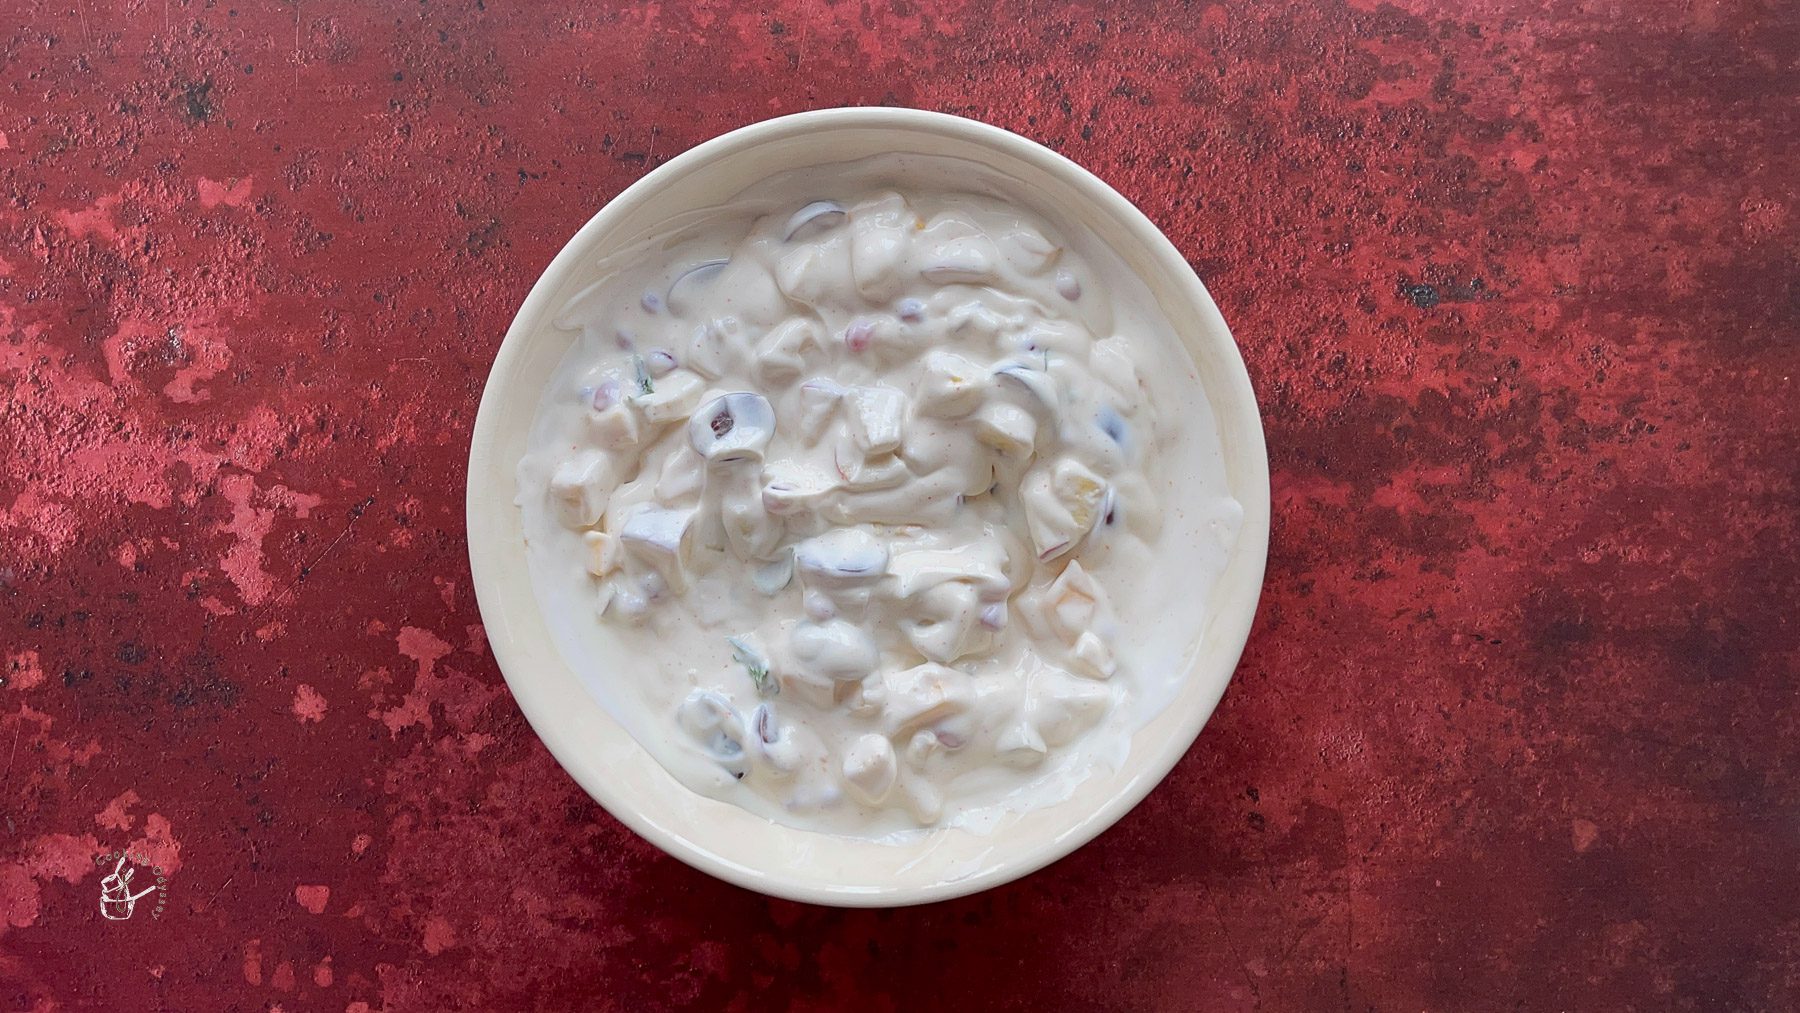

Fruit raita is best eaten within a few hours as the yogurt can split due to the acidity of the fruit.

Yogurt Garlic Sauce (Kebab Shop Style)
As always if you make this recipe, be sure to leave me a comment, rate this recipe and tag me on Instagram @jcookingodyssey or #jcookingodyssey. I love seeing all your photos of my recipe recreations!
Don’t forget to follow me on social media using the buttons below – I can't wait to see you all there!

PLEASE NOTE: Nutritional values are estimated by a computer and may vary based on ingredients and portion sizes. For personalised dietary advice, please consult a qualified healthcare professional.
Share on Facebook Pin This RecipeNote:- This post was originally posted 23rd March 2012 but I have updated the post since with helpful content.
In this Chilli Mogo recipe, fried mogo chips are tossed in a finger-licking schezwan sauce. It's the perfect vegan appetiser recipe.

The classic Indian sweet shop mithai, Chocolate Barfi recipe, is prepared with a creamy plain milk barfi layer topped with smooth milk chocolate. It's the perfect Indian dessert for gifting or special occasions. Make this easy recipe at home!
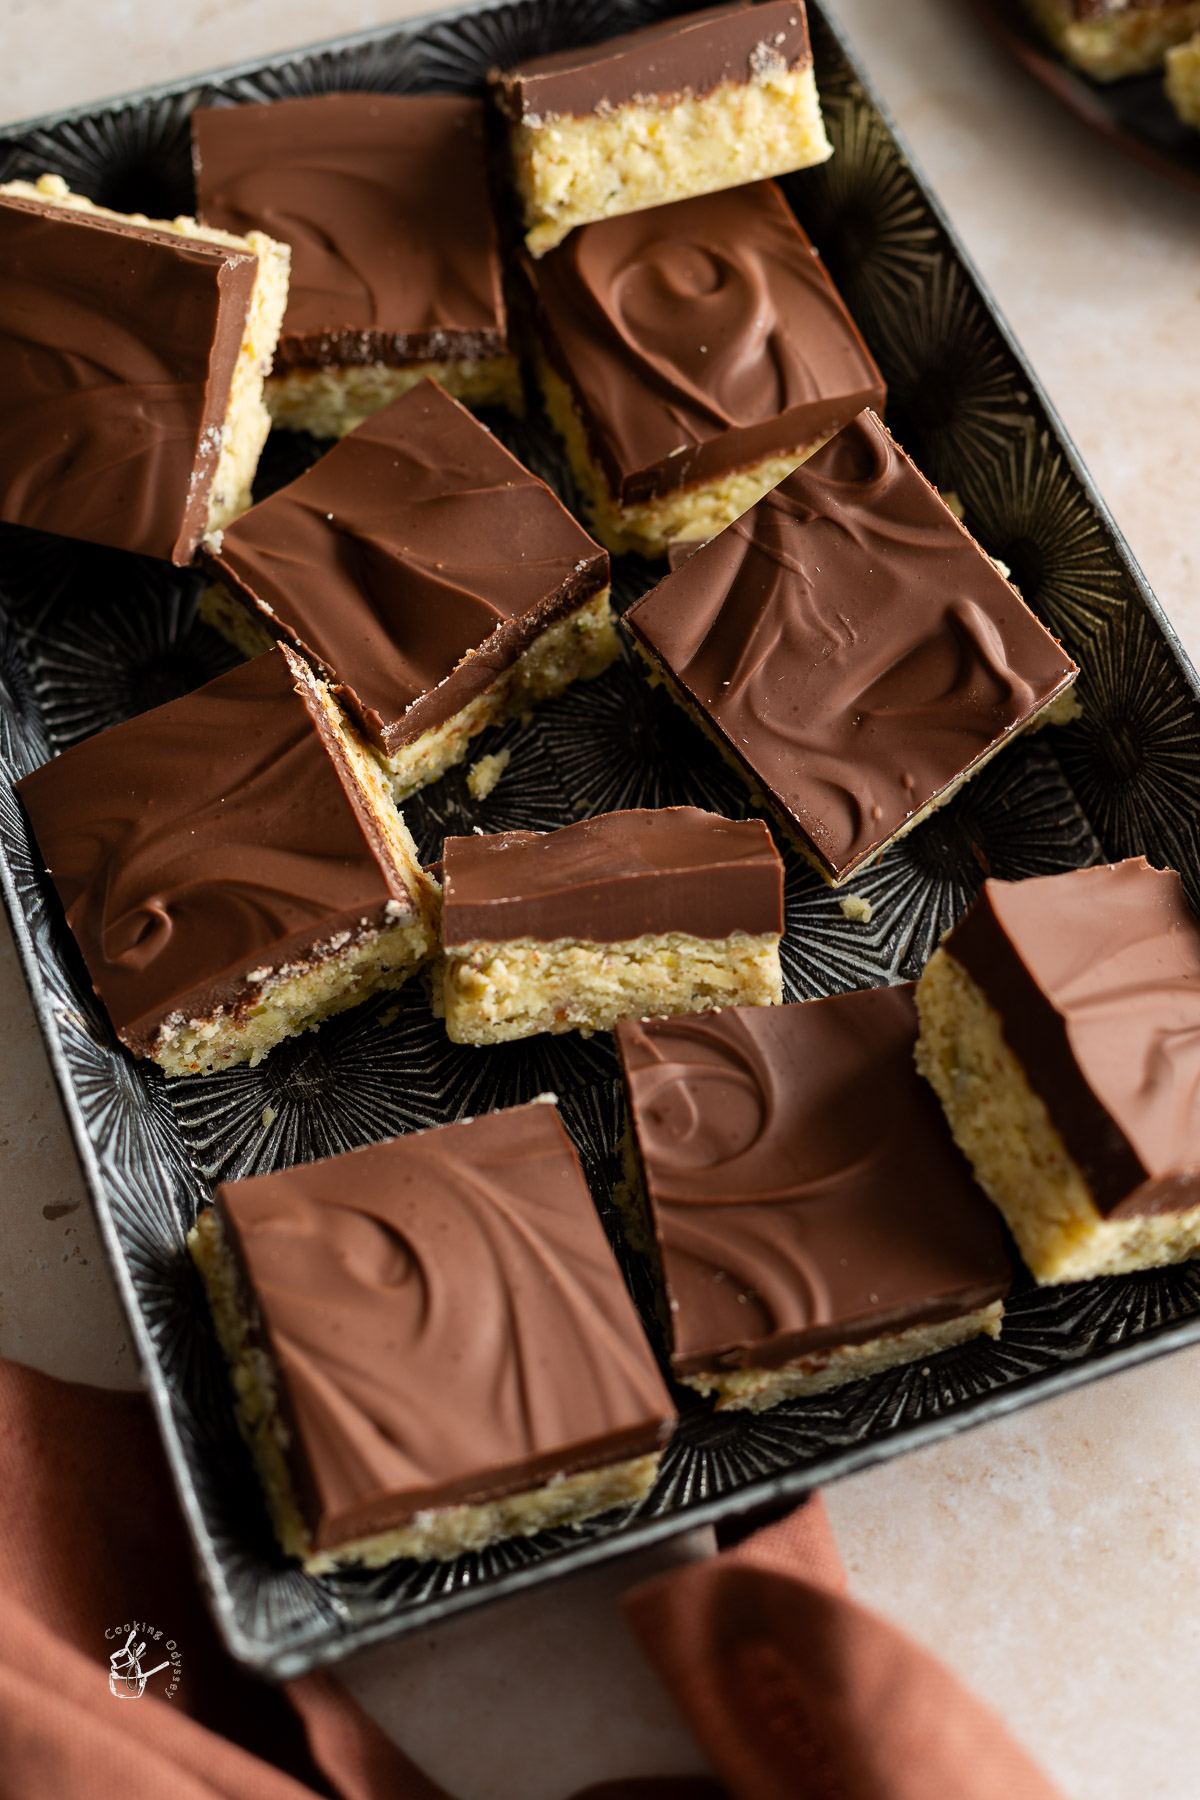
Growing up, chocolate barfi was my favourite indian sweet mithai! It was so exciting visiting the mithai shops and seeing rows of indian mithais - it was hard not to buy the whole shop!
Luckily, my Mum made the best ever chocolate barfi at home so it could be enjoyed at any time!
This chocolate burfi recipe uses the classic white barfi or milk powder burfi which is perfectly crumbly. It is an easy recipe using simple ingredients and resembles the exact texture you can find in sweet shops (kandoi). The traditional recipe uses fresh mawa, or milk solids, but most Indian homes use milk powder.
The slight variation to my barfi recipe is to roast the milk powder first - this prevents the barfi going chewy as it doesn't need much cooking. I also add powdered nuts which add to the crumbliness.
The top layer of this delicious chocolate burfi is a smooth milk chocolate. The chocolate flavor is irresistible with the milk barfi.
For a version using cocoa powder, you may like this Chocolate, Caramel and Vanilla Barfi. I've also used nutella to make Nutella Barfi and it tastes a bit like Indian chocolate fudge. I've even experimented with brown butter and brown sugar to make a butterscotch barfi!
It is a delicious treat that can be served on Raksha Bandhan, Holi, Janmashtami or Diwali!
You can discover a delightful fusion of traditional indian sweets at Indian Fusion Desserts. These Indian Milk Sweets are also perfect for the festive season!
Other Indian festival desserts include kaju katli and other popular burfis like coconut barfi.
Ingredients can be found in any indian store and most supermarkets.
White barfi layer
Full cream milk powder aka instant milk powder
Whole milk - you must use full fat milk
Sugar - white granulated sugar
Crushed nuts - almond, cashew and pistachio
Ghee - I use homemade ghee always for my sweets
Cardamom powder
Chocolate layer
Milk chocolate - I used milk chocolate chips, you can use bars of chocolate too. Mix it up by using dark chocolate, white chocolate or even ruby chocolate!

Nonstick pan
Prepared pan - either a greased plate (with vegetable oil or other flavourless oil), barfi tray or baking tray lined with parchment paper
Sharp knife
In a large plate, mix together the ghee, a dash of milk and the dry milk powder and leave for 5-10 minutes.
Then, on low heat, roast the crumbly milk powder until you get a toasted aroma. The milk powder should not change in colour.
Now make a milk sugar syrup. In a heavy bottomed pan, heat the milk on medium heat, continuously stirring as you go.
Once it simmers, add in the sugar and cook on a low flame until the sugar dissolves and reaches a runny condensed milk consistency. This will take a couple of minutes.
Tip in the milk powder, stir the mixture and cook until it forms a single mass and pulls away from the sides of the pan.
Immediately transfer the barfi mixture into a lined barfi tray.
Allow it to cool a little before proceeding.
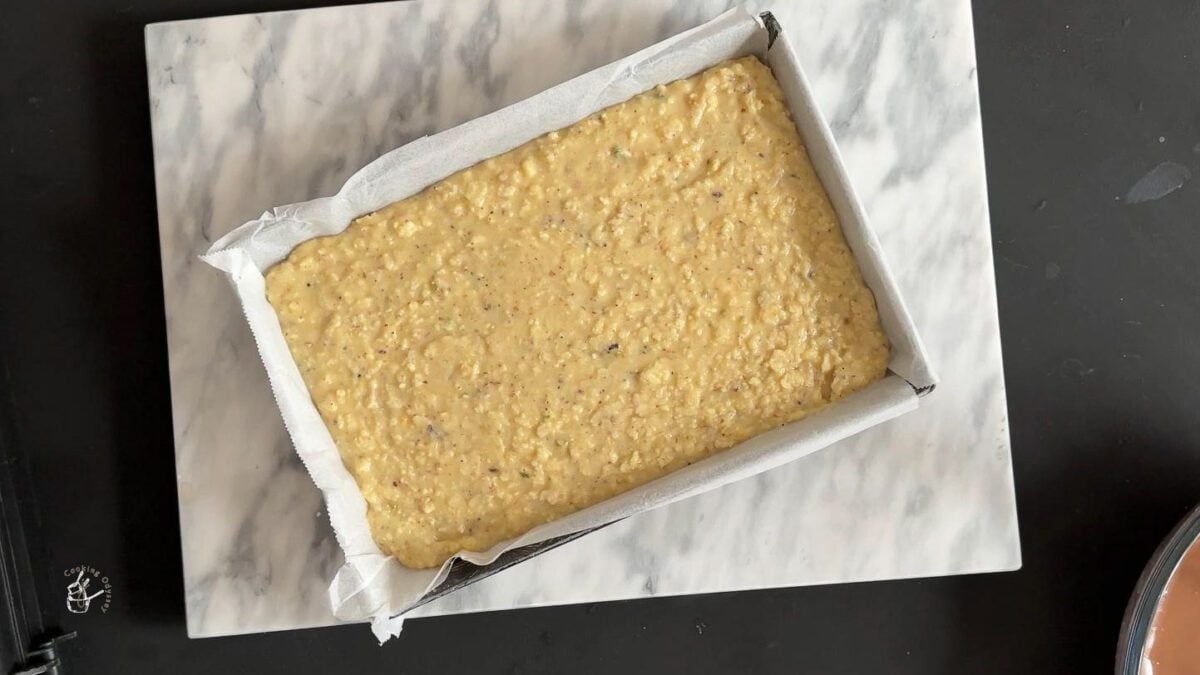
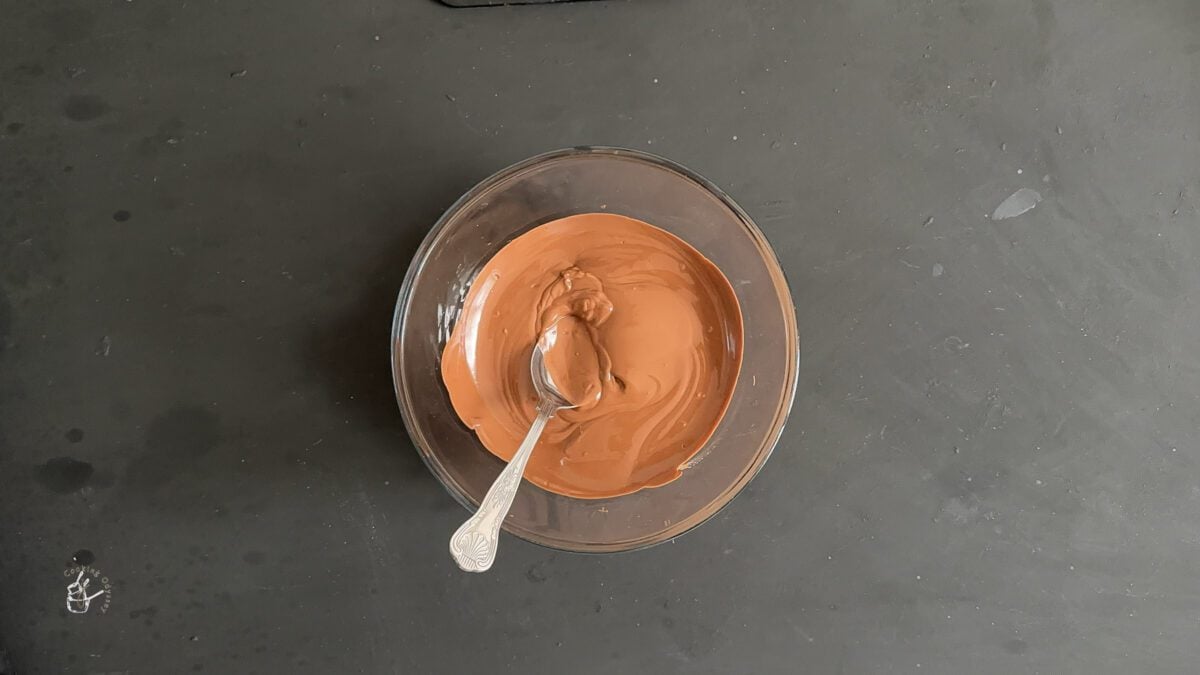
Meanwhile, heat chocolate in the microwave or using the bain marie technique.
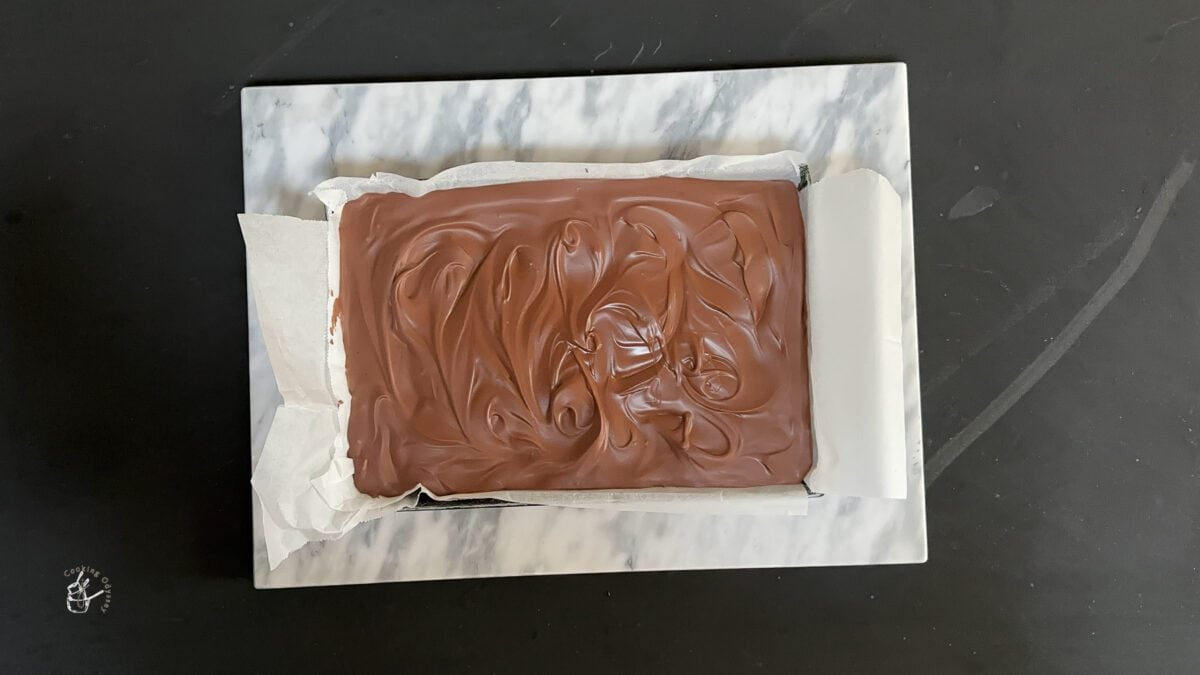
Pour this melted chocolate over the top of the milk burfi mixture and smooth out.
You can optionally create a swirl pattern as well with the back of a spoon
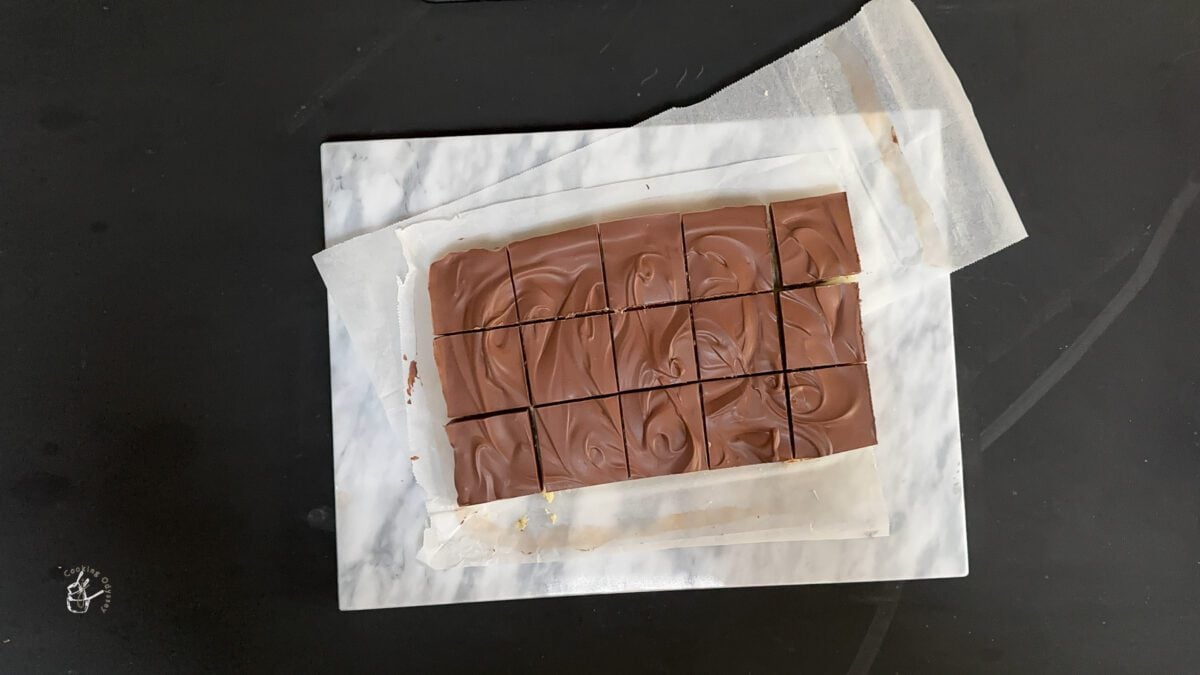
Allow the barfi and chocolate to set then slice cleanly into square shapes or rectangular shapes.
Clean the knife in between slices.
You can optionally add flavourings such as rose water or kewra water but this will change the flavour of the traditional version.
Do not leave the chocolate barfi uncut overnight - the chocolate will harden a lot and it will become difficult to get clean slices. As soon as the chocolate is just hard, I recommend cutting then. If your chocolate has hardened quite a bit, wash your knife under hot water, wipe dry and try again - the heat will gently melt the chocolate.
You will probably need to wipe the knife in between slices.
You can find the video recipe for the white barfi in the corresponding post.
Save the crushed nuts and transform into Badam Milk Powder.
Chocolate barfi is best stored at room temperature in an airtight container. Keep in a cool place, away from direct sunlight as the chocolate can soften in warm weather.
I do not recommend freezing this particular barfi as the chocolate will not thaw properly - usually, barfi is freezer safe.

Penda Recipe with Kesar and Mawa
Mawa Gujiya (Ghughra)
As always if you make this recipe, be sure to leave me a comment, rate this recipe and tag me on Instagram @jcookingodyssey or #jcookingodyssey. I love seeing all your photos of my recipe recreations!
Don’t forget to follow me on social media using the buttons below – I can't wait to see you all there!

PLEASE NOTE: Nutritional values are estimated by a computer and may vary based on ingredients and portion sizes. For personalised dietary advice, please consult a qualified healthcare professional.
Share on Facebook Pin This RecipeNote:- This post was originally posted on 2nd of October 2010 but I have updated the post since with helpful content. The recipe remains the same.
This creamy and luxurious vegan rice pudding is made with coconut milk and is gluten-free. I love to top my vegan coconut rice pudding with fresh fruit for a delicious dessert but you can customise it to suit the season!

This Karela Sabzi or Bitter Gourd Curry is a popular curry recipe from India made with a base of onions and spices. It is also known as Karela nu Shaak in Gujarat.

This Gujarati style dry aubergine curry is quick to make and only requires basic ingredients. It's vegan, gluten-free and ready in less than 15 minutes.

Make perfect Mawa Gujiya or Mawa Ghughra at home for Holi, Diwali or other special occasions. This Indian sweet is made with a pastry filled with milk solids, coconut, nuts and raisins.
I use homemade mawa with milk powder.

This homemade khoya with milk powder is my quick way (just 5 mins!) to make smooth, soft chikna mawa without reducing milk for hours. I gently roast milk powder in ghee first, which gives some of the nutty flavour you would usually get from slow-cooked milk.
It is sticky, smooth and perfect for homemade mithai recipes where smoothness is essential, as well as rich savoury curries.

SUMMARIZE & SAVE THIS CONTENT ON
Khoya, also called mawa, is cooked-down milk solids used in Indian sweets and rich festive dishes.
I make this milk powder version when I need a smooth, soft and sticky chikna khoya rather than a grainy mawa. It is especially useful for recipes where the khoya needs to bind, knead or melt into the mixture, such as smooth gulab jamun with khoya, indulgent kala jamun and soft microwave mawa peda.
The step I do not skip is gently roasting the milk powder in ghee before adding the milk. That short roast removes the raw milk powder taste and gives some of the nutty flavour you would usually get from slowly reducing milk for hours.
Freshly made, this khoya is soft, smooth and sticky. It is not firm enough to grate straight from the pan, and it is not grainy like danedar khoya. If you chill it, it naturally becomes firmer and drier, so you can either grate it into recipes or warm it with a splash of milk to loosen it again.
I use both homemade mawa methods on J Cooking Odyssey, but they are not the same.
This milk powder mawa is smoother, stickier and more interchangeable. It works well in recipes where the khoya needs to bind, knead, melt or become smooth.
Ricotta mawa is softer, crumbly and more grainy. I use it more for sweets where that grainier khoya texture is welcome.
When in doubt, milk powder mawa is usually the more flexible option.

Find measurements in the recipe card at the bottom of the post.

Milk powder
Use full-cream milk powder for the best flavour and texture.
The milk powder gives body to the khoya, but it needs to be cooked properly. For this, a short, gentle roast in ghee removes the raw taste and gives a nuttier flavour.
Do not brown the milk powder. It should smell lightly toasted and milky, but stay pale.
Ghee
Ghee adds flavour and helps the milk powder cook into a soft, glossy mawa.
I tend to use my homemade ghee from butter but any good shop-bought desi ghee works too.
Milk
Milk brings the roasted milk powder together into a soft mass.
Full-fat milk gives the richest result, but semi-skimmed can work too. Add it gradually and stir well because the mixture thickens quickly. I've also tested this recipe with single and double cream and they work equally well too. You'll end up with an even thicker and richer mawa.

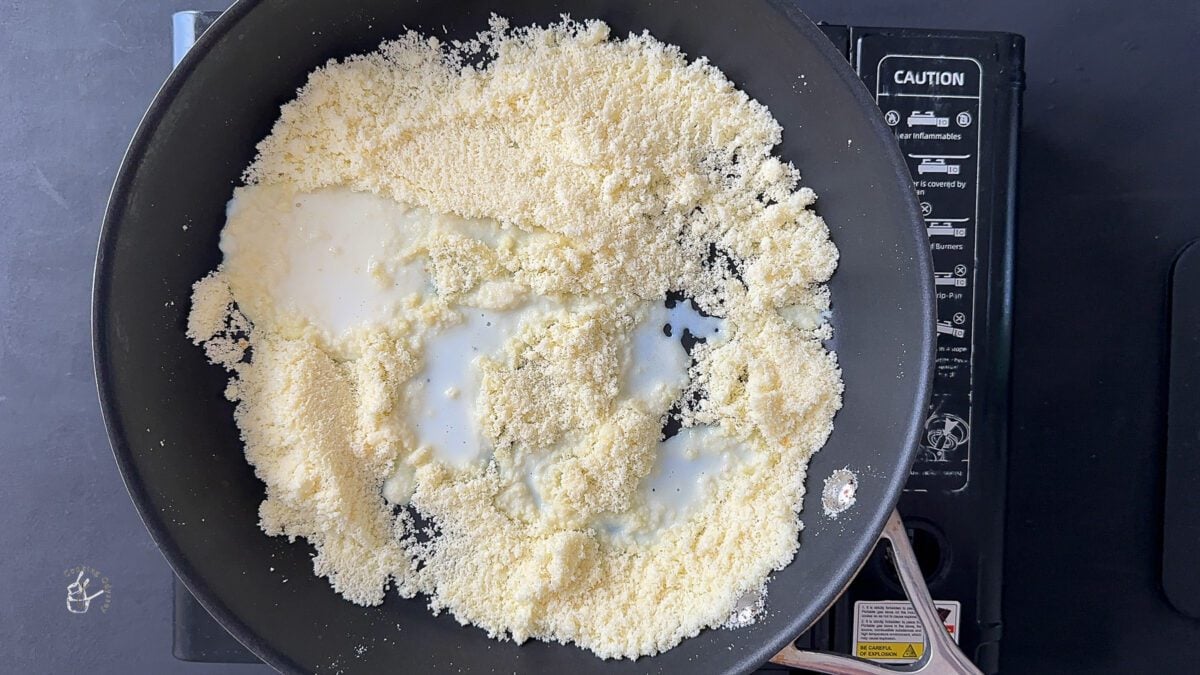
Do not skip roasting the milk powder. That short roast is what makes this taste more like mawa and less like raw milk powder mixed with milk.


Technique
Milk powder khoya is the most flexible homemade mawa on my site.
Use it anywhere you need a smoother khoya that can bind, knead, melt or blend into a recipe.
It is my preferred homemade khoya for gulab jamun with khoya because the dough needs to be smooth, not grainy. It is also my choice for kala jamun, where the mawa and paneer dough should be soft, smooth and easy to shape.
For peda, milk powder mawa works beautifully in microwave mawa peda and kesar mawa na penda. In fact, for kesar mawa penda, I specifically prefer this smooth milk powder mawa because mawa made with ricotta can be too grainy.
You can also use it in sweets where mawa adds richness and body, such as mathura peda, slow roasted mawa peda, mawa kesar kopra pak and milk barfi.
For savoury dishes, milk powder khoya melts nicely into rich gravies.
Use it in khoya kaju or add a small amount to special-occasion curries such as paneer tikka masala, shahi paneer or punjabi matar paneer.
For savoury recipes, use it sparingly. Khoya should make the gravy richer, thicker and creamier, not sweet or heavy.
Let the khoya cool completely before storing.
Store in an airtight container in the fridge for up to 1 week.
It will firm up and dry slightly in the fridge. You can grate it straight into recipes, or warm it gently with a splash of milk if you need it softer again.
I have successfully frozen khoya for up to 3 months. You need to defrost in the fridge before using but I have noticed the texture hardens. In which case, again either grate or warm with milk to loosen it again.

Is khoya the same as mawa?
Yes. Khoya and mawa are two names for cooked-down milk solids.
What type of khoya does this recipe make?
This recipe makes soft, smooth chikna khoya. It is sticky and smooth rather than grainy or hard.
Why do you roast the milk powder first?
Roasting the milk powder removes the raw taste and gives a nuttier flavour, closer to the flavour you get from slowly reducing milk.
Why did my khoya turn brown?
The heat was probably too high, or the milk powder was roasted for too long. Keep the heat low and do not let the milk powder change colour.
Why is my khoya too dry?
It may have been cooked too long, or it may have dried out in the fridge. Reheat gently with a splash of milk to loosen it.
Can I grate this khoya?
Freshly cooked milk powder khoya is usually too soft to grate. Chill it first, or cook it slightly longer if you need a firmer texture.
Can I use this instead of ricotta mawa?
Usually, yes. Milk powder mawa is more flexible. Ricotta mawa is better when you specifically want a softer, crumbly, grainier texture.
Can I use this in curries?
Yes. A small amount of khoya can enrich restaurant-style curries and special-occasion gravies.
As always if you make this recipe, be sure to leave me a comment, rate this recipe and tag me on Instagram @jcookingodyssey or #jcookingodyssey. I love seeing all your photos of my recipe recreations!
Don’t forget to follow me on social media using the buttons below – I can't wait to see you all there!

Yield can vary depending on the brand of milk powder and how firmly it is packed into the cup.Recipe tips:
PLEASE NOTE: Nutritional values are estimated by a computer and may vary based on ingredients and portion sizes. For personalised dietary advice, please consult a qualified healthcare professional.
Share on Facebook Pin This RecipeNote:- This post was originally posted on 1st of October 2015 but I have updated the post since with helpful content. The recipe remains the same.
This Air Fryer Bread is an easy, no knead bread recipe. You can achieve perfectly crusty bread with a light soft crumb at home using your air fryer.

This homemade Asian zing sauce is a copycat version of the Buffalo Wild Wings Asian zing sauce recipe. It is a tangy sauce with sweet and spicy flavors. This easy recipe, made with simple ingredients, is vegan and can be made gluten-free. Ready in less than 5 minutes!

How to make Mug ni chutti dal | Mag ni Dal is a simple, delicious and homely Gujarati side dish that can be served daily as part of a Gujarati thali. This daal requires just a handful of ingredients that are easily available in Indian kitchens. Made without using any expensive ingredients and takes less than 15 minutes to make.

This Pakistani style Maash ki Dal is made with white urad dal, onion, garlic and basic spices. Sukhi urad dal is delicious served with Indian flatbreads. It is finished with green chili and ginger julienne.
Naturally vegan and gluten-free. Stovetop and Instant Pot recipe.

These vegan peanut butter oatmeal cookies are so chewy with an irresistible crunchy edge. They have a delicious peanut butter flavor and are great breakfast cookies. Beware, you can't stop at one!

This Homemade Punjabi Rajma Masala has an irresistible melt in the mouth texture. Rajma curry is made from red kidney beans, onion, garlic, tomato and aromatic spices. Often served with rice, lovingly known known as rajma chawal, this is a comforting and authentic dish.

This Aloo Tamatar ki Sabji without onion and garlic is an easy potato curry recipe. It is a North Indian recipe made with potatoes, tomatoes and basic Indian spices. It is naturally vegan and gluten-free.

No added sugar Kesar Shrikhand is the perfect summer recipe. Easy to make using greek yogurt and natural sweetener, this Indian yogurt dessert is both creamy and delicious. It is finished with saffron for a divine flavour.

Sprouting beans at home is easy, quick and affordable. With this handy guide, you can learn how to sprout mung beans (or any other) without needing any special equipment and in any temperature. I use a simple colander and kitchen roll. Great for use in cooking or enjoyed as a snack.

These 3 ingredient coconut balls or coconut truffles are made with super simple ingredients. Follow this no bake recipe for a perfect sweet treat for a special occasion or the holiday season. They're super moist and soft thanks to some handy tips!

This 3 ingredient banana pancake recipe is made with oats, banana and plant-based milk. They're vegan, refined sugar-free, egg-free but still so fluffy! A great recipe for busy mornings or pancake day.

Garlic Lilva Kachori has an unsurpassed taste. This Lilva ni Kachori recipe has the addition of garlic and a soft pastry for a new exciting kachori recipe.

This delicious Basil Walnut Kale Pesto sauce recipe will transform your dishes! It is packed with fresh kale, basil, walnuts and takes only 5 minutes to prepare.
Vegan and gluten-free.

I love this vegan pesto recipe whenever kale is in season.
When I buy a bag of kale, I usually have about half left over so this pesto is a great way to use up leftovers! It's perfect for quick lunch or dinners as you just need to swirl it through pasta. It makes a nice alternative to basil pesto.
This is a plant-based version using nutritional yeast but you can absolutely use grated parmesan if you wish.
You will also love this Roasted Brussels Sprouts and Kale Salad.
Full ingredients with measurements are available in the recipe card below at the end of this post
Kale - use the leaves and the tender stems. Ensure the kale is as fresh as possible for the best flavour and results.
Basil - I love adding a bit of fresh basil to my kale pesto but you can leave it out if you do not have it to hand. Other fresh herbs such as parsley work so well too.
Nuts - I have used walnuts but you could use pine nuts or almonds too. Even sunflower seeds or pumpkin seeds work well.
Garlic - fresh garlic cloves are best in pesto.
Extra virgin olive oil - use this generously for delicious pesto
Lemon juice - fresh lemon juice is best but you can use bottled
Red chilli flakes (optional)
Nutritional yeast - (optional) adds savoury flavour in replacement of parmesan cheese in this recipe. Alternatively, you can use hemp seeds or vegan parmesan
Salt and black pepper
Optional - italian seasoning.
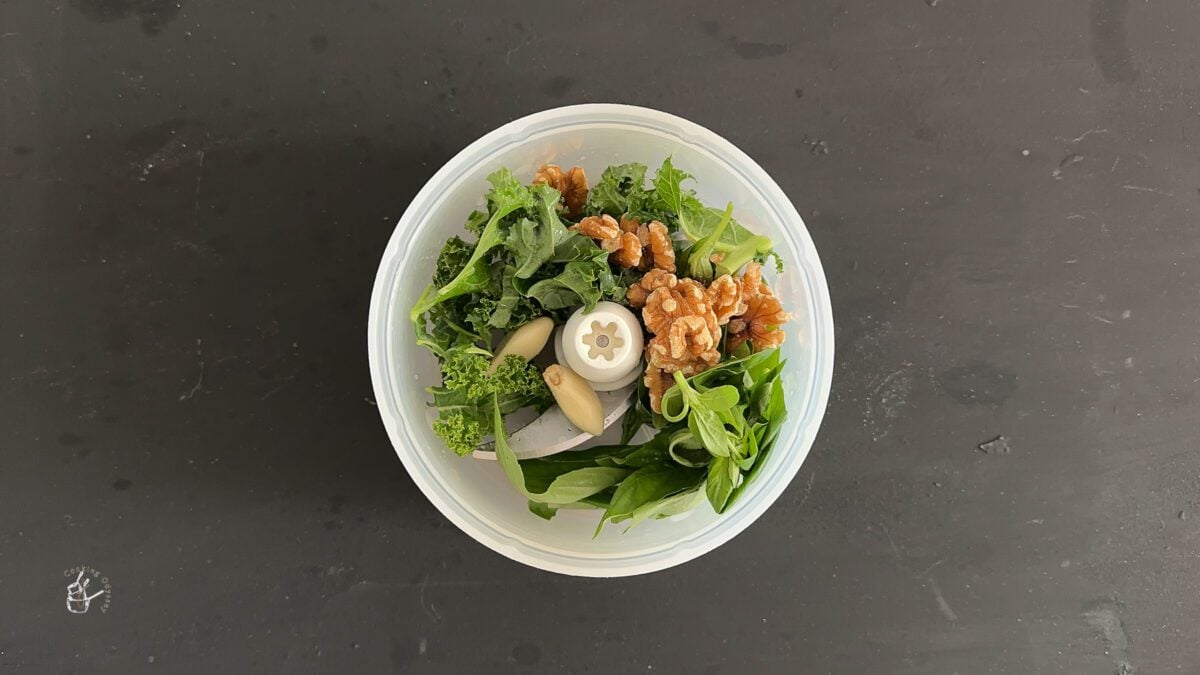
In a food processor, add the kale, basil, garlic, nuts, red chilli flakes and nutritional yeast. Blend a few times to grind down to a coarse paste.
Add the lemon juice and oil steadily and continue to blend until the pesto reaches the desired consistency. Season with salt and pepper to taste.
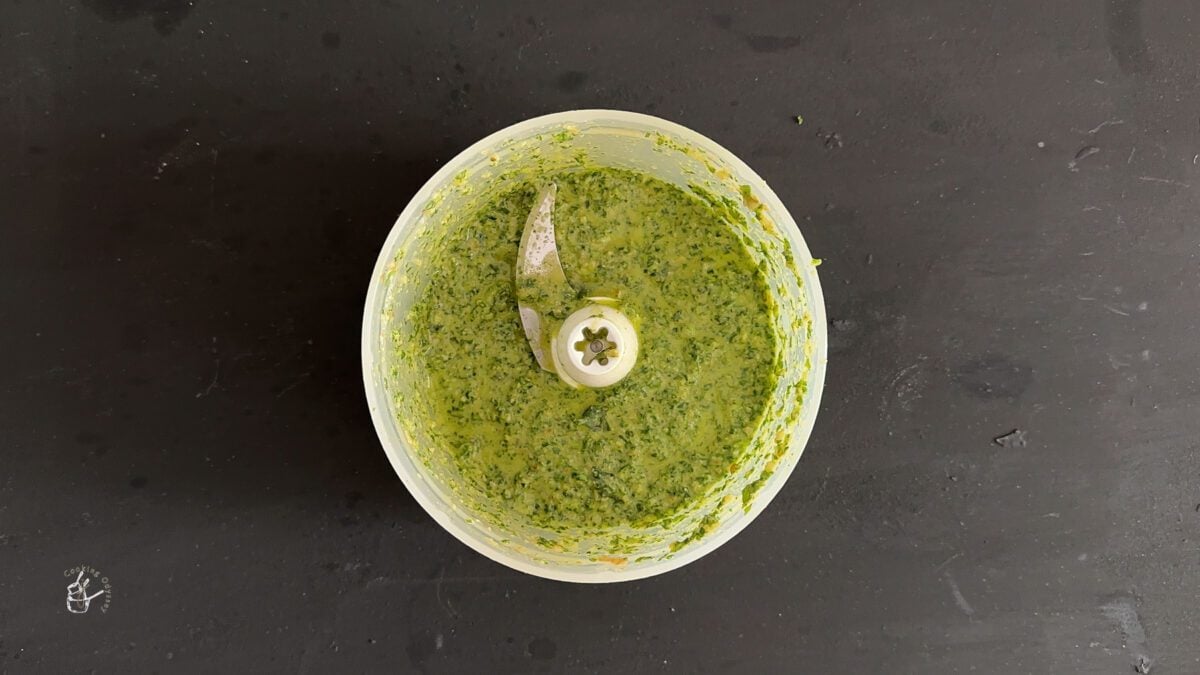
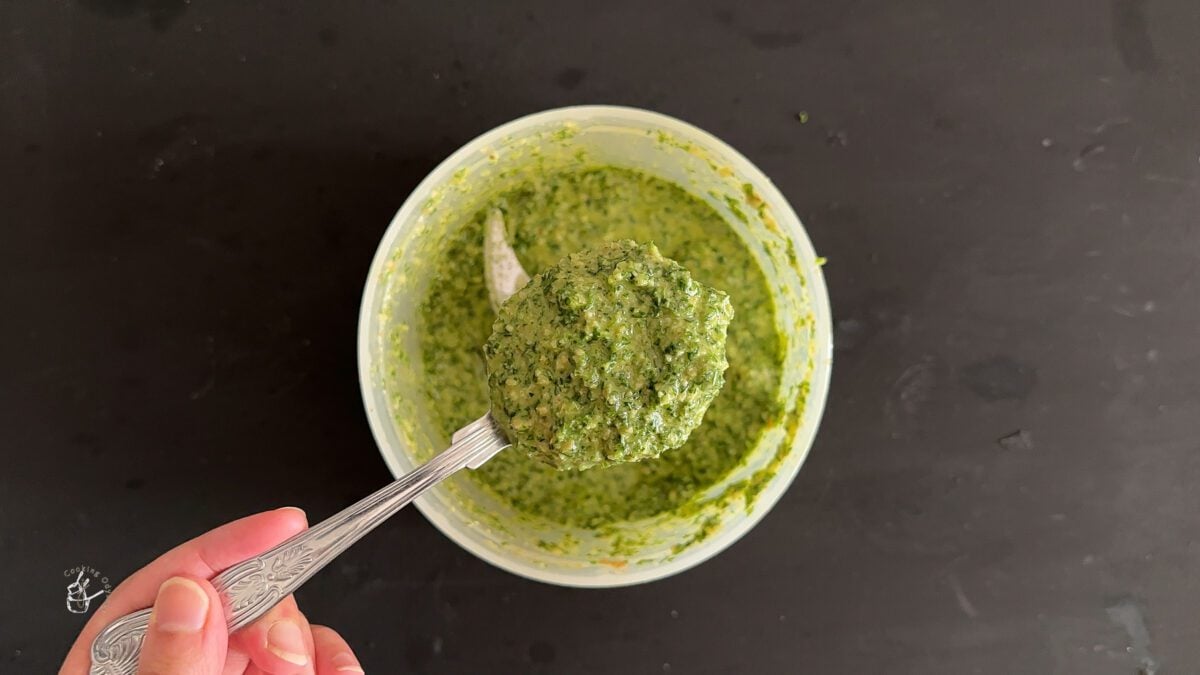

Toss through pasta or gnocci. Serve with gluten-free pasta.
Use it in this vegan bruschetta.
Use in this grilled zucchini ribbon salad.
Drizzle over roasted vegetables such as these air fryer cauliflower.
Store leftover kale pesto in an airtight container or jar and keep in the refrigerator. Use it up within 5 days.
You can also freeze pesto successfully - place in a freezer safe container and freeze for up to 3 months. Allow to defrost at room temperature. Note that this can affect the fresh flavor and taste

As always if you make this recipe, be sure to leave me a comment, rate this recipe and tag me on Instagram @jcookingodyssey or #jcookingodyssey. I love seeing all your photos of my recipe recreations!
Don’t forget to follow me on social media using the buttons below – I can't wait to see you all there!

PLEASE NOTE: Nutritional values are estimated by a computer and may vary based on ingredients and portion sizes. For personalised dietary advice, please consult a qualified healthcare professional.
Share on Facebook Pin This RecipeNote:- This post was originally posted in January 2016 but I have updated the post since with newer photos and helpful content. The recipe remains the same.
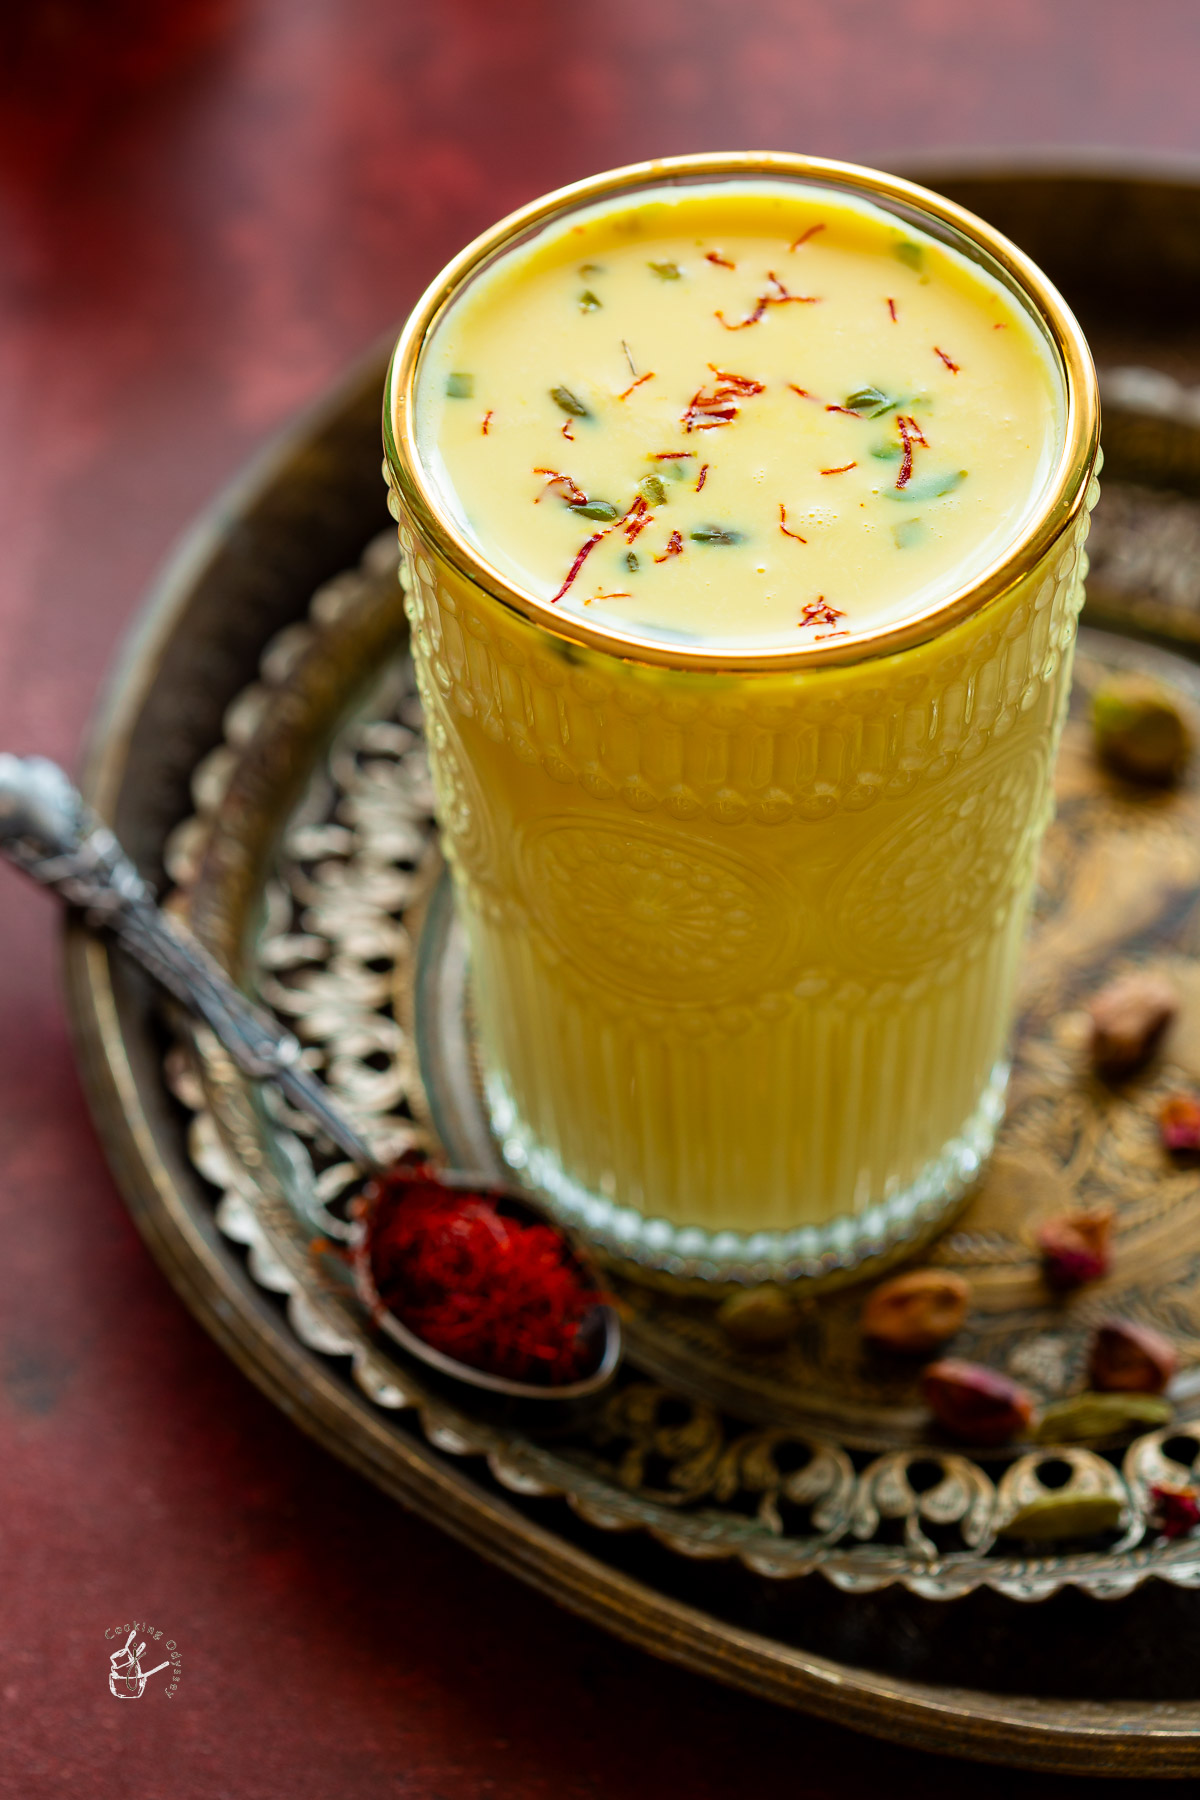
I follow my Mum's Badam Milk recipe whenever I want a comforting drink before bed. Badam Doodh is a sweet Indian milk drink made with almonds, sugar, saffron and cardamom. I love it both hot and chilled.
I keep the recipe quick and easy by keeping a jar of homemade Saffron Badam Milk Powder mix in the fridge. Making this milk takes only a couple of minutes whenever the craving hits!

This homemade Badam Milk Powder recipe is made with an aromatic blend of nuts, cardamom and saffron (kesar & elaichi). Use it to make instant Badam Milk! Ready in just 5 minutes!

This Saffron Milk Recipe, also known as Kesar Doodh, is a sweet drink made with saffron infused milk. Indian Kesar Milk is made with 4 simple ingredients and takes just 15 minutes to make. I make a big batch and keep it in the fridge.
These Skillet Tofu and Black Bean Fajitas are a smoky, sweet and slightly saucy stovetop fajita filling made with firm tofu, black beans, peppers, onions, tomatoes, lime and fajita seasoning. They’re vegan, super colourful and ready in about 25 minutes, with the black beans making them more filling than plain veggie fajitas.
I usually spoon into warm tortillas with my tropical salsa and coriander, but it's equally good in a fajita bowl.
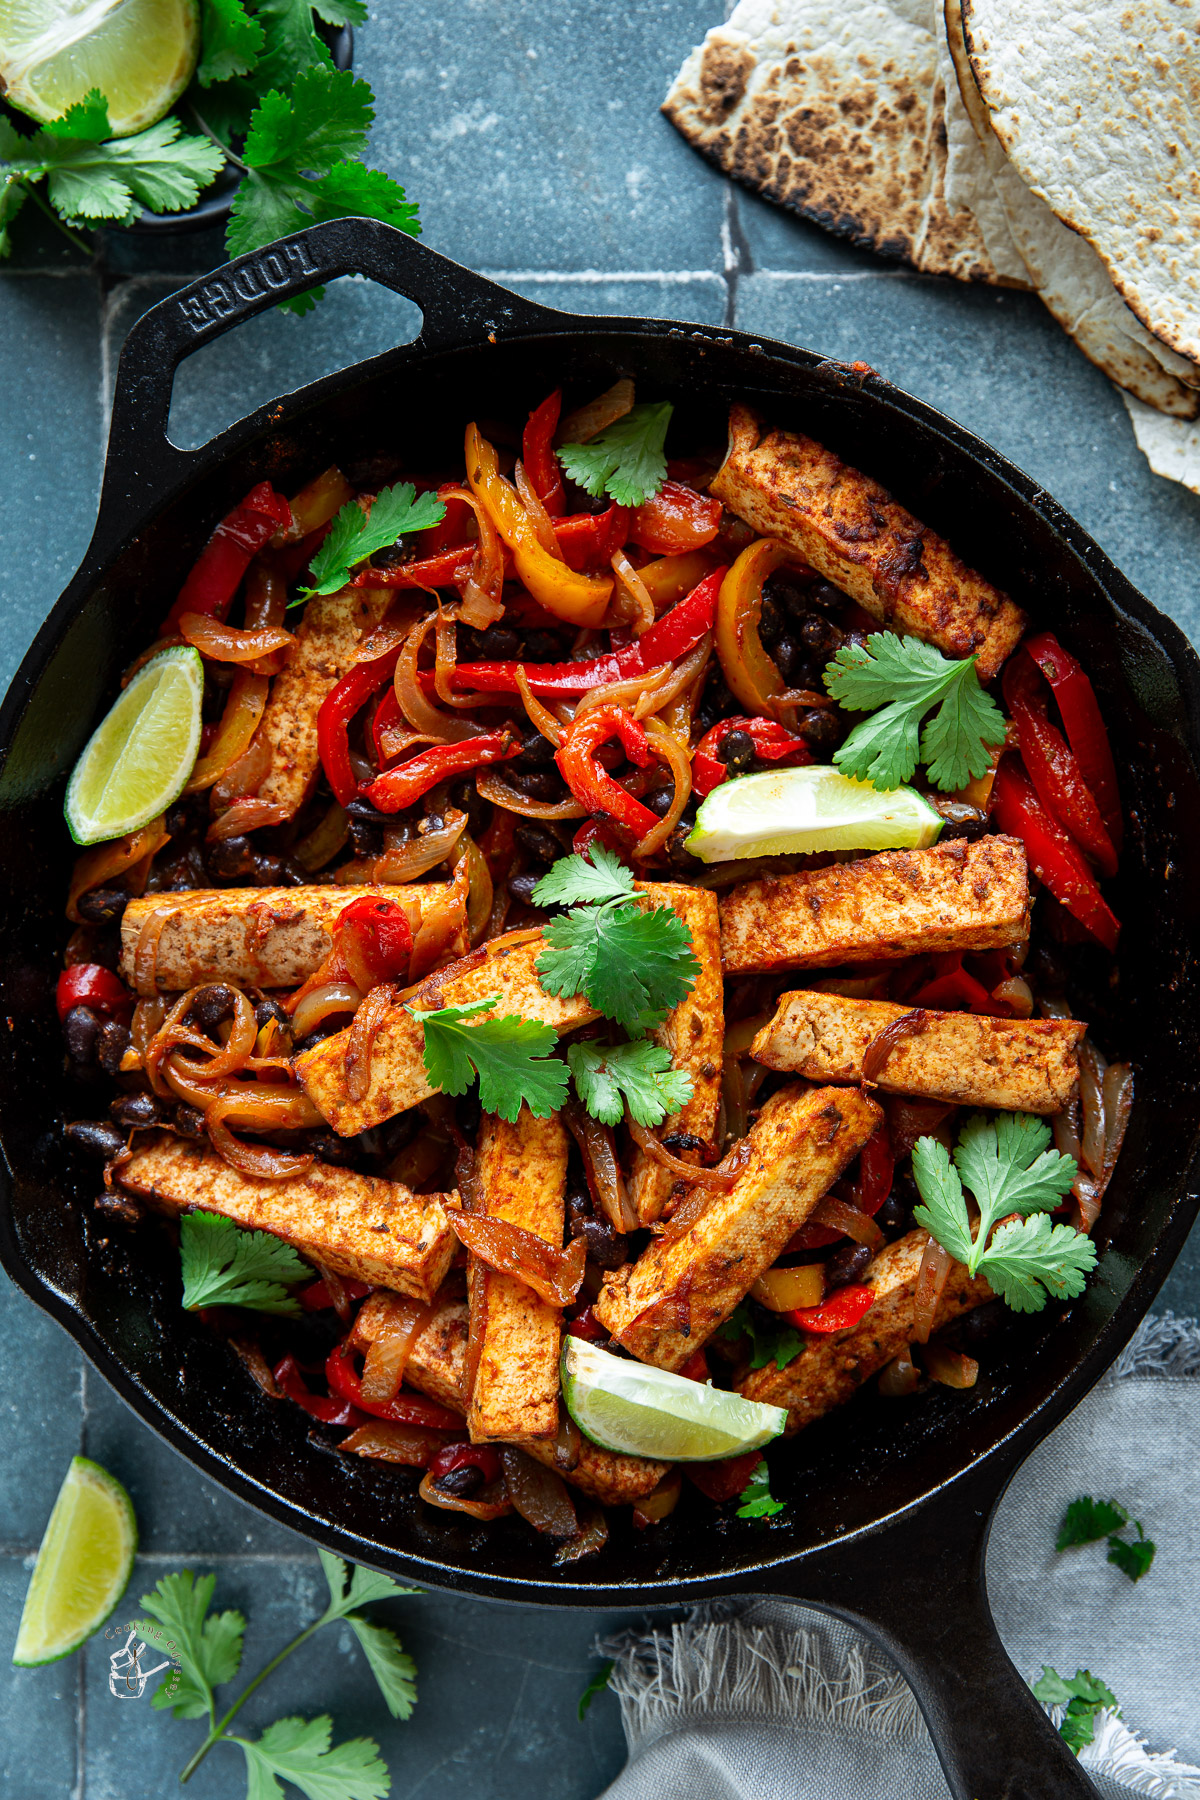
A skillet is perfect for this recipe because you want the peppers and onions to sear gently without loosing their moisture.
The tofu sits in the pan with the fajita seasoning, black beans and tomato, so it picks up the flavour while still holding its shape.
This is what makes the recipe different from my air fryer veggie fajitas with tofu. The air fryer version is a little drier and more hands-off. This skillet version is saucier and better if you want a warm tortilla filling with black beans.
Full ingredients with measurements are available in the recipe card below at the end of this post
Tofu
Use firm or extra-firm tofu so it holds its shape in the pan.
I like cutting it into thick strips rather than tiny cubes because it feels more fajita-like. Add the tofu after the peppers, black beans and seasoning are mixed, so it is less likely to break.
For a simple tofu recipe you can use in bowls, wraps or salads, try my crispy air fryer tofu.
Peppers & onions
Slice the peppers and onion into strips. They should soften in the skillet but still have some bite. I do not like them completely floppy here.
Black beans
Black beans make these fajitas more filling and give the skillet mixture a slightly saucy texture.
They also make this recipe feel more like a proper vegan dinner rather than just tofu and peppers in a wrap.
If you love black beans in Mexican-style vegetarian meals, try my sweet potato and black bean quesadilla or espresso black bean tacos.
Fajita Seasoning
I usually adapt from this homemade fajita seasoning recipe or sometimes use a shop-bought mix for convenience.
A homemade mix gives you more control over the salt and chilli, but a packet is absolutely fine when you want dinner quickly.
I use similar smoky, chilli-led flavours in my air fryer cheesy potatoes and mexican air fryer roasted peanuts.
Tomato puree or crushed tomatoes
This helps the seasoning coat everything. I prefer passata or crushing tinned tomatoes. I find that tomato paste would probably be too thick but you could thin it out with water first before adding to the pan.
Lime and coriander
I add these at the end so the flavour is retained. Adding coriander early will make it wilt!
The lime wakes up the beans and tofu, and the coriander makes the whole skillet taste fresher.

Slice the onions and peppers into thin strips. Slice the drained extra-firm tofu into thick strips.
Heat a skillet on medium-high heat and add a little bit of oil.
Tip in the sliced onions and peppers and sauté until just softening.
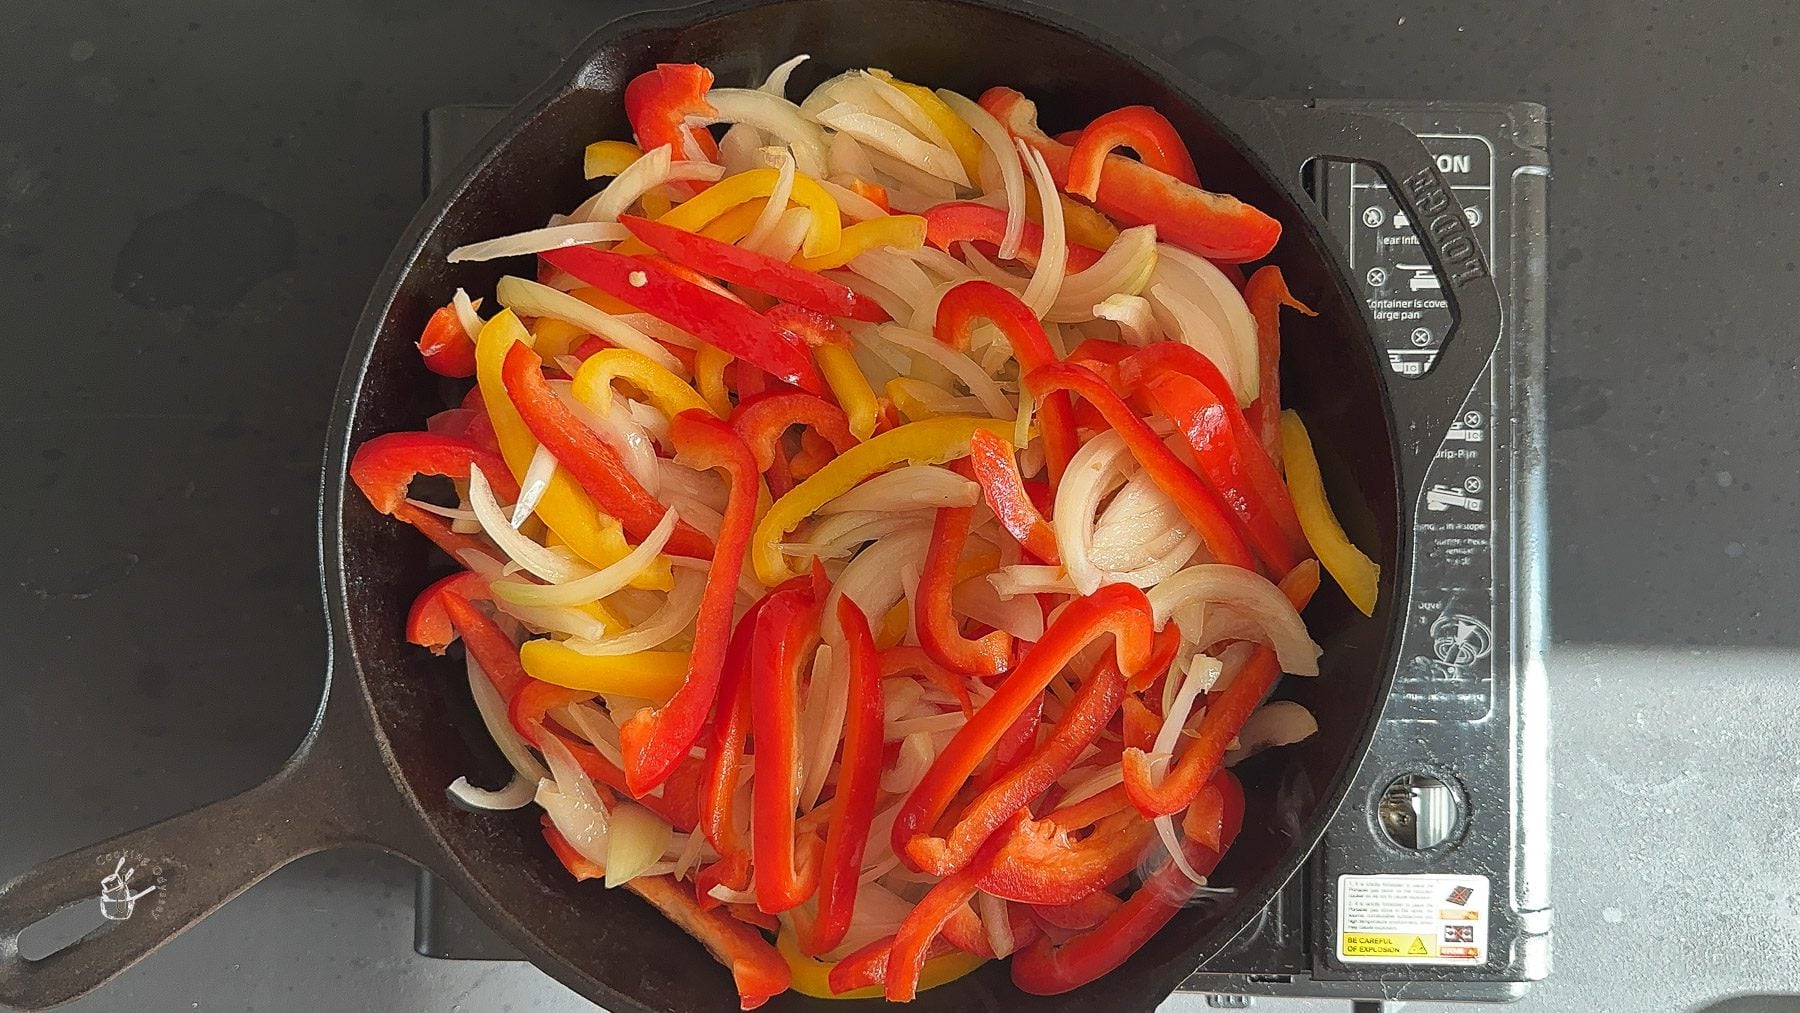
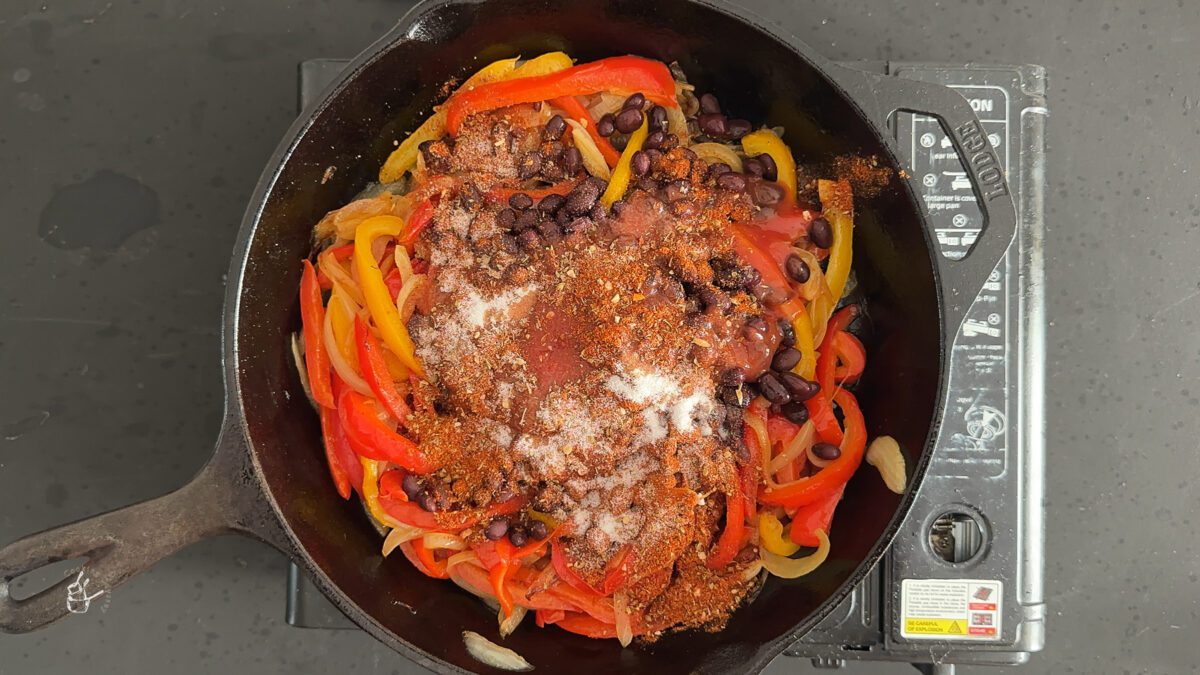
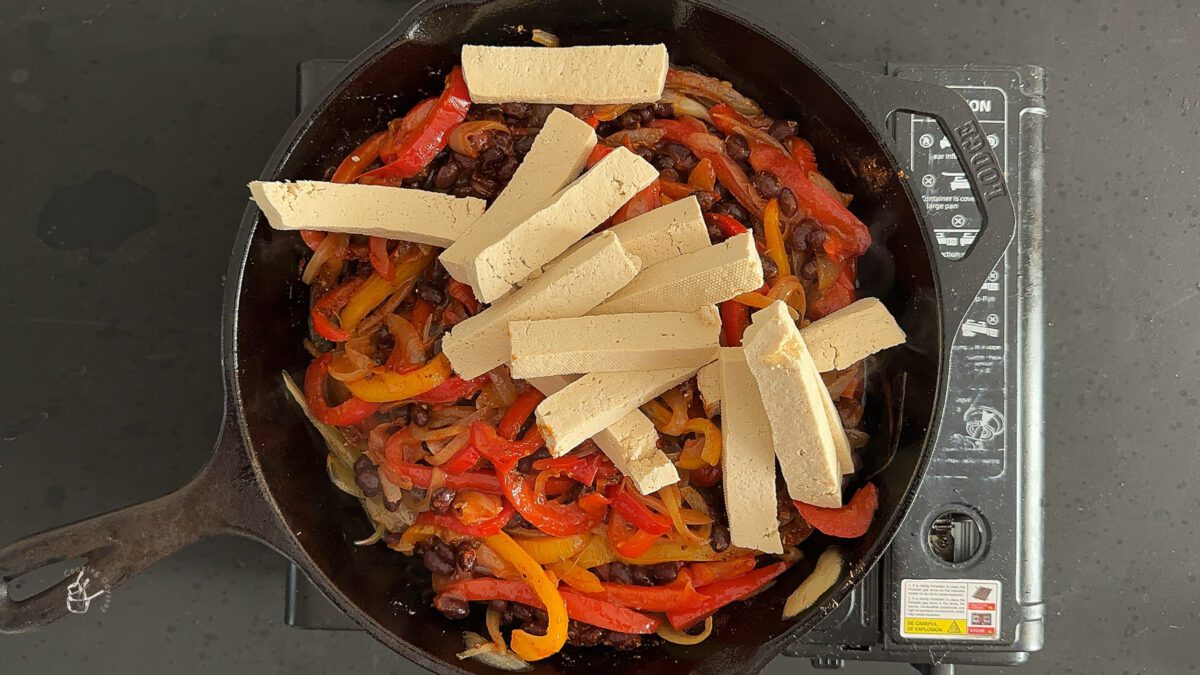
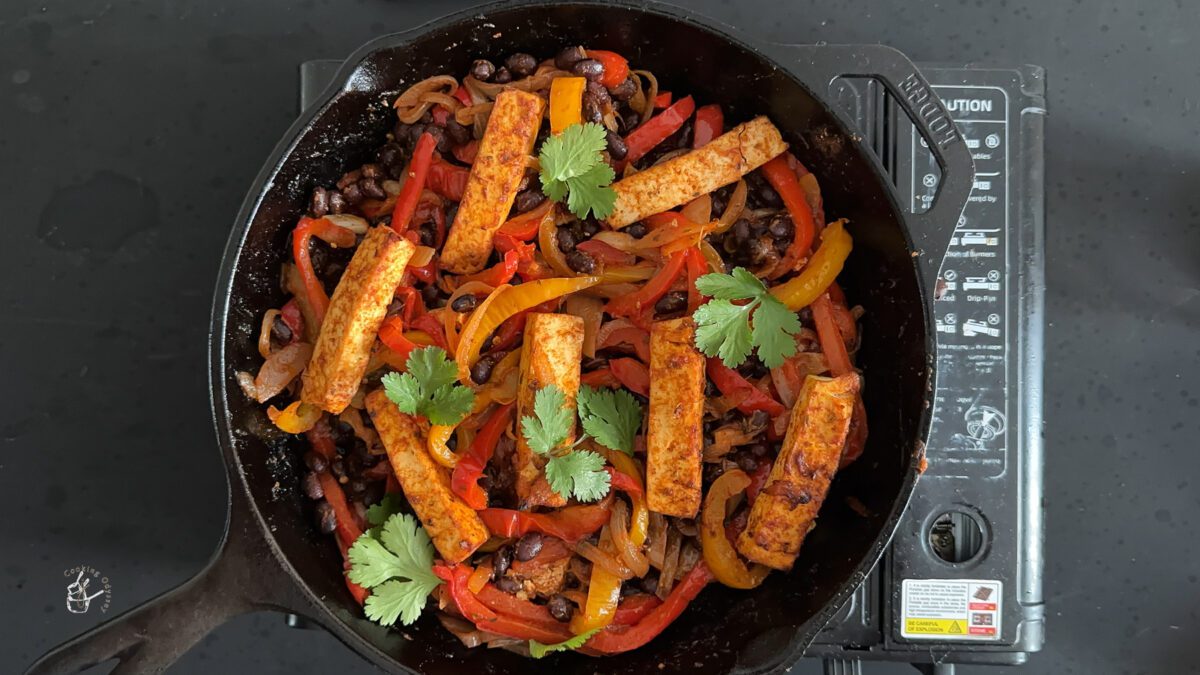
Another option is to first pan-fry the tofu, remove, cook the veggies and then tip the tofu back into the pan. This is only if you prefer crispy tofu.

I like to serve the skillet filling in warm tortillas with something fresh, something creamy and a squeeze of lime.
For toppings, try mango pico de gallo, a tropical mango avocado salsa, fresh strawberry avocado salsa or creamy cilantro sauce. You can also use yogurt garlic sauce if you want something cooling.
For a more filling meal, turn the fajitas into a bowl with mexican cilantro lime rice, avocado, salsa and extra coriander. You could also add mango avocado black bean salad on the side if you want something fresh, colourful and still in the same flavour family.
For sides, try air fryer carrot fries, air fryer avocado fries, or air fryer corn on the cob.
When I'm making a snacky party-style spread, I serve the fajitas with tortilla chips and this exciting cranberry jalapeno cream cheese dip.
To finish the meal, I’d go for a cold mango mocktail, cardamom mojito mocktail or saffron and cardamom mexican horchata.
Desserts on theme that I love are fresas con crema or air fryer sweet grilled pineapple.

As always if you make this recipe, be sure to leave me a comment, rate this recipe and tag me on Instagram @jcookingodyssey or #jcookingodyssey. I love seeing all your photos of my recipe recreations!
Don’t forget to follow me on social media using the buttons below – I can't wait to see you all there!

PLEASE NOTE: Nutritional values are estimated by a computer and may vary based on ingredients and portion sizes. For personalised dietary advice, please consult a qualified healthcare professional.
Share on Facebook Pin This RecipeGujarati Khichu is also known as Papdi no Lot or Khichiya papdi lot. This easy and quick snack or side is made with rice flour, green chilies, basic spices and is served hot with peanut oil and pickle masala.
It is naturally vegan and gluten-free.

Khichu or khichi is the Gujarati word for steamed dough.
The dough is usually prepared with rice flour, some spices and coriander. It is used to make Khichi na papad or papdi (poppadoms).
In Gujarat, these papad are made during hot summers, are sun-dried and then stored for whole year. They can be either deep fried in hot oil or roasted directly on the naked flame.
This particular recipe, Chokha Nu Khichu, is prepared with rice flour, however it can be prepared with various flours - see variations below.
Rice flour is stirred in boiling water with green chillies, papad khar and spices. Then, thick soft dough is shaped into doughnuts and steamed. Some people like to steam the dough in the tray or thali in the steamer.
Khichu is served hot with peanut oil (the most popular way), or sprinkled with red masala (methia masala) and cilantro.
Khichu has gained much popularity over time. It is served as a snack, farsan or as a side dish part of Gujarati thali in Indian restaurants. It is popular street food of India too.
This Gujarati steamed dish is enjoyed as much as other steamed dishes like instant rava dhokla, muthiya, handvo and khandvi.

Full ingredients with measurements are available in the recipe card below at the end of this post
Rice flour - you will need fine variety of rice flour for this recipe. The fresher the flour is much better as it will effect the taste of this dish.
Green chillies - If you like spicy food use small green thai chillies for this recipe. In Gujarat they are known as lavingya marcha. If your prefer less spicy food use any other green chillies.
Whole spices - cumin seeds and ajwain aka carom seeds for a robust taste.
Sesame seeds - adds a bit of crunch and flavor.
Salt - for the taste.
Baking soda or Papad Khar/kharo to make khichu fluffy and soft.
An authentic gujarati khichu recipe does not contain ginger or garlic.
To be served with:
Peanut oil aka groundnut oil
Red chilli powder/flakes or pickle masala aka methia no masalo
Cilantro / Coriander leaves
Use a ratio of 1 cup rice flour: 2 cup water for a dough that isn't dry or too sticky.
Pour water into a heavy bottom pan.
Add cumin seeds, chillies, sesame seeds, ajwain, salt and soda.
Bring the water to boil.
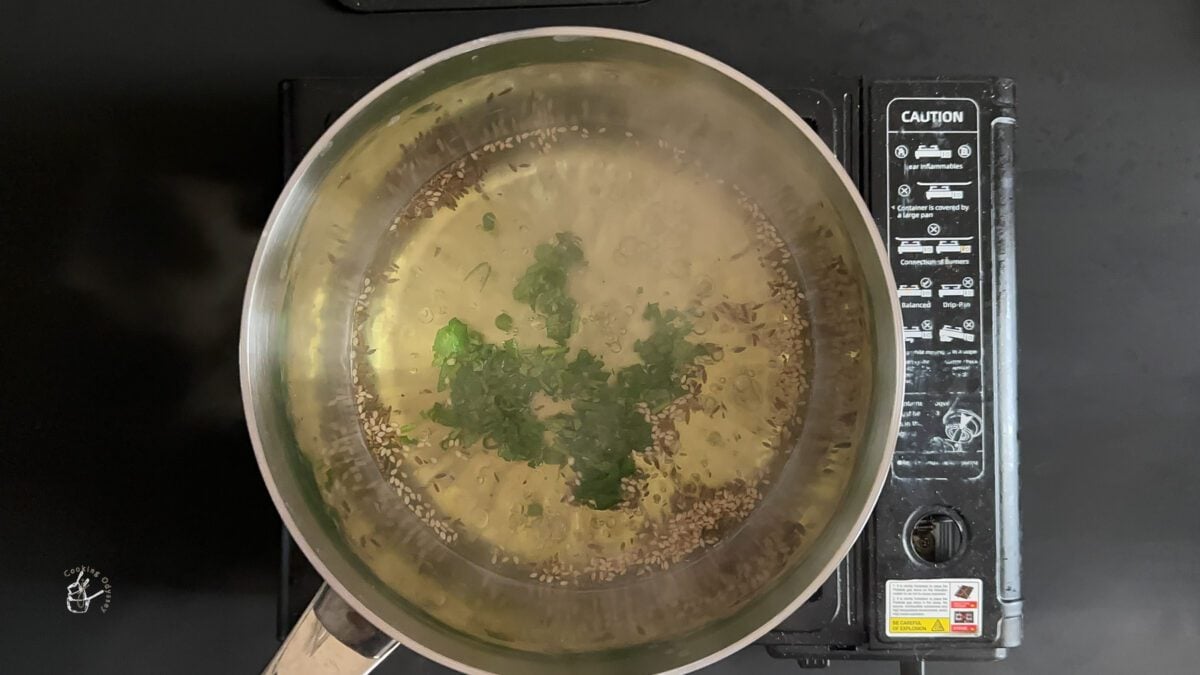
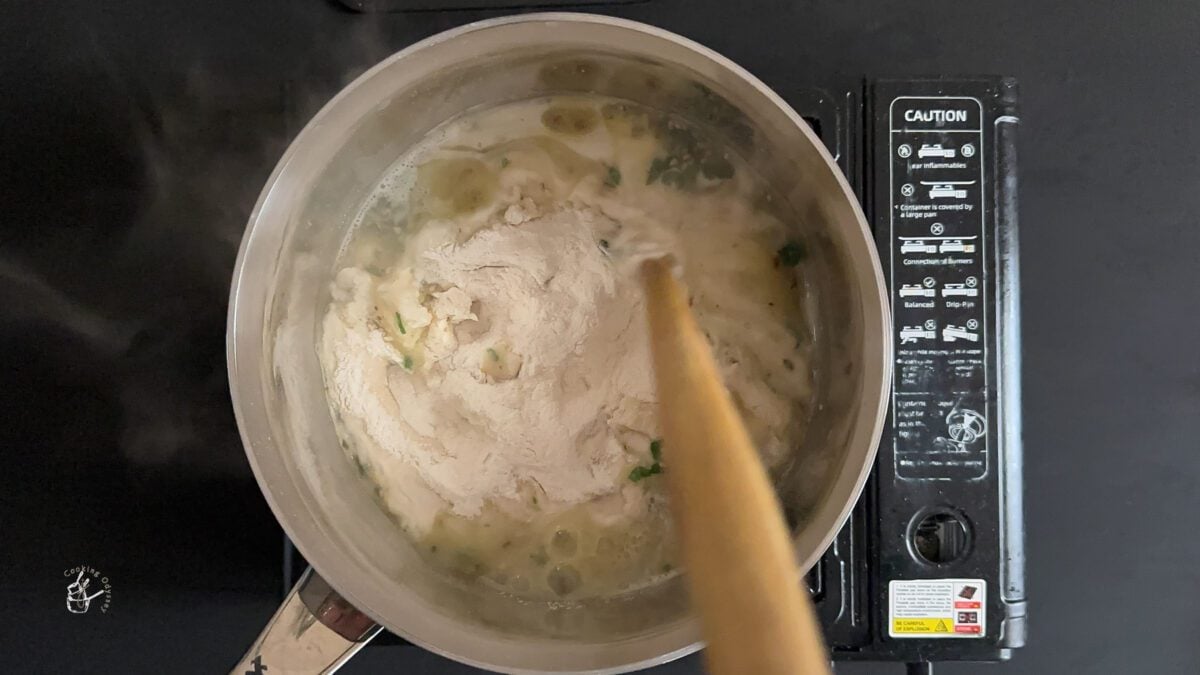
Slowly add the rice flour to it. Do not stir the flour, just let the flour absorb the water initially.
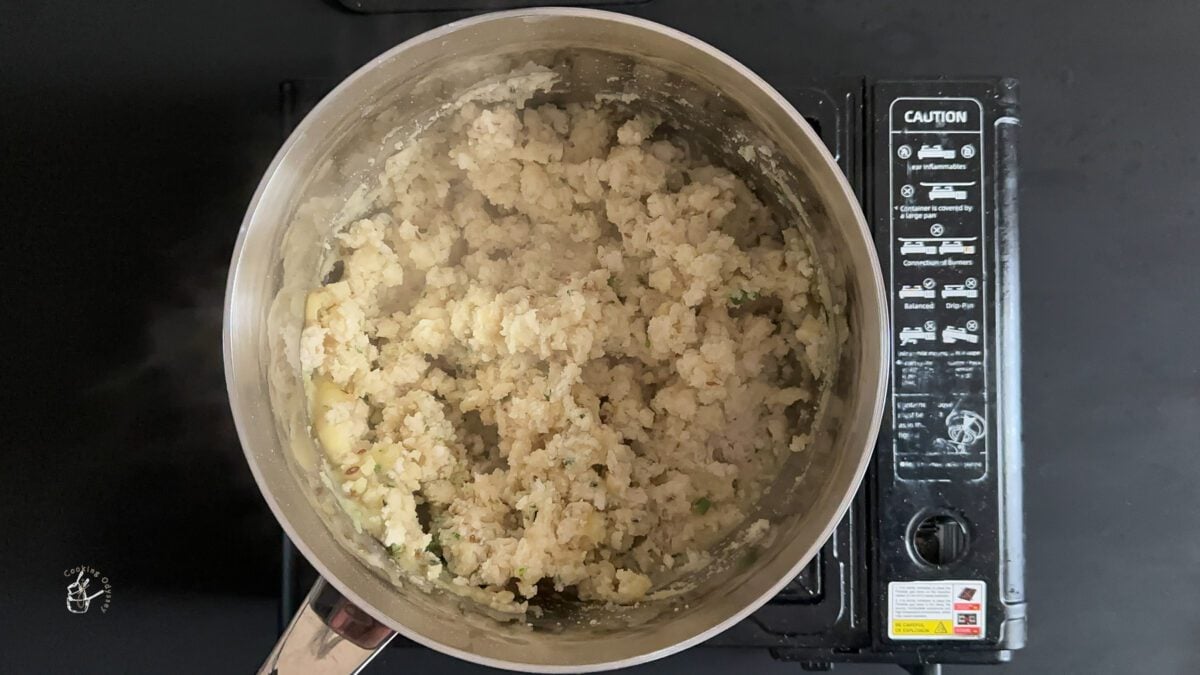
After a minute when the water is all absorbed, use a wooden rolling pin to stir the mixture and break up any lumps.
The mixture should be soft and fluffy.
Turn off the heat and allow the mixture to cool slightly.
While the rice flour mixture is cooling, prepare your steamer. Also grease the steaming plate/stand with peanut oil or oil of choice.
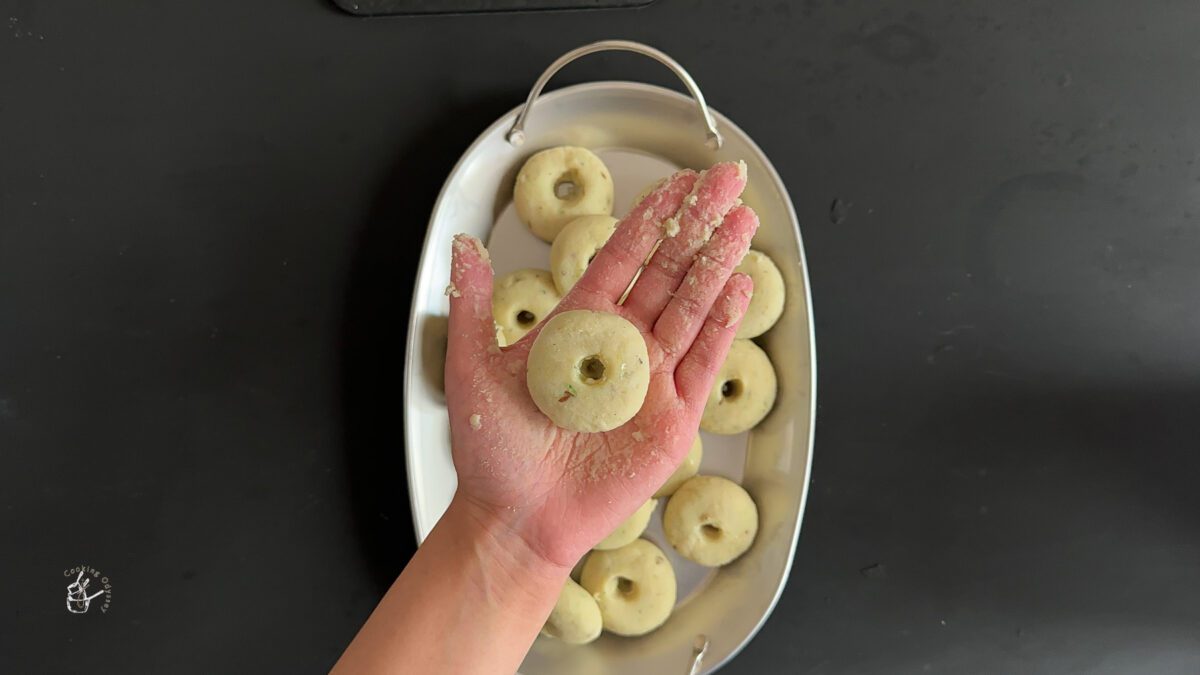
Take a small amount of flour mixture, make a small ball and slightly flatten the ball.
Make a small hole in the centre with your thumb or the end of the rolling pin to resemble a doughnut.
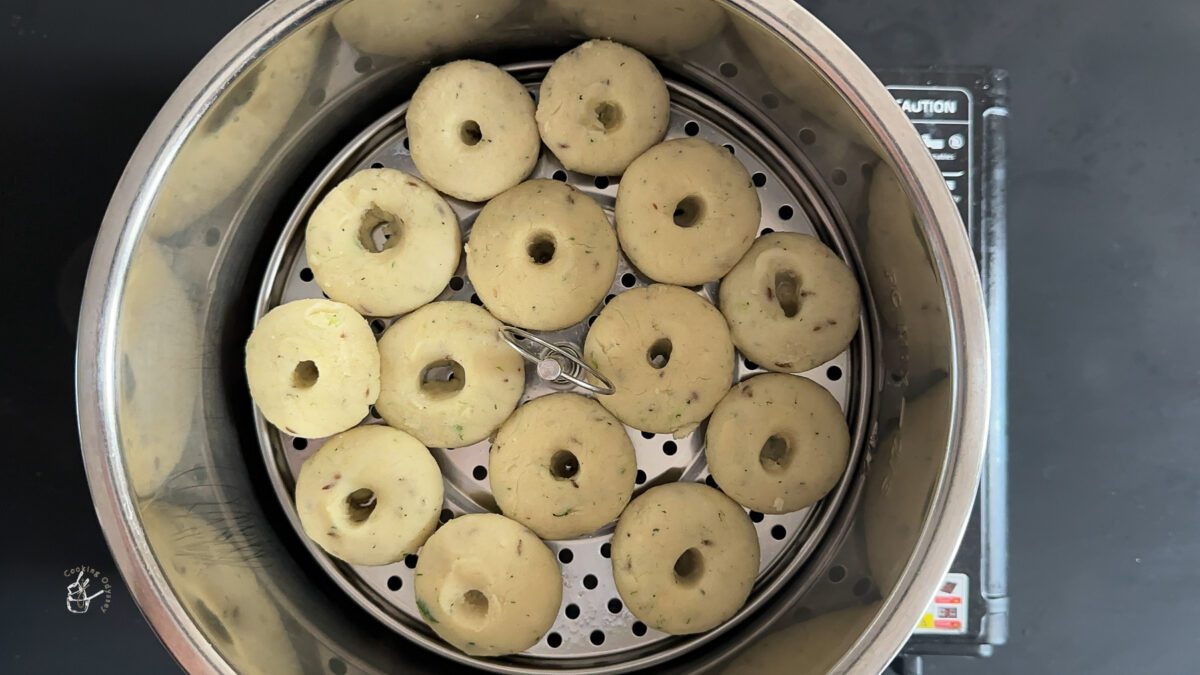
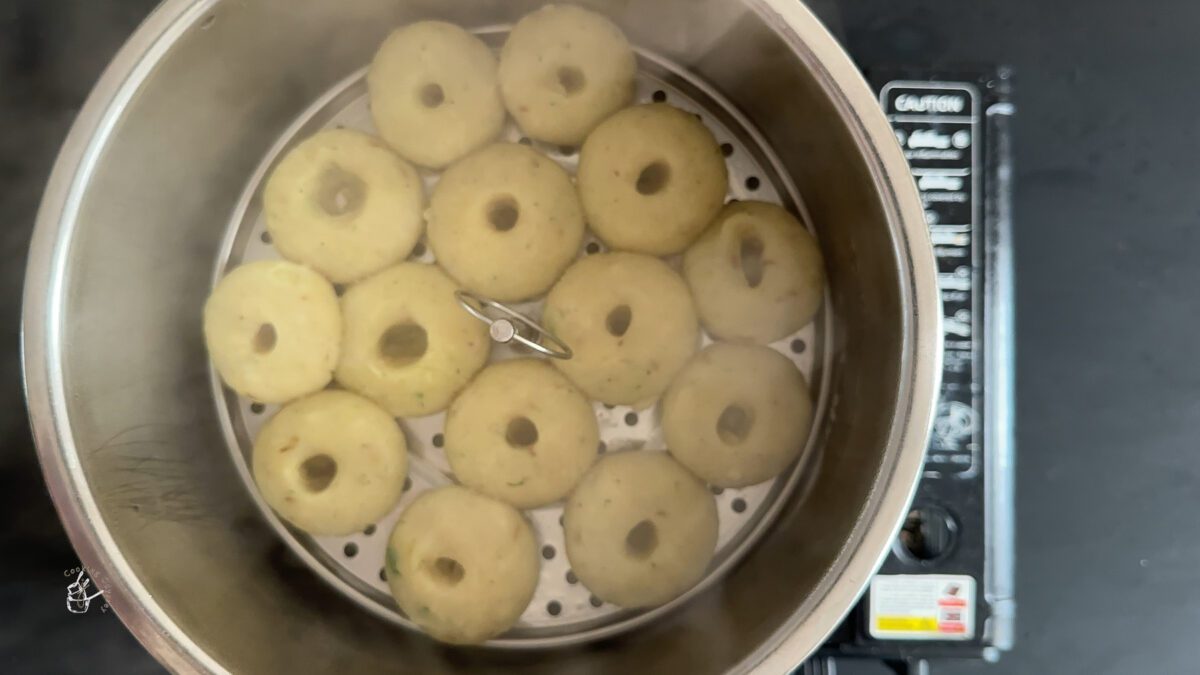
Place on the greased tray or stand and steam the flatten rice ball for approximately 15-20 minutes.
You can check for doneness by pushing through a skewer or knife. If it comes out clean the khichu balls are cooked.
Remove them from the steamer.
Garnish with fresh chopped coriander.
Serve with peanut oil, chilli flakes or pickle masala.

Serve khichu with groundnut oil and methia masala to enjoy it the traditional way.
Why not try this Green Chutney or Gujarati Garlic Chutney for something a bit different.
You can store leftover papdi no lot in the fridge, simply place in an airtight container and eat within 2 days. Note that it is best eaten fresh.
You can also freeze khichu successfully. Place in freezer safe containers for up to 3 months.
To reheat, I recommend steaming the khichu again in a steamer. You can also place on a microwave safe dish, cover with a wet towel and microwave in short bursts.

As always if you make this recipe, be sure to leave me a comment, rate this recipe and tag me on Instagram @jcookingodyssey or #jcookingodyssey. I love seeing all your photos of my recipe recreations!
Don’t forget to follow me on social media using the buttons below – I can't wait to see you all there!

PLEASE NOTE: Nutritional values are estimated by a computer and may vary based on ingredients and portion sizes. For personalised dietary advice, please consult a qualified healthcare professional.
Share on Facebook Pin This RecipeNote:- This post was originally posted in September 2012 but I have updated the post since with newer photos and helpful content. The recipe remains the same.
This Gujarati Sambharo stir-fry is made with cabbage and carrots. This Indian Cabbage Salad has a characteristic crunch and tangy flavour which accompanies dishes so well! It's ready in minutes and is so delicious!
Serve as part of a Gujarati Thali.

This delicious Chilli Paneer is a copycat of the Sakoni restaurant version. Chilli Paneer is a popular Indo-Chinese dish made with paneer cubes, green bell pepper and fresh chillies with a soy sauce gravy. It's a flavourful dish that's perfect as an appetizer, side or main.
