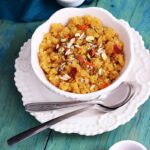
Manda/Mande (Roti)
Manda (Roti), flatbread hails mainly from the country such as Pakistan, and a traditional element in Mughlai cuisine usually served on happy occasions. Also looks similar to Roomali roti which is made in India too.

Sticky but soft dough made with plain flour and milk, and flavoured with aromatic spices like saffron, Cardamom and Nutmeg and rolled very thin then stretched by hands, quite larger in size than normal, almost translucent and cooked only for few seconds on a giant inverted clay pot ( In Hindi it's Matka )

Topped with aromatic Ghee, supple and melt in your mouth Manda Roti, usually served folded like a handkerchief. Should be relished hot and with Mughlai curry and Tandoori Dishes. I served mine with Mixed vegetable curry.
📖 Recipe

Manda Roti (Soft Mughlai-style Flatbread
Ingredients
- 1 cup plain flour plus extra for dusting
- ½ cup whole milk
- ¼ teaspoon saffron strands
- ½ teaspoon cardamom powder
- ¼ teaspoon nutmeg powder
- ¼ teaspoon salt
- 5 tablespoon homemade ghee
Instructions
- Soak the saffron strands in warm milk and allow to infuse for 30 minutes.
- In a large mixing bowl, combine plain flour, salt, cardamom powder, and nutmeg powder.
- Gradually add the saffron-infused milk and knead into a soft dough.
- Cover the dough with a clean kitchen towel and rest for 15 to 20 minutes.
- Once rested, add 1 teaspoon of ghee and knead the dough again until smooth.
- Divide the dough into 8 lime-sized portions and shape into balls.
- Heat a griddle or tawa over high heat.
- Roll each dough ball into a very thin roti on a lightly floured surface. The shape does not need to be perfect, but it should be as thin as possible.
- Place the roti onto the hot griddle.
- Cook until small bubbles appear, then flip to the other side.
- Cook for about 10 seconds on the second side, then remove immediately.
- Brush with melted ghee and fold.
- Serve immediately for best texture.
Notes
- These rotis must be served immediately as they become hard and rubbery once cooled.
- Keep cooked rotis wrapped in a clean kitchen towel for a few minutes if needed to maintain softness briefly.
Nutrition
PLEASE NOTE: Nutritional values are estimated by a computer and may vary based on ingredients and portion sizes. For personalised dietary advice, please consult a qualified healthcare professional.
Share on Facebook Pin This Recipe Share by TextShakkaria No Siro - Sweet Potato Pudding

Shakkaria no Siro, a Gujarati sweet delicacy prepared on fasting days. So simple to prepare yet so delicious with delicate and unique flavour. Generally this Siro made with Boiled sweet potato, sugar and milk and flavoured with few aromatic spices but I love to make Shakkaria no Siro very rich by adding khoya to it.

You will need :-
- 250 g sweet potato ( I have used Orange flesh sweet potato )
- 75 g khoya
- 1 tbsp. homemade desi ghee
- 75 g sugar
- Pinch cardamom and nutmeg powder
- Chopped nuts to garnish

Thank you for stopping by and reading this post !
We hope to see you again soon 🙂
Mango Coconut & Passionfruit Lassi (Dairy Free)
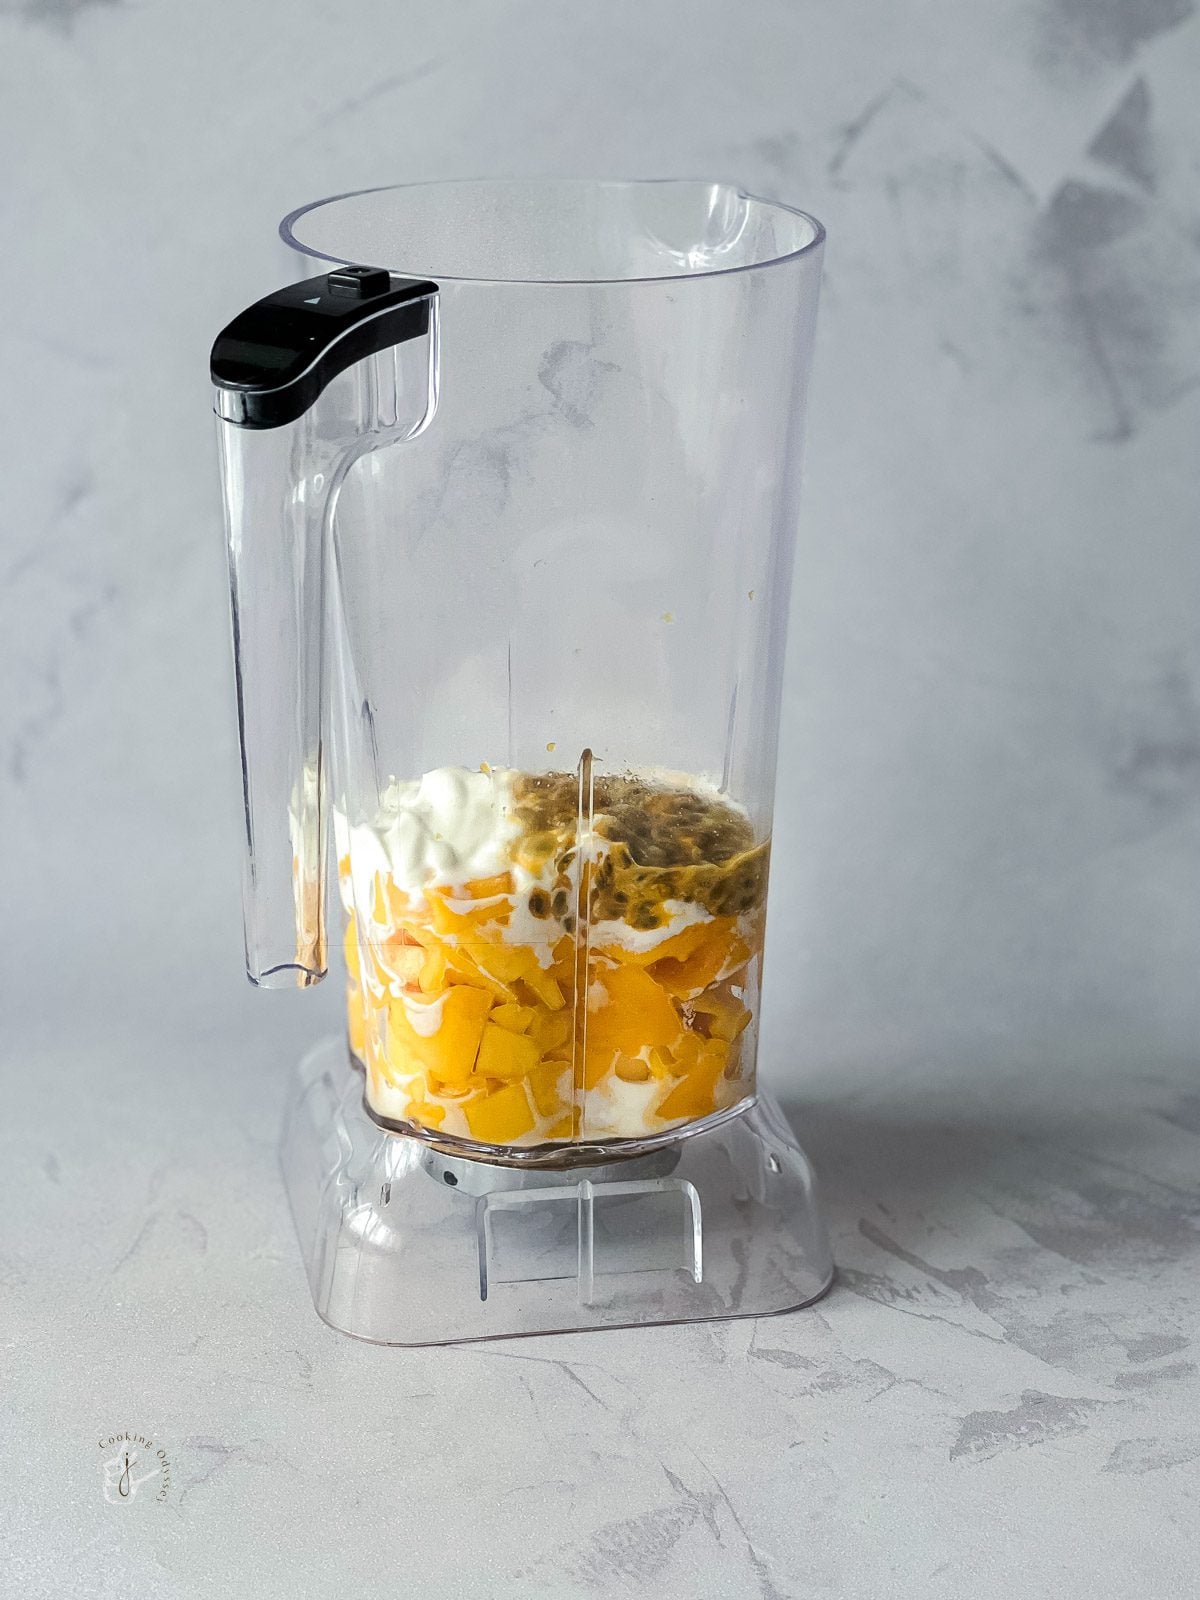
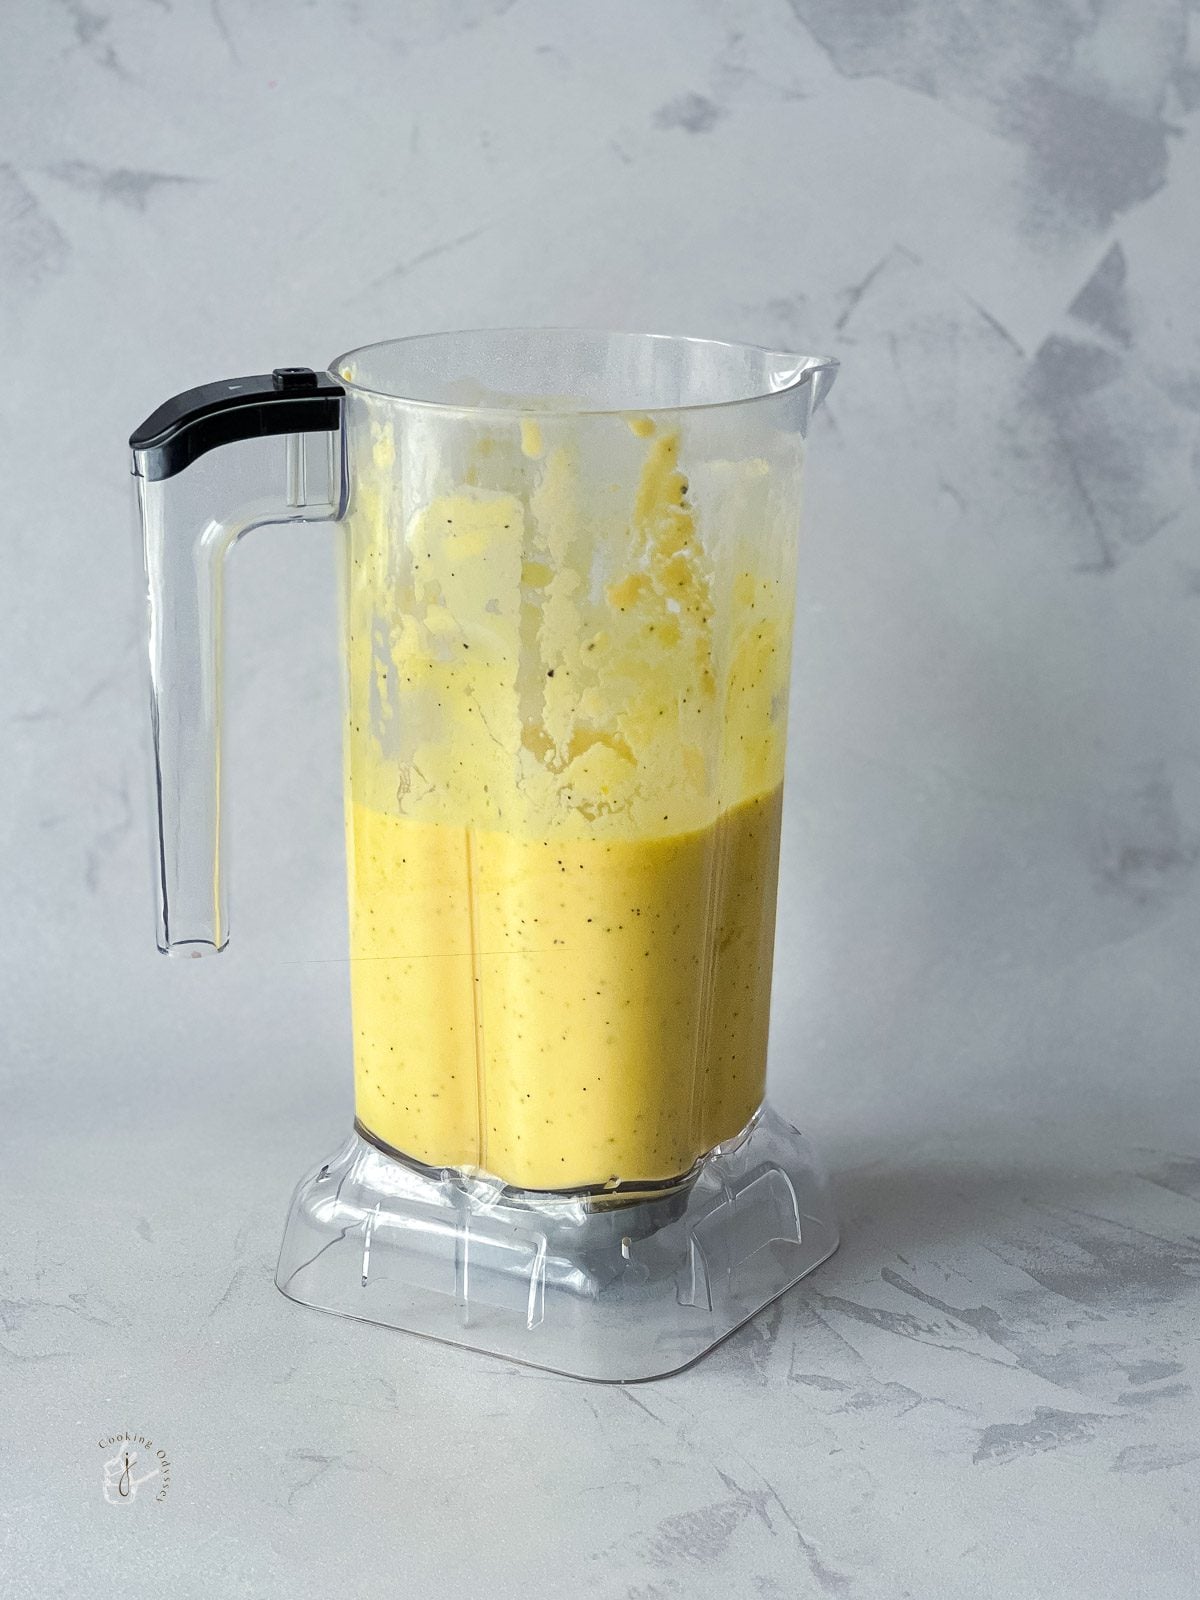
Upgrade your lassi with Mango, Passion Fruit and Coconut Lassi, a tropical fruit blend prepared with vegan coconut yogurt, fresh mango and passion fruit. Bursting with exotic flavour, it's my go-to way to cool down on hot summer days. Bonus, it's so easy to prep - just a quick whizz of all the ingredients in a blender!

MANGO PASSION FRUIT MELTING MOMENTS

Mango Passion Fruit Melting Moments, these great little 'light as a feather' meltingly crisp style biscuits or cookies are A-M-A-Z-I-N-G !!
Sandwiched with aromatic mango and passion fruit buttercream, these biscuits live up their name by literally melting in your mouth, not kidding, try it, you will be smitten 🙂
The aroma of Mango and passion fruit buttercream landed me into a tropical paradise, I love these flavours. Did I mentioned that they were amazing ?!!
So, today I thought I'd feature Mango Passion fruit Melting Moments , prepared on Easter for our afternoon tea, but that would be lovely for any spring, summer entertainment or special occasions like Mother's or Father's day.
There's always a good time for Melting Moments !

These scrumptious melts are perfect as edible gifts, arrange them in a decorative box or jar and tie it with decorative ribbon with a tag saying ' these are dangerously addictive' 😛
📖 Recipe

Mango Passion Fruit Melting Moments
Ingredients
Melting Moments
- 500 grams salted butter softened
- 120 grams icing sugar
- 460 grams plain flour
- 150 grams cornflour
- 2½ tablespoons thick mango pulp
- 2½ tablespoons passion fruit pulp seeds removed
- 5 tablespoons freshly boiled water
Mango Passion Fruit Buttercream
- 200 grams salted butter softened
- 300 grams icing sugar sifted
- 2½ tablespoons thick mango pulp
- 2½ tablespoons passion fruit pulp seeds removed
To Finish
- 1 tablespoon Icing sugar for dusting
Instructions
- Preheat the oven to 180°C (160°C fan) or Gas Mark 4. Line baking trays with baking paper.
- In a large bowl, beat the butter and icing sugar until pale, light, and fluffy.
- Sift in the plain flour and cornflour.
- Add 2½ tablespoons mango pulp, 2½ tablespoons passion fruit pulp, and the boiled water.
- Mix until a soft dough forms.
- Fit a piping bag with a large star nozzle and fill with the biscuit mixture.
- Pipe 60 rosettes onto the prepared baking trays, leaving a little space between each biscuit.
- Bake for 20 to 25 minutes, or until lightly golden around the edges.
- Leave the biscuits on the trays for 5 minutes before transferring to a wire rack to cool completely.
Prepare the Buttercream
- Beat the butter and icing sugar together until pale and fluffy.
- Add the remaining mango pulp and passion fruit pulp and beat until smooth and creamy.
Assemble
- Spread or pipe a generous amount of buttercream onto the flat side of one biscuit.
- Top with another biscuit to create a sandwich cookie.
- Repeat with the remaining biscuits.
- Dust lightly with icing sugar before serving.
Notes
- If passion fruit is unavailable, simply omit it and increase the mango pulp slightly.
- Ensure the biscuits are completely cool before filling with buttercream.
- Store in an airtight container for up to 4 days.
Nutrition
PLEASE NOTE: Nutritional values are estimated by a computer and may vary based on ingredients and portion sizes. For personalised dietary advice, please consult a qualified healthcare professional.
Share on Facebook Pin This Recipe Share by TextChannar Puli - Paneer Gulab Jamun

Â
I chose Channar Poli for Holi, because first thing my family loves Gulab Jamun to the core, whether it's Gulab Jamun, Kala Jamun or Sweet Potato and coconut Jamun, also these can be prepared in advance, stay fresh for almost a week, so you can enjoy Holi day fully.
You will need:-
- 100 ml Condensed milk
- 125 Homemade grated paneerÂ
- Oil to fry
- 3-4 tbsp. Plain flourÂ
- ¼ tsp. Baking Powder
- ½ tbsp. ghee
- ½ tsp. crushed cardamomÂ
- 2 cup sugar as the sugar we get here not too sweetÂ
- 300 ml waterÂ
- Pistachio slivers and dried red rose petals to garnish ( Optional )Â
Keep stirring and let the sugar dissolves.
After 10-12 minutes syrup will get little thicker.
The syrup is done when, while dropping from a spoon it falls in a thin single thread.
Turn off the heat and add cardamom powder and leave it aside for later use.
once again knead the dough for a few seconds.
Now make golf size balls of even size. Â
Heat sunflower oil well.Â
Switch off the heat and cool a little. Â
Let in some of the jamuns(3-4), when they rise up put back on heat and fry them on a slow heat till medium brown. Â
Remove from the oil and pierce them with fine needle and put them in Sugar syrup to soak. Â
Repeat for all the jamuns. Â
let it soak for 6-7 hours and garnish with pistachio slivers and serve.
Enjoy !
Vegan Kale and Tofu Curry
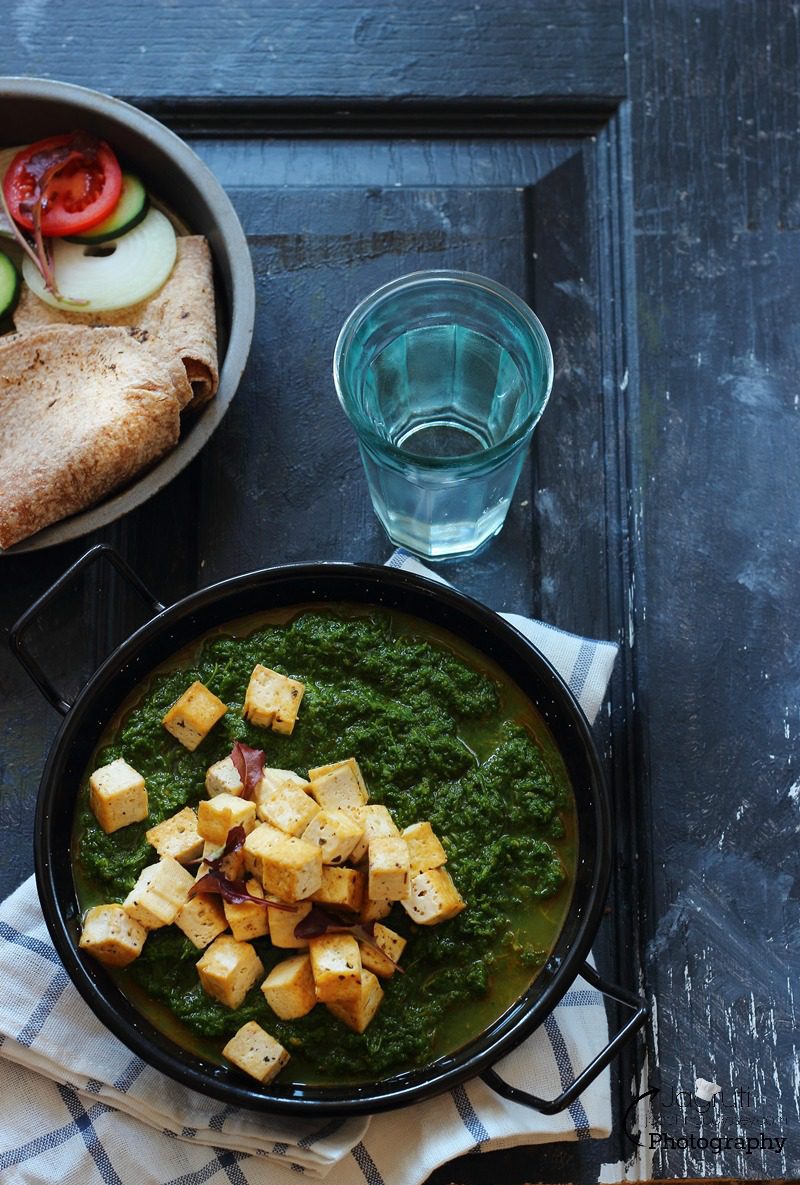
Kale and Tofu Curry, shall we call it a cousin of Indian Palak Paneer 🙂 because it comes with a twist. A flavourful curry made with steamed kale, golden tofu cubes, cashew paste, tomatoes, and aromatic spices. Serve with naan, roti, paratha, or rice for a satisfying meal.

To my surprise, curry turned out so well, we can say that we can eat this every day, so delicious and creamy. Serve hot with Gujarati rotli, paratha or naan.
📖 Recipe

Kale Tofu Curry
Ingredients
- 500 grams kale
- 400 grams firm tofu
- 3 to 4 tablespoons oil
- 4 tablespoons cashew paste
- 1 large onion finely chopped
- 4 to 5 garlic cloves finely chopped or crushed
- 2 tablespoons ginger and green chilli paste
- ½ teaspoon dried fenugreek leaves kasuri methi
- 1 tablespoon whole spices cloves, cinnamon, green cardamom, black cardamom, and bay leaves
- 1 large tomato finely chopped or puréed
- 1 teaspoon red chilli powder
- ¼ teaspoon turmeric powder
- 2 teaspoons ground cumin and coriander powder
- ½ teaspoon garam masala
- ¼ teaspoon amchoor powder
- 1 teaspoon sugar
- salt to taste
Instructions
- Drain the tofu well and cut into cubes.
- Season the tofu with a pinch of salt, heat 1 tablespoon oil in a frying pan and cook the tofu cubes until lightly golden on all sides. Remove and set aside.
- Wash and clean the kale thoroughly, then steam or blanch in boiling water until tender.
- Allow the kale to cool slightly, then blend into a coarse purée.
- In the same pan, heat the remaining oil.
- Add the whole spices and sauté until fragrant.
- Add the chopped onion and cook until softened and light pink.
- Add the garlic and cook for 1 to 2 minutes.
- Stir in the ginger and green chilli paste and cook for a few seconds.
- Add the tomato and cook until softened and the oil begins to separate.
- Add the red chilli powder, turmeric powder, ground cumin and coriander powder, garam masala, and kasuri methi. Cook for 1 to 2 minutes.
- Stir in the cashew paste. If the mixture becomes too thick, add a few tablespoons of water.
- Add the kale purée and mix well.
- Stir in the amchoor powder and sugar.
- Add the tofu cubes and simmer for 2 to 3 minutes until heated through.
- Taste and adjust seasoning if required.
- Serve hot.
Notes
- Cashew paste creates a rich, silky texture in the curry.
- Blend the kale coarsely rather than completely smooth for added texture.
- Don't like kale? use spinach instead.Â
- Adjust the quantity of green chilli paste to suit your preferred spice level.
- Serve with roti, naan, paratha, or steamed rice.
Nutrition
PLEASE NOTE: Nutritional values are estimated by a computer and may vary based on ingredients and portion sizes. For personalised dietary advice, please consult a qualified healthcare professional.
Share on Facebook Pin This Recipe Share by TextChilli Bajji - Mirchi Bhajiya (Pakora)
These Stuffed Date Chilli Pakoras are a delicious festive snack made with mild green chillies filled with a spiced date, nut and coconut mixture, then coated in a crisp besan batter and deep fried until golden. Sweet, spicy and tangy in every bite.

These Bhajiya or Pakoda makes a magnificent tea time snack or one of the farsan for Gujarati thali. Stuffing can be made in advance and you can stuff chillies in advance too, just fry once guest arrives.
📖 Recipe

Chilli Pakora
Ingredients
Pakoda
- 6 very mild long green chillies
- oil for deep frying
Batter
- 12 tablespoons besan gram flour
- 3 tablespoons rice flour
- ¼ teaspoon baking soda
- ¼ teaspoon asafoetida
- 1 teaspoon red chilli powder
- Pinch turmeric powder
- ½ teaspoon carom seeds ajwain
- 1 tablespoon ground cumin and coriander
- salt to taste to taste
- water as needed
For the Filling
- 10 medjool dates pitted
- 4 tablespoons cashew nuts finely chopped
- 1 tablespoon sesame seeds
- 1 tablespoon desiccated coconut
- 1 tablespoon red chilli powder
- 1 teaspoon amchoor powder or lemon juice
- 1 teaspoon crushed cumin, coriander and fennel seeds combined
- salt to taste
Instructions
Prepare chillies
- Wash and dry the green chillies thoroughly. Slit each chilli lengthwise on one side, keeping the ends intact. Set aside.
Stuffing
- Warm the dates in a microwave for about 1 minute until soft, then mash them well.
- Add cashews, sesame seeds, desiccated coconut, salt, red chilli powder, amchoor and crushed spices. Mix well to form a thick filling.
- Stuff each chilli with about 1 tablespoon of the prepared filling.
Batter
- In a bowl, mix besan, rice flour, salt, red chilli powder, turmeric, ajwain, asafoetida and ground cumin-coriander.
- Add water gradually and whisk to form a smooth, thick batter with no lumps.
- Just before frying, add bicarbonate of soda to the batter and mix well. Optionally add 1–2 teaspoons of hot oil to the batter and mix.
Frying
- Heat oil in a deep pan or kadai.
- Dip each stuffed chilli into the batter, coating evenly, and carefully slide into hot oil.
- Fry in batches of 3 to 4 until golden brown and crisp on medium heat.
- Remove using a slotted spoon and drain on kitchen paper.
- Serve hot.
Notes
Nutrition
PLEASE NOTE: Nutritional values are estimated by a computer and may vary based on ingredients and portion sizes. For personalised dietary advice, please consult a qualified healthcare professional.
Share on Facebook Pin This Recipe Share by TextSumac Hummus with Instant Lavash Crackers
Sumac Hummus - a twist on the classic! Spiced hummus is prepared with the tangy Arabic spice - sumac. It's a must try recipe that is so simple and easy to make. Perfect to go with homemade Instant Lavash Crackers from tortilla wraps - recipe included below!Â


Hummus is one of those dips that's incredibly easy to make and endlessly versatile. Once you've mastered a classic hummus recipe, you can create all kinds of flavour variations. Some of my favourites include caramelised onion hummus and roasted carrot hummus.
I love serving hummus with vegetable crudités, crackers, as a sandwich spread in my falafel sandwich, or simply by the spoonful.

HOW TO MAKE INSTANT LAVASH CRACKERS
These instant lavash crackers are the perfect pairing. Traditional lavash is a thin, crisp Middle Eastern flatbread made with flour, salt and water, sometimes with yeast and topped with sesame seeds.
This shortcut version uses wholemeal seeded tortilla wraps brushed with a little margarine and sprinkled with seeds, herbs and paprika before baking. In less than 10 minutes, you'll have crisp, crunchy crackers that are perfect for serving with hummus, baba ganoush, authentic Greek tzatziki or soft whipped goats cheese.
Ingredients:
- 3-4 seeded tortilla wraps
- 1 tbsp. margarine
- For topping: sesame seeds (black and white) poppy seeds, cumin seeds, dried herbs and paprika.
Method:
- Preheat oven to gas mark 6.
- Take one tortilla wrap, place on a baking sheet and thinly apply a little margarine.
- Sprinkle over the seeds, herbs and paprika.
- Using a pizza cutter, cut tortilla into strips but not all the way, keep ends together so you still have in intact round tortilla wrap.
- Bake for no more than five minutes and keep a very close eye.
- Remove from the oven and allow to cool for a couple of minutes. The crackers will harden as they cool.
- Serve with sumac hummus.
As always if you make this recipe, be sure to leave me a comment, rate this recipe and tag me on Instagram @jcookingodyssey or #jcookingodyssey. I love seeing all your photos of my recipe recreations!
Don’t forget to follow me on social media using the buttons below – I can't wait to see you all there!
📖 Recipe

Sumac Hummus
Ingredients
- 150 grams boiled chickpeas
- 25 grams tahini
- 1 teaspoon sumac plus extra to sprinkle
- 2 garlic cloves
- 1 teaspoon lemon juice
- 3-4 tablespoons extra virgin olive oil plus 1 teaspoon for drizzling
- 3 tablespoons fresh parsley plus a little extra for garnishing
- a few tablespoons water
- salt and black pepper to taste
Instructions
- Place all the ingredients into a food processor or blender.
- Blend until smooth and well combined.
- If the mixture is too thick, add a little more oil or water and blend again.
- Taste and adjust the seasoning as needed.
- Transfer to a serving bowl and garnish with the reserved olive oil, a sprinkle of sumac, and the remaining parsley.
- Serve with lavash crackers, your favourite crackers, toasted pitta bread, or fresh vegetables.
Notes
- Tinned chickpeas work perfectly well here, but for an extra smooth and creamy hummus, remove the skins before blending. I like to use chickpeas cooked in the Instant Pot.
- Sumac varies in intensity between brands. Start with 1 teaspoon and add a little more to taste if you prefer a tangier flavour.
Nutrition
PLEASE NOTE: Nutritional values are estimated by a computer and may vary based on ingredients and portion sizes. For personalised dietary advice, please consult a qualified healthcare professional.
Share on Facebook Pin This Recipe Share by TextEasy Microwave Dark Chocolate and Pistachio Fudge
This Easy Dark Chocolate and Pistachio Fudge is rich, chocolatey and packed with crunchy pistachios, yet it couldn't be simpler to make. Using just a handful of ingredients and the microwave, you'll have smooth, creamy homemade fudge with hardly any washing up.

The combination of chocolate and pistachio hardly needs an introduction. I use it to make my chocolate pistachio barfi which is a hit every time I serve it!
Inspired by Nigella Lawson's Chocolate Pistachio Fudge, I've adapted the recipe slightly to suit the way I like to cook. Rather than melting everything in a saucepan, I make the entire recipe in the microwave, making it a quick, fuss-free treat that's ideal for busy days or last-minute edible gifts.
I also leave out the butter. With both chocolate and condensed milk already providing plenty of richness, I found the fudge still sets beautifully with a wonderfully creamy texture. I like using a dark chocolate with around 50–60% cocoa solids, which gives a rich chocolate flavour while keeping the finished fudge smooth and perfectly balanced.
If you're putting together a homemade food hamper, pair it with my creamy caramel fudge with cardamom for another sweet treat, or include a jar of apricot, sweet pepper and thyme chutney for something savoury. A selection of homemade preserves, chutneys and sweet treats makes a wonderful gift for Christmas, Diwali, birthdays or as a thoughtful hostess present.
Ingredients
- Dark chocolate – I recommend chocolate with around 50–60% cocoa solids for the smoothest, creamiest texture. Higher cocoa percentages will give a firmer, less sweet fudge. Use leftover chocolate to make eggless chocolate mousse or 2 ingredient dark chocolate truffles.
- Sweetened condensed milk – Creates the rich, creamy base and helps the fudge set.
- Pistachios – Add crunch and a lovely contrast to the smooth chocolate.
Variations
- Swap pistachios for hazelnuts, almonds or walnuts.
- Stir in dried cranberries for a festive twist.
- Add orange zest for a chocolate orange flavour.
- Sprinkle flaky sea salt over the top before chilling.
- Replace some of the dark chocolate with milk chocolate for a sweeter fudge.
Why This Recipe Doesn't Use Butter
Many chocolate fudge recipes include butter for extra richness and a softer texture. In this recipe, I found it wasn't needed. The combination of condensed milk and chocolate already provides enough fat to create a smooth, creamy fudge that sets beautifully once chilled.
Leaving out the butter also means one less ingredient to measure, making the recipe even simpler without compromising on flavour or texture.
Serving Suggestions
These little squares of chocolate fudge are perfect with a cup of floral Indian cardamom tea or a strong coffee, but they're also wonderful as part of a homemade dessert platter.
Make Ahead Tips
Chocolate fudge is an ideal make-ahead treat. Prepare it a day or two in advance, then store it in an airtight container in the fridge until you're ready to serve.
It also makes a fantastic edible gift as it travels well and keeps its shape once chilled.
FAQs
Usually this happens if the chocolate-to-condensed milk ratio has changed or the fudge hasn't chilled for long enough. Leave it in the fridge for at least 4 hours, preferably overnight.
Yes. Wrap the pieces well and freeze for up to three months. Defrost overnight in the fridge before serving.
Stored in an airtight container in the fridge, it will keep well for around 2 weeks.
Yes. You can gently melt the chocolate and condensed milk together over a pan of barely simmering water before stirring through the remaining ingredients.
As always if you make this recipe, be sure to leave me a comment, rate this recipe and tag me on Instagram @jcookingodyssey or #jcookingodyssey. I love seeing all your photos of my recipe recreations!
Don’t forget to follow me on social media using the buttons below – I can't wait to see you all there!
📖 Recipe

Easy Microwave Chocolate Pistachio Fudge
Ingredients
- 500 grams dark chocolate broken into pieces
- 397 grams sweetened condensed milk 1 tin
- 100 grams plain pistachio nuts
Instructions
- Line a shallow tray or plate with foil and set aside.
- Place the dark chocolate pieces and condensed milk into a microwave-safe bowl.
- Microwave on full power for 60 seconds, then stir well.
- Microwave for a further 60 seconds and stir again.
- If the chocolate is not completely melted, microwave in additional 30-second bursts, stirring between each, until fully melted and smooth.
- Stir in the pistachio nuts until evenly distributed.
- Pour the fudge mixture into the prepared tray and spread into an even layer.
- Leave to set at room temperature for about an hour until firm.
- Refrigerate for a further 30 minutes.
- Cut into pieces and serve, or arrange in a gift box.
Notes
Be careful not to overheat the chocolate in the microwave; short bursts with stirring in between gives you the smoothest result.
Nutrition
PLEASE NOTE: Nutritional values are estimated by a computer and may vary based on ingredients and portion sizes. For personalised dietary advice, please consult a qualified healthcare professional.
Share on Facebook Pin This Recipe Share by TextFarali Patra - Savoury and Steamed Colocasia leaves

Farali Patra is a delicious and tasty variation to popular snack Patra. Mildly spiced, sweet and tangy, scrumptious Farali Patra are so easy to prepare. Farali Patra can be deep fried too, but I am not very fond of fried patra, so I always steam and its tempered with cumin, sesame seeds and fresh curry leaves.
Generally Patra (Steamed Colocasia leaves) are made using Gram flour, various spices and Tamarind paste, these farali patra I have made with Farali flour ( Flour you can eat during the Fast ) Peanuts, fresh coconut, yogurt and just few spices but in both recipes Colocasia leaves are the primary ingredients.

📖 Recipe

Farali Patra
Ingredients
- 6 fresh colocasia leaves washed, cleaned, and pat dried (pattarvel na paan / arbi ke patte)
- 1 cup farali flour
- 2 tablespoons rajgira flour amaranth flour
- 4 tablespoons roasted peanuts crushed
- 3 tablespoons fresh grated coconut
- 3 dry red chillies
- 1 tablespoon ginger and green chilli paste
- 3 tablespoons sugar
- 1 tablespoon cumin seeds
- ¾ cup plain yogurt
- 1 teaspoon black pepper freshly ground
- rock salt sendha namak to taste
- 2 tablespoons oil
For tempering
- 2 tablespoons oil
- ½ teaspoon cumin seeds
- 1 tablespoon sesame seeds
- 1 sprig fresh curry leaves
- 2 tablespoons fresh coriander leaves
- 1 tablespoon shredded coconut
Instructions
- De-vein the colocasia leaves and wipe them again with a clean kitchen towel to ensure they are dry.
- In a mixer jar, add peanuts, grated coconut, dry red chillies, ginger and green chilli paste, sugar, cumin seeds, and yogurt. Blend into a smooth, thin paste.
- Transfer the paste into a large bowl. Add oil, farali flour, rajgira flour, and black pepper powder.
- Mix well and add a little water to form a smooth, spreadable mixture. It should not be runny, just spreadable.
- Add salt and mix again.
- Place one colocasia leaf on a flat surface with the back side facing up. Spread a thin layer of the prepared mixture over the leaf.
- Place another leaf on top and repeat the process, layering 4 to 5 leaves in total, with the final top layer being the paste.
- Roll tightly from the base to the tip of the leaves.
- Steam for about 20 minutes, until cooked through.
- Allow it to cool slightly, then cut into round slices.
- For tempering, heat oil in a pan and add cumin seeds, sesame seeds, and curry leaves.
- Add the sliced patra and sauté for 3 to 4 minutes.
- Garnish with fresh coriander leaves and shredded coconut before serving.
Nutrition
PLEASE NOTE: Nutritional values are estimated by a computer and may vary based on ingredients and portion sizes. For personalised dietary advice, please consult a qualified healthcare professional.
Share on Facebook Pin This Recipe Share by TextKali Mirch, Til aur Moongphali Aloo

These baby potato dish is just not another potato recipe what you make everyday, but has a special value in your plate, these are flavourful, delicious and exceptional. Boiled baby potatoes, sautéed in the most amazing flavoured TADKA with minimum spices!
For this dish, tadka is flavoured with black pepper, curry leaves, roasted peanuts , sesame seeds and green chillies. Although I have added black pepper twice ( double the amount ) dish is not over powering with the pungent spiciness but actually enhances all the flavours !
Sesame seeds and Peanuts adds beautiful crunch and provides little balance as both ingredients are full of minerals and protein and makes a smashing combination. Although generally we peel the skin of the potatoes, with this recipe I have always used potatoes with the skin.
These lip smacking and finger licking baby potatoes are ideal for the Vrat or Upwas as they are cooked without any onion or garlic.
These yummy and irresistible potatoes can be enjoyed with mild plain Yogurt and Rajgiro Siro/Halwa ( Amaranth flour pudding )
📖 Recipe

Sesame Peanut Baby Potatoes
Ingredients
- 500 grams baby potatoes
- 1 teaspoon black pepper lightly crushed
- 3 tablespoons sesame seeds
- 4 tablespoons roasted peanuts with the skin lightly crushed
- 1 teaspoon cumin seeds
- 3 tablespoons ghee
- 1 sprig fresh curry leaves
- 5 green chillies slit
- 1 teaspoon ground black pepper
- lemon juice to taste
- sea salt to taste
- 5 tablespoons fresh coriander finely chopped
Instructions
- Wash the baby potatoes thoroughly and prick each one with a sharp knife.
- Boil the potatoes in salted water until just tender.
- Drain well and peel the skins if preferred.
- Heat the ghee or oil in a kadai or frying pan over medium heat.
- Add the cumin seeds and allow them to crackle.
- Add the green chillies and curry leaves and sauté for a few seconds.
- Stir in the lightly crushed roasted peanuts, lightly crushed black pepper, and sesame seeds. Reduce the heat and cook for a few seconds until fragrant.
- Add the boiled potatoes and season with sea salt and the freshly ground black pepper.
- Toss gently to coat the potatoes evenly and cook over high heat for 1 to 2 minutes.
- Remove from the heat and drizzle with fresh lemon juice.
- Garnish with the chopped coriander and serve hot.
Notes
- Leave the potato skins on for extra texture, or peel them if preferred.
- Avoid overcooking the potatoes so they hold their shape.
- Delicious served with dal, curry, yogurt, or as part of an Indian meal.
PLEASE NOTE: Nutritional values are estimated by a computer and may vary based on ingredients and portion sizes. For personalised dietary advice, please consult a qualified healthcare professional.
Share on Facebook Pin This Recipe Share by TextVegetable Pulao Recipe
Vegetable Pulao, or Veg Pulao, is a delicious Indian one-pot rice dish. This pulao recipe is made with fresh vegetables and aromatic spices for a light main or side dish.
Pair it with this Cucumber Raita.

Orange and Cinnamon Turkish Delight M/W method

we all 'surrender' ourselves when we hear the word 'Turkish Delight' - A Narnia Treat !Â
It is dull, Son of Adam, to drink without eating," said the Queen presently. "What would you like best to eat ?"
"Turkish Delight, please, your Majesty." said Edmund.
Excerpt - The Lion, Witch and the Wardrobe.
"My parents gifted me the first Narnia book when I was 9 and I hurriedly read through it so that I could move onto the next book. In no time, I had finished the series and would then run to find my mum or dad to retell them the whole story!
I was elated when I found out that they were making a movie and I had my tickets booked well early so that I could watch it. My love for the world of Narnia has not yet diminished. I still watch the films and read the books with the same wonderment as before, 11 years on. One scene that stuck with me as a child was when the White Witch gives Edmund the Turkish delight to eat. To this day, if Turkish delight is ever mentioned in the house, someone will remember that scene! One time, I was watching a DVD of the Lion, the Witch and the Wardrobe and the Turkish delight scene came on. My dad snuck into the kitchen and produced a box of Turkish delights!! I had no idea they'd been hidden in the house for some time (fair enough, as I probably would have eaten the whole lot straight away). There was some comfort in eating the Turkish delight and watching the film covered in a blanket!"
So now we have set a new tradition, almost a ritual that once a year whole family get together and watch the Narnia movie trilogy during Christmas holiday and along with other snacks we would demolish a box of Turkish Delight !
Orange and Cinnamon Turkish Delight, exotic and gorgeous, it's amongst the humble confection but so popular and made just from cornflour and sugar. Great for sharing or gifting wrapped up in a gift box, perfect for a valentines gift! I followed the recipe's method exactly but in Ingredients, I added mixed citrus peel.
You will need :-
- 3 cup sugar
- 2 ½ cup of cold water
- ¾ cup corn flour ( starch ) + ½ cup more for dusting
- ¼ cup light corn sugar
- 2 tbsp. mixed citrus peel
- 1 tbsp. orange extract
- ½ tsp. cinnamon powder
- few drops of orange or yellow colour
-  ½ cup powdered sugar
- Cooking spray to grease the pan
  Â
Nimbu Mari peanuts - Lemon and Black pepper Peanuts

You may like to check this Nimbu Mari Sev ( Lemon and Black pepper spicy noodles )
If you are planning a get-together, thinking of hosting a party or simply want to relax and enjoy some munchy snacks, definitely these will tempt you, air fryer Mexican Masala peanuts , Indian masala flavoured mix nuts .
📖 Recipe

Nimbu Mari Peanuts - Lemon and Blackpepper Peanuts
Ingredients
- 250 grams raw peanuts
- salt to taste
- 1 teaspoon oil
- 2 tablespoons fresh lemon juice
- 1 tablespoon freshly ground black pepper
- ½ teaspoon red chilli powder optional
- ½ teaspoon sugar
Instructions
- Preheat the oven to gas mark 2.
- In a heavy-bottomed pan, dry roast the peanuts for 7 to 8 minutes.
- Rub and peel the skin off half of the peanuts.
- Whisk together the oil, lemon juice, salt, red chilli powder, sugar, and black pepper.
- Add the peanuts and toss well to coat.
- Place the peanuts on a baking sheet and spread them in an even layer.
- Bake for 35 to 40 minutes, stirring occasionally, until they are dry.
- Allow them to cool completely.
Nutrition
PLEASE NOTE: Nutritional values are estimated by a computer and may vary based on ingredients and portion sizes. For personalised dietary advice, please consult a qualified healthcare professional.
Share on Facebook Pin This Recipe Share by TextDoodh Pak
This rich and aromatic Doodh Pak is a Gujarati style rice pudding, made with basic ingredients such as rice, milk, and sugar. It is the quintessential Gujarati dessert made in almost every Gujarati household and is enjoyed with Poori/Puri.
This doodh pak recipe is flavoured with cardamom, nutmeg, and nuts and is a delectable dessert to be enjoyed with or at the end of an Indian meal.

Dudh Pak is mostly prepared during the festive season in Gujarati households. It can be prepared during Diwali but most commonly during Sheetla Satam (Sitla Satam).
This delicious and sinful Gujarati dessert is best served with Puri or Bhajiya (pakora)
See these other incredible Indian Milk Desserts/Sweets

Many of you asked us about the this recipe, A few asked me is it kheer? No, it's not! How? Kheer and Doodh Paak look similar. The ingredients are the same, but the method and final consistency is a little different.
Difference Between Kheer And Doodh Pak
Kheer is very creamy and thick.
In kheer recipe ratio of milk and rice is e.g. 1-litre milk and ¼ cup rice
For the method of making kheer, as soon as the milk starts boiling, we add rice and cook until everything until rice is almost mushy.
In kheer recipe, saffron strands can be added.
It is important to note that in doodh pak made in Gujarat is ONLY white in colour. Do not add saffron or other colourings as it will not remain white.
What is Doodh Pak?
Doodh Paak translates 'Cooked Milk'.
In Doodh Paak recipe, it is very important that you boil milk first and milk should be concentrated and approximately 60% of the water content has to be evaporated and it should look like cream colour evaporated milk but should not become Rabdi or basundi.
Ratio of milk and rice should be 1 litre milk and 1 tablespoon rice.
In doodh pak, rice is only added after the milk is cooked properly.
Do not add saffron.
It should only be garnished with almonds and pistachio nuts.
Doodh Paak is creamy but not thick but can almost be drunk.

Doodh Pak Recipe Ingredients
Whole milk or full fat milk
Sugar
Rice - I used basmati rice
Ghee
Cardamom
Nutmeg
Nuts - I used pistachio and almond slivers. You can optionally add charoli
Can I make Vegan Doodh Paak?
Yes, you can. Use coconut, oat or rice milk. Note that the flavour will change slightly
Can I use sweetened condensed milk to make Doodh Paak?
Traditional Doodh Paak recipe is made without condensed milk, but can be used in making Rice Kheer.
Top Tips for the best Doodh Paak recipe
To make Doodh Paak always use whole milk or full cream milk, it will be creamier and rich.
Always, use heavy base pan or kadai to make doodh paak, and continually keep stirring to get the best results.
Never leave milk-based recipes unattended, there will be a chance of milk getting burnt or sticking to the bottom of the pan.
Once Doodh Paak is made, cover the pan with a muslin cloth. This will prevent a milk skin forming on the top.

How to make Doodh Pak
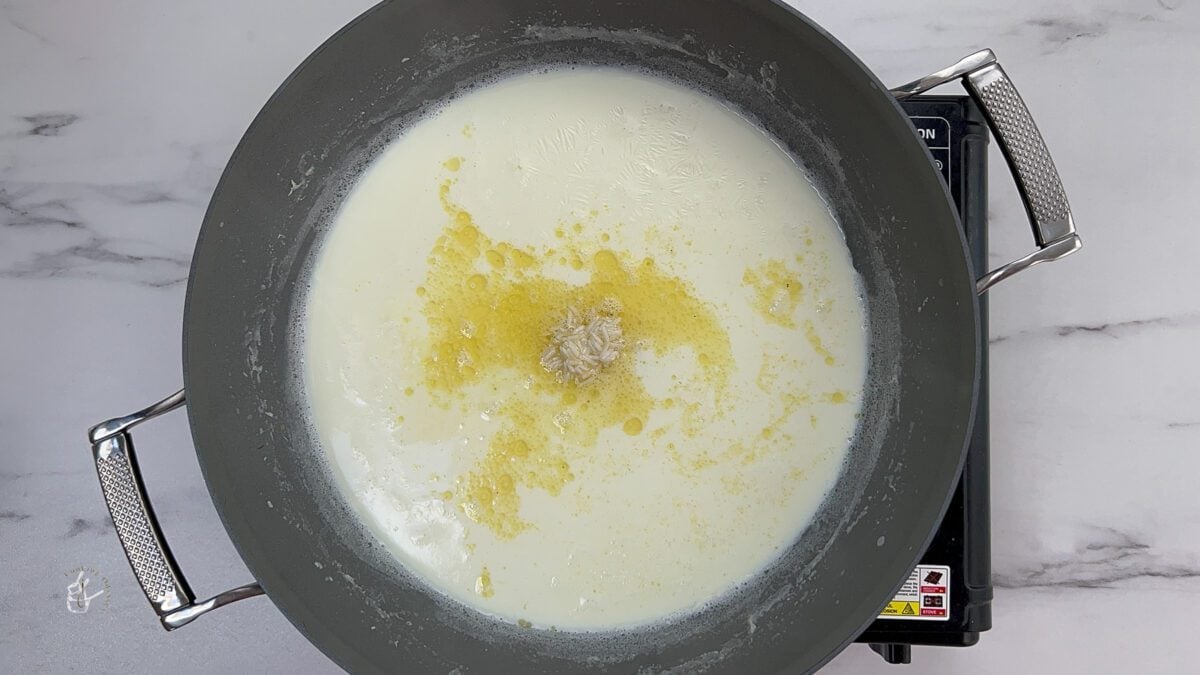
In a small bowl, add soaked rice and ghee, mix and set aside.
Add a splash of water to the pan before adding the milk - this helps reduce the chance of milk burning
Add the milk and simmer on a low flame. Remember to stir continuously to avoid the milk sticking to the bottom of the pan.


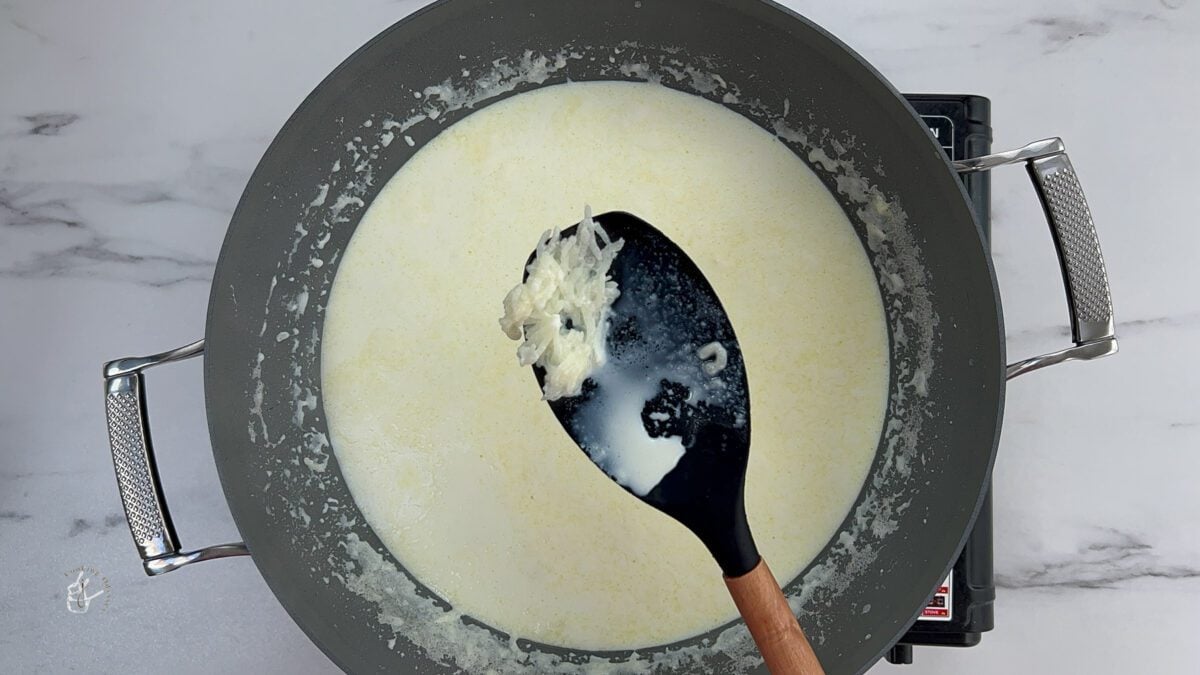
Allow the milk to cook until it becomes thicker then add the rice and ghee.
Keep cooking the milk on low medium heat until the rice is fully cooked and tender and the milk thickens.
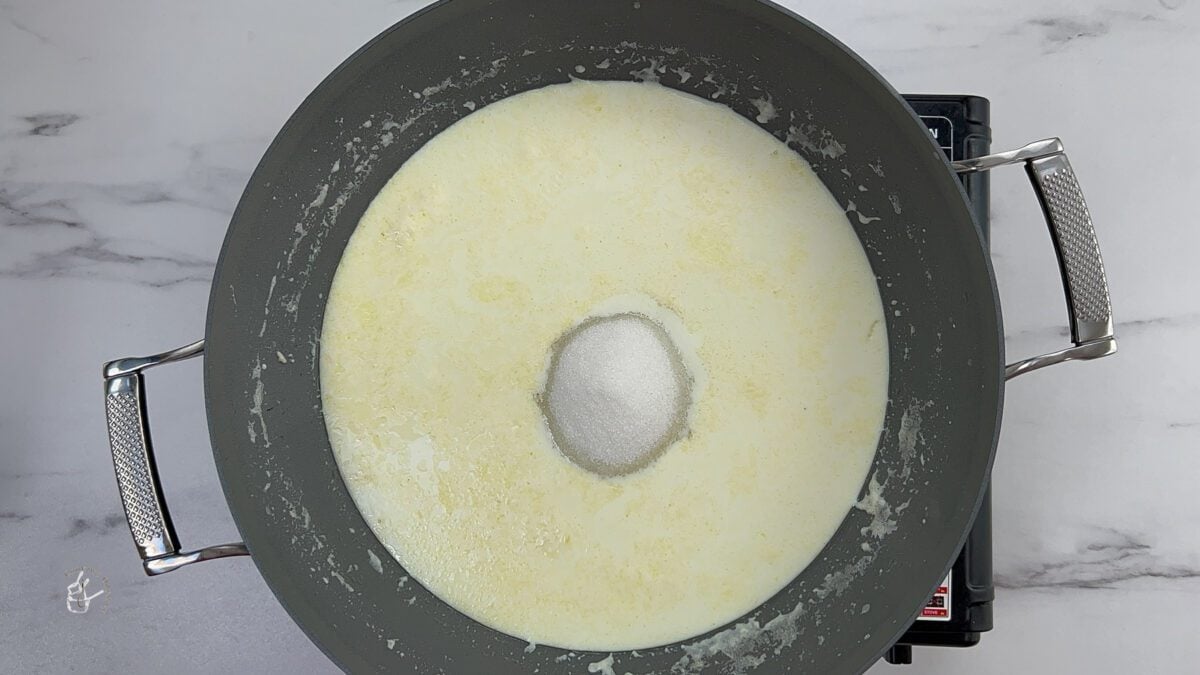
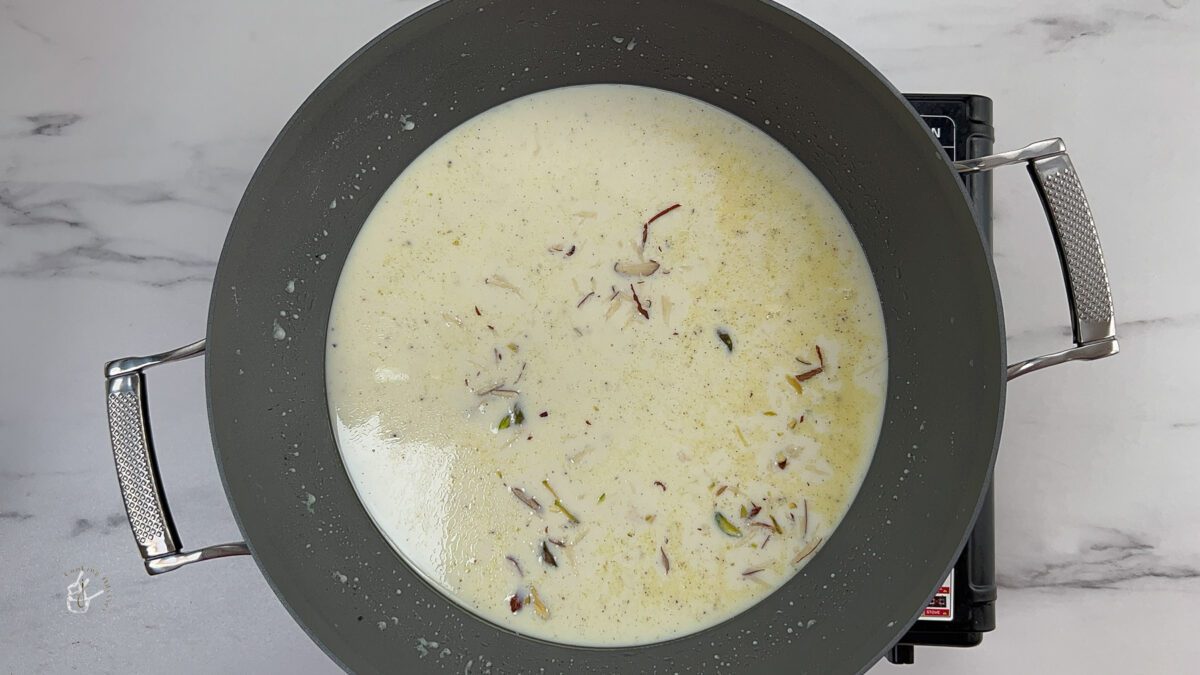
Add in the sugar and stir well. Once the sugar has dissolved, remove from the heat. Add the spices and nuts.
Serve at room temperature or chilled.


Storage
Keep doodh pak stored in the refrigerator where it will remain fresh for up to 2-3 days.
You can also freeze doodh pak - place in a freezer safe container and freeze for up to 1 month. Allow to thaw at room temperature.
Other Gujarati Sweets
As always if you make this recipe, be sure to leave me a comment, rate this recipe and tag me on Instagram @jcookingodyssey or #jcookingodyssey. I love seeing all your photos of my recipe recreations!
Don’t forget to follow me on social media using the buttons below – I can't wait to see you all there!
📖 Recipe

Doodh Pak
Equipment
- Thick bottom/base pan or kadai
- Big spoon
Ingredients
- 2 litre whole milk
- 2 tablespoon basmati rice washed and soaked for 10 minutes
- 1 tablespoon ghee
- 200 gram sugar
- ¼ teaspoon cardamom powder
- ¼ teaspoon nutmeg powder
- 1 tablespoon almonds chopped
Instructions
- Mix 1 tablespoon ghee into 2 tablespoon basmati rice (soaked) and leave it aside.
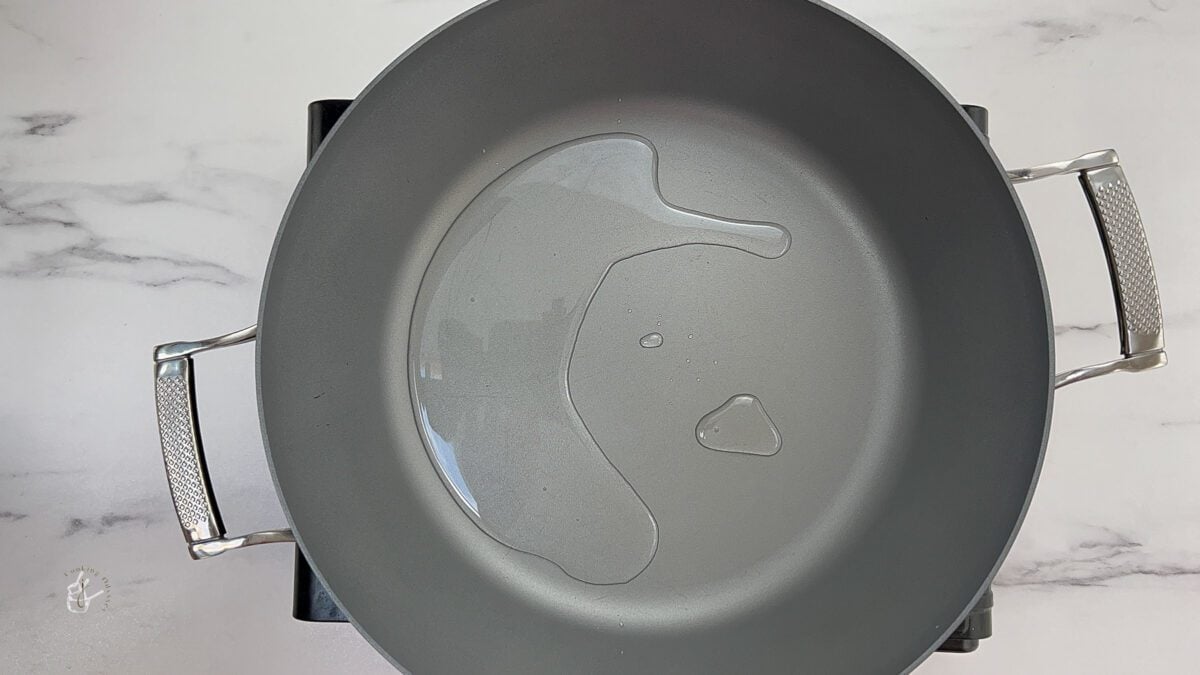
- Take a heavy bottom pan, wash it with cold water.
- Add a couple of tablespoons of water.
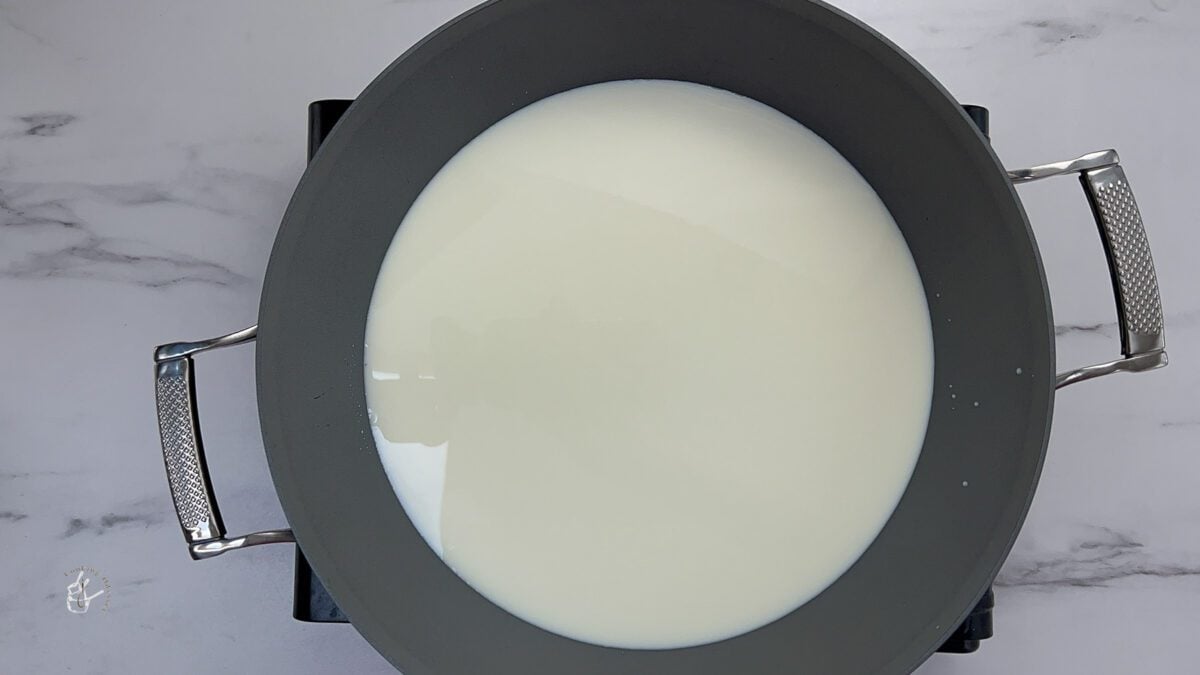
- Pour 2 litre whole milk in the pan and bring it to boil, keep the heat on medium.
- Continuously keep stirring the milk for 30-40 minutes.
- Now add rice and continuous cook the mixture.
- When you see milk is getting creamier and reduced to almost half, add 200 gram sugar or per your taste.,
- Keep mixing and cook on a medium flame for another 10-12 minutes until sugar dissolves properly.
- Add ¼ teaspoon cardamom powder and ¼ teaspoon nutmeg powder
- Sprinkle slivered 1 tablespoon almonds.
- Serve hot or chilled.
Video
Nutrition
PLEASE NOTE: Nutritional values are estimated by a computer and may vary based on ingredients and portion sizes. For personalised dietary advice, please consult a qualified healthcare professional.
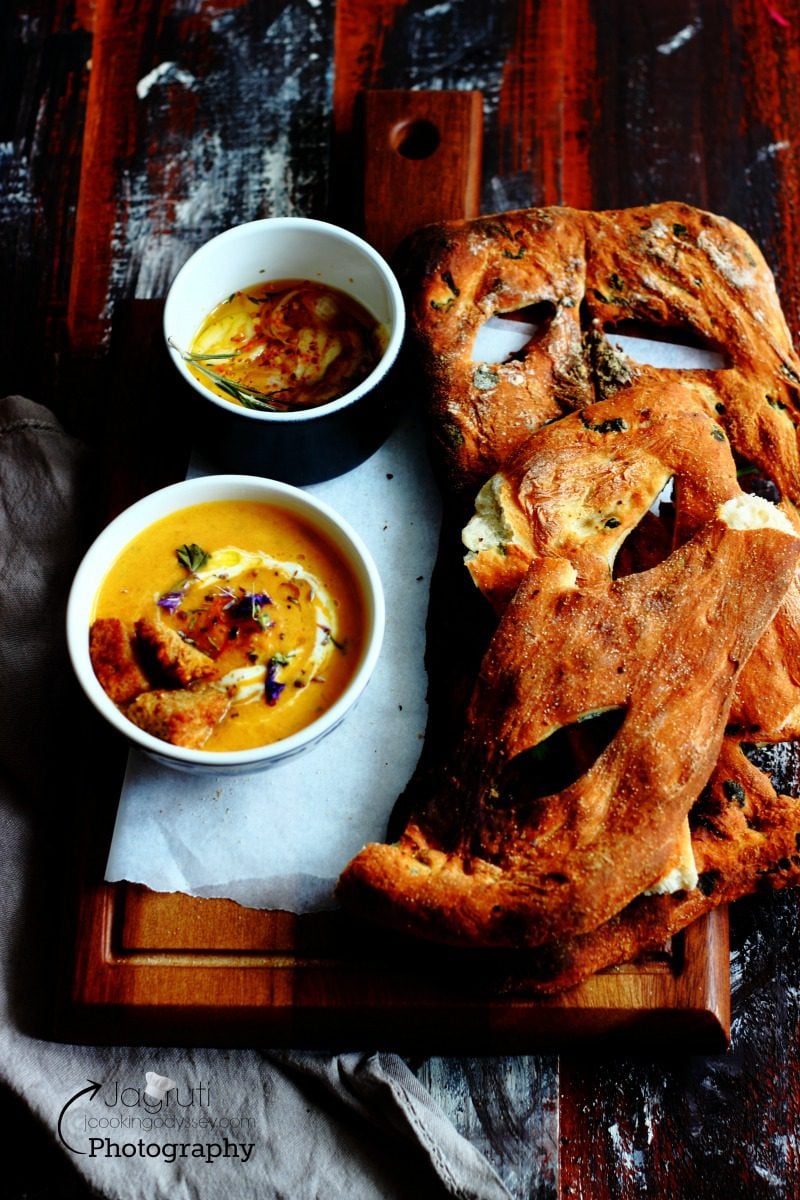
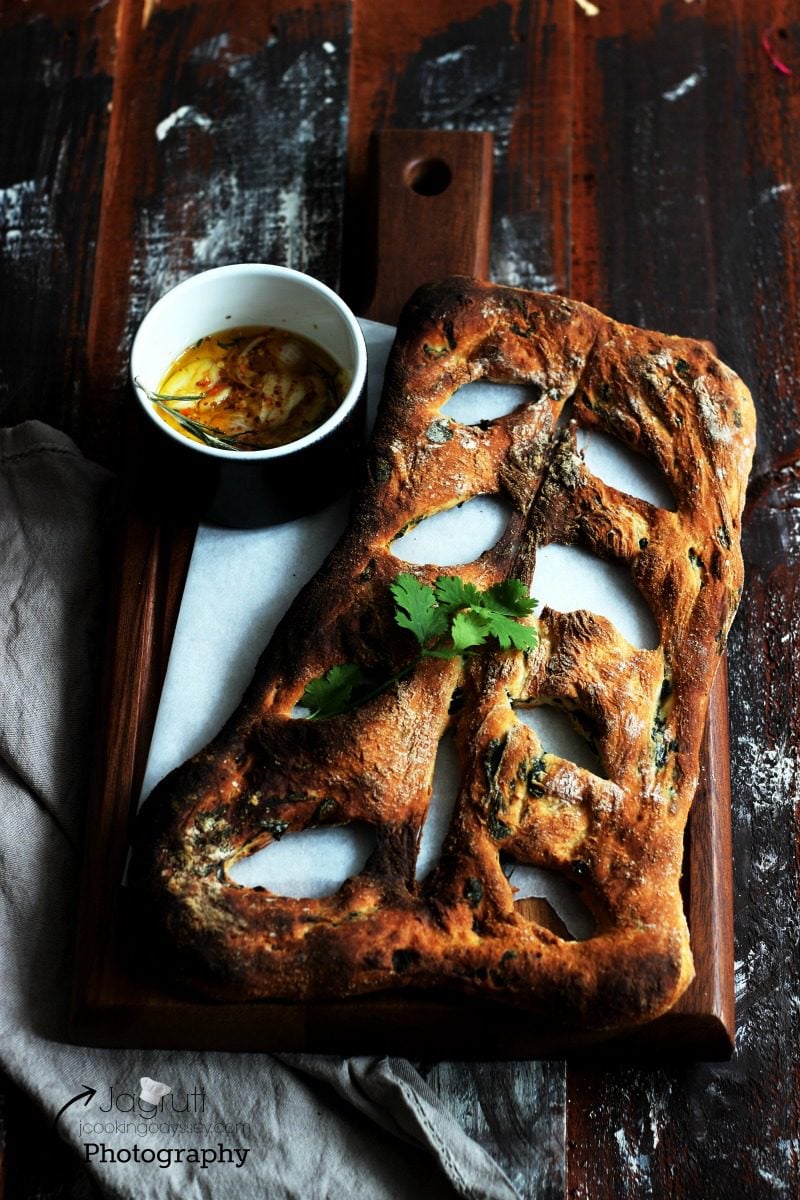
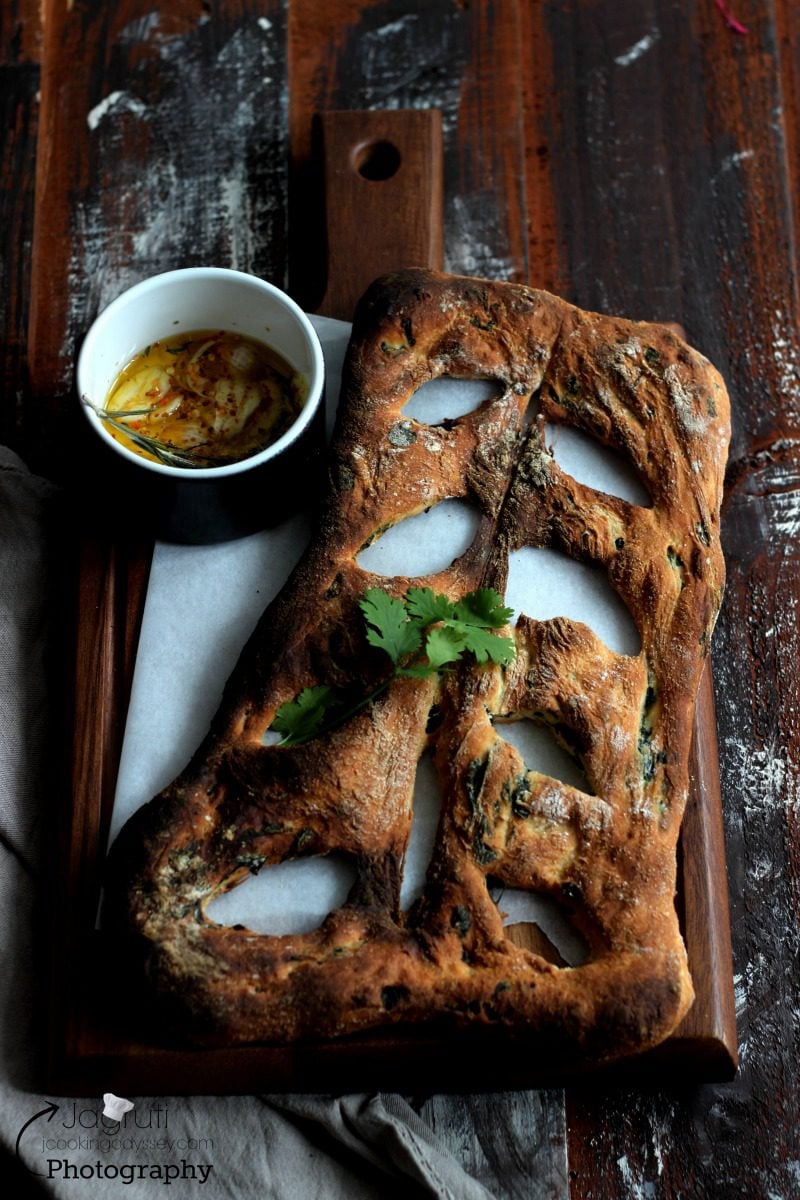
Share on Facebook Pin This Recipe Share by TextMethi and Ajwain ( Fenugreek leaves and Carom seeds ) Fougasse
📖 Recipe

Methi Ajwain Fougasse
Ingredients
for the dough
- 7 g easy blend yeast one sachet
- 500 g strong bread flour + 2 tablespoon for dusting
- 2 teaspoon sea salt
- 1 teaspoon sugar
- 1 tablespoon olive oil
- 100 ml boiling water
- 300 ml cold water
- 2 tablespoon semolina for dusting
Fenugreek Mix
- 100 g fresh fenugreek leaves finely chopped
- ½ teaspoon chilli ginger paste
- ½ teaspoon carom seeds
- 1 teaspoon oil
- Pinch coarse sea salt
Instructions
Fougasse Dough
- In a big bowl place flour, easy blend yeast, sugar and salt.
- Mix everything with wooden spatula.
- Now mix 100 ml boiling and cold water, it should feel perfectly hand hot.
- Add oil in water.
- Make a well in the centre of the flour and pour oily water all at once.
- Quickly using a wooden spatula mix everything to make a soft and sticky dough.
- On a clean surface sprinkle flour and tip the soft and sticky dough.
- Knead the dough by stretching it away from you then folding it half towards you and pushing it away with the heel of your hands. ( do it about 18-20 times )
- Once dough is smooth and silky, put it in a well oiled mixing bowl and cover it with clean kitchen towel and leave it for about one hour. ( No need to put in a warm place )
Fenugreek Mix
- Mean while make fenugreek mix by heating oil in a pan.
- Add carom seeds, chilli ginger paste .
- Fry just few seconds and add methi leaves.
- Keep heat high, and let the methi cook for 2-3 minutes.
- Methi mixture should be totally dry.
- Let it cool.
- Once dough is risen and ready ( the dough is ready when it springs back when you press the dough with your finger. )
- Mix semolina and dry flour to sprinkle on the surface.
- Now sprinkle semolina and flour mix on the clean worktop , tip the risen dough on it and lightly need in the fenugreek mix.
- Pre heat oven to gas mark 7-8 ( high )
- Keep baking tray ready dusting with semolina.
- Cut the dough in 3-4 equal pieces.
- Put the dough piece on dusted baking tray and use your hands to make each piece into triangle or rectangle shape.
- Now create a hole in the dough by using sharp knife, make 3-4 diagonal cuts.
- Carefully stretch the dough so holes open up more.
- Sprinkle some sea salt.
- Bake in the pre heated oven for 10-12 minutes.
Nutrition
PLEASE NOTE: Nutritional values are estimated by a computer and may vary based on ingredients and portion sizes. For personalised dietary advice, please consult a qualified healthcare professional.
Share on Facebook Pin This Recipe Share by Text
I can't believe it, why on earth I never baked Fougasse until few months back when by chance I switched on channels and watched Paul Hollywood's baking programme which was broadcasting on BBC2, I think it was repeated programme. He was showing how to make Sour dough starter and few baking recipes using sour dough. OMG, how easy that was, oh yes, whatever he makes look so easy. I always thought that breads like fougasse, difficult to make, but when I saw Paul making it, I could not have been more wrong.

I left everything, once he started making Olive Sour dough Fougasse, there and then I decided that next morning my oven had to do work for me. While he was adding olives and oregano into dough, many things were dancing in my head. Although I was watching TV, my eyes were scanning my refrigerator to find some Desi ( Indian ) stuff..and I found something which I can never get tired of..It was Fresh Fenugreek Leaves ! Well, you all know me right ? I always want to create a recipe where one ingredient always travels from far east and meets the west 🙂 well that's what really I am !

And next afternoon I met one of the most aromatic, rustic and bursting with flavours bread I'd ever encountered. I was so pleased with the results, fresh fenugreek leaves and carom seeds both flavours suited so well and aroma of baking fenugreek leaves was just simply divine, you can't ignore the wonderful baking aromas wafting from the kitchen ! so simple to make and yet so impressive looking, crunchy on the outside and soft inside.
I would definitely say that this recipe is much easier to bake than to actually to pronounce it !!
Although Paul's recipe of Olive Fougasse inspired me to bake Fougaasse, actually I did not follow his recipe as his recipe was using sour dough starter which I did not have that time, but followed his tip to use semolina for dusting.

Fougasse, is a great traditional and popular French bread. It is crusty, and can be flavoured with many ingredients. It is flat and often shaped like a leaf with holes running through the surface.( I am not sure that mine did 🙂 ! And definitely this bread is best torn rather than slice, just pass around the table and each person will tear off the desire quantity. Generally Fougasse share along with balsamic vinegar and olive oil, but I prepared flavoured oil with mixed herbs, spices and garlic.
You will need :- For the dough
- One 7 g sachet of easy - blend yeast or 15 g fresh yeast
- 500 g strong bread flour + 2 tablespoon for dusting
- 2 tsp. salt
- 1 tsp. sugar
- 1 tbsp. olive oil
- 100 ml boiling water
- 300 ml cold water
- Semolina for dusting
- 1 cup finely chopped fresh methi leaves ( do not use dried fenugreek leaves )
- ½ tsp. chilli ginger paste
- ¼ tsp. ajwain ( carom seeds )
- Coarse sea salt
- ½ tsp. oil
In a big bowl place flour, easy blend yeast, sugar and salt.
Mix everything with wooden spatula.
Now mix 100 ml boiling and cold water, it should feel perfectly hand hot.
Add the oil in water.
Make a well in the centre of the flour and pour oily water all at once.
Quickly using a wooden spatula mix everything to make a soft and sticky dough.
On a clean surface sprinkle flour and tip the soft and sticky dough.
Knead the dough by stretching it away from you then folding it half towards you and pushing it away with the heel of your hands. ( do it about 18-20 times )
Once dough is smooth and silky, put it in a well oiled mixing bowl and cover it with clean kitchen towel and leave it for about one hour. ( No need to put in a warm place )
Mean while make fenugreek mix by heating oil in a pan.
Add ajwain seeds, chilli ginger paste .
Fry just few seconds and add methi leaves.
Keep heat high, and let the methi cook for 2-3 minutes.
Methi mixture should be totally dry.
Let it cool.
Once dough is risen and ready ( the dough is ready when it springs back when you press the dough with your finger. )
Mix semolina and dry flour to sprinkle on the surface.
Now sprinkle semolina and flour mix on the clean worktop , tip the risen dough on it and lightly need in the fenugreek mix.
Pre heat oven to gas mark 7-8 ( high )
Keep baking tray ready dusting with semolina.
Cut the dough in 3-4 equal pieces.
Put the dough piece on dusted baking tray and use your hands to make each peiece into triangle or rectangle shape.
Now create a hole in the dough by using sharp knife, make 3-4 diagonal cuts.
Carefully stretch the dough so holes open up more.
Sprinkle some sea salt.
Bake in the pre heated oven for 10-12 minutes.
Serve hot.
Enjoy !
Thank you for stopping by and reading this post !
We hope to see you again soon 🙂
Aloo Chana (Without Onion Garlic)
This homely Chana Bateta without onion and garlic is pure comfort food. It's made with potatoes and chickpeas cooked in a flavourful sauce made with whole spices and tomatoes. I make it in one pot and it's ready within 15 minutes.

Kale Spaghetti (quick & easy)
Kale Spaghetti - a simple but flavour packed pasta dish made with homemade vegan kale pesto. Ready in less than 15 minutes, it's perfect for lunch or mid-week dinner.

Multigrain Butternut Squash Achari Thepla

Hey guys, how is your new year going ? Exciting or feeling little Blue ! I hope all going well for you.
It's just returning to normal routine of early nights and waking up in the dark induce what's been dubbed 'social jet leg'.

Lol, almost forgot that we are back to reality, holiday season is over, days are gone when we were snuggling in the duvet in our pyjamas, overdoing with TV and eating and browsing the sales online. Yep, life is back to normal.


One cold morning family were in treat with Multigrain Butternut Squash Achari Thepla for the breakfast. If Pumpkin Sabji left over, add Wheat flour and few masala and prepare delicious paratha.
I roasted Butternut Squash, added fresh methi leaves and I used Pickle masala from the ready pickle and Kalonji seeds. Many times I add fresh spinach, omit pickle masala and add crushed green chillies too, it depends on my moods and what is available in the fridge.

I know that my family loves anything with pumpkin, even we just roast any squash with little seasoning and finish in few minutes, If this happened to you then can check out my other recipes like Pumpkin curry, Butternut squash raita, soups and Low fat pumpkin Falafel


In the cold weather Paratha or Thepla works like magic, no one will say no to hot and steamy Thepla, we enjoyed a lot.
These Squash Achari thepla so easy to make, soft and very little chewy inside, little crispy outside and without a doubt so nutritious and flavoursome. Devour with raita, pickle, or a hot cup of Masala Chai.

More Thepla Recipes
1. Oats, Jowar and Methi Thepla
4. Authentic Gujarati Plain Thepla
You will need:-
- 500 g butternut squash
- 3 ½ cup multigrain flour + for dusting
- 2 cup chopped fresh methi ( fresh fenugreek leaves )
- 2 tbsp. fresh coriander
- 1 tbsp. any pickle masala ( I used Mixed pickle masala )
- 1 tsp. Kalonji ( onion seeds )
- 1 tsp. ajwain seeds
- 1 tsp. lightly crushed cumin and coriander seeds
- Salt to taste
- 2 tsp. red chilli powder
- 3 tablespoon oil ( moin ) + more for frying
Method :-
Preheat the oven to gas mark 6.
Wash and cut half the butternut squash and deseed, no need to peel.
Rub little oil and bake in the oven for 40-45 minutes or until tender but does not get burn.
Remove roasted squash from the oven, let it cool and scoop out all the flesh from the squash.
Place in a big bowl, add all the other ingredients and 3 tbsp. oil.
Combine everything and with very little water knead semi stiff pliable dough.
Cover the dough with clean kitchen towel and leave it for 10 minutes.
When you are ready to make thepla, once again knead dough for one or two minutes.
Then divide the dough in equal sizes and make a round balls.
Dust the flour on working surface, first roll one ball into circle.
Heat griddle or tawa on a medium heat .
Place a Thepla on the griddle and cook for 20 seconds, or until the top starts to brown and slightly bubble.
Turn the Thepla over using a spatula, apply little oil and continue cooking for about 30 seconds, or until brown spots appear.
Flip it over one more time and, using the spatula and apply oil, carefully press down all over.
Turn over again and repeat on the other side until you have the desired crispiness.
Keep each thepla warm, while you repeat to cook them all.
Serve hot. Enjoy with raita , Chutney, yogurt or tea.
Thank you for stopping by and reading this post !
We hope to see you again soon 🙂
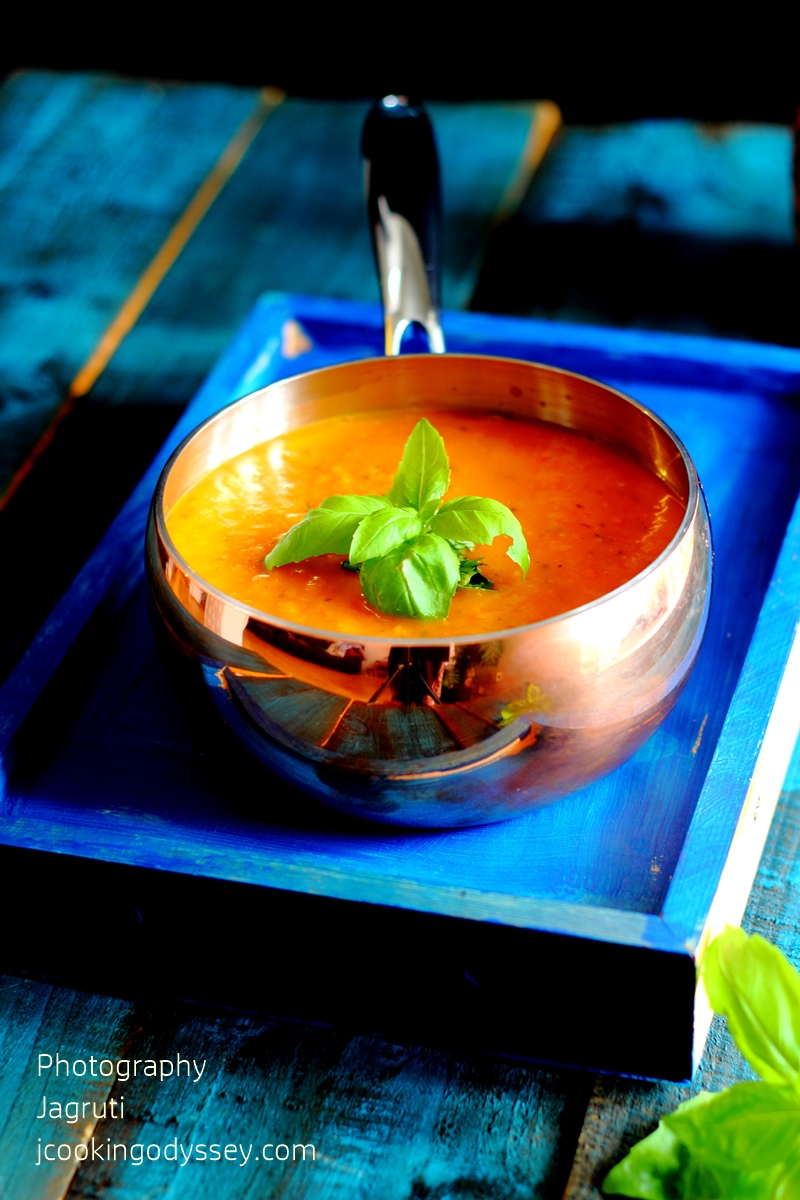
Harrisa Roasted Mixed Squash, Tomatoes, Cashew and Mixed Herb Soup
It's right time to get in to habit in well balanced and healthy eating after all the festive indulgence over the Christmas and New Year period. Butter, oil and sugar were roaming around freely in my kitchen and kept flowing in our dishes. I better watch out my waistline before my Jeans refuses to fit me 😉
What a fantastic way to include Soup for a healthy and balanced eating, great way to consume lots of veggies, don't have to sit in one corner and chew for hours  but quick way to get a nutritious and balanced meal.  Research shows that purely vegetable-based soups are high in nutrition and low calories.
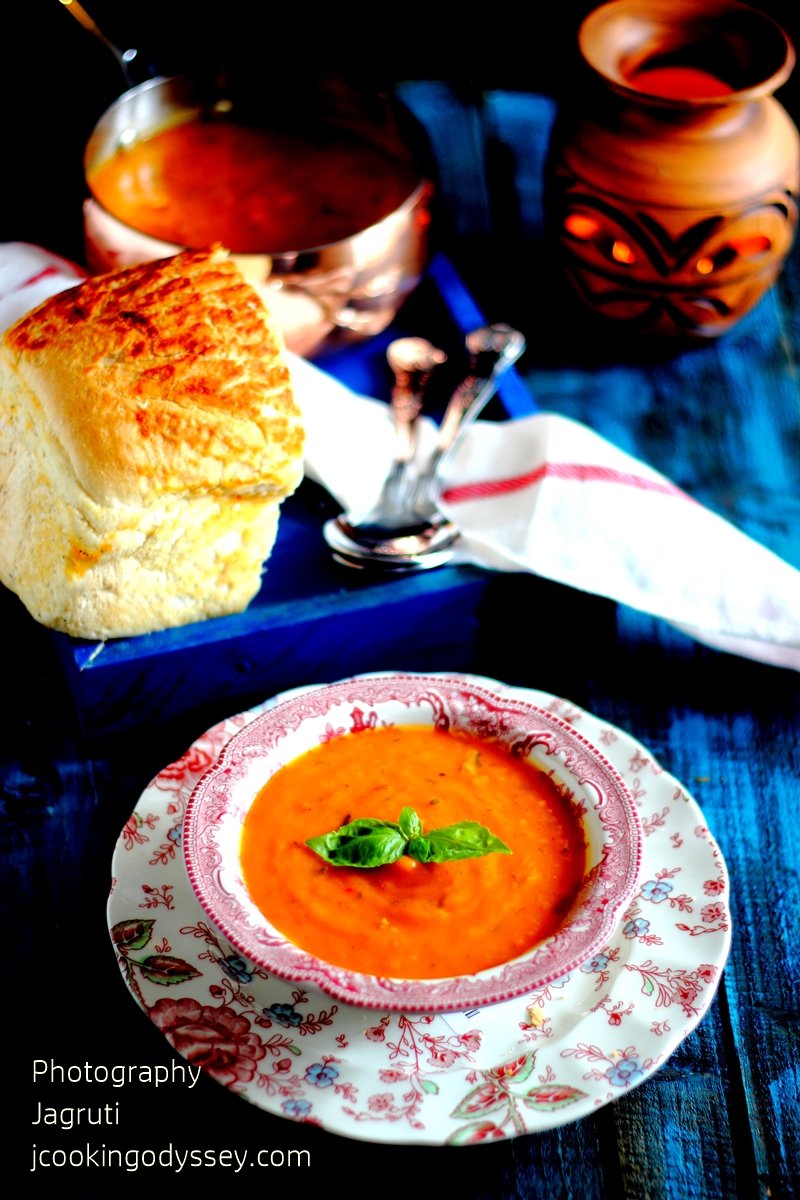
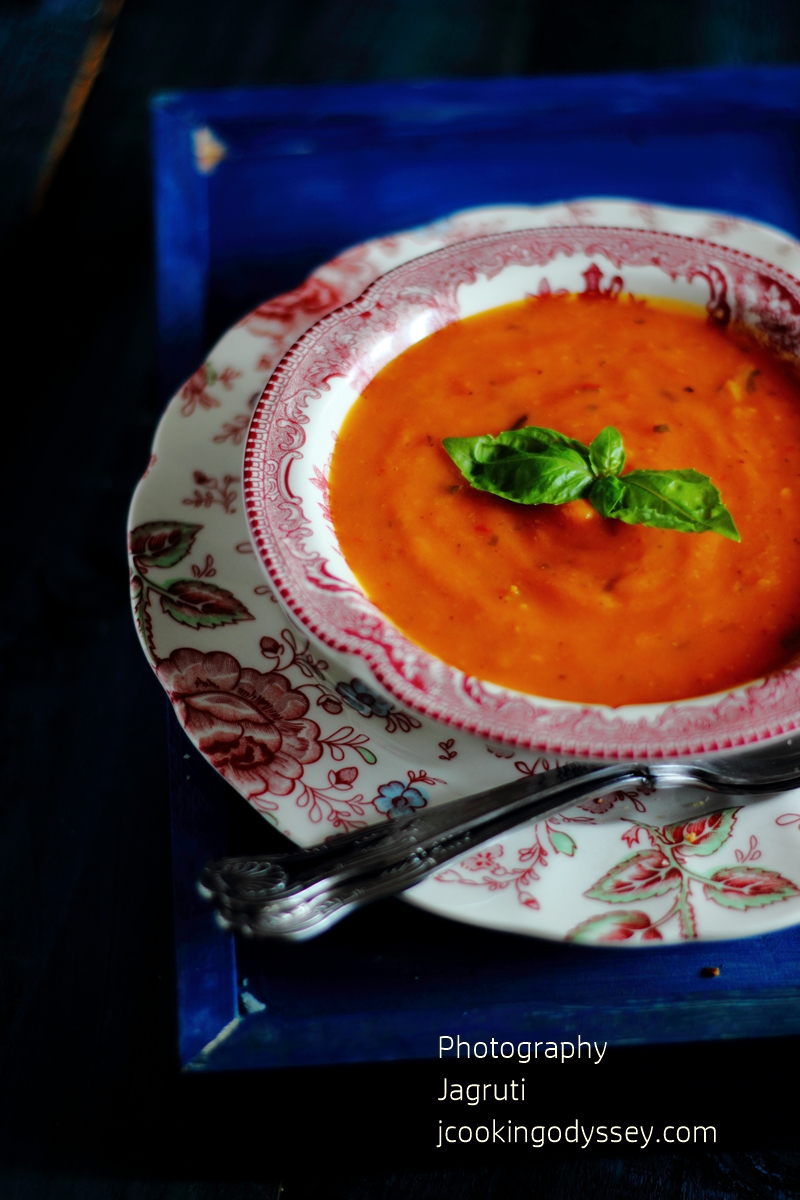
Now that we are truly into winter season and temperatures has dropped here, it's perfect time to bring soup on the table, naturally home made soups are the best option ! Harrisa Roasted Mixed Squash, Tomatoes and Mixed herb soup..what can I say about this soup ! Past few months Harrisa rules me and my kitchen, seems every one needs a kick now and then 🙂
We include pumpkin or squash, Broccoli and Spinach on our menu almost each week. On the new year's day, for lunch we settled for soup, it was fabulous, the spicy paste and roasting made it divine and I used a generous amount of fresh herbs and this only enhances the flavours !
We enjoyed with Tiger Bread Rolls in Instant Pot

You will need :-
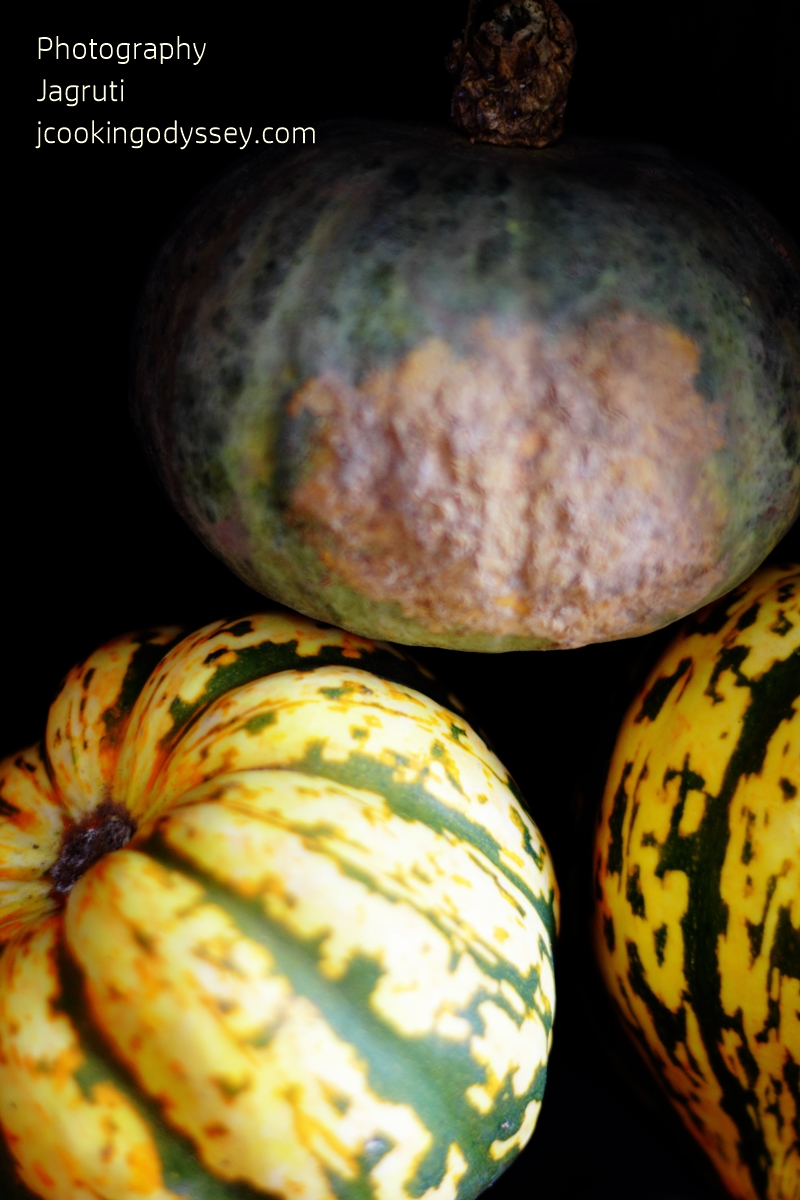
- 500 g  mixed squash peeled, de seeded and cubed ( I used acorn , Kabocha and sweet dumpling )
- 250 g fresh tomatoes
- 4 tbsp. cashew nuts ( soaked in water for 15 minutes )
- 2 tbsp. thick tomato paste ( optional )
- 4 tbsp. harissa pasteÂ
- 1 tbsp. maple syrup or honey
- Salt to taste
- 500 ml vegetable stock
- 1 big onion chopped
- 3-4 garlic cloves
- 3 tbsp. olive oil
- 4-5 tablespoon gresh herbs ( I used parsley, basil, rosemary, thyme and coriander )
- Pinch freshly ground black pepper
Thank you for stopping by and reading this post !
We hope to see you again soon 🙂
Vegan Stuffed Butternut Squash (Oven Baked)
This Festive Vegan Stuffed Butternut Squash is baked in the oven to perfection. A whole butternut squash is filled flavourful green lentils, cranberries, nuts and seeds. Make it the centrepiece for your Thanksgiving, Christmas table or any roast dinner.
It is vegan and gluten-free.

Goda Masala Dum Aloo

In this recent post, I told you about Goda Masala and mentioned that how we started liking Maharashtra Cuisine. Recently I prepared few dishes, Veg Kolhapuri, Misal Pav and vangi Bhat. So delicious and lip smacking but I did not put them in the frame thinking there are thousands of recipes out there, however one recipe which I created and as far as I know ( Please do let me know if any of you seen or posted this recipe before me ) I am the first one who has developed this recipe and posting it too. It's Goda Dum Aloo!


Full of flavours and spices, lip smacking Goda Dum Aloo where I did not fry the potatoes, neither submerged in any kind of rich gravy but only lightly roasted them in a little oil and made usual gravy using onion, garlic and tomatoes. Goda Masala imparts a wonderfully smoky sweetness which is unique to this spice blend, to the curry.
Please keep in mind if you want to use this recipe on your blog or anywhere else, then I would surely like the credit for it, you can do this by linking it back to my blog and this post.
Thank you in Advance!

You will need:-
- 500 g boiled and peeled baby potatoes
- 4-5 tbsp. oil
- 3 small or 2 medium onions roughly chopped
- 6-8 garlic cloves
- 3 tomatoes chopped ( use less if you want to keep gravy in dark brown colour )
- 1 tbsp. thick tomato puree
- 3 tbsp. Goda masala
- 1 tsp. ground turmeric
- 1 tsp. red chilli powder
- 1 tbsp. desiccated coconut
- salt to taste
- Fresh coriander leaves
Heat 2 tbsp. oil in a heavy bottom or non-stick pan and saute boiled potatoes until they turn light pink.
Remove them and leave it aside.
In the same pan add onion and saute till nice and brown but not burnt.
Add garlic cloves and fry few seconds.
Add coconut and switch off the heat, let the coconut roast in the masala for few minutes.
Once slightly cooled, transfer onion mixture into the grinder, add tomatoes and make a fine puree. ( add tablespoon of water if too thick )
In the same pan heat remaining oil, add the ground masala and cook until you see oil leaves edges.
Now add all the masala and salt.
Cook for one minute and add a half cup of water.
Let the water boil for minute or two, add pan fried potatoes and mix well.
Cover the pan with a lid and cook potatoes for 5-7 minutes.
make sure potatoes don't break.
Switch off the heat.
Serve in a bowl, add coriander leaves and enjoy with hot phulka round and soft gujarati rotlis, paratha and fresh salad !
Thank you for stopping by and reading this post ! We hope to see you again soon 🙂
Eggless Mini Panettone
Charles N. Barnard
The perfect Christmas tree? All Christmas trees are perfect!
Once again, with the help of a little sparkle and glow, our home has turn into a winter wonderland with all these beautiful Christmas decorations as we always wanted. This year's collection includes some new bought and handmade nostalgic Christmas decorations and we have a little something for everyone in the family - Gold tree baubles in many style adding glitter and sparkle, beautiful scented candles are spreading the cosy-ness and loads of tinsel and fairy lights adding light to the Christmas tree and home .

Panettone is a large, yeasted fruitcake, It's an Italian Christmas Classic and traditionally eaten during Christmas period. In recent years it has become very popular around the world, and so does on our Christmas table too ! Perfect for a indulgent breakfast or brunch over the Christmas holidays or wrap with festive ribbon or bakers twine and give as a gift, they can make wonderful edible gift!!
- 120 ml warm water
- 120 ml full fat milk
- 2 and half tsp. easy bake yeastÂ
- 115 g butter or margarine
- 3 cup strong white bread flour or plain flour + extra for dusting
- ¼ cup wheat germ
- ½ cup sugar
-  ¼ tsp. salt
- ½ cup raisins and sultanasÂ
- ¼ cup glace cherriesÂ
- ½ cup mixed candid peel
- Pinch cinnamon powder
- 1 tsp. vanilla extract
- 1 tsp. orange blossom waterÂ
Method :-
Mix yeast and warm water in a bowl and let it bubble. It will take less than five minutes if yeast is not gone off.
Meanwhile place milk, sugar and butter in a saucepan and let it heat, until just you see bubble around the edges.
Let milk mixture cool down a bit, add into yeast mixture. Mix well.
Pour this mixture in a big bowl or in stand mixer bowl with dough hook.
Add cinnamon, vanilla, salt and orange blossom water.
Stir in wheat germ and one cup flour and beat well for minute or two.
Gradually add remaining flour and knead the dough for another 5 minutes.
Dough will be sticky , place dough in a lightly oiled bowl and cover it with the cling film for 1 or 2 hour or until double in size. Leave bowl in a warm place.
When the dough is risen, tip it out on a lightly floured surface and knead the dough for 5 minutes.
Gradually knead the raisins, sultanas , cherries and mixed candid peels.
Drop large muffin wrap in to 6 clean , 200 g tin.
Cut into 6 equal pieces and drop into lined tin.
Cover again leave until they are well risen.
Heat oven to gas mark 5, Gentle make a cross on top of the risen dough and place ½ tsp. butter.
Bake for 20 minutes and turn the gas oven down to mark 4 and bake Panettone for 15 minutes or until  dark golden.
Cool on a rack before slicing.
Recipe partly adopted fromÂ
here
Thank you for stopping by and reading this post !
We hope to see you again soon 🙂
Chocolate and Rose Indian Milk Cake
Recently someone celebrated their birthday in the family, and chose not to have an elaborate Birthday cakes or any big celebrations as recently we gorged on so many rich and sinful delicacies during Diwali ! More often than not it's a birthday in the family that brings inspiration into my actions.
Indian Milk cake  or  'Dudh no Halwo' in Gujarati, one of our favourite Indian sweets. Sticky, slightly brownish and delicious Indian dessert is second to none.  Serve in a bowl it's 'Halwo' or set it in a tray and cut into slices then it's a cake !

Because this dessert  was meant for a birthday , I thought it will look lovely  as cake and slices. Generally Indian Milk cake made with just few ingredients like Milk, sugar and Nuts, but here I made space for Chocolate and Rose syrup in this milk cake.
Since I prepared Kesar Kalakand in M/W more than three years ago, and the thought was always hovering since that time... I also mentioned this in that post
"This receipe is obviously very traditional, but I want to try it out one day by adding chocolate giving this authentic sweet a complete make over..!!!"Â
and oh boy it took all these years to give this traditional recipe a complete make over. It was one of my most dreamy combinations that has made it through this mouthwatering milk cake.
What can I say about this make over, Chocolate and Rose Milk Cake actually tasted as delicious as it looks , Â the rose flavours in this cake is a win win situations, not too subtle and not too strong, but just you notice it and you will appreciate how it rounds up and smooths out the chocolate flavour. Rose and chocolate works so well with each other and instead of clashing the floral notes, blends and balances the dark bittersweet cake and compliments each other.
Chocolate and Rose milk cake, I adorned with fragrant dried rose petals and pistachio slivers, the contrast of garnishing , combinations of flavours and elegant looking milk cake turned out darn delicious and delectable and simply satisfying !
📖 Recipe

Chocolate and Rose Indian Milk Cake
Equipment
- 1 Kadai
- 1 Tray
- 1 Spatula
Ingredients
- 4 liter full fat milk
- 1 teaspoon alum fatkadi or 2 tbsp. vinegar
- 250 grams sugar
- 3 tablespoon ghee
- 3 tablespoon rose syrup
- 3 tablespoon cocoa powder
- 3 tablespoon pistachio finely chopped + 2 tbsp. pistachio slivers
- 2 tablespoon rose petals dried or fresh edible
Instructions
- In a heavy bottom pan or kadai bring the 4 liter full fat milkto a boil .
- Once started to boil add 1 teaspoon alum and keep stirring.
- Let the milk curdle, once you can see whey is separating, remove at least one cup of the whey.
- Continue to cook and stir until the milk starts grainy consistency.
- Add 250 grams sugarand keep cooking until the mixture gets thick.
- Add 3 tablespoon ghee and keep cooking and stirring until the mixture leaves pan.
- Add finely chopped 3 tablespoon pistachio
- Once mixture is nice and thick. quickly halved into equal parts.
- In one part add 3 tablespoon rose syrup and in other 3 tablespoon cocoa powder and mix well.
- Transfer first rose syrup mixture evenly into greased tray or thali.
- After couple of minutes pour chocolate mixture on top of the rose mixture and press gently with the spatula.
- Let it set the milk cake for at least 2-3 hours or over night in a dry but cool temperature.
- Garnish the milk cake with rose petals and pistachio slivers.
- Cut into desire shapes serve at room temperature.
- Enjoy !
Nutrition
PLEASE NOTE: Nutritional values are estimated by a computer and may vary based on ingredients and portion sizes. For personalised dietary advice, please consult a qualified healthcare professional.
Share on Facebook Pin This Recipe Share by TextCashew and Amaranth Cookies (Eggless)
These eggless Amaranth Cookies have added cashew nuts for delicious flavour and bite. These crumbly cookies are perfect at tea-time with a cup of Masala Chai.

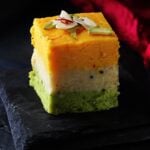
Three Layered Sandwich Dhokla
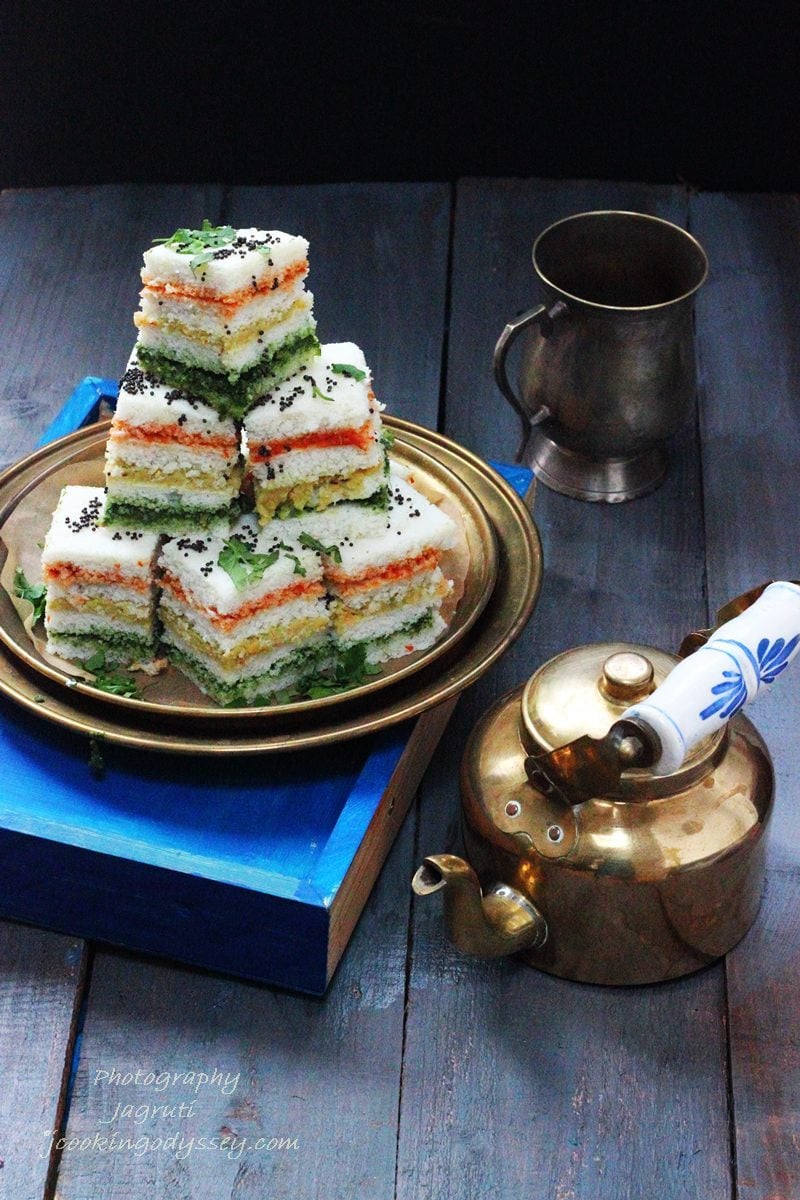
Revive your flagging spirit any time of the day with these tasty and filling Sandwich Dhokla accompanied by a pot of good, strong Masala Chai ( tea ) ! you won't regret having it. Dhokla can be eaten at breakfast, lunch, as snacks or as light dinner, or serve at tea party or kitty party !

Gujarati's are known for their Dhokla making skills all over the world. You can find so many different varieties of Dhokla recipes, some of most popular are Khatta Dhokla ( mostly prepared in the homes) and Naylon Khaman. ( sold in shops ) and Idra Dhokla ( White Dhokla )
Originally, dhokla are made from gram and rice flour. Over the years, experimentation has led to changes in the recipe for dhokla where different flours are used. Nowadays, dhokla can made from Semolina and corn flour , different lentils and vegetables too. Along with traditional Dhokla, I have prepared Mag ni Daal na Lasniya Dhokla ( Dhokla prepared with Yellow Moong daal lentils and Garlic ) and Sooji Matar Dhokla ( Instant semolina and green peas Dhokla ).
Sandwich Dhokla, is a new variety of authentic Idra Dhokla, for Idra Dhokla rice and white urad lentils ( split and huskless matpe beans ) are used. Rice and Urad daal batter is prepared by fermented over night or 24 hours in cold weather and steamed thinly in a plate next day. I've been making sandwich dhokla for a while where one kind of spicy chutney is used, but this time I prepared sandwich dhokla with not only two different kind of chutnies but added healthy filling too. With little pre-planning you can have this tasty, healthy and lip smacking dhokla on your table for you and your guests !
You will need :- Batter
- 2 cup Rice ( any )
- 1 cup Urad daalÂ
- Salt to taste
- Pinch of bi co soda
- 1 tsp. oil
- Pinch of citric acid ( limboo na phool )
You will need :-
- ½ cup green coriander and mint chutneyÂ
- ¼ cup garlic chutney + 2 tsp. grated jaggery and  mix well.
You will need :- Chana daal filling
- ½ cup boiled chana daal ( dry )
- 1 tbsp. oil
- 1 tbsp. crushed green chilli and ginger
- Salt to taste
- 1 tsp. garam masala
- 1 tsp.lemon juice
- ½ tsp. turmeric powder
- ½ tsp. mustard seeds
You will need :- Vaghar
- 2-3 tablespoon oil
- 1 tbsp. mustard seeds
- Pinch of hing
2-3 tbsp. fresh coriander leaves for garnishing
Method :- Batter
Clean, and soak rice and daal separate for 8-10 hours or over night.
Next morning grind daal and rice ( like idly batter ).
Mix both and add salt.
Leave the batter to ferment in a warm area. ( Mine takes almost 24 hours )
Method :- Chana daal filling
Heat oil in a kadai, add mustard seeds.
Once they crackle ginger and chilli, fry for few seconds and add boiled daal.
Add other masala and cook for few minutes.
Add lemon juice and switch off the heat.
Method :- Sandwich Dhokla
Once you are ready to prepare dhokla, mix oil, citric acid and soda with little water in a bowl and add into batter.
Mix well, if batter is too thick add little water.
Start heating water in a big pot.
Mix the batter once again and pour thinly in a deep lightly greased plate .
Steam over water about 15-20 minutes.Pierce knife, and check, should come out clean if done.
Leave it to cool little.
Steam one more plate of dhokla, so now you'll have 2 dhokla plate.
Once they cooled, take sharp knife and make a cut right in between of dhokla plate, so you'll have now 2 half round( like half moon).
Slowly with the help of big spatula lift both half round shape dhokla.
Follow same procedure with other dhokla plate too.
Now you will have 4 half round shape dhokla discs.
Take flat plate or wooden chopping board, gently lift one half dhokla disc and lay it on the board.
Rough side up, now spread green chutney, gently lift another half dhokla disk and place on the green chutney.
Gently press it down with the rolling pin, now spread chana daal filling and take third dhokla disc and place it on the chana daal filling.
Once again press it down with the rolling pin.
Now spread garlic chutney evenly and place last ( fourth ) dhokla disc and place it on the garlic chutney.
Once again press it down with the rolling pin ( very gently ) and make sure filling doesn't come out.
Now with the sharp knife cut the layered dhokla in to square shape.
Make vaghar by heating oil, add mustard seeds once they crackle add hing.
and pour over the dhokla pieces.
Sprinkle coriander leaves and serve with tea.
Enjoy !
Thank you for stopping by and reading this post !
We hope to see you again soon 🙂
Sweet Thor - Meetha Satta
Meetha Satta or Sweet Thor is an authentic Gujarati sweet. It is simply made by dipping a flaky, buttery pastry made with flour and ghee into a sugar glaze. This glaze hardens into a thick white crust and the two textures are phenomenal together.
Thor, also known as Devta Saata is most often served during Diwali or served to Lord Krishna during the Hindu New Year.

It is often the simplest recipes are the most fantastic and it is definitely true of this Gujarati Thor. Similar to the Indian sweet Khaja or Meethi Khajali (which is often prepared for Dussehra), Thor is prepared by coating pastry in a thick sugar syrup, almost like sugar glazed donut!
I love serving them with a rich and sweet saffron chai.

Ingredients
For the pastry
- Plain flour - you will need all-purpose flour for this recipe
- Ghee - you will need pure butter ghee, aka desi ghee, for the best results. You can use homemade, or shop bought. Ghee is used in the dough and to deep-fry as well. Alternatively, you can use a flavourless oil to deep fry with
- Milk - to bind the dough
For the sugar glaze
- Sugar
- Water
- Milk - optionally, add a dash of milk to the glaze
To decorate (all are optional, use all or some of the below)
- Chopped pistachios
- Rose petals
- Edible silver foil/chandi varq
How to make Meetha Satta/Thor
Firstly, you need to prepare the pastry:
In a large plate or bowl, add the flour and the ghee and rub the ghee into the flour using your fingers. This technique helps to shorten the dough and give you that crumbly, flaky texture.
Once the ghee is well incorporated, add the milk little by little and make a stiff dough. The dough will be hard and can easily crumble. That is ok. We are not looking for a smooth soft dough.


Cover with a clean kitchen towel for 10-15 minutes.
Divide the dough into equal golf size balls.
Roll out each ball into a small round shape with around ¼ inch thickness. You can use a cookie cutter to get a perfect circle or simply keep the shape you have rolled out.
Prick all over with a sharp knife or fork. Set aside.


Heat ghee (or oil if using) in a kadai/pan on a medium heat.
Gently, place a few rounds into the ghee and reduce the heat to low.
Deep-fry the rounds and turn over gently to ensure even cooking. When they are lightly brown, remove and leave to drain and cool. Repeat for each of the pastries.
Keep the heat low or else the pastry will burn from the outside and not cook from the inside
Allow to cool completely.


Next, make the sugar glaze
Before you start making your syrup, keep a baking tray with parchment paper ready. Spray the tray with cooking oil so that the pastries do not stick once they are coated in the glaze.
To make sugar glaze, take a non-stick pan. We need to make a very thick sugar syrup that will become white as it dries.
Add the sugar and water and heat on medium flame. It will seem as if there is barely any water but as the sugar dissolves, it will release its own moisture. We need a thick sugar syrup for this recipe.
Keep stirring and let the sugar dissolve completely.
Allow the syrup to thicken.
Add a teaspoon or two of milk and switch off the heat.


Next, glaze the thor
Now, quickly drop the pastries one by one into the sugar syrup and coat completely and place them on the greased baking sheet.
Repeat this for every pastry. Work fast.
The syrup may begin to crystallise, so heat it again to loosen it. Add a teaspoon of water if needed.
Whilst the glaze is still warm, sprinkle the nuts, rose petals if using.
Allow the glaze to set for at least an hour. You will see the thor beginning to go white.
Once the glaze has set and hardened, they are ready to eat!


Storage
Meetha Satta can be made ahead of serving.
They are best stored in airtight containers to retain their flakiness. They will keep well for up to a week before they go soft.
More Diwali Recipes
Anjeer, Chocolate and Cashew Rolls
As always if you make this recipe, be sure to leave me a comment, rate this recipe and tag me on Instagram @jcookingodyssey or #jcookingodyssey. I love seeing all your photos of my recipe recreations!
Don’t forget to follow me on social media using the buttons below – I can't wait to see you all there!
📖 Recipe

Sweet Thor | Meetha Saata
Ingredients
Pastry
- 2 cup plain flour
- 8 tablespoon ghee
- 8 tablespoon milk
- 2 cup ghee deep fry
Sugar Glaze
- 2 cup sugar regular granulated
- 8 tablespoon water
- 2 teaspoon milk
Garnish
- 4 tablespoon pistachio slivered
- 2 tablespoon rose petals
Instructions
- Place flour in a plate, add ghee and rub flour and ghee with your fingers.
- Combine well, start adding milk little by little and knead a stiff pliable dough.
- Cover with a clean kitchen towel for 10-15 minutes.
- Divide dough into small golf size balls.
- Roll out small round shape puri, thicker than normal puri.
- Prick with the sharp knife or fork.
- Heat ghee on a medium heat, GENTLY place in a couple of rounds and turn the heat on low.
- Very gently fry rounds till nice and brown, it will take about 5-6 minutes.
- Remove from the ghee and continue until all of the thor have fried.
- Keep each thor separated on a thali.
- Let them cool completely.
- Take a couple of baking sheet, greased little oil on it, by doing this THOR will not stick to on the tray.
- To make sugar glaze take a non-stick pan.
- Add sugar and water, heat sugar on a medium heat.
- Keep stirring and let the sugar dissolve completely.
- Let the syrup go very thick.
- Add milk and switch off the heat.
- Now quickly drop thor one by one into glaze and coat completely and put them on a greased baking sheet.
- Sprinkle rose petals and pistachio nuts.
- Let the glaze set about an hour or so.
- Once the glaze is set, THOR will be white.
- Store in an airtight container.
Video
Nutrition
PLEASE NOTE: Nutritional values are estimated by a computer and may vary based on ingredients and portion sizes. For personalised dietary advice, please consult a qualified healthcare professional.
Share on Facebook Pin This Recipe Share by TextPanch Ratna Chevdo / Chevro or Chivda
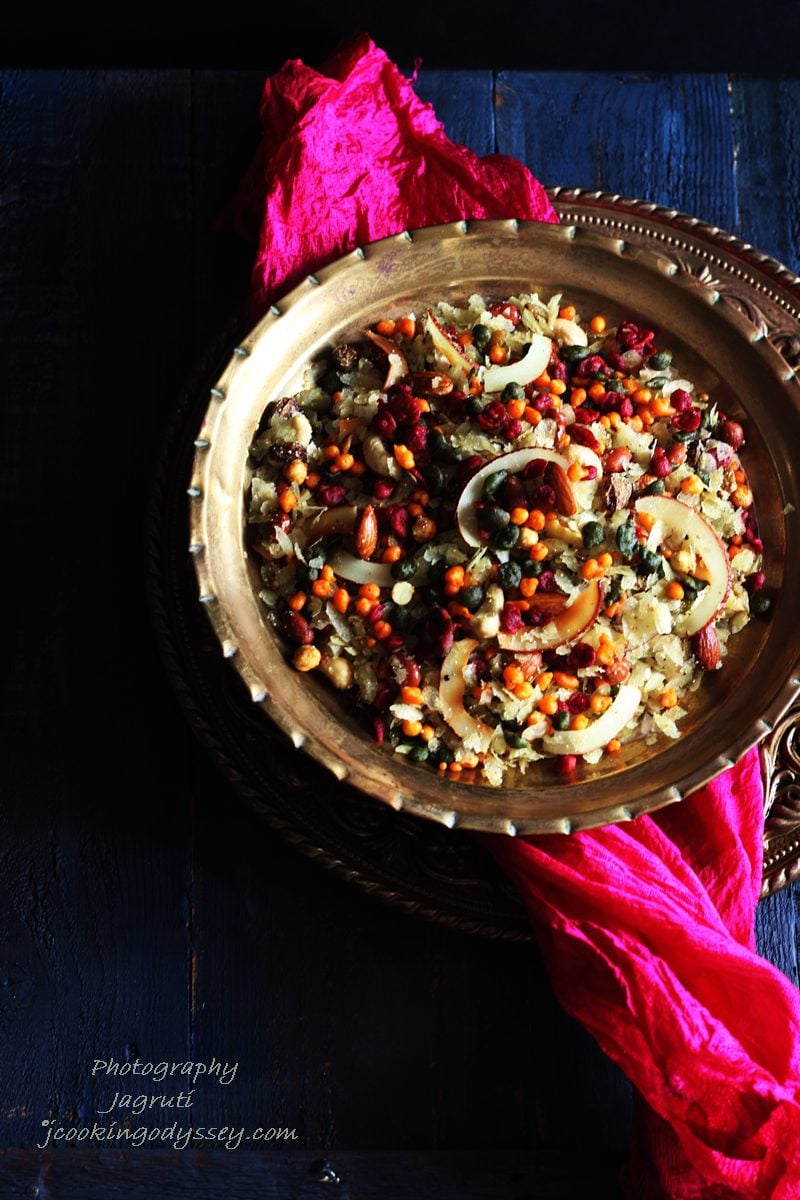
It's hard to imagine Diwali without Chevdo or Chevro in a Gujarati household, It's a tradition ! Whether diwali or not Gujaratis are known to munch away the various kind of chevda throughout the year, especially they love to have with Masala chai. But we don't, Only on diwali I make one type of chevdo.

📖 Recipe

Panchratan Chevdo
Ingredients
- ½ cup spinach and beetroot masala boondi
- 250 grams thin poha flattened rice
- 25 millilitres oil
- 1 teaspoon mustard seeds
- 1 teaspoon cumin seeds
- ½ asafoetida hing
- 1 teaspoon white poppy seeds
- 1 teaspoon whole coriander seeds
- 3 dried red chillies
- 1 green chilli finely chopped
- 12 curry leaves fresh
- 2 cloves
- 1 inch cinnamon stick
- ½ cup mixed nuts cashews and almonds
- ¼ cup peanuts
- 4 tablespoons roasted chana dal daria
- 4 tablespoons sultanas or raisins
- 4 tablespoons coconut flakes
- 1 tablespoon desiccated coconut
- 1 teaspoon turmeric powder
- 3 tablespoons powdered sugar
- ½ teaspoon citric acid limbu na phool (powdered)
- salt to taste
Instructions
- Preheat the oven to 180°C (Gas Mark 4).
- Spread the poha evenly on a baking tray and bake for 10 to 12 minutes, stirring halfway through for even crisping.
- Transfer the crisp poha to a large mixing bowl.
- Place the cashews, almonds, and coconut flakes on the baking tray and roast for 3 to 4 minutes until lightly golden. Watch the coconut carefully as it browns quickly.
- Heat the oil in a large kadai or frying pan.
- Add the peanuts and fry over a low heat until crisp. Remove and add to the poha.
- In the same oil, add the mustard seeds. Once they crackle, add the cumin seeds and asafoetida.
- Add the dried red chillies, green chilli, and curry leaves and fry for a few seconds.
- Stir in the cloves, cinnamon, whole coriander seeds, poppy seeds, and roasted chana dal.
- Add the turmeric powder and immediately add the baked poha.
- Gently mix to coat the poha with the tempering.
- Add the roasted nuts, coconut flakes, raisins, desiccated coconut, salt, and powdered sugar. Mix well.
- Roast the chevdo over a low heat for 3 to 4 minutes, stirring gently.
- Turn off the heat and sprinkle in a small pinch of powdered citric acid. Mix for another 2 to 3 minutes.
- Allow the chevdo to cool completely.
- Fold in the Spinach and Beetroot Masala Boondi.
- Store in an airtight container.
Notes
- Add the boondi only after the chevdo has cooled completely to keep it crisp.
- Adjust the sugar, salt, and citric acid to suit your taste.
- Store in an airtight container for maximum freshness.
Nutrition
PLEASE NOTE: Nutritional values are estimated by a computer and may vary based on ingredients and portion sizes. For personalised dietary advice, please consult a qualified healthcare professional.
Share on Facebook Pin This Recipe Share by TextPalak Beet Masala Boondi
Plain Boondi or Masala Boondi is a typical deep fried snack , consumed on any day or added into numerous dishes to enjoy it more. It is very easy to prepare. I've been making plain Boondi and Sweet Boondi, and Boondi ladoo past few years now, this year I've come up with a variation. Sometimes little change here and there is good 🙂
I have added spinach and beetroot puree into the boondi batter along with few spices. Colourful Boondi looks so cute and tastes so yummy. It can be perfect snack for Diwali in the tray and definitely will get lot of attention from young to old.
Note :- To make masala boondi, follow same method without spinach and beetroot puree.

📖 Recipe

Spinach Beetroot Masala Boondi
Ingredients
- 2 cup chickpea flour besan
- 3 tablespoons rice flour
- 1 cup fresh spinach palak
- 1 small beetroot peeled and chopped
- 1 green chilli deseeded
- 1 teaspoon red chilli powder
- 1 teaspoon black pepper
- ½ teaspoon black salt kala namak
- salt to taste
- pinch baking soda
- 1 teaspoon chaat masala
- tap water as needed
- oil for deep frying
Instructions
- Wash the 1 cup fresh spinach and place it in a microwave-safe bowl. Cook on high power for 1 minute along with the green chilli. Set aside to cool.
- Place the 1 small beetroot with 2 to 3 tablespoons water in a pressure cooker and cook for about 3 whistles until soft. or cook in the instant pot. Allow to cool.
- Once cooled, blend the cooked spinach and 1 green chilli and cooked beetroot separately into smooth purées.
- In a bowl, mix 2 cup chickpea flour, 3 tablespoons rice flour, salt to taste and pinch baking soda.
- Divide the besan mixture evenly into two bowls.
- In one bowl, add spinach purée and 1 teaspoon black pepper. In the other, add beetroot purée, 1 teaspoon red chilli powder and ½ teaspoon black salt.
- Mix each batter well, adding a little tap water if needed to achieve a smooth, medium-thick pouring consistency.
- Heat oil in a heavy-bottomed kadai until very hot.
- Hold a perforated spoon (jharo) over the hot oil and pour 2 to 3 spoonfuls of batter so it drops into the oil as small pearls.
- Fry until golden and crisp, then remove using another jhar or slotted spoon.
- Clean the base of the perforated spoon between batches for even-shaped boondi.
- Repeat with both batters.
- Once done, mix both spinach and beetroot boondi together.
- Sprinkle 1 teaspoon chaat masala and mix gently.
Notes
- Ensure both batters are of similar consistency for even frying.
- Oil temperature should be hot enough to form proper boondi pearls.
- Store in an airtight container once fully cooled.
Nutrition
PLEASE NOTE: Nutritional values are estimated by a computer and may vary based on ingredients and portion sizes. For personalised dietary advice, please consult a qualified healthcare professional.
Share on Facebook Pin This Recipe Share by TextAnjeer, Chocolate aur Kaju Rolls - Figs,Chocolate and Cashew Rolls

As with all festivities, Food of course is an integral part !  Let's talk about today's recipe, It's, Figs, Chocolate and Cashew Rolls. I tweaked the original recipe by adding chocolate in the filling and upper layer made with semolina and cashews.
Check out our Diwali Sweets and Savoury Recipes
A delicious and elegant looking dessert tastes so fine. Figs and Chocolate mingles brilliantly with the cashew layers. I am sure this will be a great addition to your Diwali sweet list..!
Â


You will need :- Filling
- 200 g Dried Figs
- 100 g Seedless Dates ( I used Medjool )
- 1 tsp. Homemade Desi Ghee
- 2 tbsp. Cocoa powder
- 1 tbsp. powdered sugar
- 1 tbsp. White poppy seeds ( khus khus )
- ½ cup semolina
- 1 tablespoon Desi Ghee
- 2 cup warm milk
- 3 tbsp. cashew powder
- 2 tbsp. homemade grated khoya
- 2 tbsp. milk powder
- 3-4 tbsp. sugar
Method :- Filling
Soak figs and dates in a warm water for 15-20 minutes.
Drain the water and make smooth paste in a grinder.
Heat ghee in a heavy bottom pan, add figs and dates paste and sugar.
Keep stirring the paste continuously.
After 7-8 minutes add poppy seeds.
After about 10-12 minutes you will see mixture getting shiny and comes together and will become small ball.
Keep stirring another 2-3 minutes.
Switch of the heat, add cocoa powder mix well.
Leave it to cool totally.
Method :- Upper layer
Heat ghee in a kadai, add semolina and roast on a very low heat until light pink. ( It takes about good 8-10 minutes. )
Add milk powder, grated khoya and cashew powder. Still keep low heat.
Keep roasting for another 3-4 minutes.
Add warm milk and sugar, keep stirring until you see very thick and firm semolina halwa.
Transfer into another plate, let it cool completely. ( I made previous night and left it in the fridge )
When you are ready, take butter paper or plastic sheet.
Take out the semolina halwa, and knead for 2-3 minutes. make sure there should be no lump at all. If you think halwa is soft, add little cashew powder. halve the dough.
Make about cricket size ball from one portion.
Put it on the butter paper, on top of the ball lay another piece of paper.
Now very gently and carefully start rolling the dough.
Make big oblong shape chapatti.
Once you are happy with the size and thickness stop. ( about 5mm is enough )
Cut sides and make square.
Now take dry fruit and chocolate mix, make two halfs.
And make long cylindric thin roll out of it.( see picture 1. )
Put that dry fruit roll on a square semolina dough ( see picture 1.)
Slowly slowly start folding, by lifting butter paper.
Once you roll up to half way, leave the butter paper.
Now use your hands to roll the very very gently.
Once the roll is ready, roll the roll for few seconds to make sure it sticks properly.
Now sprinkle pistachio slivers on the butter paper, and once again roll the roll on the pistachio slivers.
Now the same butter paper and tightly wrap the Dry fruit and cashew Roll seal the sides and leave it in a cool place for one hour or so.
Once time is up, take out the roll and gently cut into small discs or roll with very sharp knife.
Baked Bhakarwadi

Bhakarwadi is popular Maharashtrian spicy snack , normally is deep fried, which requires little more effort, also very popular in Gujarati households too. Many houses prepare them regularly and have it with their evening tea. Bhakarwadi is a good snack to carry with you whilst you are travelling and has good shelf life(in my home no shelf life at all,lol they don't even survive before going on any shelf).
There are two types of Bhakarwadi recipes out there, Bhakarwadi and Dry Bhakarwadi, however Dry Bhakarwadi is hugely popular. In normal Bhakarwadi Onion, Garlic and fresh coriander leaves are added where in Dry Bhakarwadi Gram flour sev ( spicy noodles ) , garlic and tamarind chutney added, because of Tamarind and Gram flour these Bhakarwadi filling stays dry and also stays for longer too, I did not add any Garlic in this recipe to keep this recipe Onion Garlic free but added dried coriander leaves.

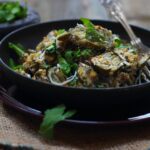
So, let's see how I baked delicious and mouth watering Dry Bhakarwadi which has loads and loads of yummy flavours. With little extra care and effort, you can have these healthy wadis in your home.
Notes:-
If you do not have sev, take 100 g besan, add chilli and turmeric powder, salt and oil. Make batter adding little water and make small BHAJIYA and fry in oil. Let it cool completely then grind in a mixer and make coarse flour. Add this instead of sev.
To make dry coriander leaves, wash and pat dry coriander leaves with kitchen towel. In a plate lay washed coriander leaves on a kitchen paper for 24 hours. they will dry.

📖 Recipe

Baked Bhakarwadi
Ingredients
Pastry Dough
- 400 grams plain flour
- 200 grams besan
- 1 tablespoon red chilli powder
- ¾ teaspoon turmeric powder
- salt to taste
- 4 tablespoons oil
- water as needed
Filling
- ½ cup thin sev
- 2 tablespoons sesame seeds roasted
- 2 tablespoons white poppy seeds roasted
- 4 tablespoons desiccated coconut roasted
- 2 tablespoons roasted peanuts
- 1 tablespoon fennel seeds
- 1 tablespoon garam masala
- 2 tablespoons red chilli powder
- 2 tablespoons ground coriander and cumin powder dhana jeera
- ½ teaspoon black pepper powder
- 3 to 4 tablespoons sugar
- 2 tablespoons oil
- 2 tablespoons dried coriander leaves
- 3 to 4 tablespoons thick tamarind pulp
- ½ teaspoon amchoor powder
- salt to taste
For Assembly
- 3 to 4 tablespoons oil for brushing
- ½ teaspoon lemon juice mixed with ½ teaspoon water
Instructions
Prepare the Bhakarwadi Dough
- In a large bowl, combine the plain flour, whole wheat flour, red chilli powder, turmeric powder, salt, and oil.
- Gradually add water and knead into a firm dough.
- Cover and rest for 20 to 25 minutes.
Prepare the Filling for Bhakarwadi
- Preheat the oven to 190°C (170°C fan) or Gas Mark 5.
- Place the sev, sesame seeds, poppy seeds, desiccated coconut, peanuts, fennel seeds, garam masala, red chilli powder, ground coriander and cumin powder, black pepper, salt, sugar, dried coriander leaves, and amchoor powder into a food processor.
- Pulse until coarsely ground.
- Transfer to a bowl and mix in the oil and 1 to 2 tablespoons tamarind chutney. The filling should be slightly moist but not wet.
Assemble the Bhakarwadi
- Divide the dough into equal portions.
- Roll each portion into a large, thin circle.
- Spread a thin layer of tamarind chutney over the surface, leaving a small border around the edges.
- Evenly sprinkle the filling over the chutney and gently press it down with the back of a spoon.
- Brush the edges with the lemon and water mixture.
- Fold a small strip of dough on the left and right sides over the filling.
- Starting from one end, tightly roll the dough into a log.
- Cut into 2.5 to 4 centimetre (1 to 1½ inch) pieces.
Bake the Bhakarwadi
- Lightly grease a baking tray with oil.
- Arrange the bhakarwadi pieces on the tray, leaving a little space between them.
- Brush the tops lightly with oil.
- Bake for 20 minutes.
- Rotate the tray and bake for a further 10 to 12 minutes, or until golden brown and crisp.
- Allow to cool completely before serving.
Notes
- The filling should be moist enough to hold together but not wet.
- Cooling completely helps the bhakarwadi become crisp.
- Store in an airtight container for up to 2 weeks.
- Serve with tea, coffee, or cold drinks.
Nutrition
PLEASE NOTE: Nutritional values are estimated by a computer and may vary based on ingredients and portion sizes. For personalised dietary advice, please consult a qualified healthcare professional.
Share on Facebook Pin This Recipe Share by TextPumpkin Falafel
Autumn is here, Â Autumn is there, Autumn is everywhere and that too in full swing!
I already sneezed quite few times, and I had my flu shot, so from now on double dose of Chai Masala in our tea!
I am not sad that summer is gone, I have many reasons to welcome autumn with open arms. I won't be too hot when the sun shines, it will be just right! No more creepy crawlies in the house and no more hay fever. Okay no more ice creams and smoothies but hot and cosy drinks are back on the menu.
Mornings are golden and crispy, and best highlight of this season is trees with red and golden leaves, they look so pretty, there are leaves to kick and the grounds are positively gleaming as beautiful autumn keep adding more and more vibrant colours to the landscape, reminds me of a Bollywood movie Mohabbatein and it's posters 🙂
Vegetable patches and farmers markets are flooding with autumn produces, in short autumn has spread it's wings upon us, and entered in our homes and kitchen too, so now for us time to embrace the autumn activities indoors and outdoors.
Autumn lead us more towards to the winter but in a pretty cool way. Halloween party, Bonfire Night, costumes and loads of sweets. Autumn also brings many Indian festivals like Navratri, Dussehra and Diwali. Lot's of fun starts with beautiful fireworks and glorious food !! Every celebration screams for satisfying and yummy food, and it will be more delicious when prepared with the seasonal produce.
If you're looking for a versatile autumn produce , certainly winter squash and pumpkin does the trick. From soups to pie, warm salads to curries and beverages, we can find this seasonal most favourite in all kinds of dishes.

Â

Our family favourite dish Pumpkin falafel, not fried but pan-seared served with wholemeal Lebanese flatbread, fresh salad and topped with chilli chutney tzatziki.
Sometimes I make in large quantity and freeze it for 2-3 weeks. Whenever feel like having them just pop them in hot oven and bake them for 25-30 minutes.
Notes :-
Butternut squash can be used instead of pumpkin.
If you do not have paniyaram pan, make small patties and pan fry them on a very low heat on the stove or bake them in the oven.

LIGHT PUMPKIN FALAFEL
ingredients:
- 400 g Pumpkin peeled and seeded
- 2 tablespoon + 4 tbsp. Olive oil
- 1 tsp. Chilli flakes
- ½ tsp. Cinnamon powder
- ½ tsp. Fennel seeds crushed
- per taste Sea salt
- 1 Red onion chopped
- 3-4 Garlic cloves

- 2-3 tbsp. Fresh parsley and coriander
- 2 tsp. Cumin and coriander powder
- 1 teaspoon Red chilli powder
- 1 tsp. Lemon juice
- 3-4 tbsp. Wholemeal bread crumbs
- 2 tbsp. Chickpea flour dry roasted
- 250g Soaked and drained chickpeas
instructions:
How to cook LIGHT PUMPKIN FALAFEL
- Preheat the oven to gas mark 6.
- Cut the pumpkin into 3-4 cm pieces.
- In a bowl add olive oil, salt, cinnamon, chilli flakes and fennel seeds.
- Mix and add pumpkin pieces, transfer it on the oven tray and bake about 20-25 minutes.
- Leave it to cool for a while.
- Once cool place roasted pumpkin in a blender together with all the remaining ingredients except the flour, breadcrumbs and oil.
- Blitz to a rough paste.
- Transfer the mixture into a bowl, now add bread crumbs and enough flour to make a smooth mix.
- Refrigerate the falafel mix to firm a little.
- Once you are ready to make, make ping pong ball-shaped sizes, heat the paniyaram pan add few drops of oil.
- Cook the falafel balls in a pan for 6-7 minutes on a very low heat till crispy and little brown.
- You can semi cook falafel in a paniyaram pan, then bake them in the oven.
- Once ready, serve hot.
- Enjoy!
NOTES:
If you do not have paniyaram pan, make small patties and pan-fry them on a very low heat on the stove or bake them in the oven.
285.03
16.16
2.20
29.62
7.54
22.08
6.73
8.27
178.17
0.53
Red Pepper and Chilli Chutney for Cheese
This red pepper and chilli chutney is the perfect accompaniment to your cheese board. It's sweet, mildly spicy with just the right amount of tang.

CARAMEL RAVA LADOO
Caramel Rava Ladoo, this irresistible dessert can be done in 20 minutes. Prepared with semolina, almond flour and sweetened with caramel.
Today is Ganesh Chaturthi, a religious festival close to every Hindu. This festival celebrated in honour of the Lord Ganesha, a ten-day-long festival people celebrates throughout India but Maharashtra is the state known for the grand scale Ganesh Chaturthi celebrations!

Ganesh Chaturthi means Ladoo / Modak season, foodies like me wait for Modak and Ladoos.
A sweet treat which is Lord Ganesha's favourite. Traditional Modak I have never prepared or eaten, in Gujarat, Churma Ladoo is hugely popular at this festival.
I've been preparing Gujarati Churma Ladoo, M/W method Churma Ladoo , Besan Ladoo , Paneer and Kaju Ladoo or Ghotma Ladoo for Prasad.
This year I wanted to make little difference for prasad since I bought a couple of Dul de leche / caramel tin couple of weeks back because it was on offer thought of making Rava Ladoo with almond meal and caramel as we are a huge fan of anything but caramel.
. These Ladoos tastes divine and scrumptious, little chewy and nutty. takes very little time to prepare.
More Ladoo Recipes

CARAMEL RAVA LADOO
ingredients:
- 1 ½ cup Semolina
- ½ cup Almond meal
- 1 tbsp. Desiccated coconut
- 1 tin Dul de leche or Caramel - 397g
- ½ tsp. Cardamom powder
- 4-5 tbsp. Ghee
- 1 tsp. Pistachio slivered (optional)
- 1 tbsp. Edible orange flowers ( optional)
instructions:
How to cook CARAMEL RAVA LADOO
- Dry roast semolina on a very low heat for 10-12 minutes.
- Remove from the heat, transfer into another plate.
- Add ghee in same pan and roast almond meal for 3-4 minutes on low heat.
- Add caramel and stir quickly.
- Now add about 1Â cup roasted semolina, combine well.
- If you think the mixture is enough thick don't add any semolina.
- Maybe add a couple of tbsp. semolina if you think mixture can take
- Add cardamom powder, mix well.
- Switch off the heat, transfer ladoo mixture into another plate.
- Let it cool little, apply ghee in your palms and make ladoo.
- I used modak mould.
- Garnish with pistachio and flower.
NOTES:
Ladoo mixture can be set in a tray and cut to diamond shape to make Barfi.
Melted chocolate can be drizzled on top of the laddoo and Barfi and omit pistachio nuts.
124.41
6.04
2.65
14.89
1.20
13.68
1.92
3.01
11.36
9.83
Masoor Dal Halwa
Celebrate Indian festivals with this divine Masoor Daal Halwa. It's prepared with Massor Daal (red lentils), ghee and sugar and enhanced with aromatic spices such as cardamom.

📖 Recipe

Masoor Dal Halwa
Ingredients
- 150 gram red lentils
- 75 gram ghee
- 150 gram sugar
- 450 millilitre milk
- ½ teaspoon Cardamom powder
Garnish
- 2 tablespoon almonds and pistachio chopped
Instructions
- Clean, wash and soak dal for at least 4 hours in water.
- Once again wash daal in clean water and grind coarsely in a food processor without any water.
- In a heavy bottom pan or kadai heat ghee, add daal and stir fry daal over very low heat until it’s raw aroma completely gone.
- Keep stirring the halwa mixture until you can see ghee separating from the daal mixture.
- You can smell the frying mixture and see the change of colour too.
- It will take a minimum of 35-40 minutes.
- Now add hot boiled milk and keep stirring continuously.
- After 5-7 minutes add sugar and keep stirring the mixture.
- Keep stirring until once again ghee separates from the halwa.
- This will take another 18-20 minutes.
- Now add cardamom powder, mix well.
- Transfer in a serving bowl garnishes it with slivered nuts.
Nutrition
PLEASE NOTE: Nutritional values are estimated by a computer and may vary based on ingredients and portion sizes. For personalised dietary advice, please consult a qualified healthcare professional.
Share on Facebook Pin This Recipe Share by TextBuff Vada (Farali Pattice)
Buff Vada or Farali Pattice is a Gujarati recipe mostly consumed during the fasting period (vrat). Farali Patties are an easy snack prepared with a coconut and dry fruit filling and mashed potato. This fasting recipe is best to serve with Dahi Chutney and Amli/ Imli Chutney.Â
Dahi chutney recipe is given in the recipe card below. The recipe of Farali Patties that I am sharing is copycat of what you get in Gujarati Mithai shops, often called Farsan shops.

3 Layer Kesar Badam Pista Barfi
Kesar Badam Pista Barfi is a rich and delicious Indian sweet made with full-fat milk powder, almond powder, pistachio powder, and fragrant saffron. Flavoured with cardamom and layered with nutty goodness, this melt-in-the-mouth barfi is perfect for Diwali, festivals, celebrations, or gifting.

Whether you're preparing it as prasad, serving it as a festive dessert, or sharing it with family and friends, this homemade mithai is always a crowd-pleaser. The beautiful layers of saffron, almond, and pistachio make it as impressive to serve as it is delicious to eat.
If you enjoy homemade barfi recipes, you may also like my Malai Dodha Barfi, Chocolate Layered Barfi, Milk Powder Barfi, and Nutella Barfi recipes.
As always if you make this recipe, be sure to leave me a comment, rate this recipe and tag me on Instagram @jcookingodyssey or #jcookingodyssey. I love seeing all your photos of my recipe recreations!
Don’t forget to follow me on social media using the buttons below – I can't wait to see you all there!
📖 Recipe

Kesar Badam Pista Barfi
Ingredients
- 6 cups full-fat milk powder
- ½ cup almond powder
- ½ cup pistachio powder
- 2 cups whole milk
- 2 cups sugar
- 6 tablespoons ghee divided
- 1 teaspoon cardamom powder
- 1 teaspoon saffron threads soaked in 4 tablespoons warm milk
- 2 tablespoons slivered almonds and pistachios for garnish
- Extra saffron threads for garnish
Instructions
- Mix the milk powder with 4 tablespoons of ghee in a large bowl. Set aside.
- Heat 1 tablespoon of ghee in a heavy-bottomed pan over low heat. Add the almond powder and roast for 3 to 4 minutes, stirring continuously. Do not allow it to brown.
- Transfer the roasted almond powder to a plate and leave to cool.
- Repeat the same process with the pistachio powder using the remaining 1 tablespoon of ghee. Set aside to cool.
- In a separate heavy-bottomed pan, combine the milk and sugar. Cook over medium heat, stirring frequently, until the mixture thickens and resembles condensed milk.
- Stir in the cardamom powder and remove from the heat.
- In a large non-stick or heavy-bottomed pan, gently roast the milk powder mixture over low heat for 4 to 5 minutes, stirring continuously to prevent burning.
- Gradually add the prepared milk and sugar mixture to the roasted milk powder, mixing quickly until smooth and combined.
- Divide the mixture evenly among three bowls.
- Mix the roasted almond powder into one bowl, the roasted pistachio powder into the second bowl, and the saffron milk into the third bowl.
- Grease a tray or plate with a little ghee. Spread one mixture evenly into the tray, followed by the second layer and then the third layer.
- Smooth the top with a spatula and gently press down to create even layers.
- Leave to cool completely and set.
- Cut into squares or diamonds and garnish with slivered almonds, pistachios, and saffron threads before serving.
Nutrition
PLEASE NOTE: Nutritional values are estimated by a computer and may vary based on ingredients and portion sizes. For personalised dietary advice, please consult a qualified healthcare professional.
Share on Facebook Pin This Recipe Share by TextTandljo Keri Thepla

Who doesn't love a plate of hot and steamy parathas, smeared with oil or ghee straight from the skillet. Either with a side of Indian Masala Chai ( tea ) or creamy yogurt and a favourite pickle.
We love paratha anytime, everyone in the family have their own favourite, and raves about it, whether they are Fenugreek leaves paratha, Oats, Jowar and Methi Paratha , Methi Dhebra
These Tandljo Keri Thepla are so easy to prepare, just throw every ingredients in the plate, knead the dough and starts rolling them.
These Tandljo Keri Parathas are absolutely yummy, soft inside and little crispy outside, full of flavour. Either prepare them in the morning for a breakfast and have it with a cuppa, at lunchtime with creamy yogurt and pickle or in the evening with a potato sabji ( batata sukhi bhaji ). I would recommend making them before amaranth season goes away !
As always if you make this recipe, be sure to leave me a comment, rate this recipe and tag me on Instagram @jcookingodyssey or #jcookingodyssey. I love seeing all your photos of my recipe recreations!
Don’t forget to follow me on social media using the buttons below – I can't wait to see you all there!
📖 Recipe

Tandljo Keri Paratha (Amaranth Leaves and Raw Mango Paratha)
Ingredients
- 250 grams green amaranth leaves tandljo, finely chopped
- 1 large raw mango
- 1½ cups whole wheat flour chapati atta
- 3 tablespoons fresh coriander finely chopped
- 3 tablespoons green chillies and ginger crushed
- salt to taste
- 2 tablespoons sesame seeds
- 2 tablespoons oil for the dough
- 1 tablespoon red chilli powder
- ½ teaspoon turmeric powder
- ½ teaspoon garam masala
- ½ teaspoon sugar
- 1 tablespoon ground cumin and coriander
- freshly ground black pepper to taste
- oil for shallow frying
Instructions
- Clean, wash, and roughly chop the amaranth leaves.
- Peel the raw mangoes, chop roughly, and blend into a smooth pulp.
- In a large mixing bowl, combine the amaranth leaves, mango pulp, coriander, crushed green chillies and ginger, salt, sesame seeds, oil, red chilli powder, turmeric powder, whole wheat flour, garam masala, sugar, ground cumin and coriander, and black pepper.
- Mix everything together until well combined.
- Gradually add water as needed and knead into a soft dough.
- Cover and rest the dough for 10 to 15 minutes.
- Knead the dough briefly again, then divide it into 10 equal portions.
- Roll each portion into a smooth ball.
- Lightly dust a work surface with flour and roll each ball into a round paratha.
- Heat a tawa or griddle over medium heat.
- Place a paratha on the hot tawa and cook for about 20 seconds, until small bubbles begin to appear.
- Flip the paratha, drizzle with a little oil, and cook until golden brown spots develop.
- Flip again, applying a little more oil if needed, and press gently with a spatula to ensure even cooking.
- Continue cooking until both sides are golden and lightly crisp.
- Repeat with the remaining dough.
Notes
- Adjust the quantity of green chillies to suit your preferred spice level.
- The tartness of the mango may vary, so taste and adjust seasoning if needed.
- Serve with pickle, raita, yoghurt, chutney, or masala chai.
Nutrition
PLEASE NOTE: Nutritional values are estimated by a computer and may vary based on ingredients and portion sizes. For personalised dietary advice, please consult a qualified healthcare professional.
Share on Facebook Pin This Recipe Share by TextVegan Thai Yellow Curry Paste (authentic recipe)
Elevate your Thai curry night with this authentic Thai yellow curry paste that is suitable for vegans and vegetarians. This curry paste follows a traditional recipe, you can make a big batch and freeze it ready for use any day to make perfect Thai yellow curry within minutes.

Puy Lentils and Swiss Chard Daal


Puy Lentils and Swiss Chard Daal
ingredients:
- 250 g Puy Lentils
- 250 g Swiss Chard
- 3 tbsp. Olive oil
- 1 Large tomato chopped
- 4-5 Garlic cloves

- 5-6 green chillies slit
- 1 tsp. Cumin seeds
- 1 Onion chopped
- 1 tbsp. Ginger-Garlic paste
- 1 tsp. Kasoori Methi - dried fenugreek leaves
- to taste Salt
- 1 tsp. Curry Powder ( optional )
- 1 tsp. Red Chilli Powder
- ½ tsp. Turmeric Powder
- 2 tsp. Cumin and coriander powder
- ½ tsp. Garam Masala
- Pinch Hing ( asafoetida )
instructions:
How to cook Puy Lentils and Swiss Chard Daal
- Clean, wash and soak lentils in water for half an hour to one hour.
- Wash and roughly chop the swiss chard, tomato.
- Place lentils, swiss chard, tomato, garlic cloves, green chillies in a pressure cooker with 2 cups of water and cook till three whistles.
- Let the pressure cooker cool naturally.
- Open the pressure cooker lid and mush the lentil slightly with the back of the spoon or ladle.
- Heat oil in a heavy-based pan or kadai, add cumin seeds.
- As soon as they crackle add hing and chopped onion.
- Saute the onion till light pink, add ginger-garlic paste and cook further 2 minutes.
- Add kasoori methi, red chilli powder, turmeric powder, cumin and coriander powder and curry powder.
- Cook the mixture for few seconds and add cooked lentils.
- Mix everything, add salt and simmer the daal for 7-8 minutes or your desired consistency.
- Turn off the heat, garnish with fresh coriander and serve HOT with Roti, Rice and salad.
- Enjoy!
NOTES:
Mustard leaves, Amaranth or Spinach can be used instead of swiss chard.
253.62
12.74
1.72
29.36
9.21
20.15
7.44
9.89
340.21
0.26
Hazelnut Butter, Buckwheat and Honey Cookies


These chubby and plump, crispy outside, soft inside, nutty and wholesome cookies came out of my oven, few weeks back, (yes, surely I do take my time in posting recipes). Surely these cookies can take one's taste buds to next level. I never thought that I'll be able to make a good cookie which can be utterly addictive. In these cookies added protein rich hazelnut butter and ditched butter, also clearly excels robust flavours of buckwheat and honey in them and the occasional burst of cinnamon sugar gives nice little kick, so it was perfect in my book !


Hazelnut Butter, Buckwheat and Honey Cookies
ingredients:
- 1 cup hazelnut butter
- ¾ cup buckwheat flour
- ¼ cup rolled oats
- 100ml rich honey for baking
- Pinch fine sea salt
- 1 tsp. baking powder
- 2 tsp. cinnamon powder
- 3-4 tbsp. caster sugar
- 1 tsp. vanilla extract
instructions:
How to cook Hazelnut Butter, Buckwheat and Honey Cookies
- Dry roast buckwheat flour and rolled oats for 3-4minutes.
- In a big bowl add buckwheat flour, oats, salt and baking powder and whisk together.
- In another big bowl combine Hazelnut butter, Vanilla, Honey and flour mixture.
- Stir vigorously for 20-30 seconds and form a dough.
- Take one teaspoon and form the cookie dough into small balls.
- Mix sugar and cinnamon powder and coat balls into.
- Place cookie balls on a lined baking sheet at least 2 inches apart.
- Bake cookies in a preheated oven on gas mark 3-4 for 18-20 minutes.
- Keep rotating the baking sheets from front to back once or twice until cookies are slightly cracked and puffy.
- Let the cookies cool completely.
- Enjoy!
NOTES:
209.02
12.41
0.94
23.80
2.99
20.80
14.63
4.13
53.16
0.00