You can make the creamiest Caramel Mousse with 2 ingredients! In this easy mousse recipe, you need just caramel and heavy cream.
A super simple egg-free, gelatine-free, gluten-free and no-cook dessert.
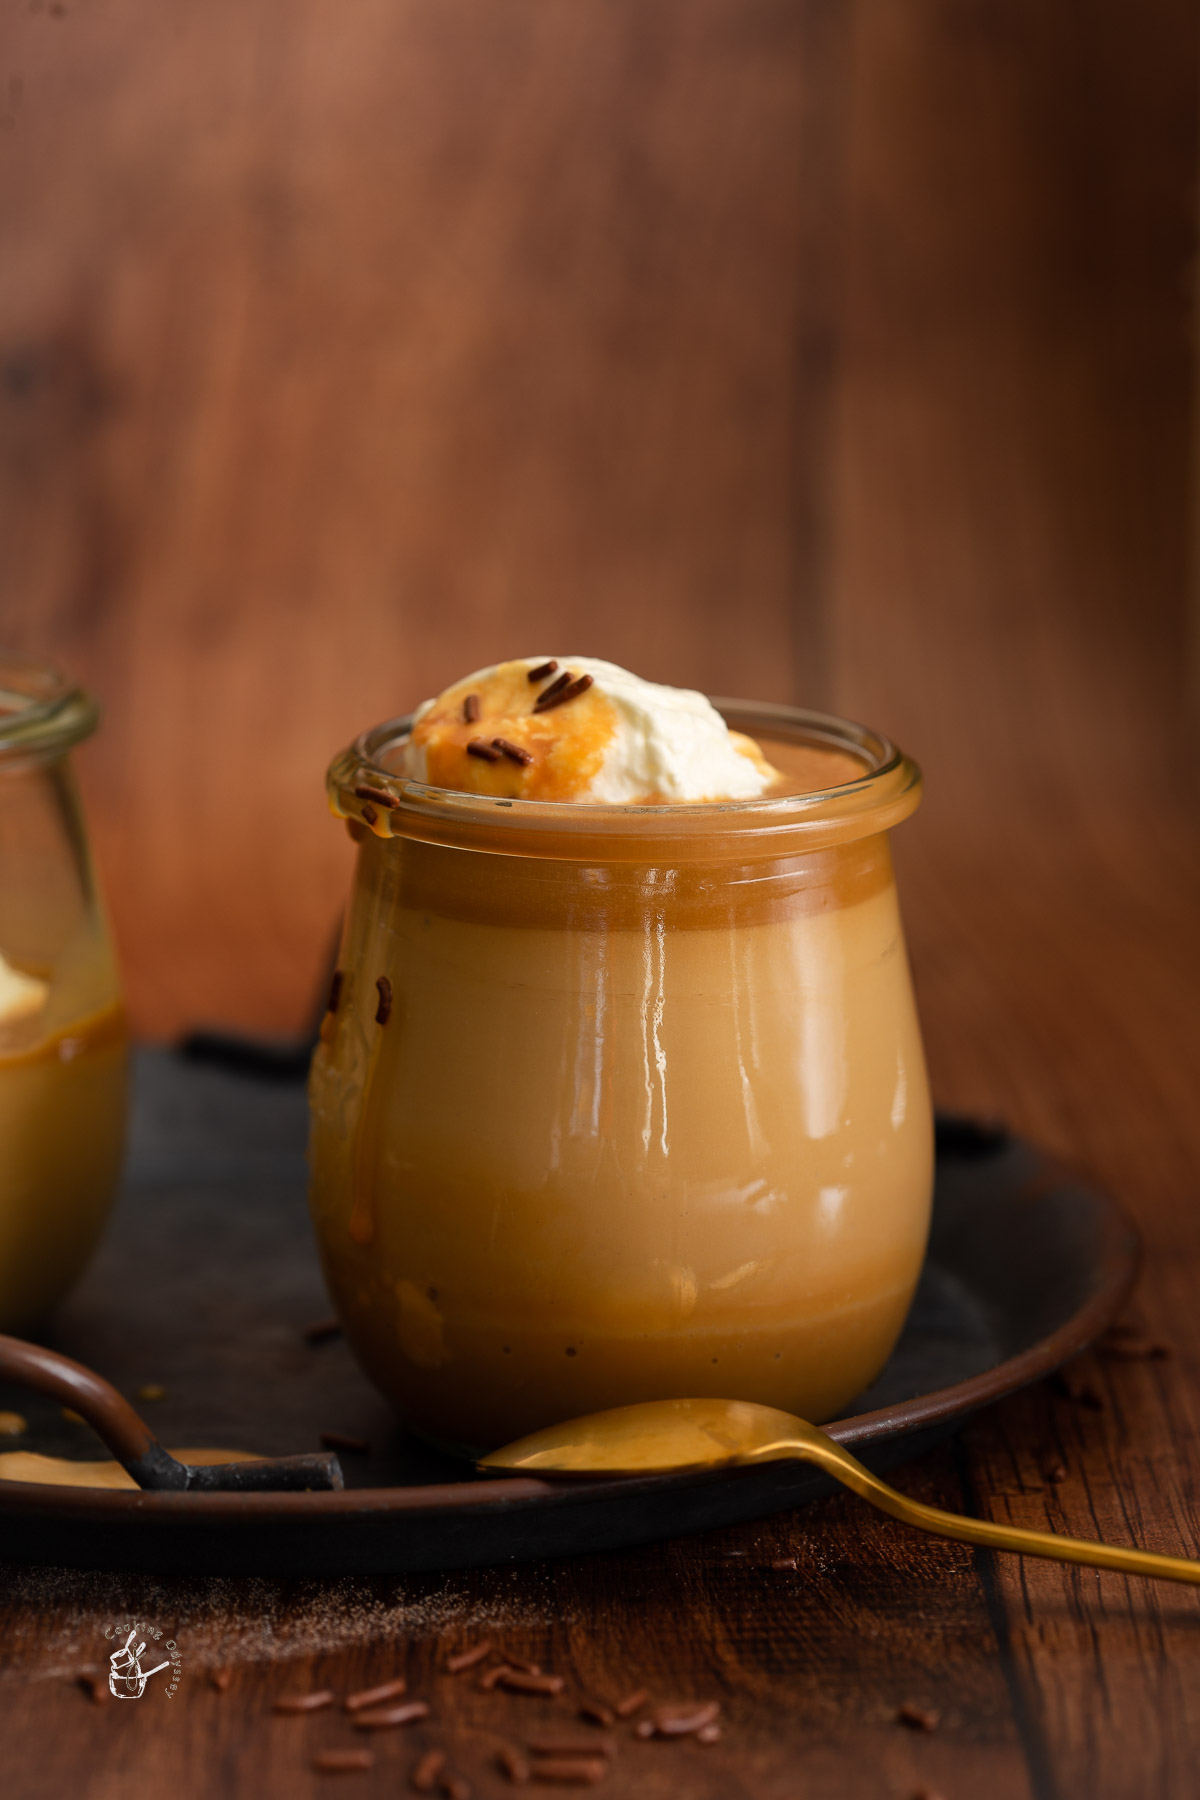

You can make the creamiest Caramel Mousse with 2 ingredients! In this easy mousse recipe, you need just caramel and heavy cream.
A super simple egg-free, gelatine-free, gluten-free and no-cook dessert.
This is the ULTIMATE Air Fryer Chips recipe! These Air Fryer Triple Cooked Chips have a crispy exterior and are soft and fluffy inside.
These home cut chips are easier to make than the original version. Perfect as they are or as a side to your favourite meal!
Dunk them into this sour cream and chive dip!

This is the easiest Air Fryer Pasta Bake recipe that is perfect for lunch or dinner. Simply cook your favourite pasta, mix with pasta sauce, top with cheese and cook in the air fryer.
It is prepared with simple ingredients just like my One Pot Ricotta and Lemon Pasta.

This Turkish Semolina Halva or Irmik Helvasi is a delicious semolina dessert from Turkish cuisine. Made from just five basic ingredients, this halva is so easy and quick to make.

Prepare fresh pineapple juice for a refreshing summertime drink. This homemade recipe is made with fresh pineapple and has the perfect balance of sweet and tart. Takes less than 10 minutes to prepare!

This is the best Onion Bhaji recipe! Like it makes ridiculously good onion bhajis! These Indian Onion Fritters are a delicious side dish or appetizer, perfect for curry night! This easy recipe is vegan, gluten-free and tastes like your local takeaway but better!
Serve with this trio of Poppadom Dips for curry night!

Samosa Chaat is a style of Indian chaat recipes that is prepared with crispy samosa, chickpea curry, chaat chutney and fine sev. In this easy Samosa Chaat recipe, I have prepared spiced chickpeas instead of chole for a quick appetizer that can be prepared in less than 30 minutes.

If you're wondering can you cook baked potato in the air fryer, you definitely can! This is the BEST way to make Jacket Potato (aka Baked Potato). I like to air fry baked potato after microwaving it first for a couple of minutes for the crispiest skin and fluffiest potato inside.
This easy air fryer recipe has a cooking time of just 15 minutes in total!

This Indian Chickpea Salad is a delicious salad with Indian flavours using fresh vegetables and fresh herbs. Prepare this simple salad as an appetizer, side dish or light lunch. This easy recipe can be prepared in less than 10 minutes! It's vegan and gluten-free.

You can learn how to make mango pulp with this mango puree recipe using fresh mangoes. This mango pulp recipe takes only 5 minutes and can be used in so many mango recipes.

Prepare this easy Indian Mixed Vegetable Curry recipe for a healthy midweek dinner. Simple Mix Veg Curry is made with basic ingredients such as fresh vegetables and Indian spices. It is vegan, gluten-free and ready in less than 30 minutes.

These are the best 3 poppadom dips and sauces that are served in Indian restaurants alongside crunchy poppadoms and starters. These 3 Indian condiments are Mango Chutney, Indian Mint Sauce and Indian Onion Chutney.
Prepare these easy Indian dipping sauces for poppadoms for your next curry night. Included in the post is a recipe for Mango Chutney.
Make your own homemade poppadoms from scratch.

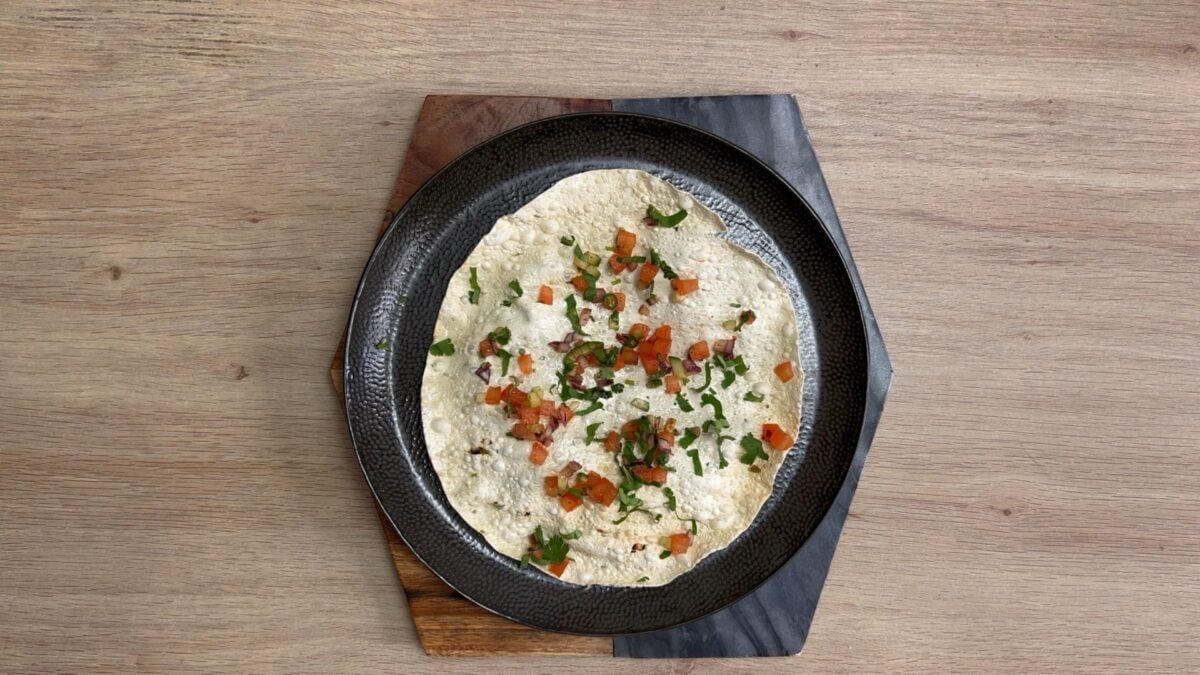
Masala Papad or Masala Poppadoms are a quick Indian starter or snack prepared with crispy thin papad and finely chopped onion, tomato, coriander and cucumber.
This recipe is vegan and takes less than 10 minutes.

Poppadoms, papadums, or papad are a wafer thin crispy snack originating in India. They are made with either urad dal or rice flour and are cooked just before serving by deep-frying or heating on a pan.
Poppadoms are served in restaurants with easy Indian dips like Indian Onion Salad, Indian Mint Sauce and Red Indian Onion Cold Chutney.
They are also prepared in peoples homes alongside biryani and curries.
Masala Papad is made by topping the poppadoms with a finely chopped Indian salad and basic Indian spices. This spicy tangy mixture consists of tomatoes, onions, cucumber, coriander, red chilli powder and chaat masala.
Masala Poppadoms can also be found on Indian restaurant menus around the world and are great to munch on whilst awaiting the first course. It is also a street food in some parts of India.
The combination of crunchy poppadoms and the softer yet crunchy salad is so irresistible!

Papad - I have used urad dal poppadoms that have been cooked on the pan without any oil. You can also use deep-fried poppadoms made from either urad dal or rice flour but they tend to curl up making it more difficult to top them with the salad.
You can also choose flavoured papad such as cumin, black pepper, green chilli to name a few.
The finely chopped toppings are essentially kachumber, which is an Indian side salad. For a variation sometimes I use Shirazi salad too.
If preparing the ingredients for later, do not add the salt until the last minute as it will draw out moisture and make it soggy.
Onion - you can use red or white onion. Leave out onions if preparing for an occasion that calls for no onion no garlic
Tomato - I have used salad tomato which is not as fleshy. Remove the seeds as they will make the papad soggy.
Cucumber - optional but goes so well. Scoop out the seeds to prevent the papad going soggy
Green chillies - finely sliced fresh green chillies are optional if you don't want it spicy or remove the seeds
Coriander / cilantro - finely chop fresh coriander leaves
Spices - red chilli powder, chaat masala and salt.
If you do not have chaat masala, an alternative spice blend to use is red chilli powder, cumin coriander powder, black pepper powder and a dash of lemon juice.
Variations - you can add chopped raw mango and a drop of mint coriander chutney to make a Masala Papad Chaat
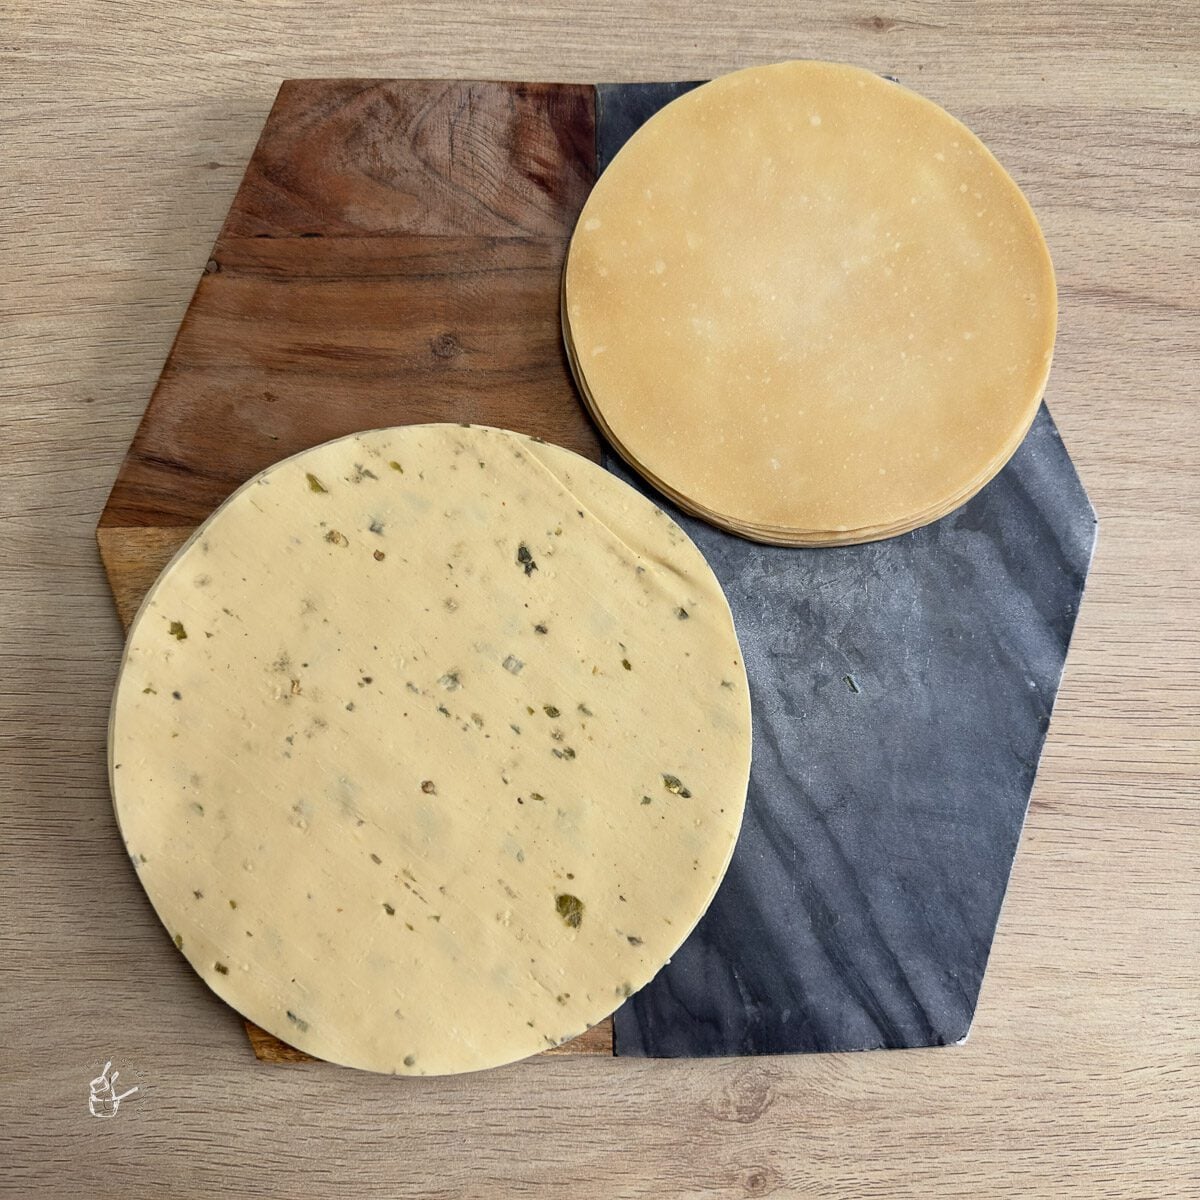
You can make your own poppadoms at home or buy ready to eat papad from the supermarket.
Follow these instructions on how to make poppadoms at home within minutes. A less detailed version is given below.
You can dry roast the papad in a hot pan until small bubbles appear on both sides.
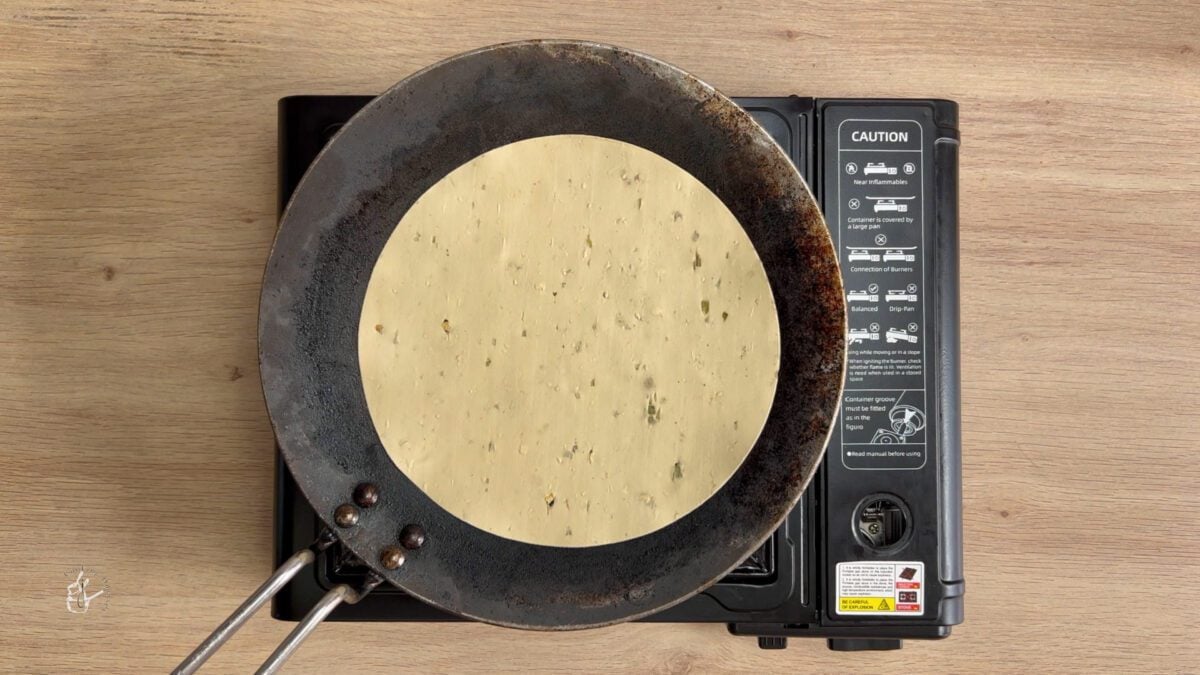
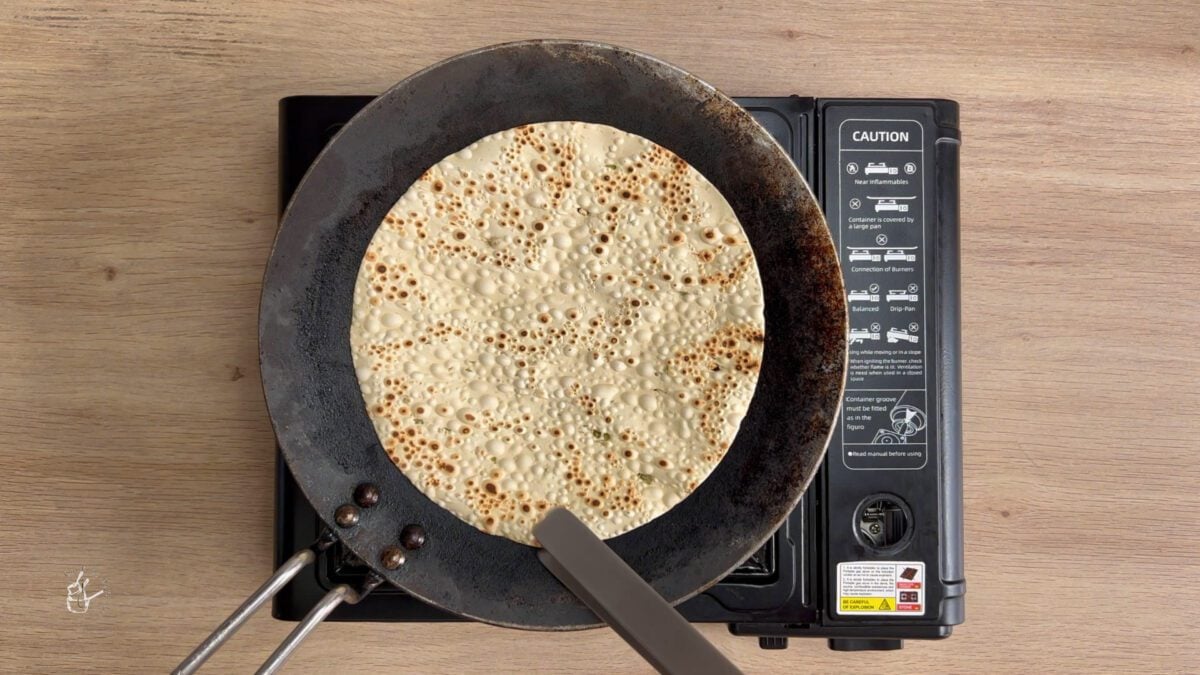
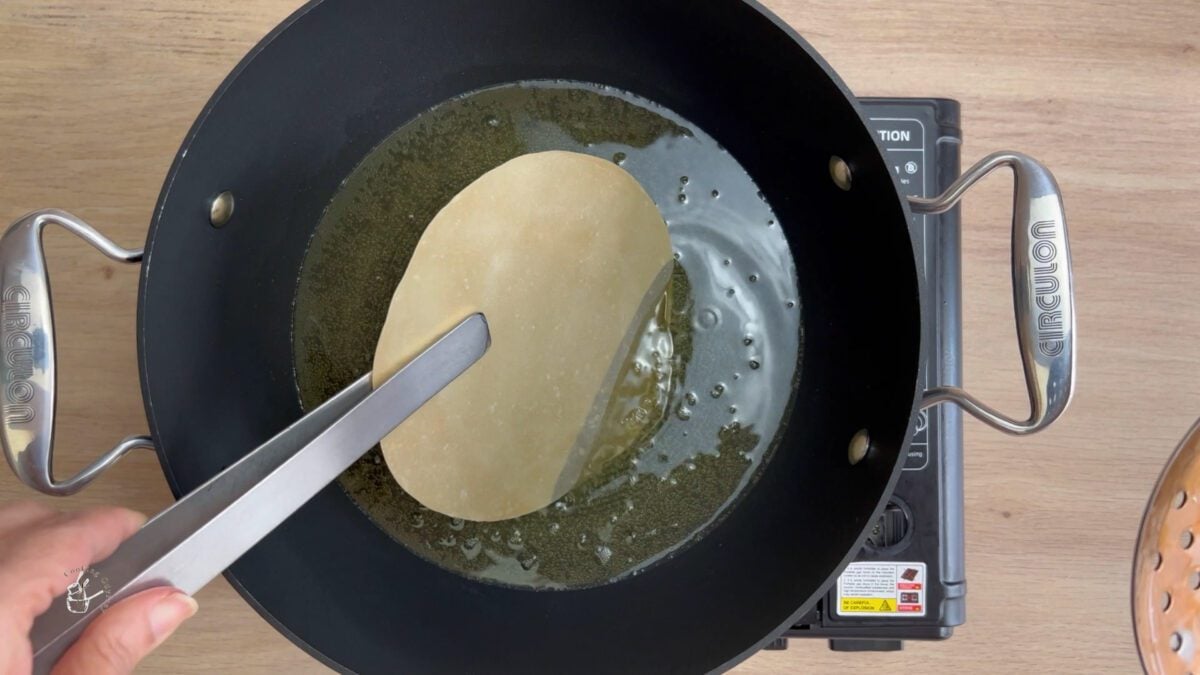
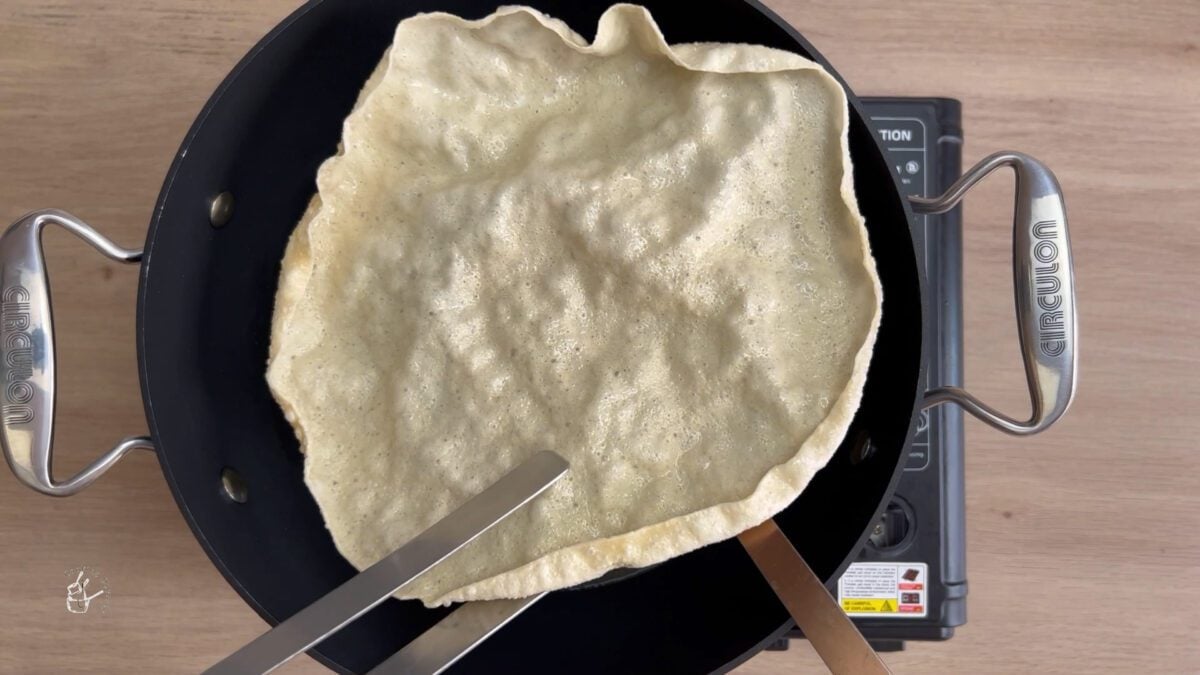
To deep-fry, heat oil in a wide pan. When the oil is hot, add one papad at a time. As soon as it expands, remove from the oil and drain.
In both methods, the papad will become crunchy as they cool.
If serving to a wide range of guests, you may want to keep the vegetables separate and allow your guests to build their own papad.
Finely chop your onions, tomatoes and cucumber and add to a bowl. Scoop out the tomato and cucumber seeds
Next, finely chop the coriander/cilantro leaves and mix with the salad.
If serving immediately, add the red chilli powder, chaat masala and a pinch of salt.
Mix well.
Top the poppadoms with a spoon or two of the kachumber and spread out.
Serve immediately.


Do not prepare this recipe far in advance as the papad easily go stale and the chopped salad will release water.
Remember to scoop out the fleshy parts of the tomatoes and cucumber before using.
You can either toast the papad or deep-fry it.
To microwave the poppadoms, brush both sides with oil and microwave for 40-60 seconds until bubbles have appeared.
Prepare the toppings before cooking the papad and add the toppings just prior to serving.
You can also let everyone help themselves by keeping a stack of cooked papad separate from a bowl of the toppings.
Masala Poppadom make an excellent starter or appetizer to curry night, along with creamy and cooling Indian yogurt dip - boondi raita. It is also great to serve with drinks.

Store leftover salad in an airtight container and place in the fridge for up to a day. The salad vegetables will likely release moisture so are best enjoyed the next day as a side salad rather than masala poppadom topping.
You can store cooked papad in an airtight container at room temperature for a day. After this, the papad becomes stale
As always if you make this recipe, be sure to leave me a comment, rate this recipe and tag me on Instagram @jcookingodyssey or #jcookingodyssey. I love seeing all your photos of my recipe recreations!
Don’t forget to follow me on social media using the buttons below – I can't wait to see you all there!

PLEASE NOTE: Nutritional values are estimated by a computer and may vary based on ingredients and portion sizes. For personalised dietary advice, please consult a qualified healthcare professional.
Share on Facebook Pin This RecipeAir Fryer Breaded Mushrooms are the perfect side dish or appetizer. This air fryer mushroom recipe leads to super crispy breaded mushrooms. Make these quick and easy breaded mushrooms that are also vegan and gluten-free!

Mango Kalakand is a delicious Indian sweet made with mango pulp, paneer, milk powder and cardamom. This easy mithai is perfect for festivals and special occasions. I shape them into balls for a fun twist!

This Tindora nu Shaak, or Tindora Sabzi, is an easy to make Gujarati curry prepared with ivy gourd and basic spices. I don't use onion or garlic. It's vegan, gluten-free and can be ready in 15 minutes. Win!

Poppadoms are a delicious Indian appetizer popular in Indian restaurants. With this quick and easy homemade poppadom recipe, you can prepare perfectly crunchy poppadoms to serve during curry night! Included are fried, tava cooked, air fryer and microwave recipes.
Follow the video instructions or step by step method for homemade fried poppadoms in 5 minutes!

This Brinjal Bhaji is the British Indian restaurant (BIR) style aubergine curry I wanted to recreate after our favourite takeaway closed. Cubes of aubergine are pan-fried first, then folded through a thick onion, tomato and masala until almost melting but still holding their shape. Within 20 minutes you'll have a semi-dry, deeply savoury and vegetable side for curry night.

SUMMARIZE & SAVE THIS CONTENT ON
I loved Indian takeaways as a kid.
My favourite was always saag aloo, my Mum's bhindi bhaji and my dad loved brinjal bhaji. Brinjal bhaji is an Indian aubergine curry often served as a side dish in British Indian restaurants.
When our favourite takeaway eventually closed, my Mum and I worked on recreating those familiar curry-house flavours at home.
That is the spirit of this recipe. It is not a dry home-style aubergine sabzi, and it is not a big saucy aubergine curry (Gujarati aubergine potato curry or North Indian baingan masala).
It sits somewhere in the middle: soft aubergine, thick tomato masala, enough oil for flavour, and that curry-house finish from nigella seeds and kasoori methi.
If you think you do not like aubergine because it is spongy, watery or oily, this is the kind of recipe that might change your mind!
It is completely different from onion bhaji, which is a crispy fritter served as a starter. Here, “bhaji” means more of a curry or vegetable side dish.

You should find all ingredients in major British supermarkets. Find the full ingredients list at the bottom of the post.
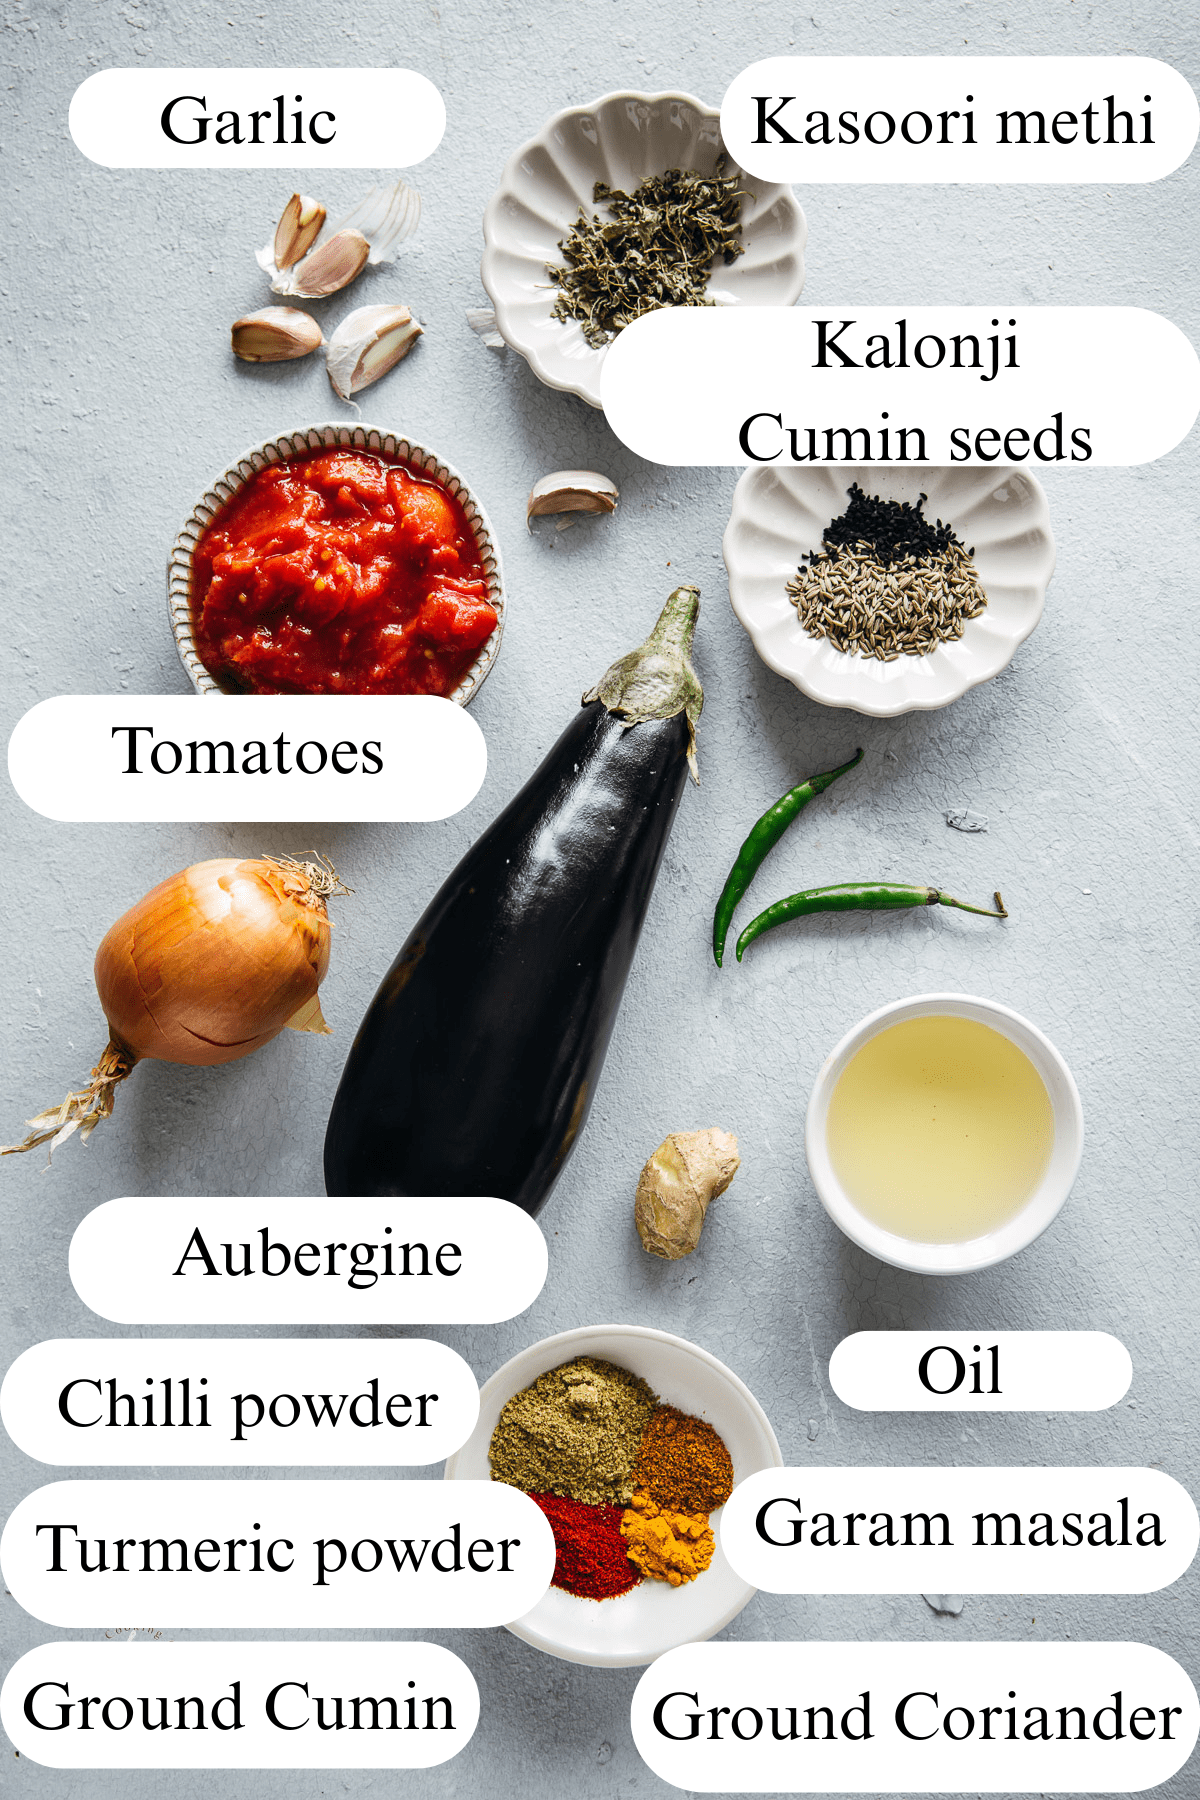
Aubergine
I usually use large British supermarket aubergines for this recipe because they are easy to find and work well.
Small Indian brinjals are also lovely, but I save those more for recipes where their shape matters, like Gujarati stuffed aubergine.
Cut the aubergine into cubes. Batons or wedges also work, but cubes cook faster and, in my experience, absorb less oil than larger wedges.
The finished aubergine should be almost melting, but still holding its shape.
Oil
You do need a reasonable amount of oil here.
I have tried reducing it, but the texture and flavour are not the same. This is British Indian restaurant-style brinjal bhaji, and aubergine needs oil to cook properly.
That said, it should not be greasy. Too much oil makes the aubergine heavy, and you can end up with oil dripping back out of the pieces.
The aim is soft, silky aubergine, not oily aubergine.
I use either sunflower oil which is neutral in flavour or pomace olive oil.
Onion, garlic, ginger and chilli
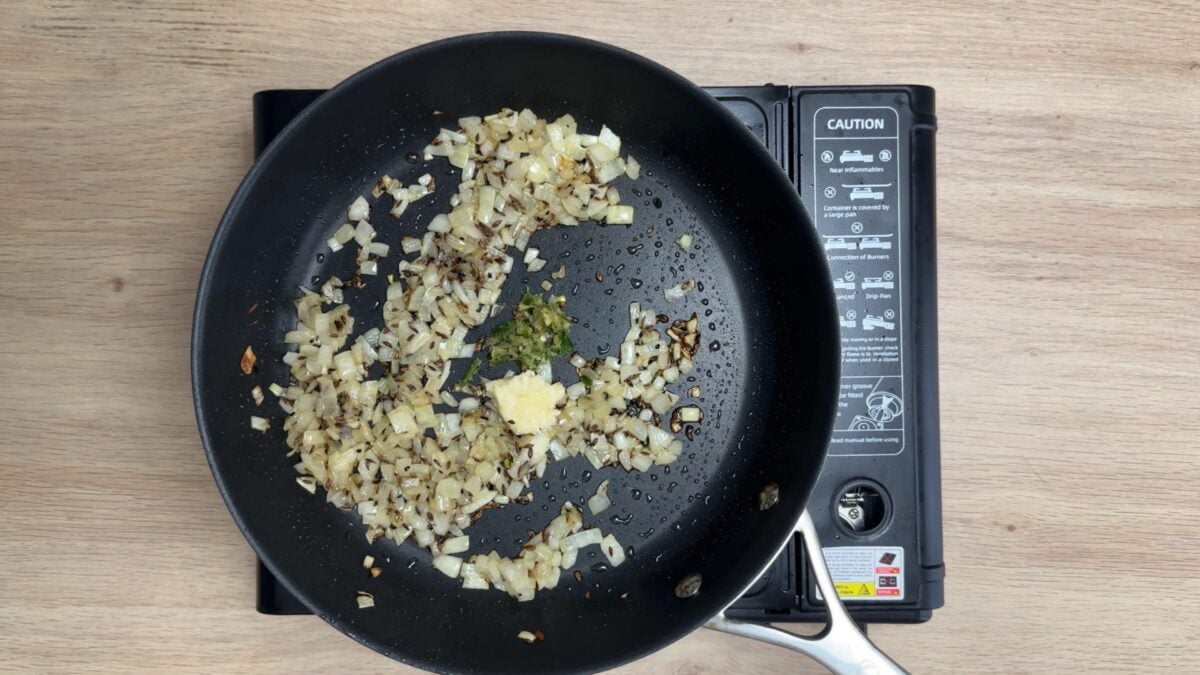
The onion, garlic, ginger and green chilli help create the curry-house masala base. Cook the onion properly so it softens before the tomatoes go in.
Tomatoes
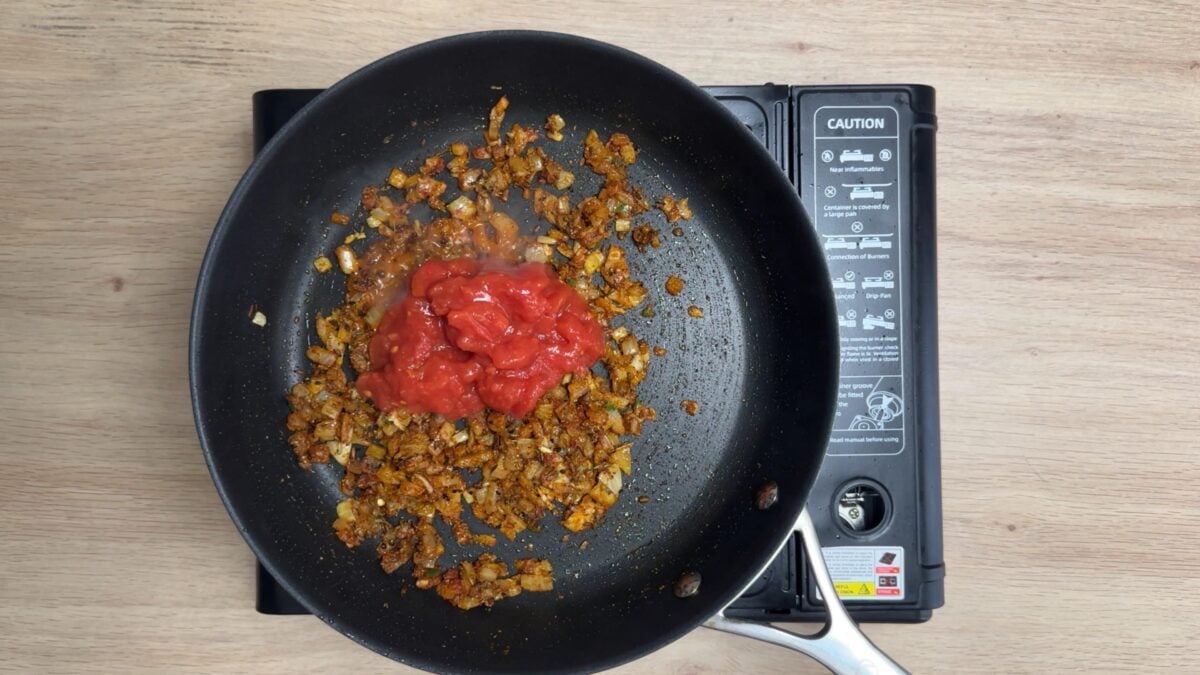
Passata, crushed tinned tomatoes or tinned chopped tomatoes work best.
They give the curry more moisture and a deeper tomato flavour than fresh tomatoes. Fresh tomatoes work, but I find they do not give quite the same sauciness.
Tomato paste can work too, but use much less because it is concentrated.
At this point, you may want to make extra Indian curry paste with these ingredients and freeze into blocks for convenience!
Spice powders
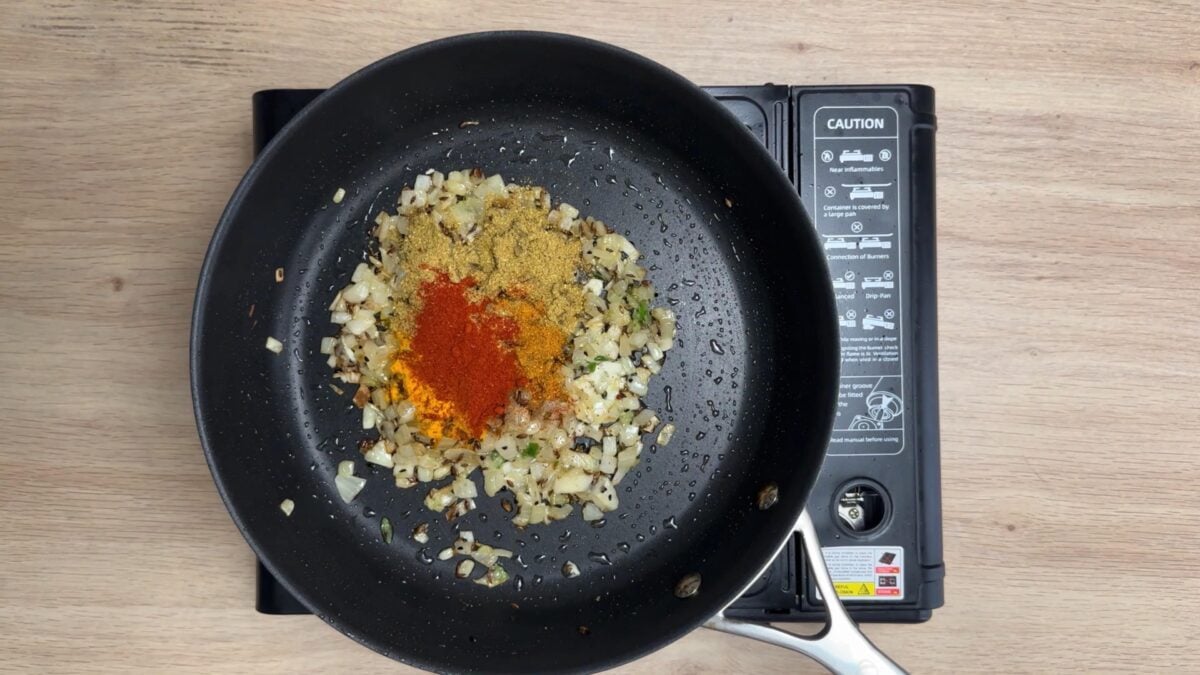
As with most Indian curries, I've used the classic red chilli powder, turmeric powder, cumin coriander powder and garam masala. I've also tested this dish with both my homemade mild curry powder and hot Madras curry powder and found both do a pretty good job - it depends on your spice preference which one you use and the quantities too.
Nigella seeds
Nigella seeds give a proper curry-house flavour. You should find them in the Asian food aisle.
I strongly recommend using them, but the recipe still works without them.
Kasoori methi
Kasoori methi gives that slightly restaurant-style aroma at the end. Crush it between your palms before adding so the flavour spreads through the curry.
Sugar
I keep a little sugar in this recipe.
It balances the tomato, the spices and any slight bitterness from the aubergine.
Keep all the ingredients ready as this aubergine curry cooks quite fast.
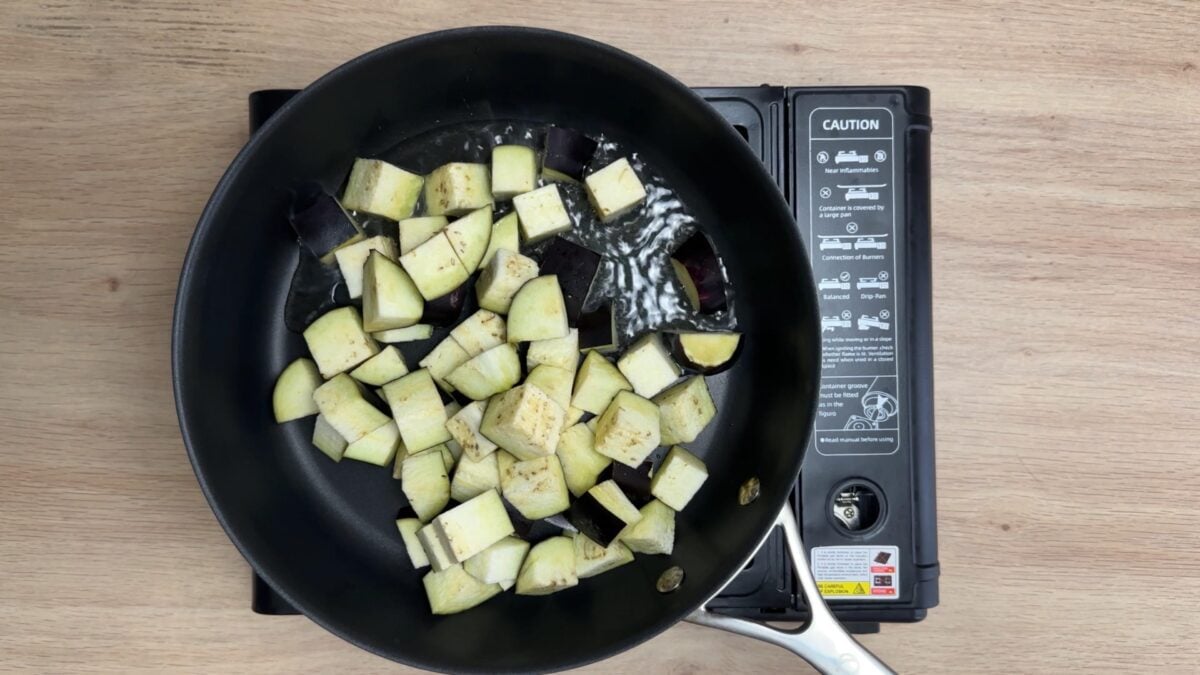
Wash the aubergine and pat dry using a clean kitchen towel. Cut the aubergine into medium size dices just before you start cooking (they oxidise easily!).

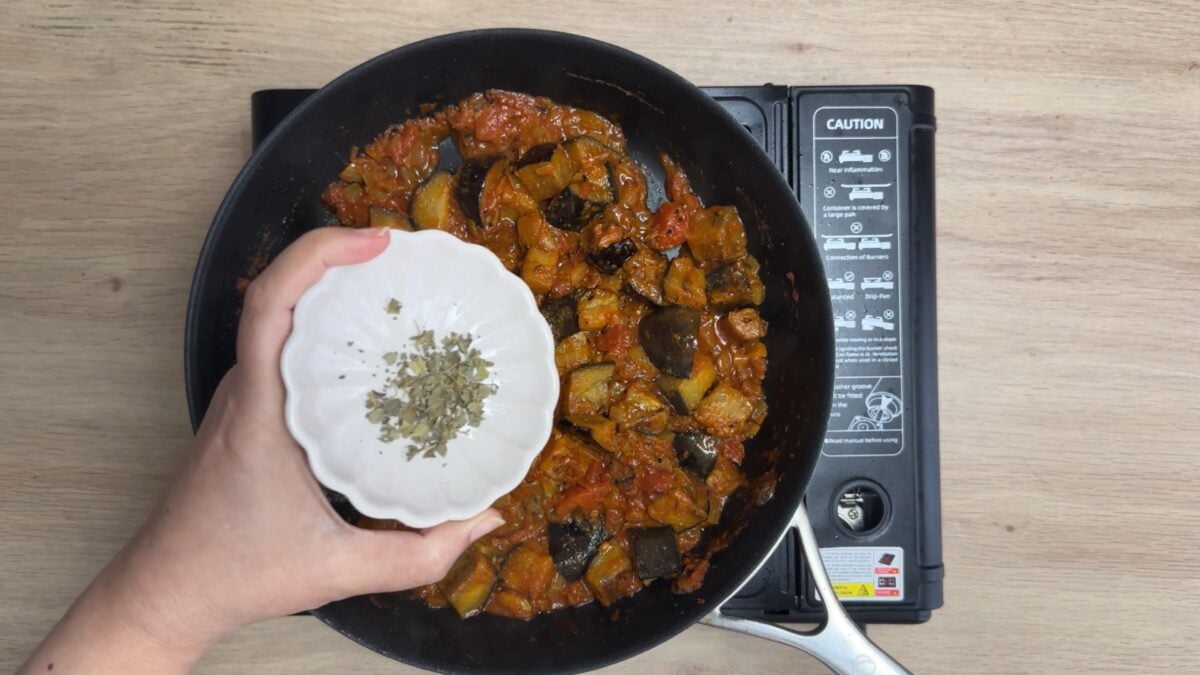
Technique
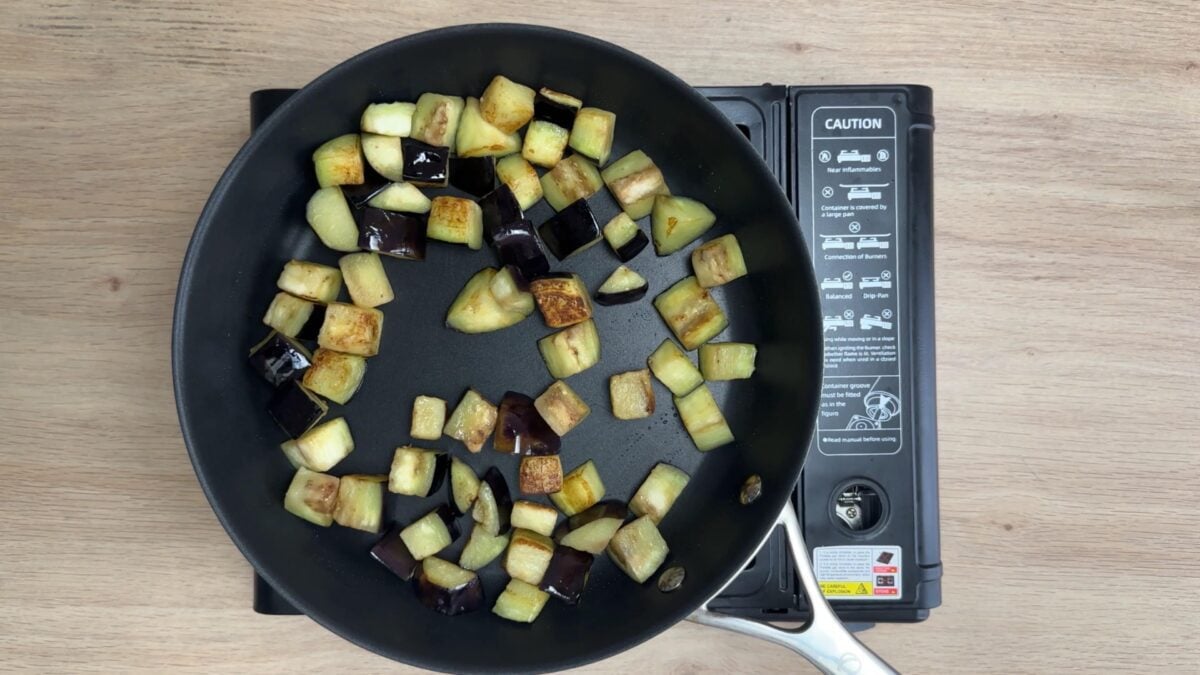
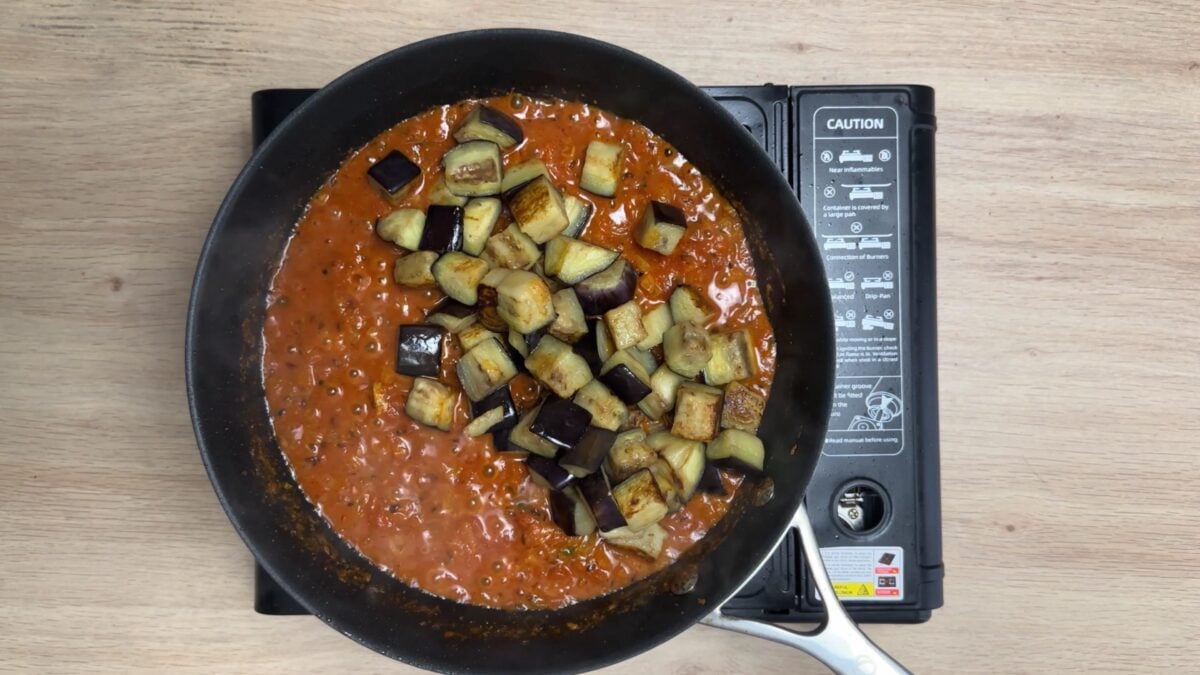
Pan-frying is the step that makes this brinjal bhaji work.
Aubergine has a spongy texture. If you cook it in water first, it can absorb liquid and become soft in the wrong way: watery, spongy and a bit flat.
When you pan-fry the aubergine first, the oil coats the pieces and helps them cook from the outside. They soften, brown slightly and hold their shape better once they go into the masala.
I prefer pan-frying over air frying or oven roasting here because it keeps the aubergine softer and more silky. In my experience, air frying and roasting can dry the pieces out, especially before they are added to the curry.
Brinjal bhaji is usually served as a side dish, but I happily eat it as a main as part of a curry night at home.
For a proper British Indian restaurant-style meal, serve it with restaurant style tarka dal, takeaway style yellow pilau rice and garlic coriander naan.
Add homemade poppadoms, trio of poppadom dips and indian onion salad if you want the full takeaway-style spread. This spicy red onion chutney is great too!
For more curry-house-style vegetable sides, try bombay potatoes, a quick mushroom and pea curry or indian vegetable curry.
Store leftovers in an airtight container. The curry will keep well in the fridge for 3-4 days. Reheat in a pan or in the microwave.
You can freeze brinjal bhaji but the aubergines may loose their texture upon defrosting.
Why is my aubergine spongy?
It may have been cooked in too much water, or not browned in oil first. Pan-frying helps the aubergine soften without becoming waterlogged.
Why is my brinjal bhaji oily?
Aubergine needs oil, but too much can make the curry greasy. Use enough to coat and cook the aubergine, then cook the masala until glossy rather than swimming in oil.
Can I use fresh tomatoes?
Yes, but passata, crushed plum tomatoes or tinned chopped tomatoes give a better curry-house texture. Fresh tomatoes are lighter and less saucy.
Do I need nigella seeds?
I strongly recommend them for curry-house flavour, but you can leave them out if you do not have them.
Can I air fry the aubergine?
You can, but pan-frying gives the best texture for this recipe. Air frying can make the aubergine drier.
Is brinjal bhaji vegan?
Yes, this recipe is naturally vegan and gluten-free.
Can I freeze brinjal bhaji?
I do not love freezing aubergine curries because aubergine can lose its texture once defrosted. The flavour is still good, but the pieces may become softer.

As always if you make this recipe, be sure to leave me a comment, rate this recipe and tag me on Instagram @jcookingodyssey or #jcookingodyssey. I love seeing all your photos of my recipe recreations!
Don’t forget to follow me on social media using the buttons below – I can't wait to see you all there!

PLEASE NOTE: Nutritional values are estimated by a computer and may vary based on ingredients and portion sizes. For personalised dietary advice, please consult a qualified healthcare professional.
Share on Facebook Pin This RecipeThis Iced Coffee Recipe with Ice Cream is the perfect drink for any coffee lover on a hot summer day! This delicious cold coffee recipe is made with a scoop of vanilla ice cream instead of using ice cubes!

My version of zucchini curry is prepared with basic Indian spices and is a dry sabzi. It's a simple recipe that can be prepared in less than 20 minutes.

This easy Bombay Potatoes recipe is full of flavour! Bombay Aloo takes only 20 minutes and is the perfect side dish to accompany an Indian meal. These Indian spicy potatoes are vegan and gluten-free.

Prepare perfectly crispy air fryer spring rolls from frozen in just 12 minutes! Air fryer frozen spring rolls use less oil, are minimal effort than deep-fried. Serve this easy and quick appetizer for get-togethers or as a snack.

Instant Kalakand is made with just 2 main ingredients - ricotta cheese and condensed milk. Kalakand is a popular Indian dessert traditionally made with milk and sugar. Follow this easy kalakand recipe for the festive season.
Includes stove top and microwave kalakand method.

My version of Mughlai Shahi Paneer is made restaurant-style with soft cubes of paneer simmered in a rich and creamy tomato gravy. It's perfect for special occasions thanks to the aromatic spices, nuts, saffron and lashings of cream.

These Mexican Tres Leches Pancakes are the ultimate breakfast treat! Delicious pancakes are doused in a sweet cream made with 3 different kinds of milk - just like the Mexican pancakes served at IHOP and Denny's.

This easy Chana Saag recipe is a comforting meal prepared with chickpeas, spinach and Indian spices. Prepare chana saag just like your favourite Indian restaurant.

Dal Paratha is an Indian flatbread recipe made using wholewheat flour, leftover dal and spices. Dal ka Paratha is a quick and easy recipe that can be prepared for a filling breakfast, brunch or lunch.
I have used leftover Gujarati toor dal but you can use any other dal to make Chana Dal Paratha or Moong Dal Paratha.

Make these delicious 2-ingredient chocolate truffles prepared with dark chocolate and cream. These homemade chocolate truffles are so creamy and fancy yet couldn't be simpler to make!

These Ricotta Cheese Peda are soft, milky Indian sweets made with fresh ricotta, milk powder, cream and cardamom. They're mostly smooth with a delicate grain, rich without being heavy, and firm enough to stack in a mithai box. A lovely alternative to traditional milk peda without spending hours reducing milk!

SUMMARIZE & SAVE THIS CONTENT ON
This is one of Mum's experiments that really worked! She started using ricotta as an alternative to making mawa from scratch, and it turned out to be a lovely way to make peda at home. We've been sharing this recipe on the blog since 2010, and it's still one I come back to when I want homemade mithai without the lengthy milk-reducing process.
Fresh ricotta has a slightly grainy, milky texture that reminds me of chenna or paneer. Once cooked with the other ingredients and kneaded, it makes a wonderfully soft peda dough.
You still get that classic milk-sweet flavour, but you don't need to start with litres of fresh milk and wait for them to reduce. That's why I also use it for my instant ricotta cheese kalakand too!
These are slightly different from my malai paneer ladoo, where I make fresh paneer (chenna) from scratch. Ricotta does a surprisingly good job of recreating that milky texture with considerably less preparation.
If you want to use ricotta for other Indian sweets and curries, my homemade ricotta mawa is another useful recipe to have up your sleeve.
I also sometimes prepare these instant kesar peda - an easy recipe made with condensed milk.

You'll find the full ingredients list with measurements in the recipe card below, but these notes are worth reading first. They explain the small ingredient choices, swaps and texture cues I've learnt from making this recipe.
Ricotta cheese
Use fresh, full-fat ricotta from the supermarket's chilled dairy section.
I prefer the soft, creamy, spoonable type rather than a firm, dry or crumbly ricotta.
The moisture content varies between brands, which means you may need to adjust the amount of milk later. Don't worry if your mixture doesn't behave exactly like mine at first - the texture is more important than adding every last drop of milk.
Milk powder
Use full-fat milk powder for a richer milk flavour.
It helps the ricotta mixture come together into a dough that can be shaped into peda.
Double cream
I use the full four tablespoons in this recipe.
It adds richness and gives the finished peda a softer, creamier mouthfeel. I wouldn't leave it out of my preferred version.
Whole milk
This is the ingredient to adjust as needed.
Depending on how moist your ricotta is, you might need some milk to loosen the mixture after adding the milk powder.
Add it gradually rather than pouring it all in at once.
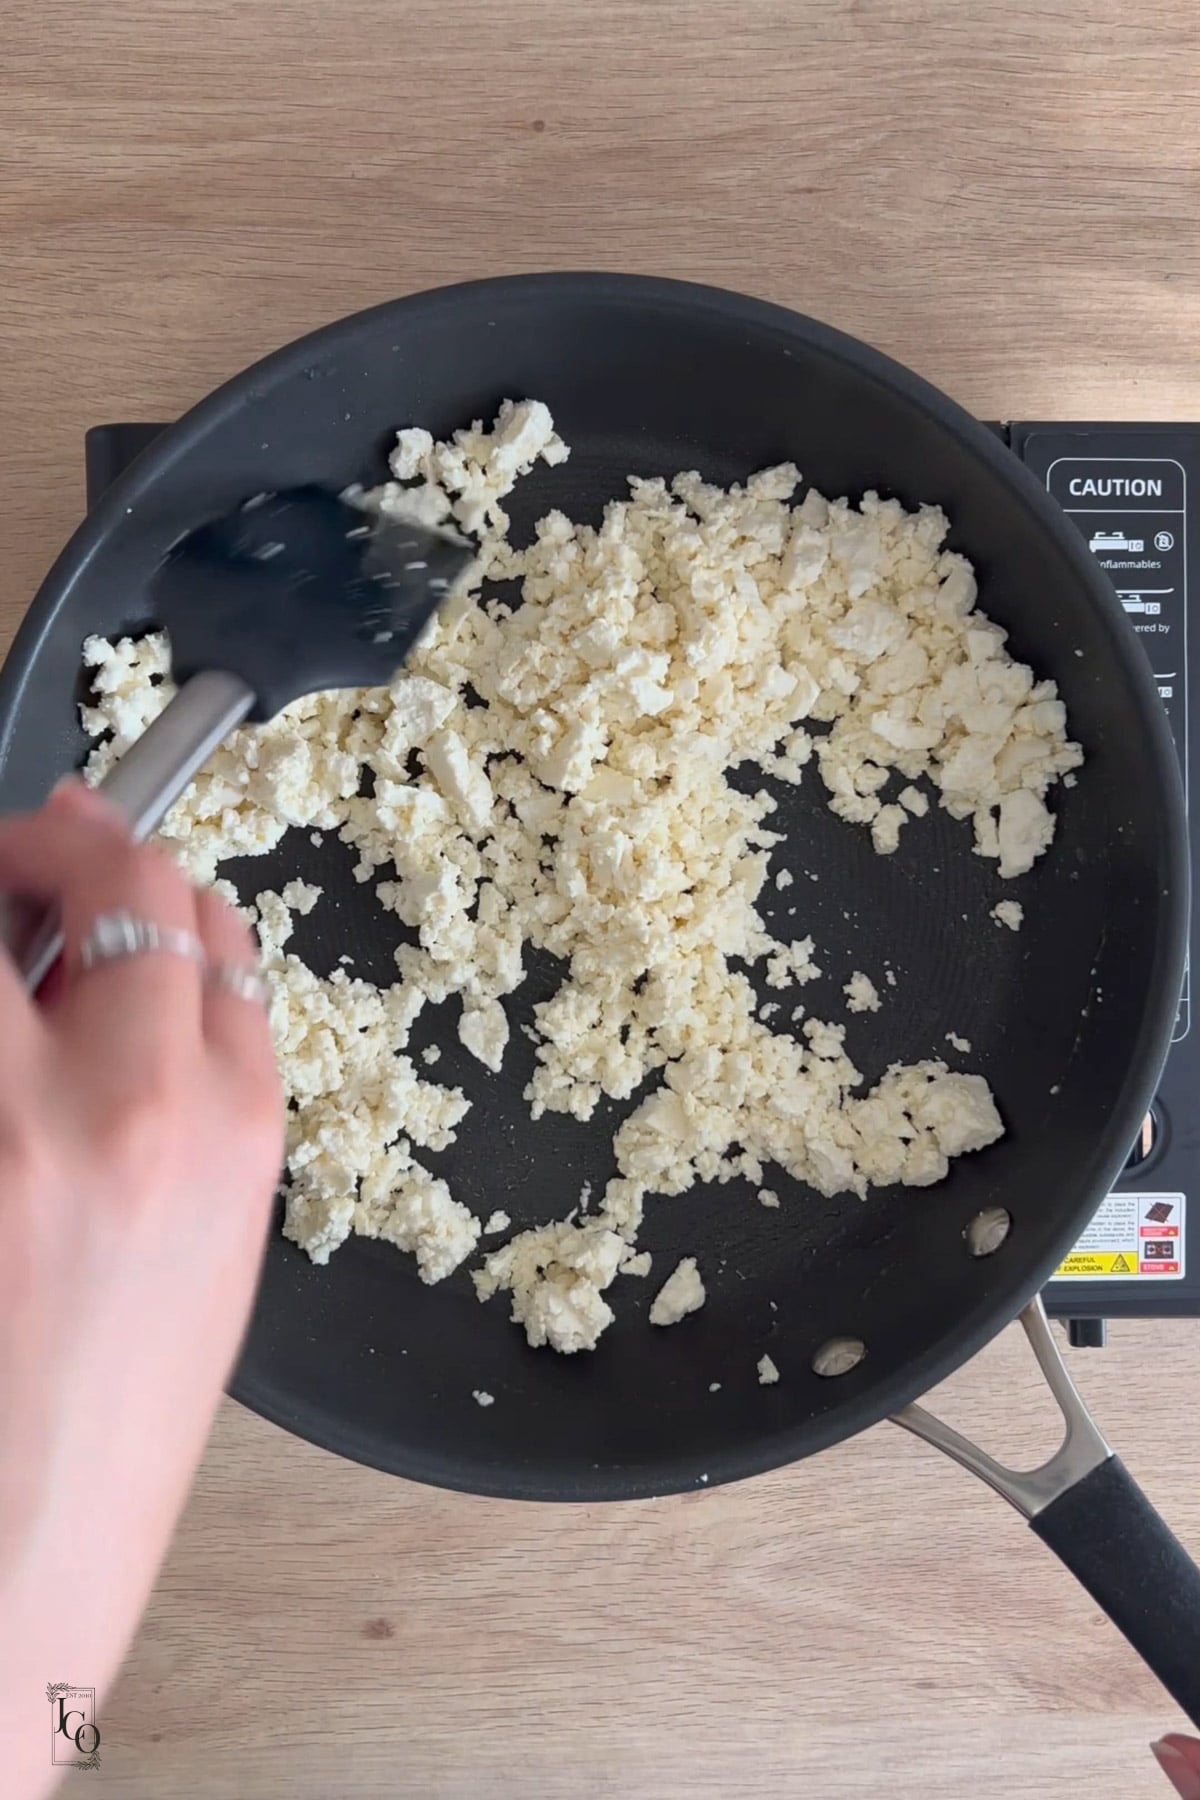
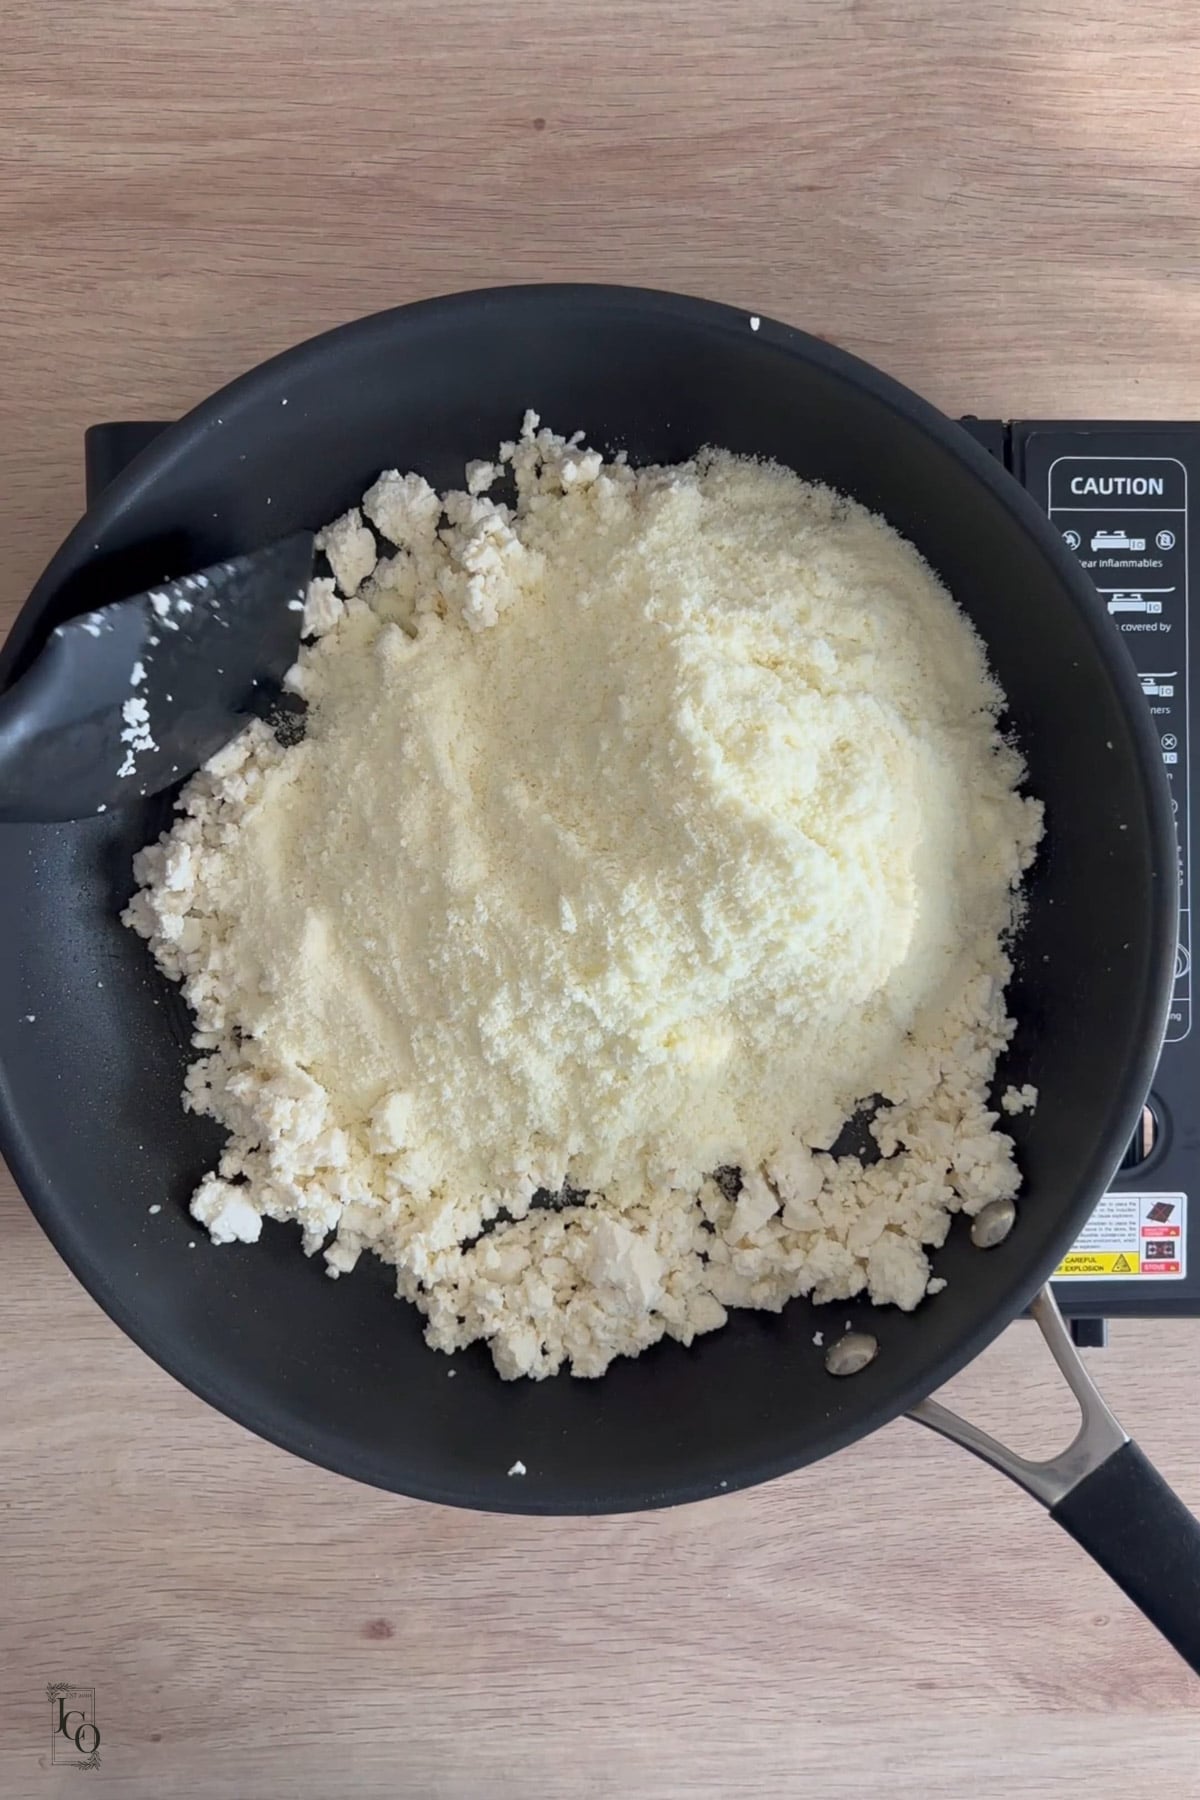
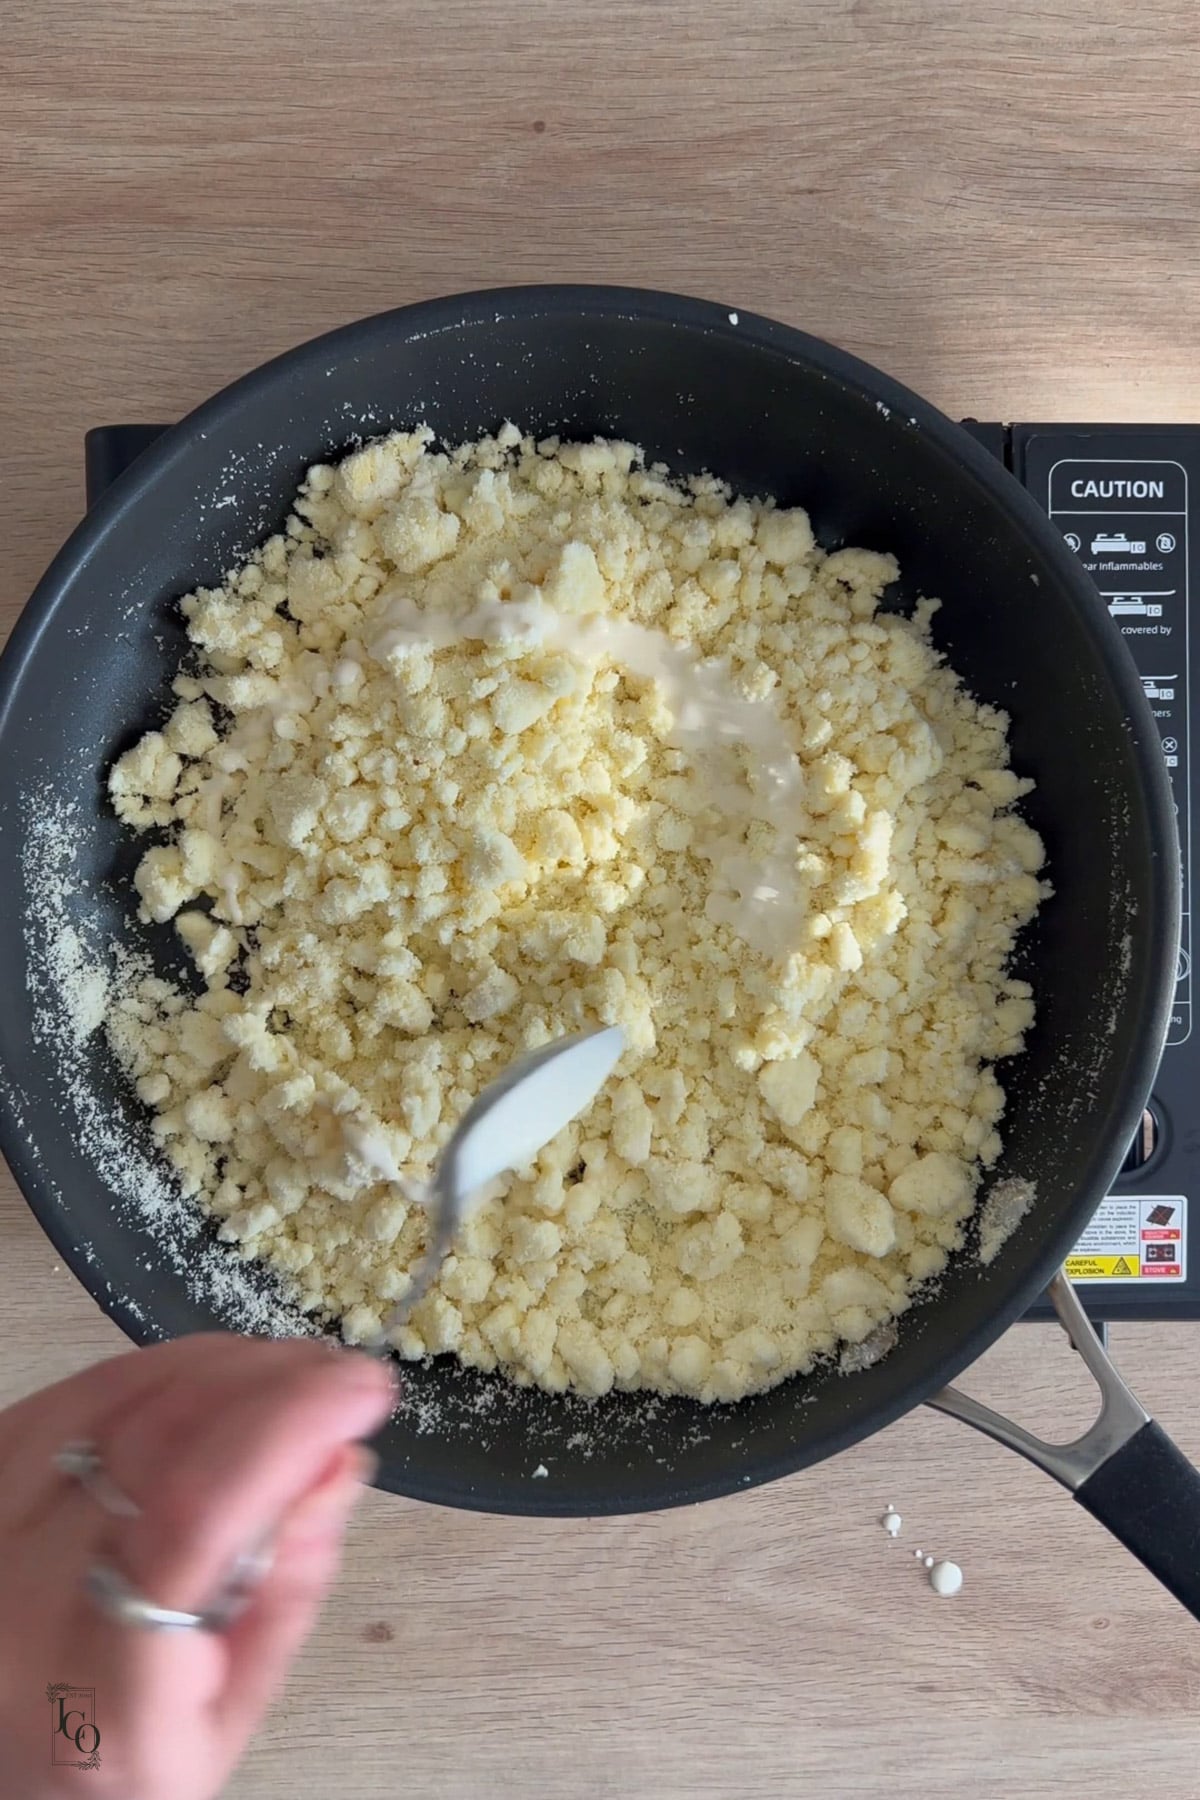
Technique
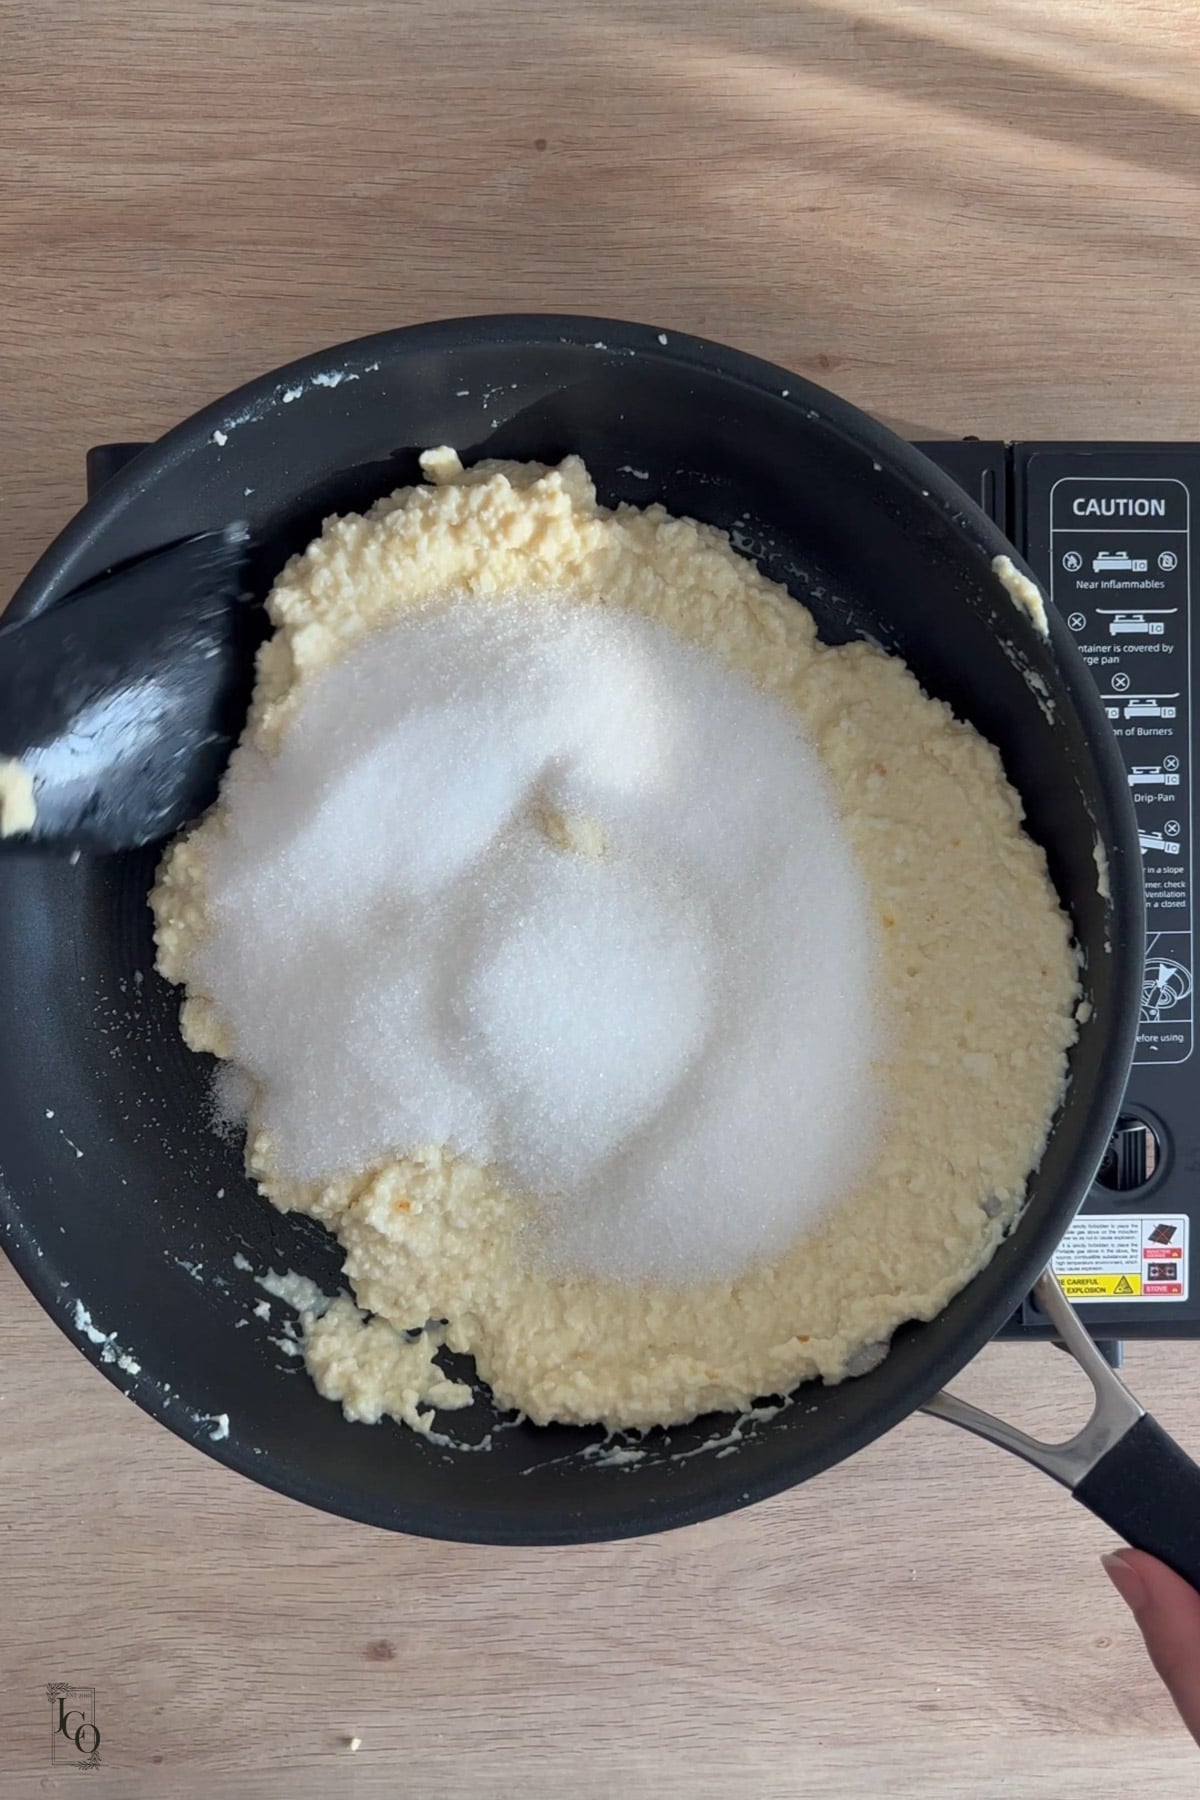
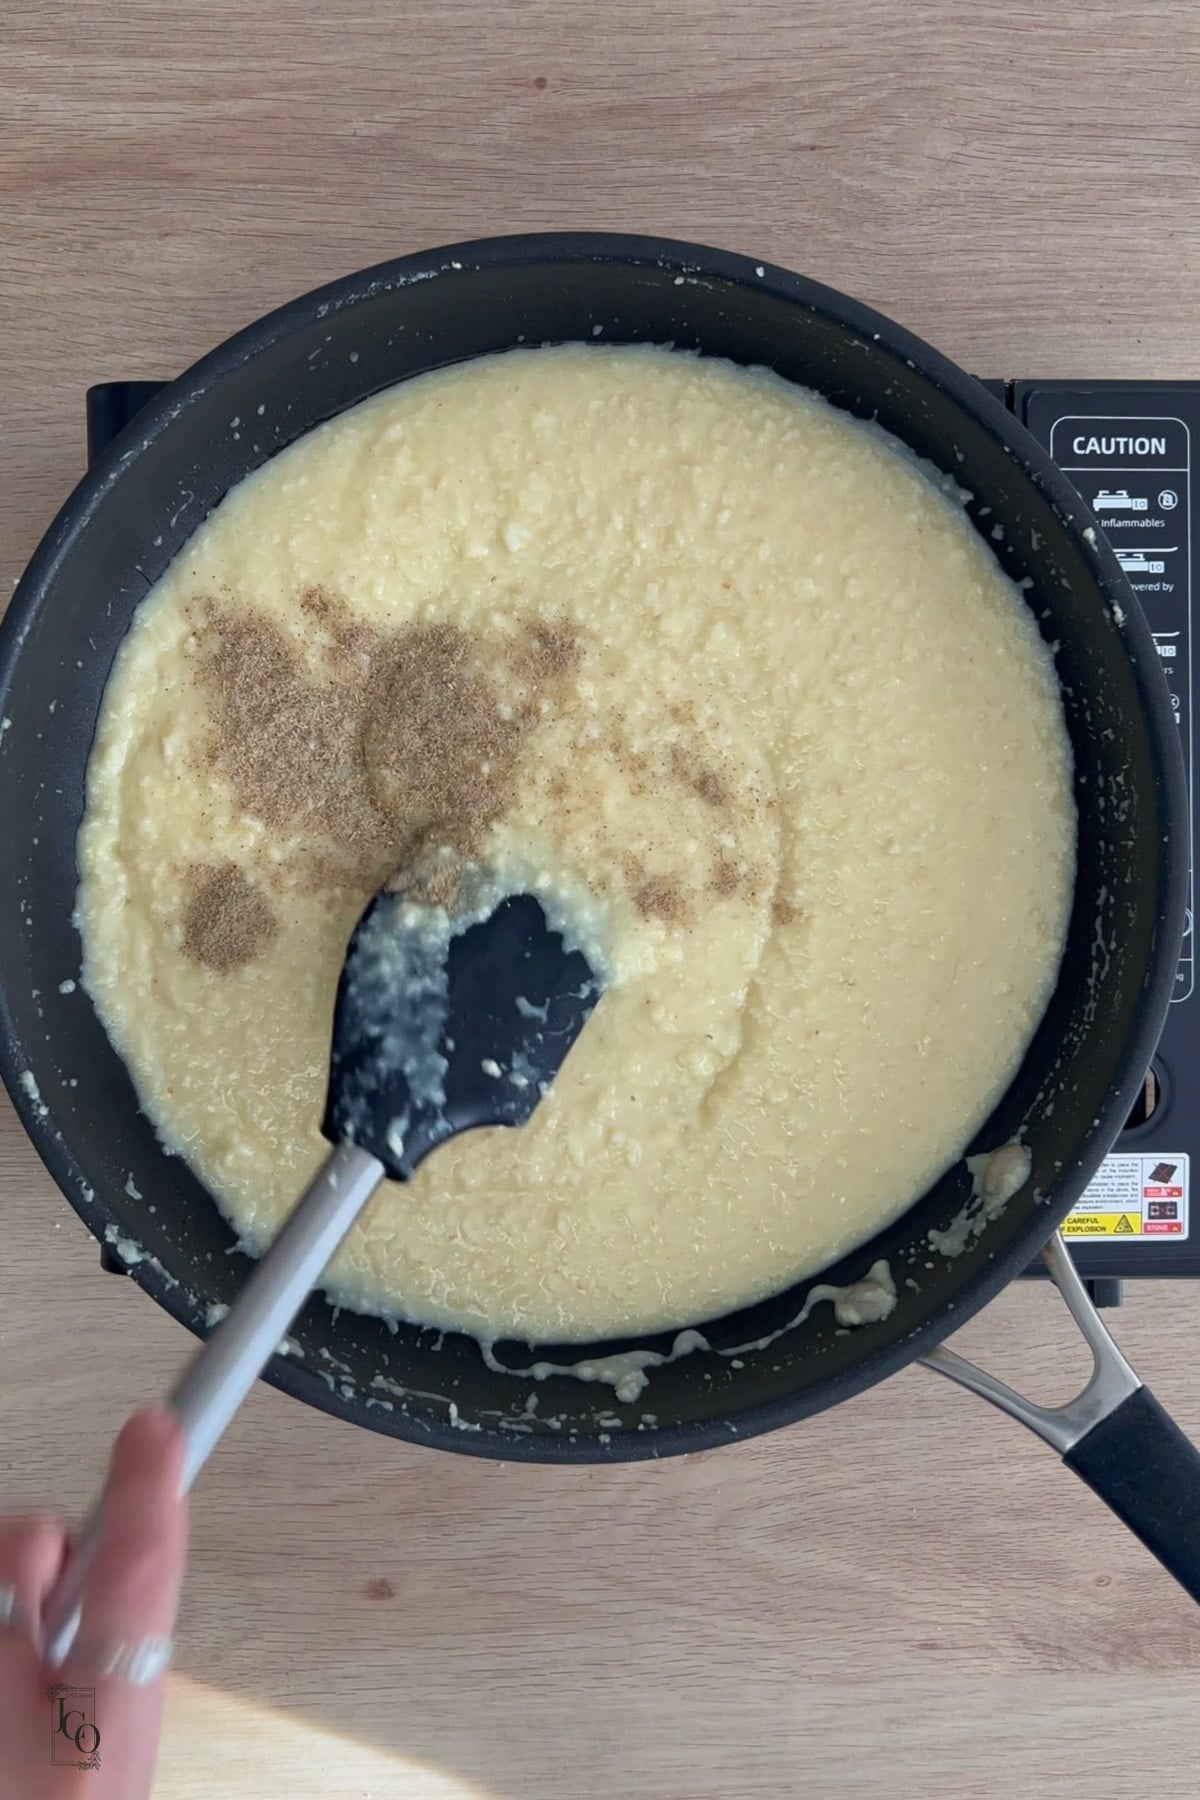
Don't cook the mixture until it looks dry.
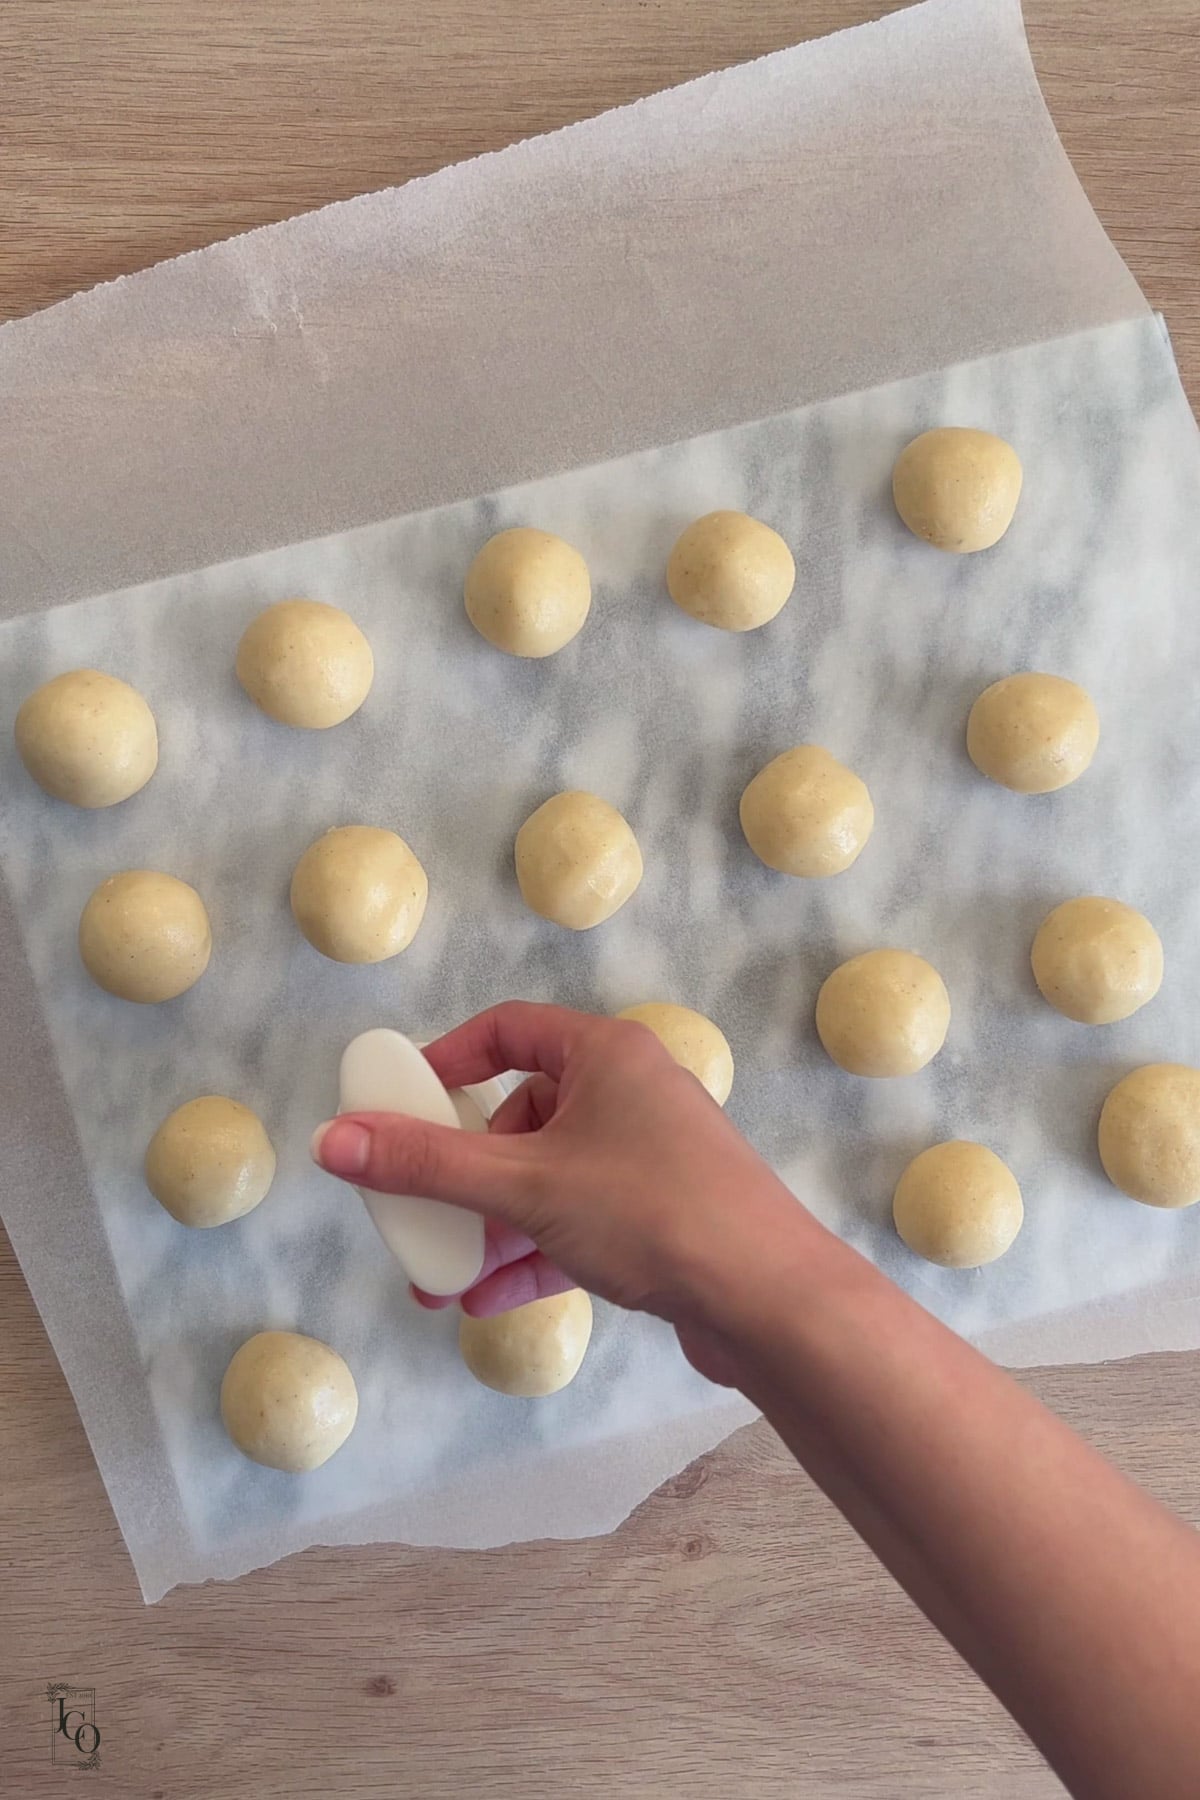
The correct peda dough should still be soft and moist when you take it off the heat. A small cooled portion should roll into a ball without sticking badly to your fingers.
The mixture firms up as it cools, so waiting until it looks completely dry in the pan will leave you with hard peda that crack when shaped.
The second trick is kneading.
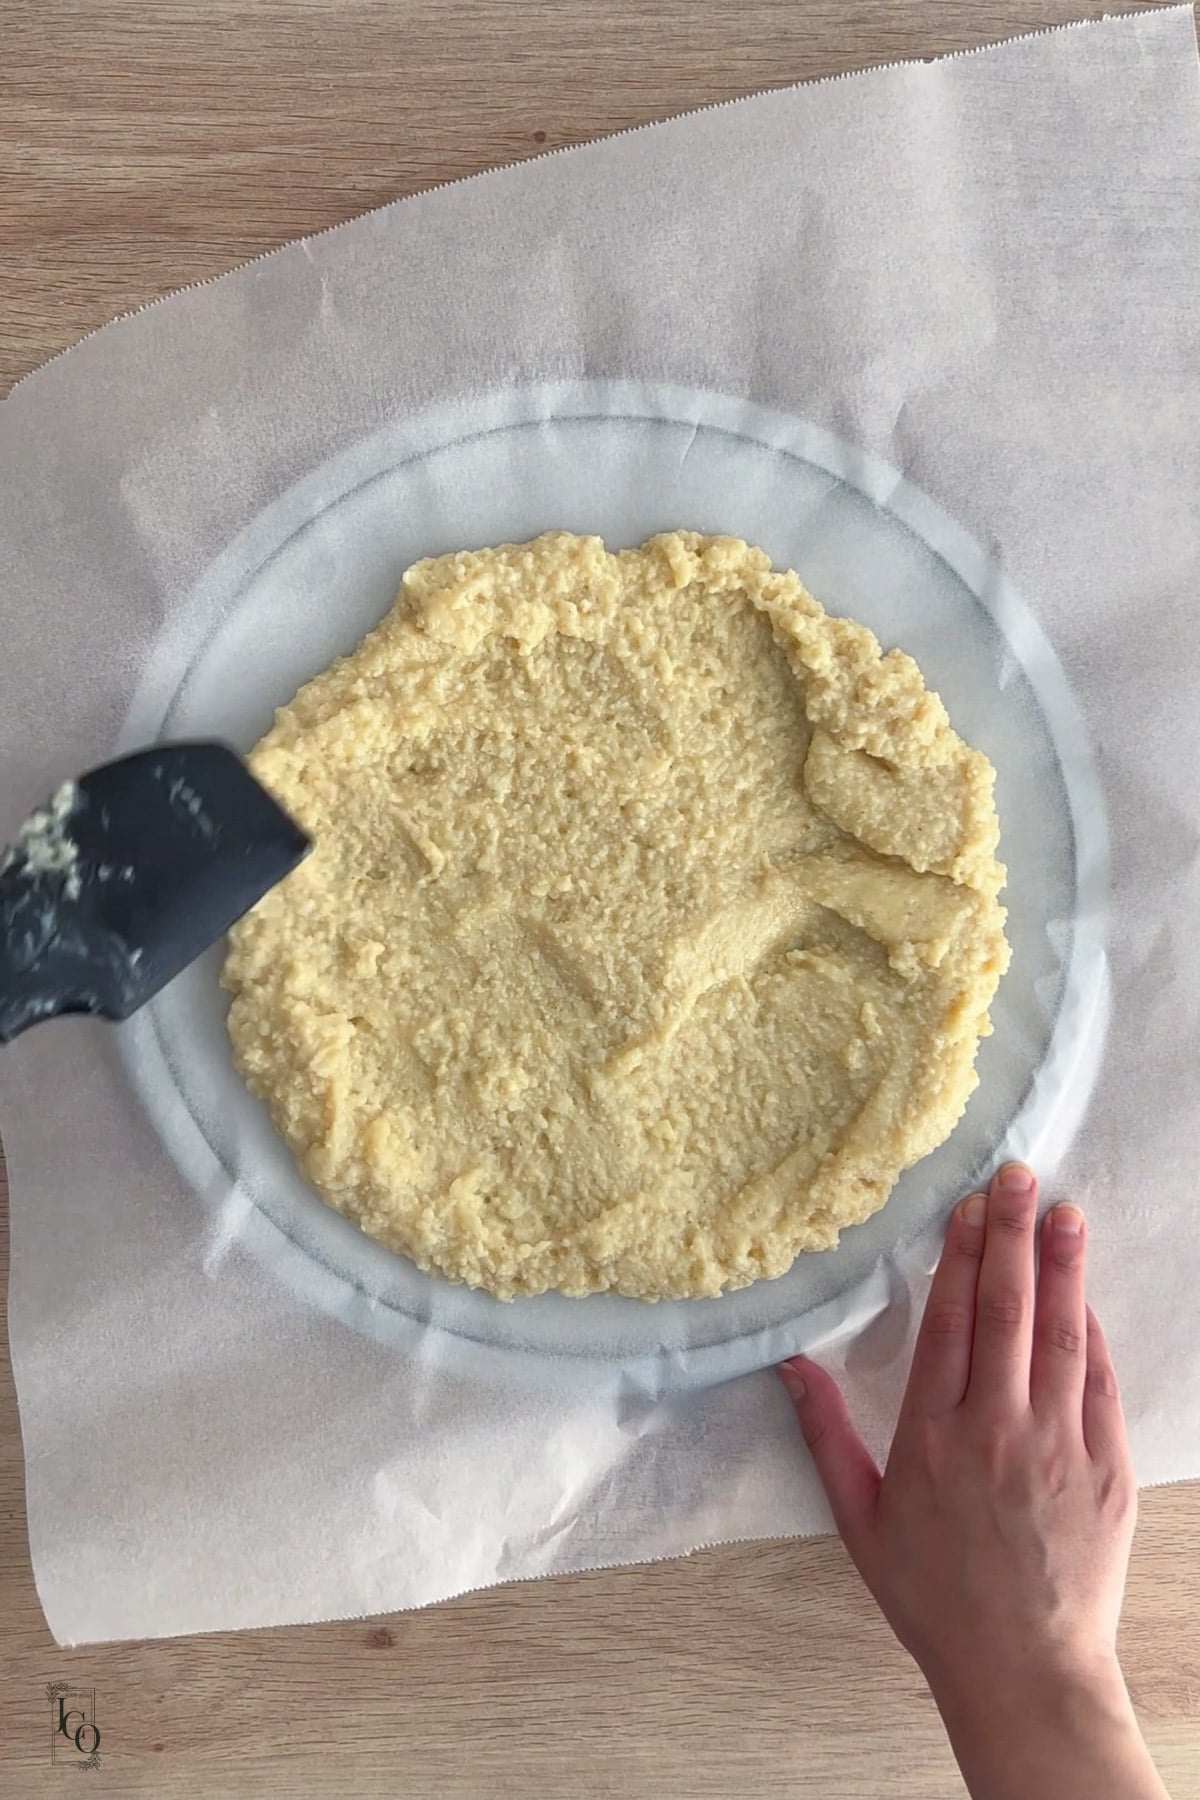
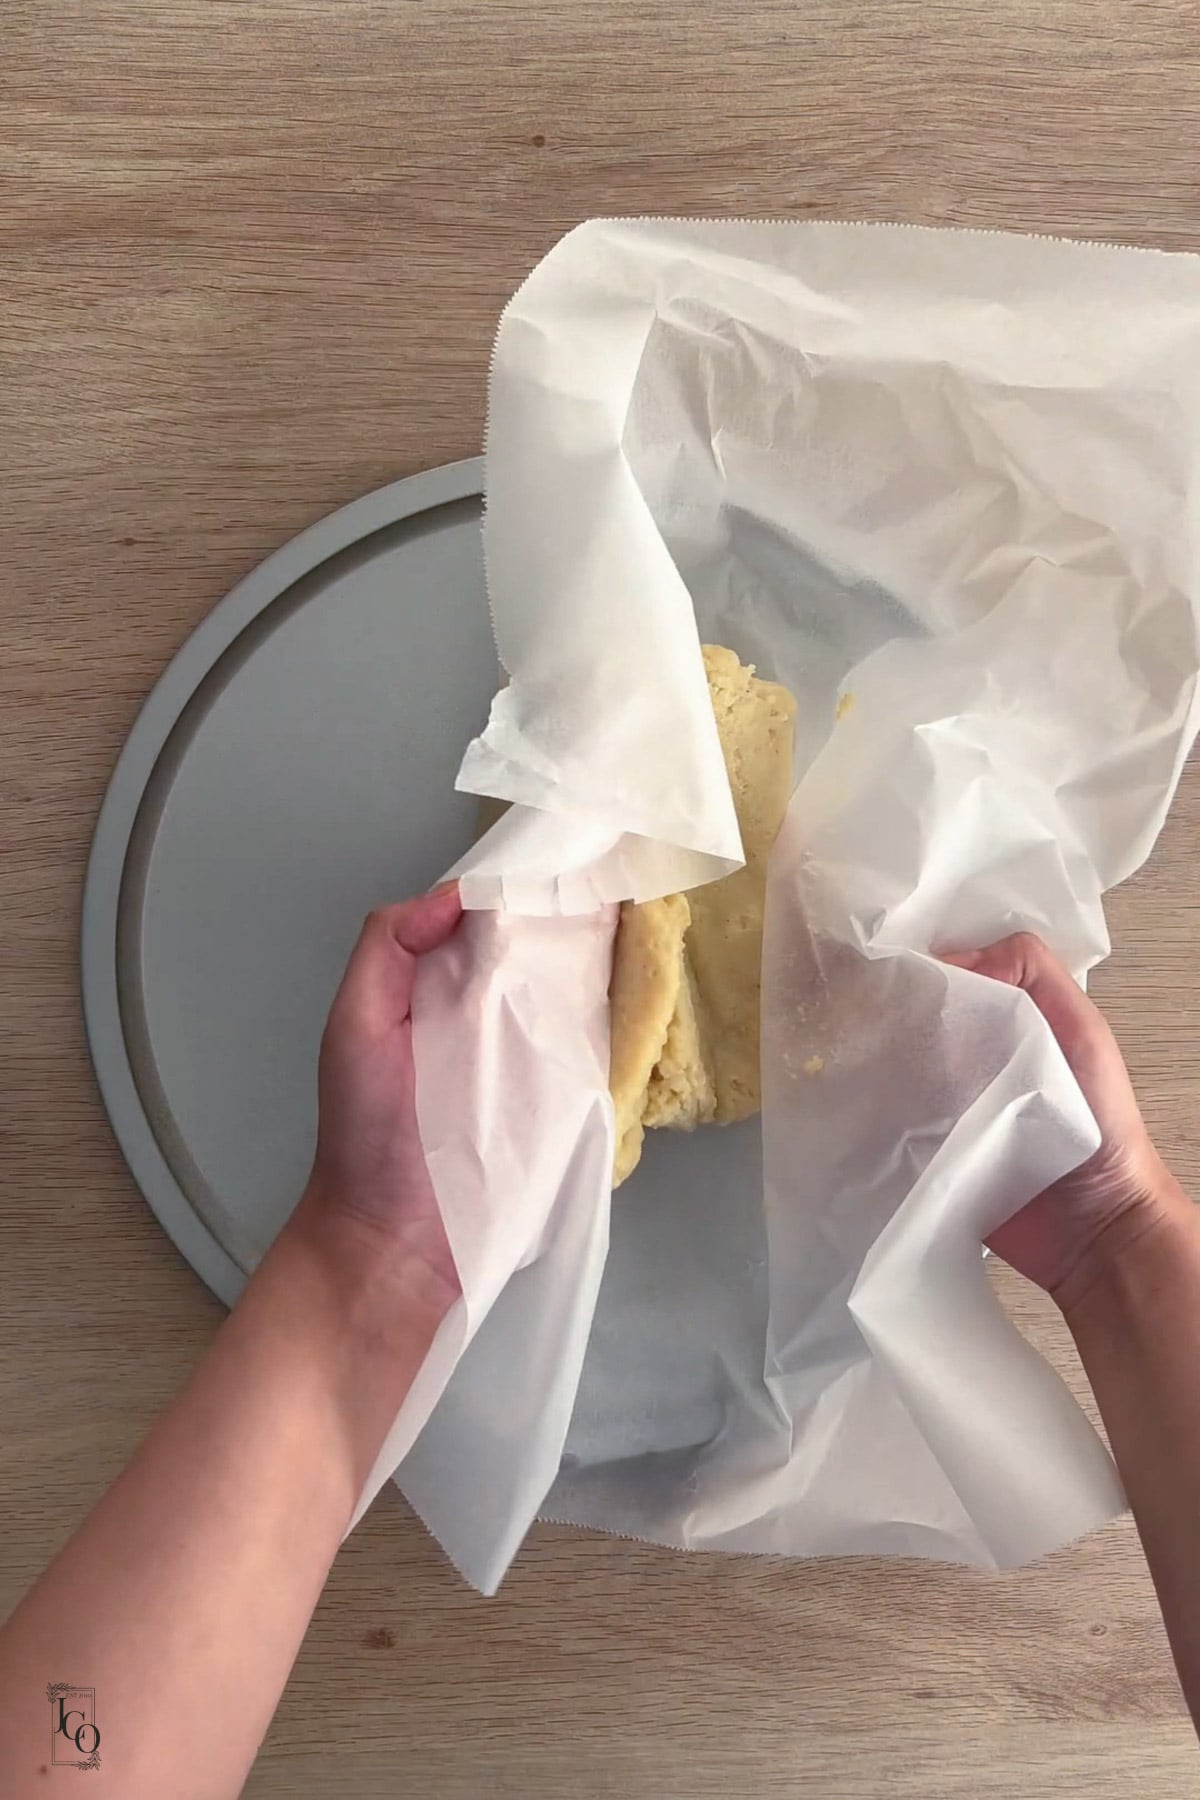
Freshly cooked ricotta peda dough can look quite grainy. That's normal. Once it has cooled enough to handle, knead it for 3–5 minutes to smooth it out.
You're aiming for a mostly smooth dough with a little of that lovely ricotta grain remaining.

Peda are best stored in an airtight container to prevent them from drying out and taste best at room temperature.
They can be kept at room temperature for 1 day, otherwise they are safer stored in the fridge (I find they quickly loose taste and texture though).
Peda freeze well for 2-3 months. To defrost, allow to thaw at room temperature.
Can I use any ricotta cheese?
I recommend fresh, full-fat supermarket ricotta. Drier varieties behave differently and may need more milk.
Do I have to add all 60ml of milk?
No. The amount depends on the moisture content of your ricotta. Add a little at a time and stop once the mixture reaches the correct consistency.
Why is my peda dough grainy?
Ricotta is naturally a little grainy, and the mixture can look especially grainy straight after cooking. Kneading the cooled dough for 3–5 minutes makes it much smoother.
How do I know when to stop cooking?
A small cooled portion should roll into a soft ball without sticking badly to your fingers. The dough should still feel moist, not dry.
What can I do if my peda are too soft to shape?
The mixture has likely not been cooked enough. You can add a little milk powder to thicken the dough and then knead again. Heating further on the stove can lead the peda to become chewy.
Why are my peda cracking?
They may have been overcooked. The dough firms as it cools, so don't wait for it to become dry in the pan. Kneading also helps smooth the surface before shaping.
Can I make these without condensed milk?
Yes. This recipe uses ricotta, milk powder and sugar instead.
Can I add saffron?
Yes. Cardamom is my classic flavour, but saffron can also be added if you fancy a different version.

As always if you make this recipe, be sure to leave me a comment, rate this recipe and tag me on Instagram @jcookingodyssey or #jcookingodyssey. I love seeing all your photos of my recipe recreations!
Don’t forget to follow me on social media using the buttons below – I can't wait to see you all there!

PLEASE NOTE: Nutritional values are estimated by a computer and may vary based on ingredients and portion sizes. For personalised dietary advice, please consult a qualified healthcare professional.
Share on Facebook Pin This RecipeMy easy one pot lemon ricotta pasta recipe is a perfect meal for any night of the week! The delicious sauce is made from creamy ricotta cheese, garlic and lemon.

This Eggless Chocolate Mousse is rich, smooth and intensely chocolatey, with a light texture that melts on the tongue. Made without eggs or gelatine, it's one of my favourite make-ahead desserts because it's simple to prepare but always feels special enough for dinner parties and celebrations.

SUMMARIZE & SAVE THIS CONTENT ON

I love desserts that feel impressive without requiring lots of effort, and this is one I come back to time and time again.
Because it's made ahead, I can prepare it the day before friends come over and simply garnish before serving.
It's also one of those recipes that often surprises people. Nobody expects an eggless chocolate mousse to be this rich, airy and full of chocolate flavour.
[feast_advanced_jump_to]Chocolate
Good-quality chocolate makes all the difference here.
I recommend using chocolate with around 50–70% cocoa solids. It gives the perfect balance of rich chocolate flavour while still keeping the mousse creamy.
When I'm making this for adults or a dinner party, I usually reach for dark chocolate.
If I want a lighter dessert, I often use milk chocolate instead. I think this option would work great for kids too!
Double cream
Cold double cream creates the light, airy texture. For best results, I would stick to a cream with minimum 36% fat content. In the UK, whipping cream is 36% fat and double cream is 48% fat.
I always whip it to soft peaks. Overwhipped cream gives a heavier mousse and is much harder to fold into the chocolate.
Sugar
I like to add a little icing sugar, also known as powdered sugar or confectioners sugar as it contains corn starch. The corn starch helps provide some hold to the mousse.
Firstly, prepare your chocolate. I used chocolate slabs which I broke into smaller uniform pieces so that they can melt in the cream with ease.
To prepare the double boiler method, heat water in a saucepan and place a heatproof bowl on top. The bottom of the bowl should not be touching the water.
In the bowl, heat the cream and chocolate over the bain marie. Do this over a low heat to prevent the melted chocolate from seizing.

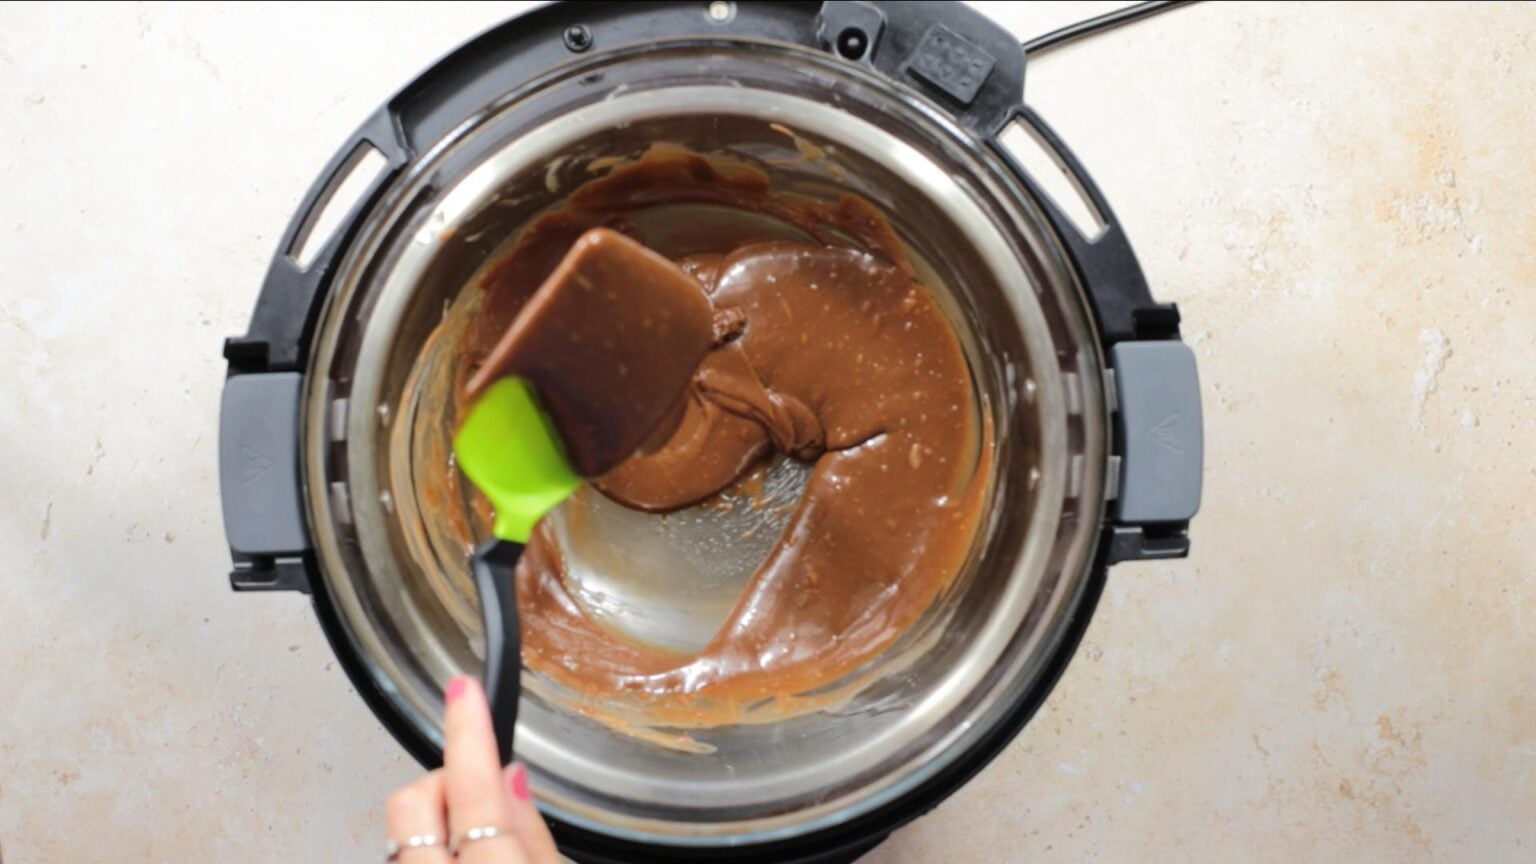
Remove the bowl from the hot water once the chocolate ganache has begun forming. You risk the chocolate seizing if it is left on the heat for a long time.
Add any flavourings to the ganache if using then set aside and allow to cool. It is important that the chocolate has totally cooled before adding to the cream.
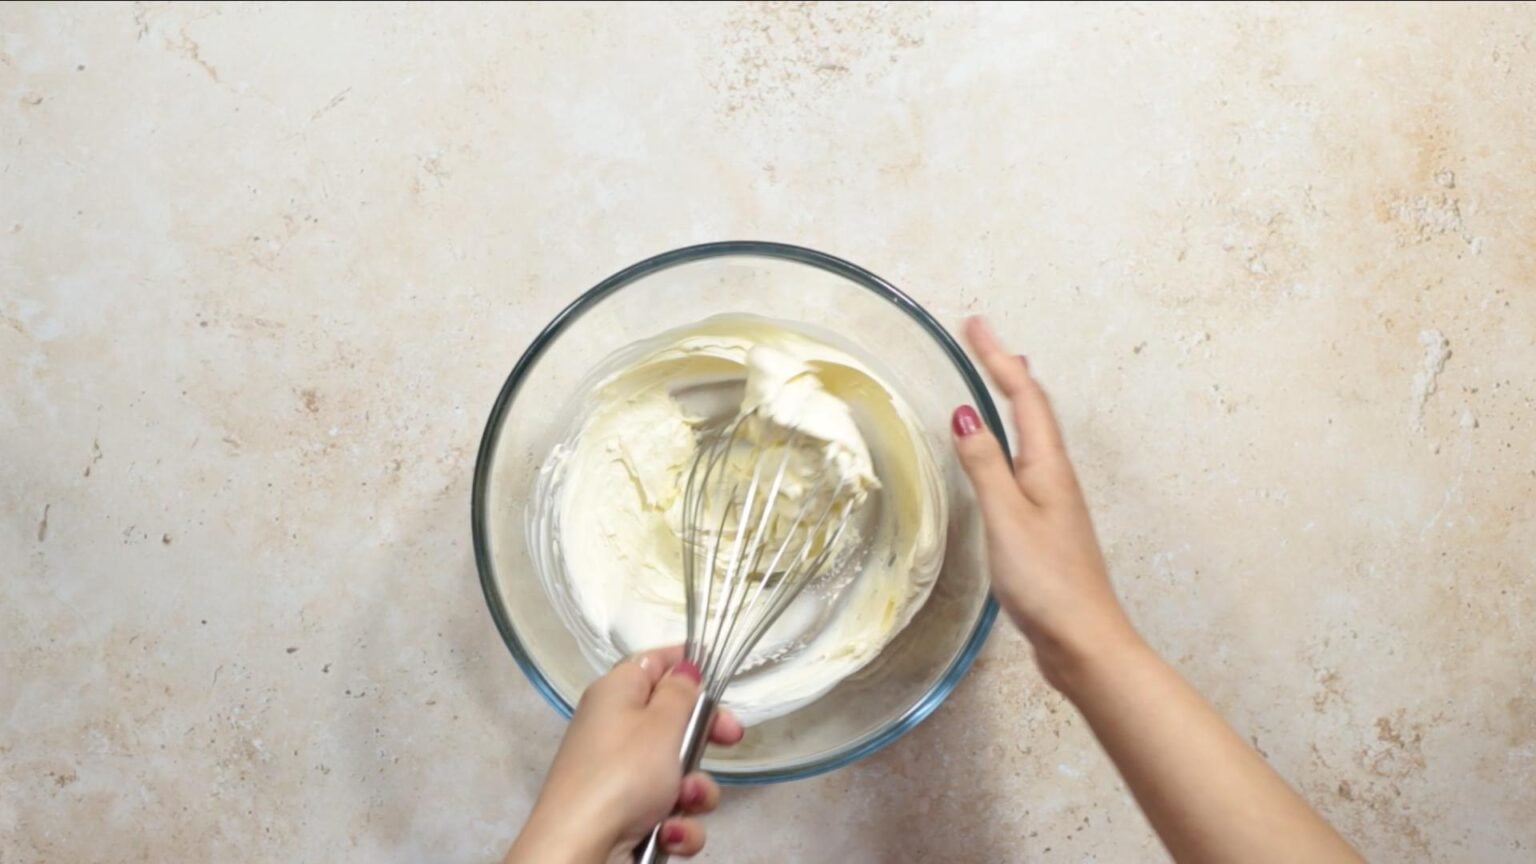
In a separate mixing bowl, whip the remaining cream until you get medium soft peaks ie you will see the cream just hold its shape on the whisk attachment before folding back in.
If using an electric hand mixer and using a high speed, ensure you do not over whisk or else the cream can split.
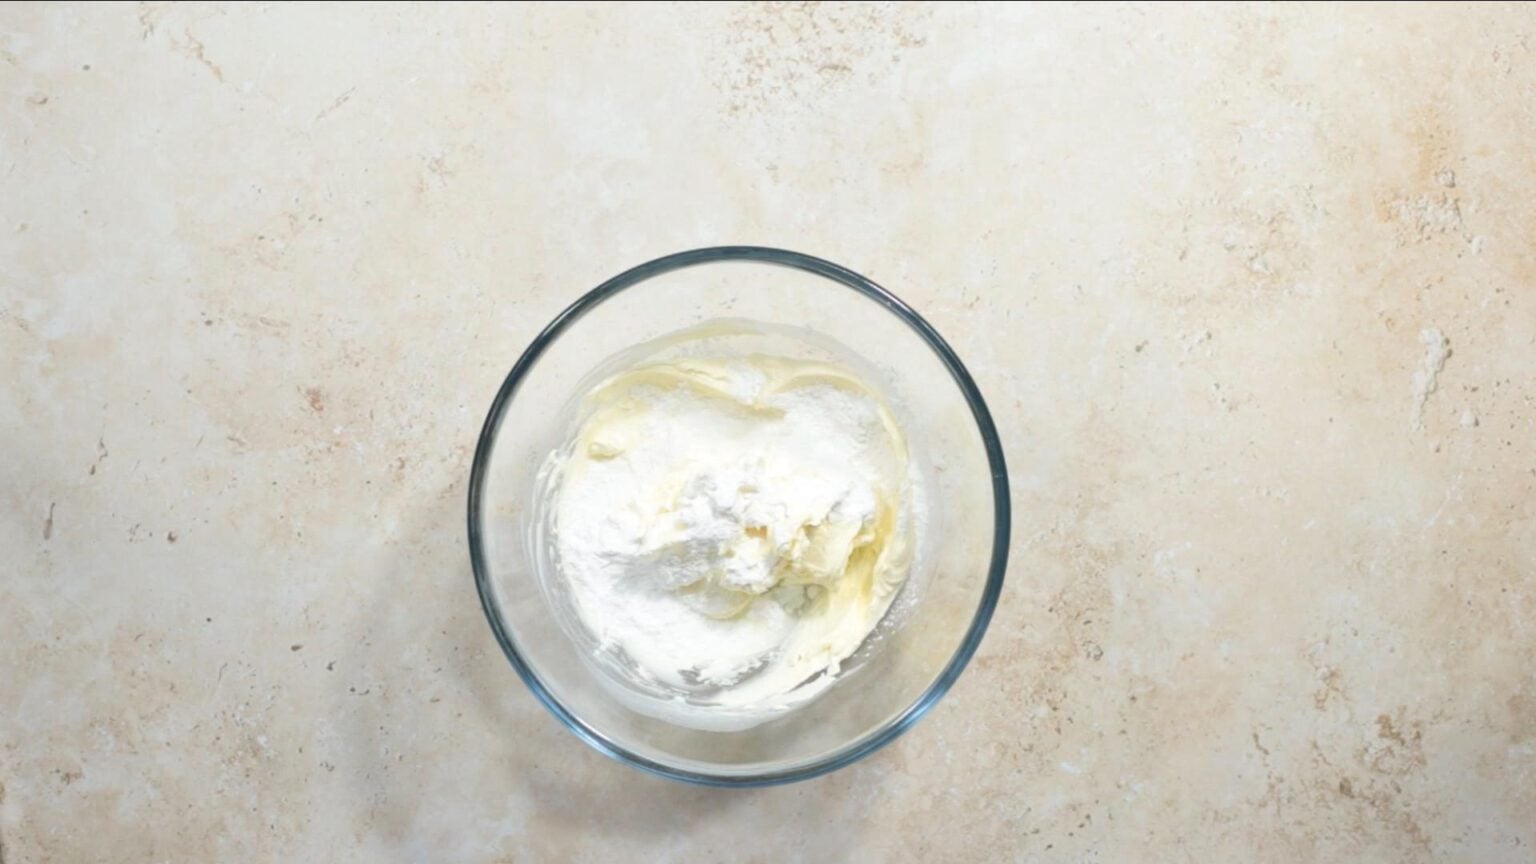
Add icing sugar and mix into the cream.
Fold the chocolate mixture gently into the whipped cream.
Spoon the mousse into individual serving bowls. You could also set the mousse in a large chilled bowl.
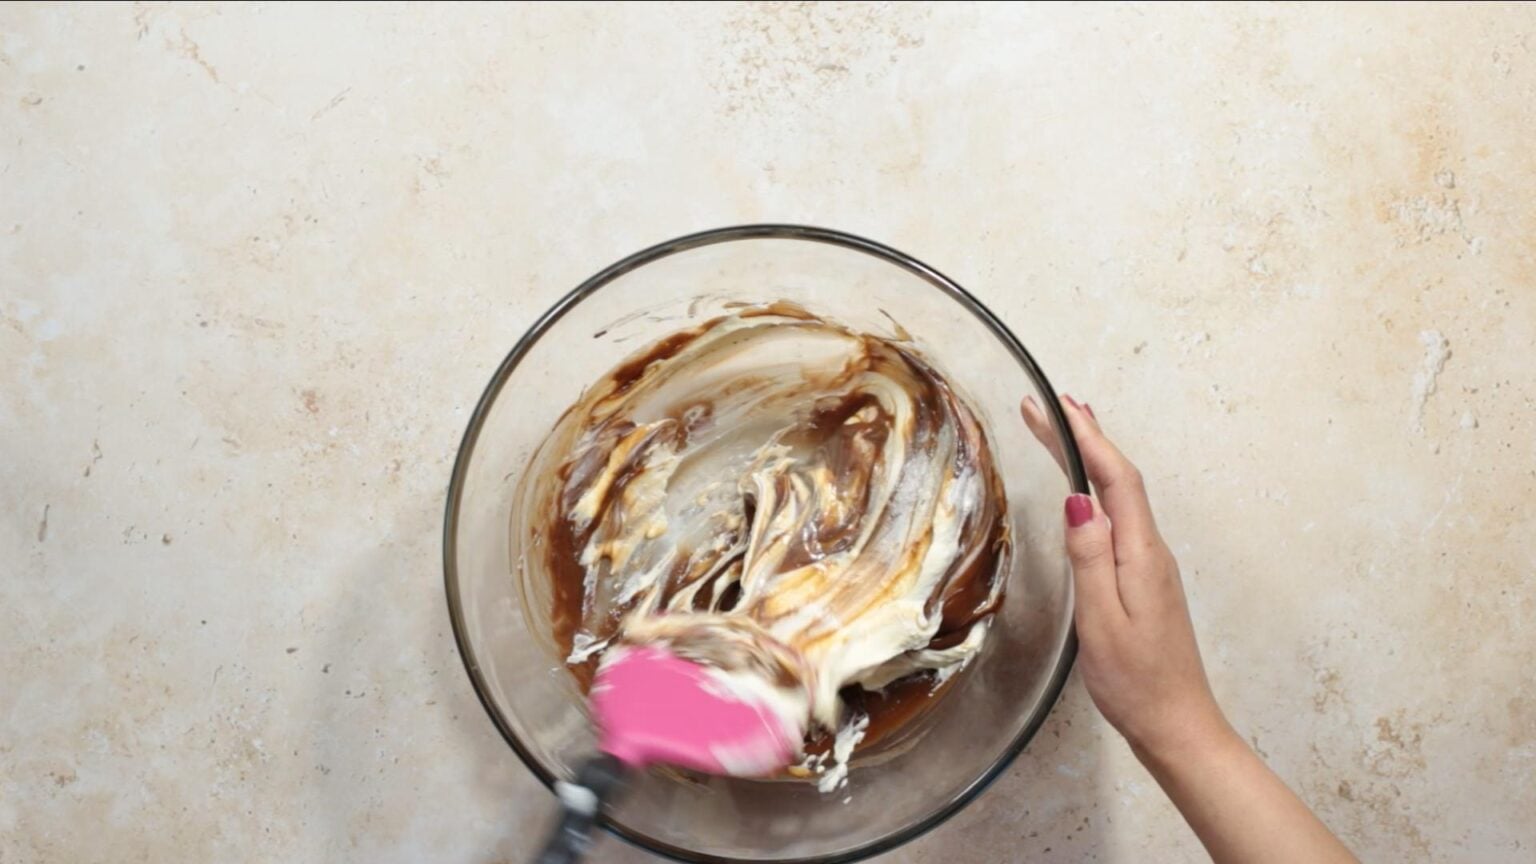
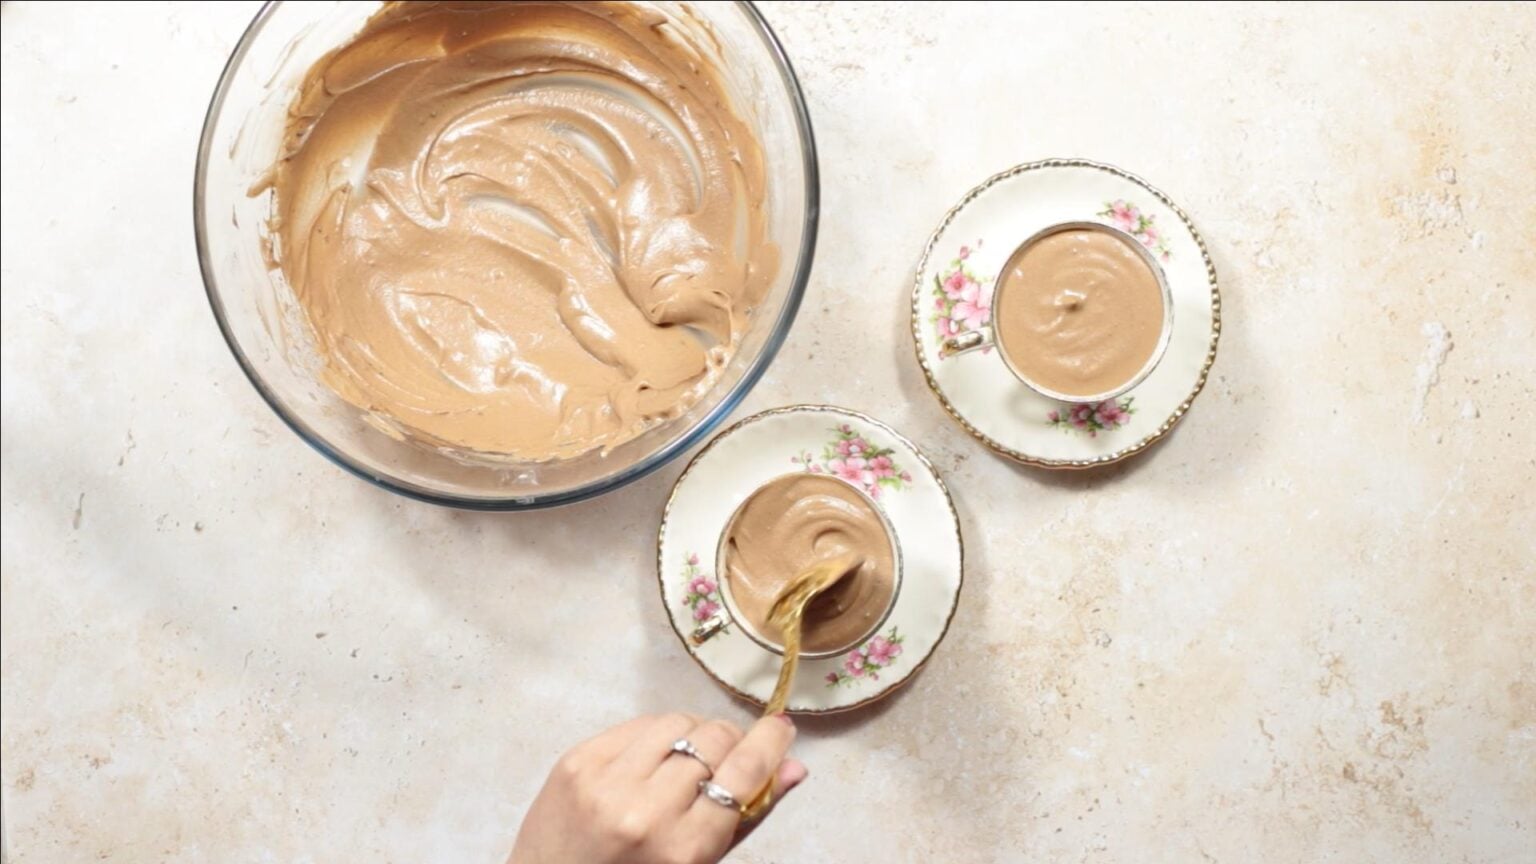
I usually serve this mousse in small glasses with chocolate shavings and a scattering of rose petals.
If I'm making it for a dinner party, I sometimes add a little sweet cardamom whipped cream on top. It pairs beautifully with the chocolate and adds an extra touch of luxury.
One of my favourite variations is adding a tiny drop of orange oil to the chocolate. It reminds me of a chocolate orange and works wonderfully if you're already a fan of my eggless chocolate orange cake or Christmas chocolate orange truffles.
This is one of my favourite make-ahead desserts.
I nearly always make it the day before serving.
After a night in the fridge, the texture is even more airy and all that's left to do is add the garnish.
It is really up to you. Traditional chocolate mousse uses only eggs for the airy texture, so if you want a traditional recipe, then using eggs is your best bet. There are many benefits to not using eggs, especially for many dietary reasons or health restrictions. You still achieve a similar taste and texture
Yes you can. Adding powdered sugar adds some corn starch to the mousse with helps provide hold.
There are a number of reasons. It could be because too high heat was used during the double boiler method. Remove the bowl as soon as the chocolate starts to melt.
Also, the ganache must have totally cooled before it is added to the whipped cream
Do not allow water to come into contact with the chocolate.
I wanted this mousse to be every bit as light and indulgent as a classic version while keeping it completely eggless.
I tested whipped cream, which I've also used successfully in my eggless mango mousse, easy peanut butter mouse and caramel mousse.
Also, I tried plain full fat yogurt which I strained to make it thicker. It worked pretty well at giving the mousse a stable texture but it does add an extra step. I wanted to keep the main recipe as simple as possible.
I tested melting the chocolate in both the microwave and over a bain-marie. Both methods work well, as long as the chocolate isn't overheated.
I found that folding the cream into cooled chocolate gave the best texture.
The biggest difference came from patience. I once served it before it had fully chilled and it was silky rather than mousse-like. Giving it enough time in the fridge creates the light texture I'm looking for.

As always if you make this recipe, be sure to leave me a comment, rate this recipe and tag me on Instagram @jcookingodyssey or #jcookingodyssey. I love seeing all your photos of my recipe recreations!
Don’t forget to follow me on social media using the buttons below – I can't wait to see you all there!

PLEASE NOTE: Nutritional values are estimated by a computer and may vary based on ingredients and portion sizes. For personalised dietary advice, please consult a qualified healthcare professional.
Share on Facebook Pin This RecipeThis homemade schezwan rice is made from cooked rice, vegetables and schezwan sauce. It is a popular Indo Chinese recipe.

This homemade madras curry powder is full of flavour and will elevate your Indian dishes. With my handy tip it's so easy to customise it to suit your spice tolerance.

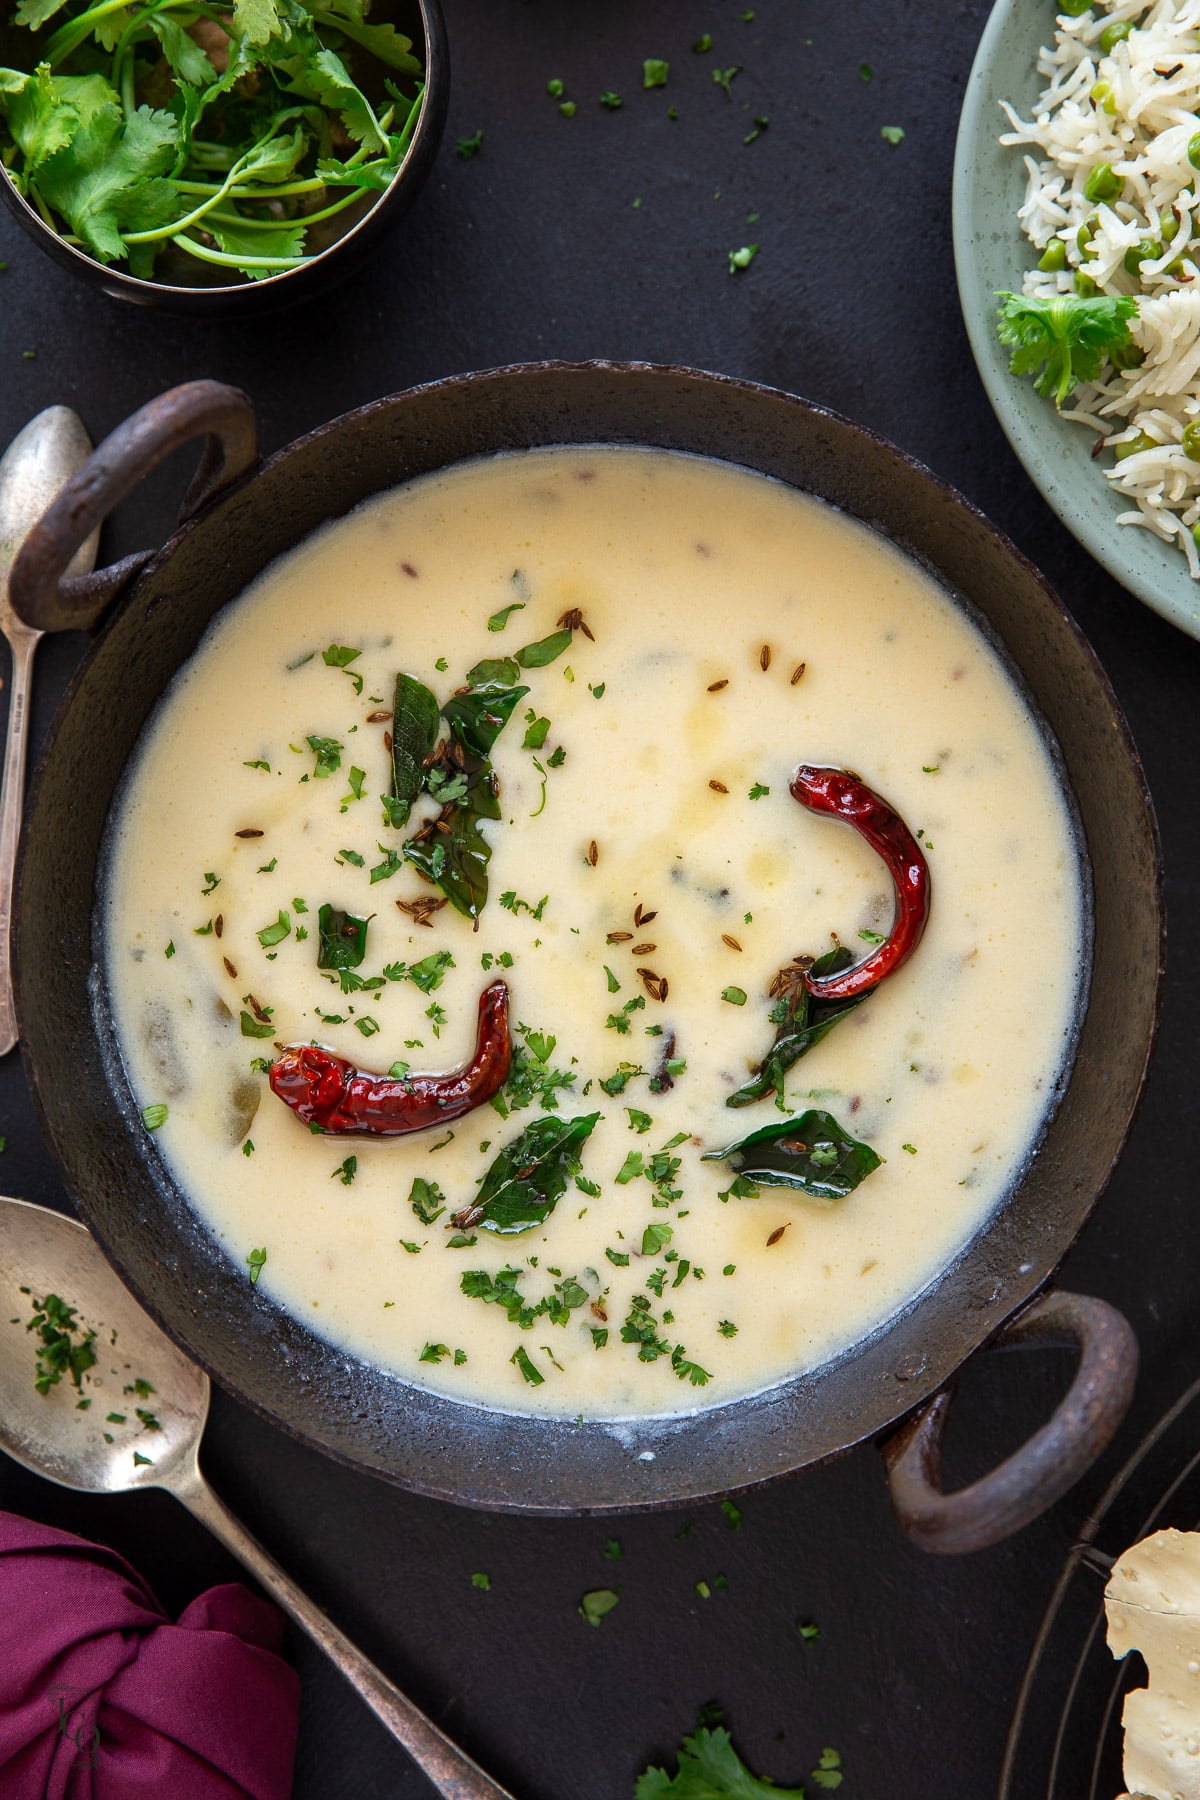
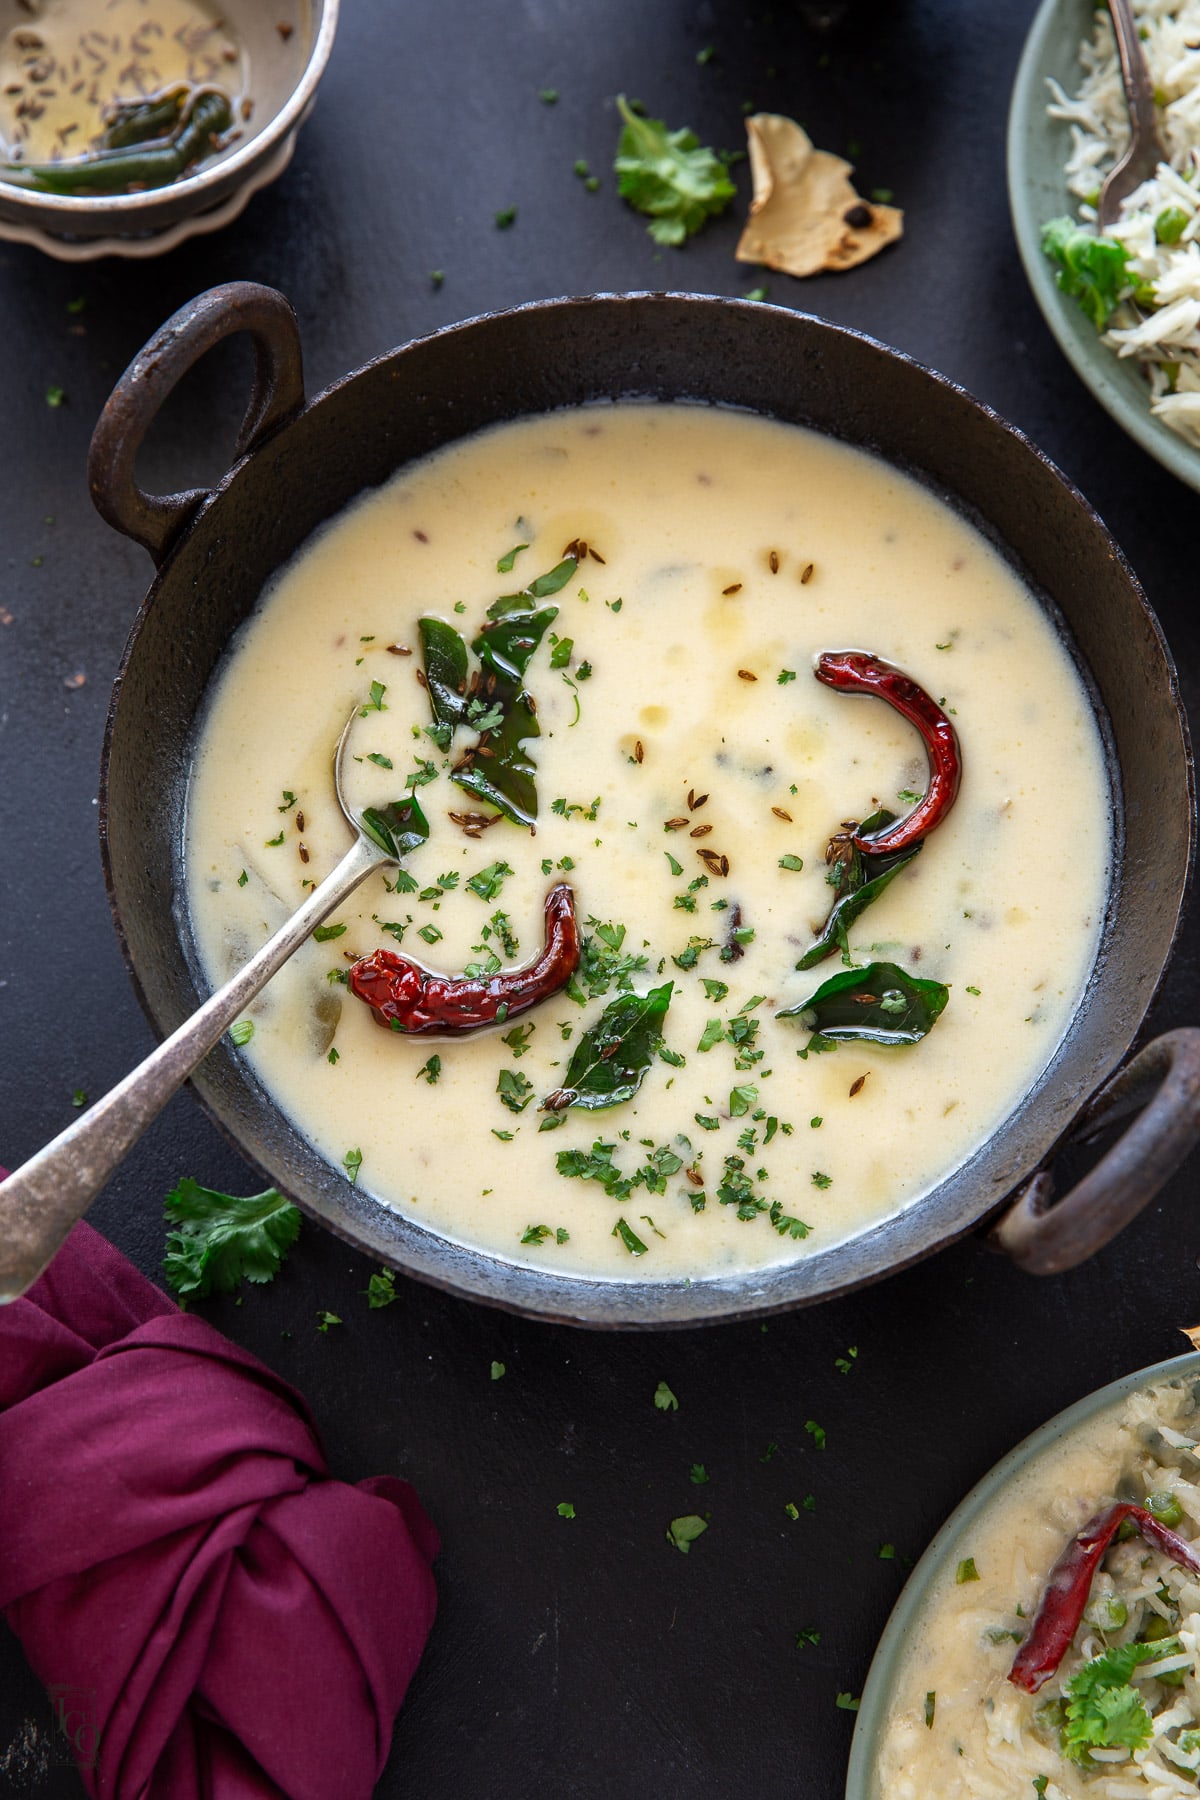
Here is my authentic Gujarati Kadhi made to a traditional Gujarati family recipe. This kadhi is characteristically white with a sweet and sour flavour. It's a comforting dish that's prepared with plain yogurt, besan, a ghee tempering, curry leaves and sweetened with jaggery.
Perfect as part of a Gujarati thali.
SUMMARIZE & SAVE THIS CONTENT ON
This kadhi must be quintessentially Gujarati in taste. It's sweet and sour thanks to the tangy yogurt and sweet jaggery.
Ginger and green chilli should give fresh warmth rather than a strong heat.
The final kadhi should be thin, creamy white and fragrant. It needs to be easy to pour over dishes like plain boiled basmati rice, my Nanima's simple aloo matar pulao or moong dal khichdi.
For a summery variation, try my fruity mango kadhi or in the cooler months, this ultra savoury pyaaz ki kadhi. You can also prepare farali kadhi with rajgira flour or this kadhi with okra.
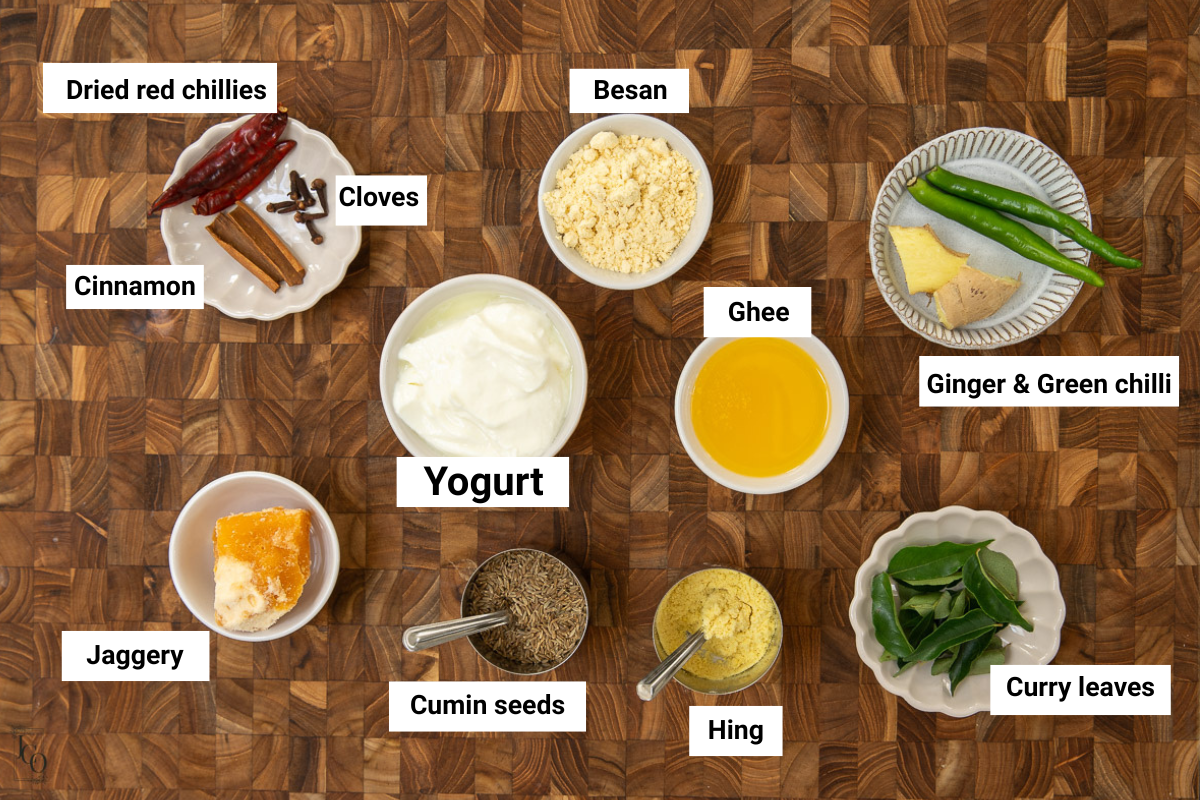
Find the full ingredients list with measurements in the recipe card below.
Yogurt
I use full-fat plain yogurt with a mild tang because I find that low-fat yogurt can taste too sharp or sour, and it does not give the same creamy flavour.
I sometimes use my homemade set yogurt using live yogurt, but any good plain yogurt works.
Besan
Besan, also called gram flour or chickpea flour, lightly thickens the kadhi.
Remember that Gujarati kadhi should stay thin and pourable so I do not add too much.
Jaggery
Jaggery gives Gujarati kadhi its gentle sweetness.
I prefer lighter jaggery because it keeps the kadhi pale. Darker jaggery still works if that is what you have, but it will make the kadhi darker and give a deeper flavour.
Sugar also works in a pinch.
Ginger and green chilli
Fresh ginger and green chilli are important.
I crush them so there are no large pieces, but it does not need to be a completely smooth paste.
Gujarati kadhi is more about sweet and sour balance than spice.
Curry leaves
Curry leaves are non-negotiable for my Gujarati kadhi. Fresh curry leaves are best, but frozen curry leaves also work well.
Ghee
For everyday kadhi, the tempering can be simple with oil.
When I want it to taste extra special, I use ghee which is the authentic ingredient. It gives the kadhi a richer aroma.
I love using my homemade ghee from butter for this.
What I leave out
I do not add turmeric, garlic, mustard seeds or red chilli powder to this traditional version.
Those ingredients can be used in other kadhi variations, but they change the flavour and colour.
Gujarati kadhi is meant to stay pale, light and gently spiced.
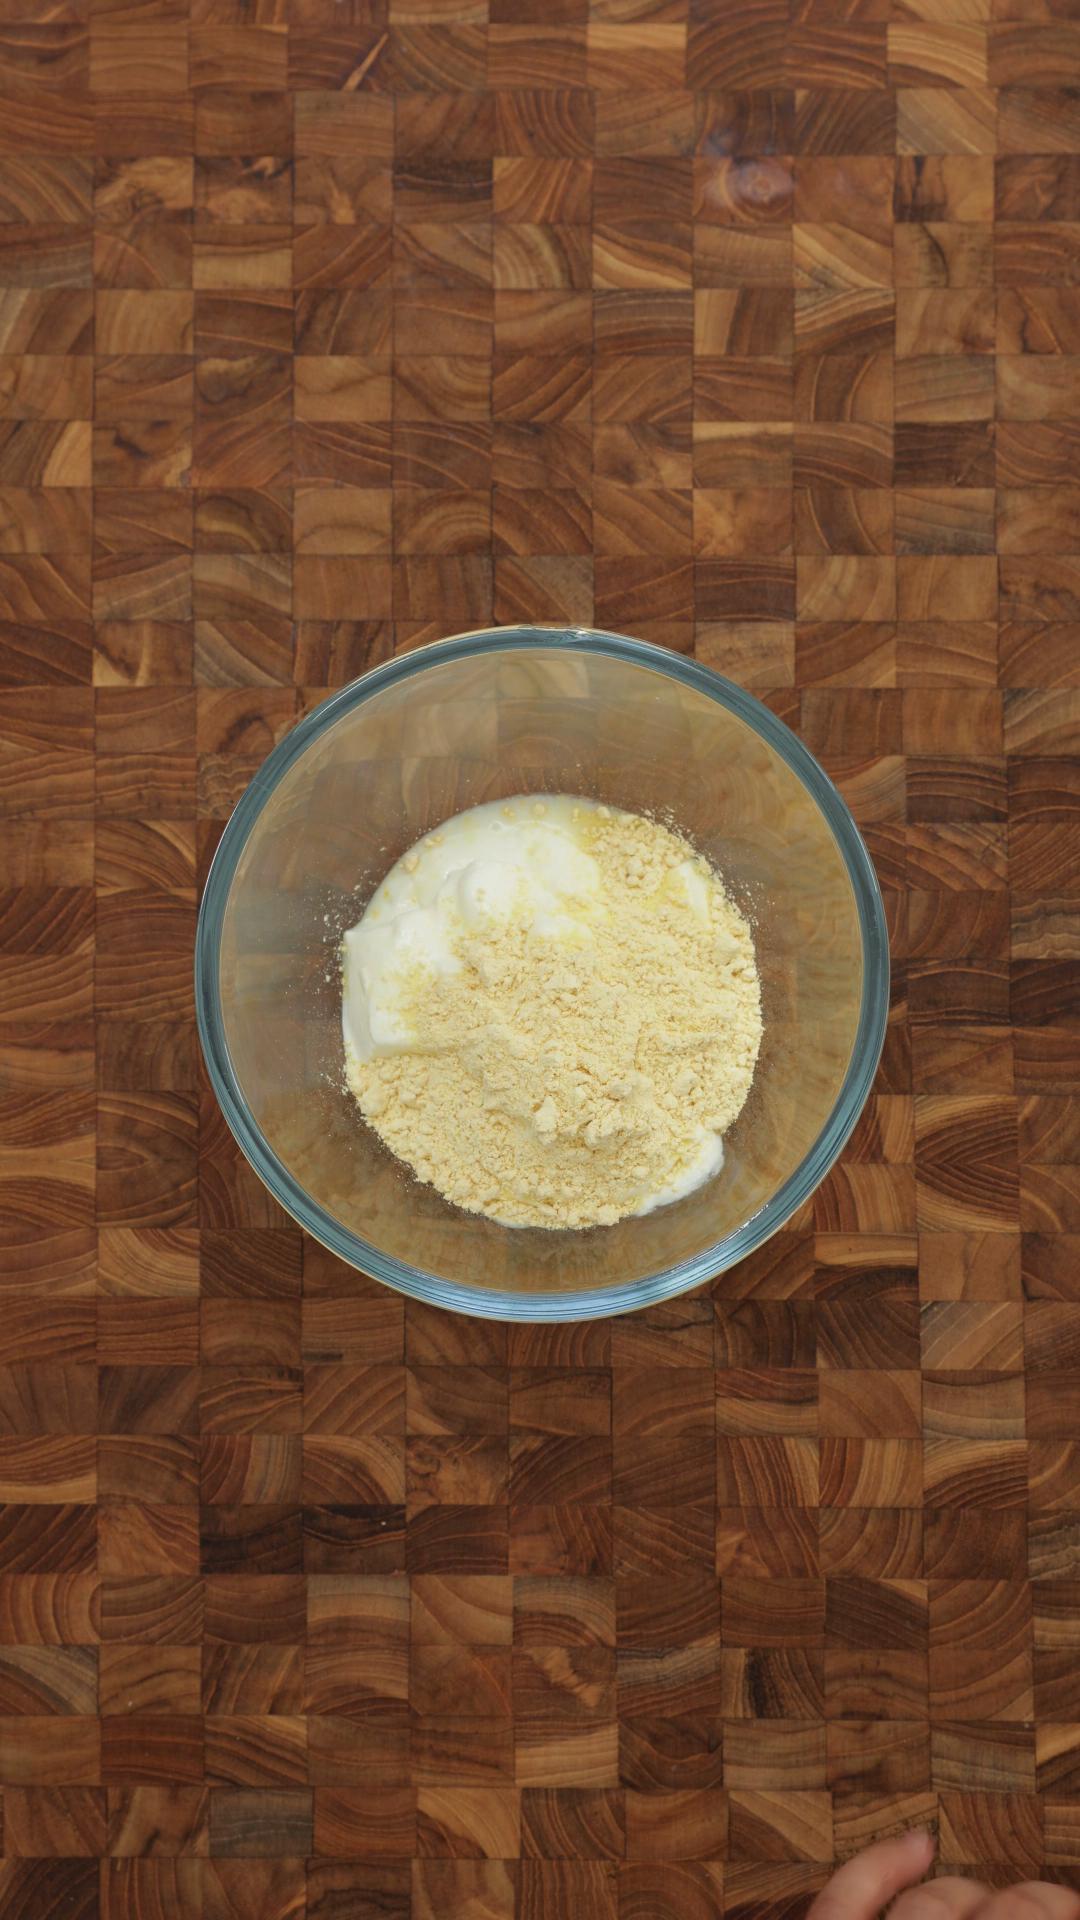
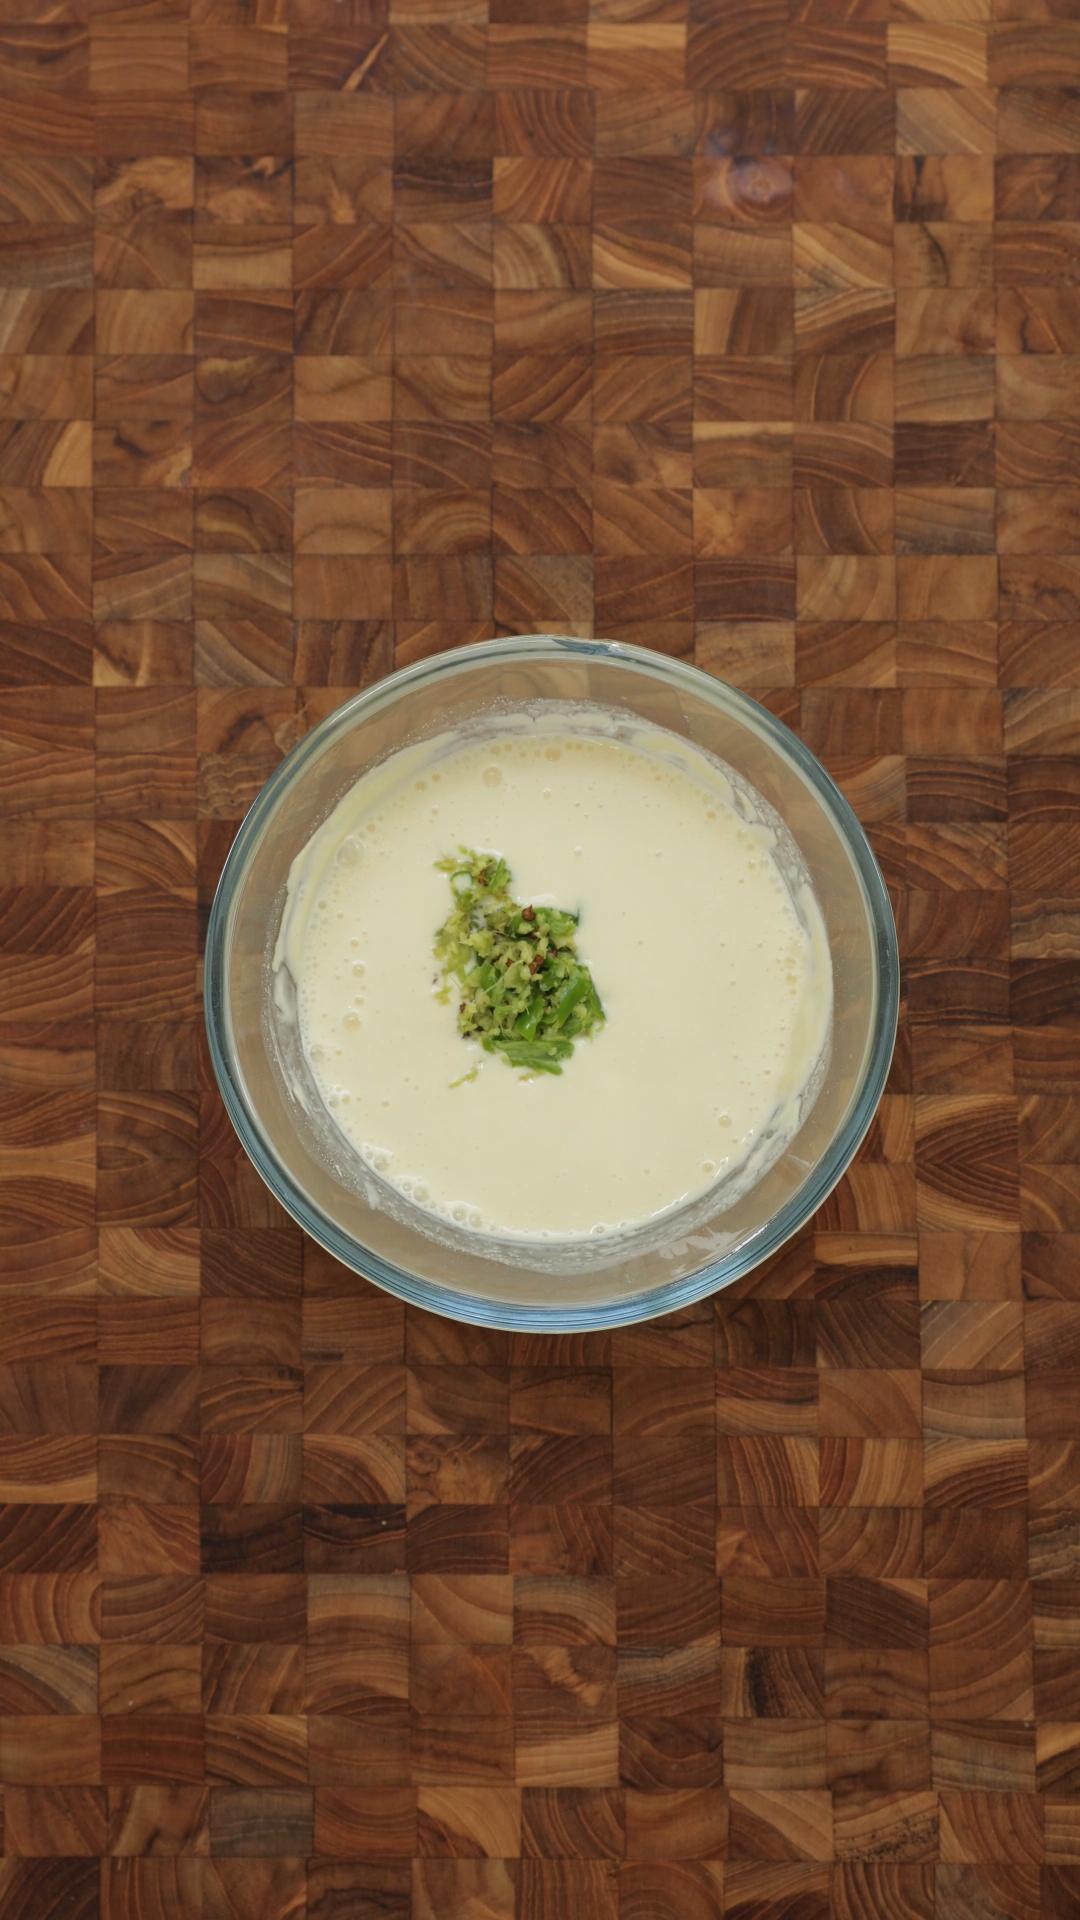
Whisk the yoghurt, besan and water until completely smooth before heating. Then bring the kadhi up gently while stirring. This helps prevent lumps and splitting.
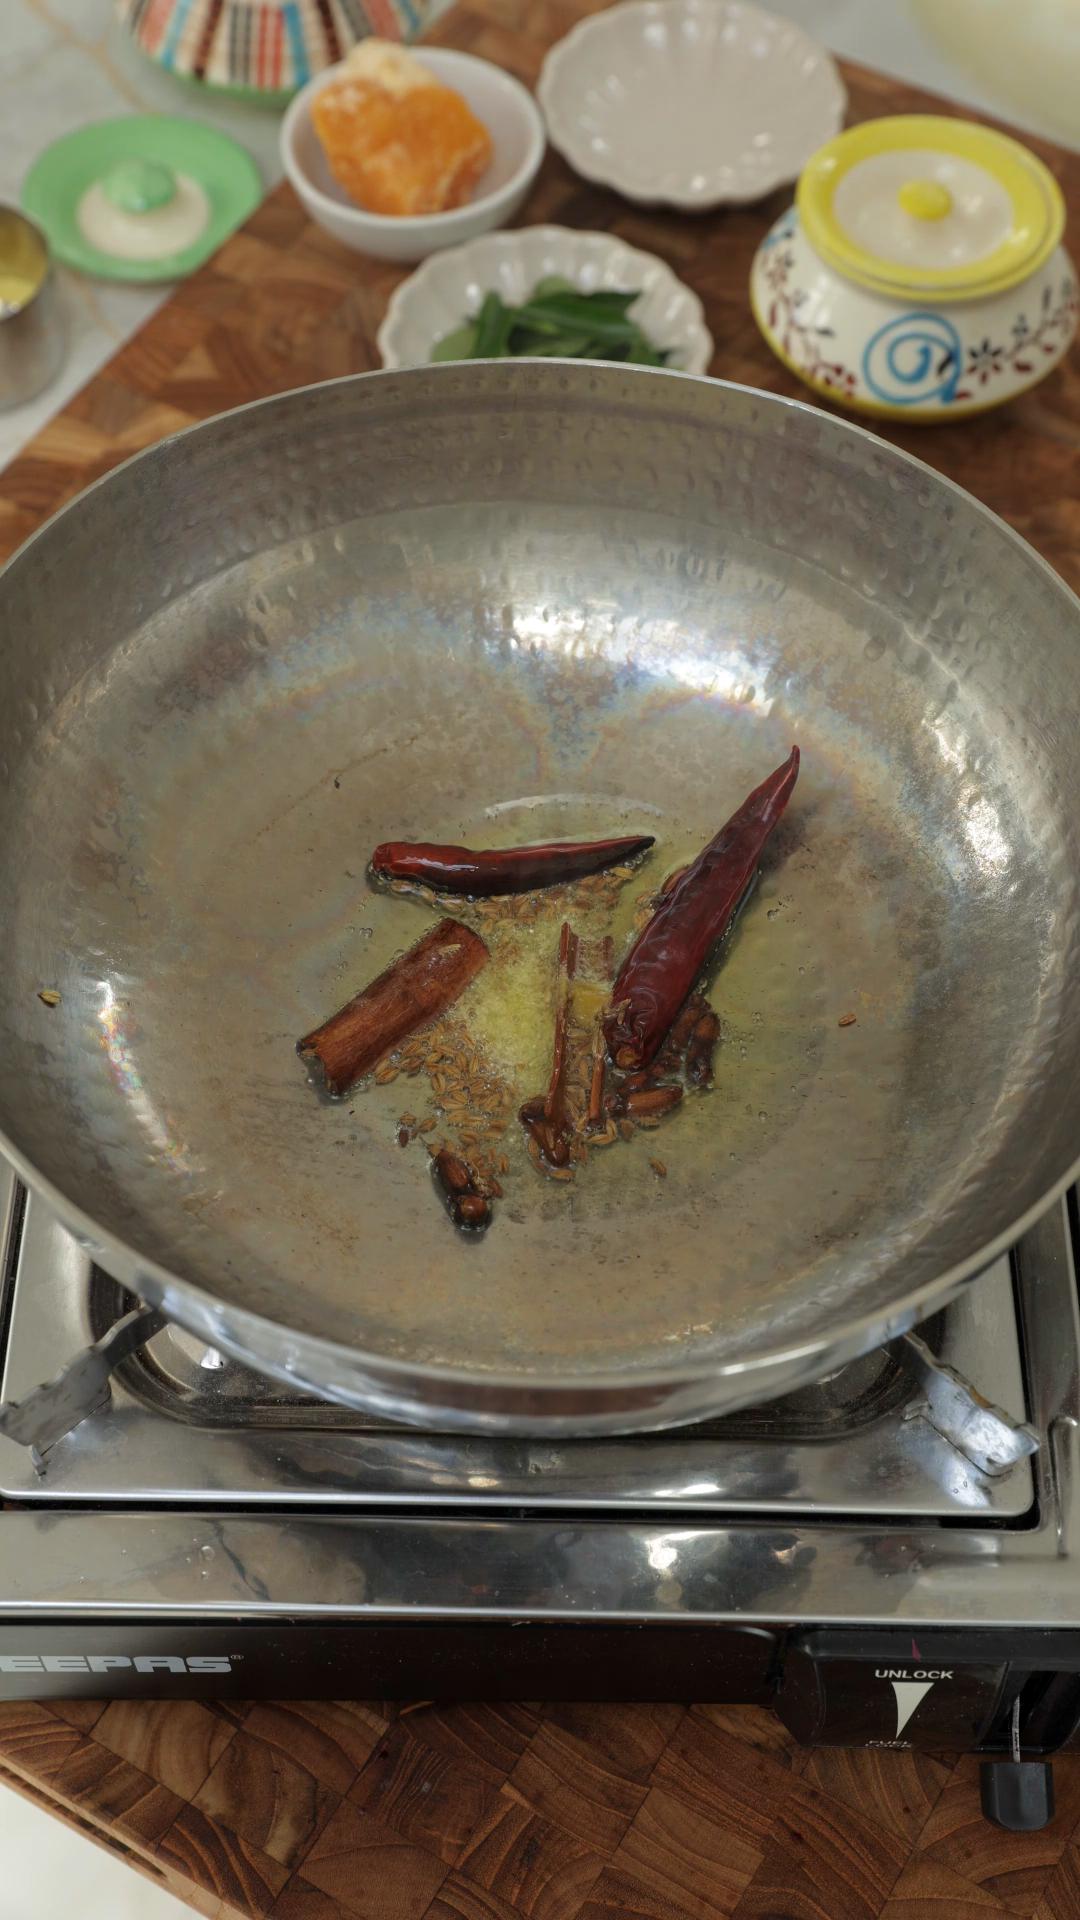
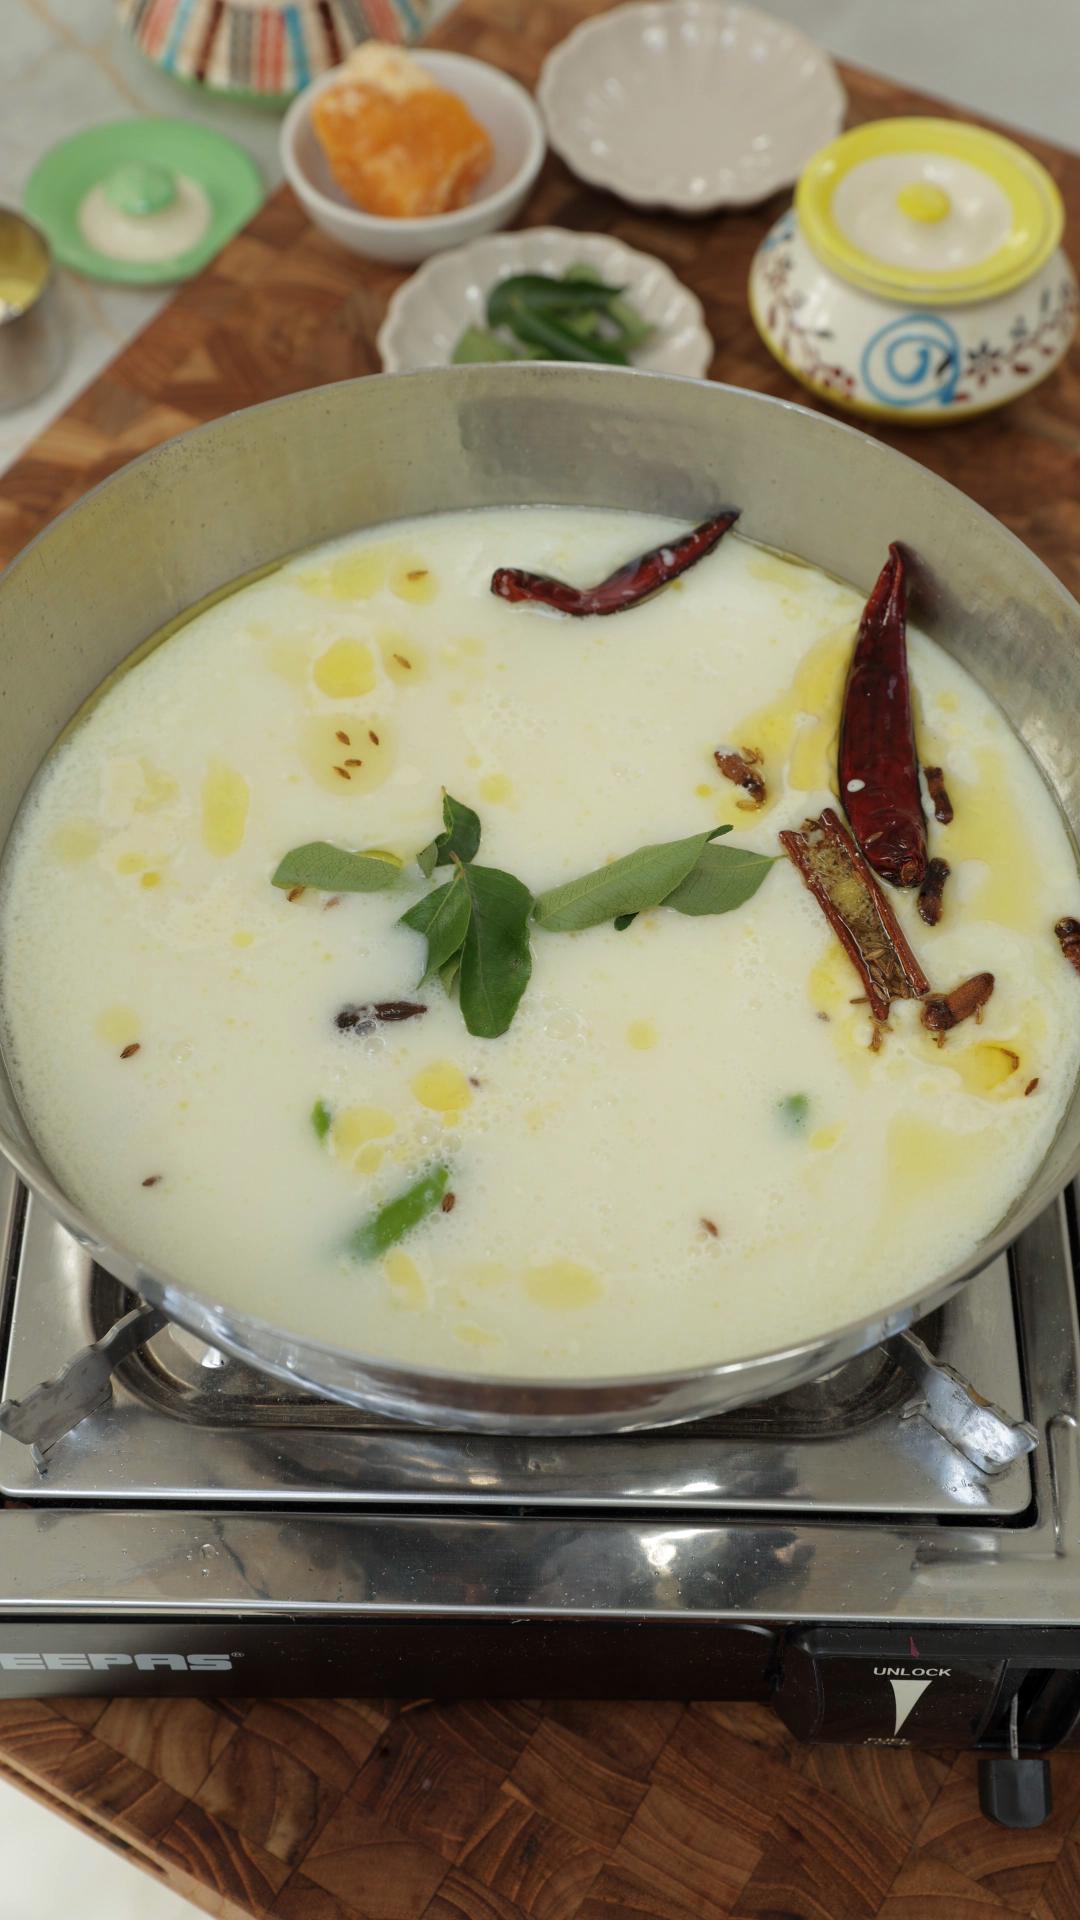
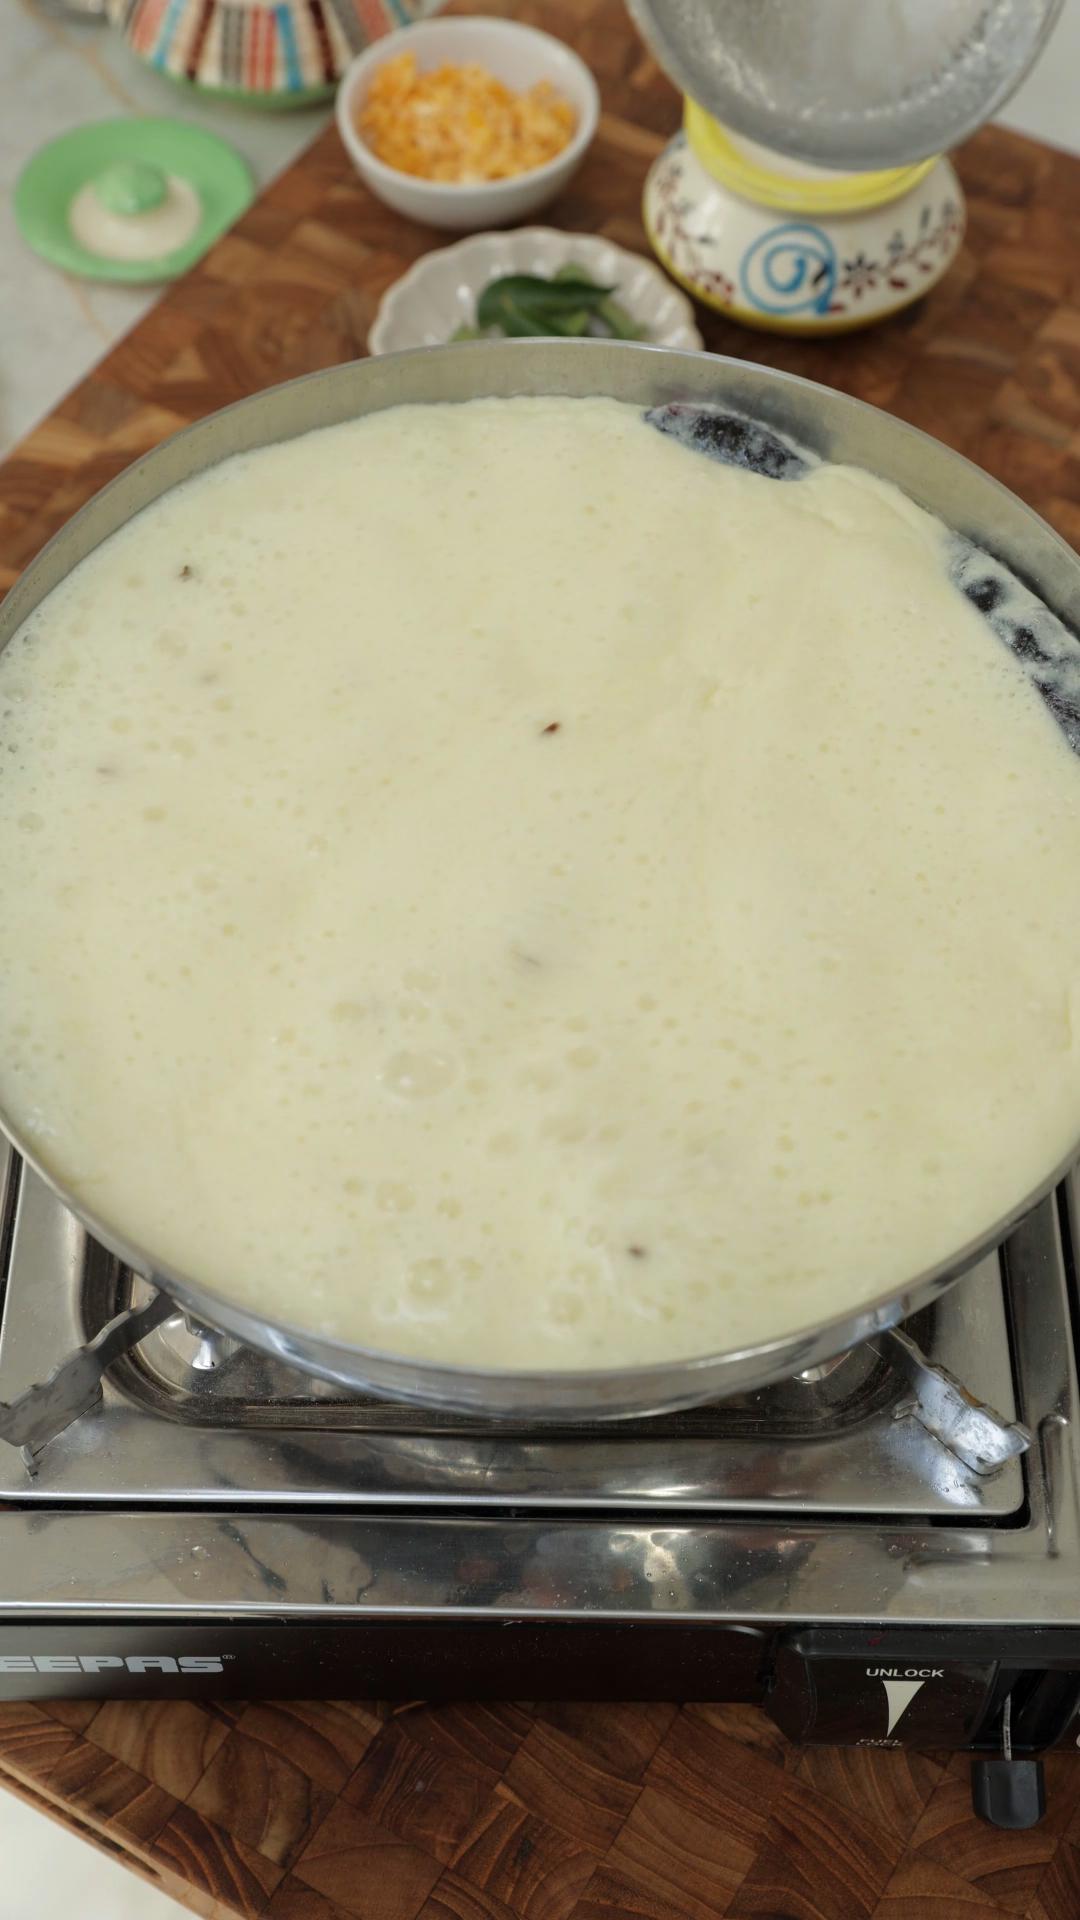
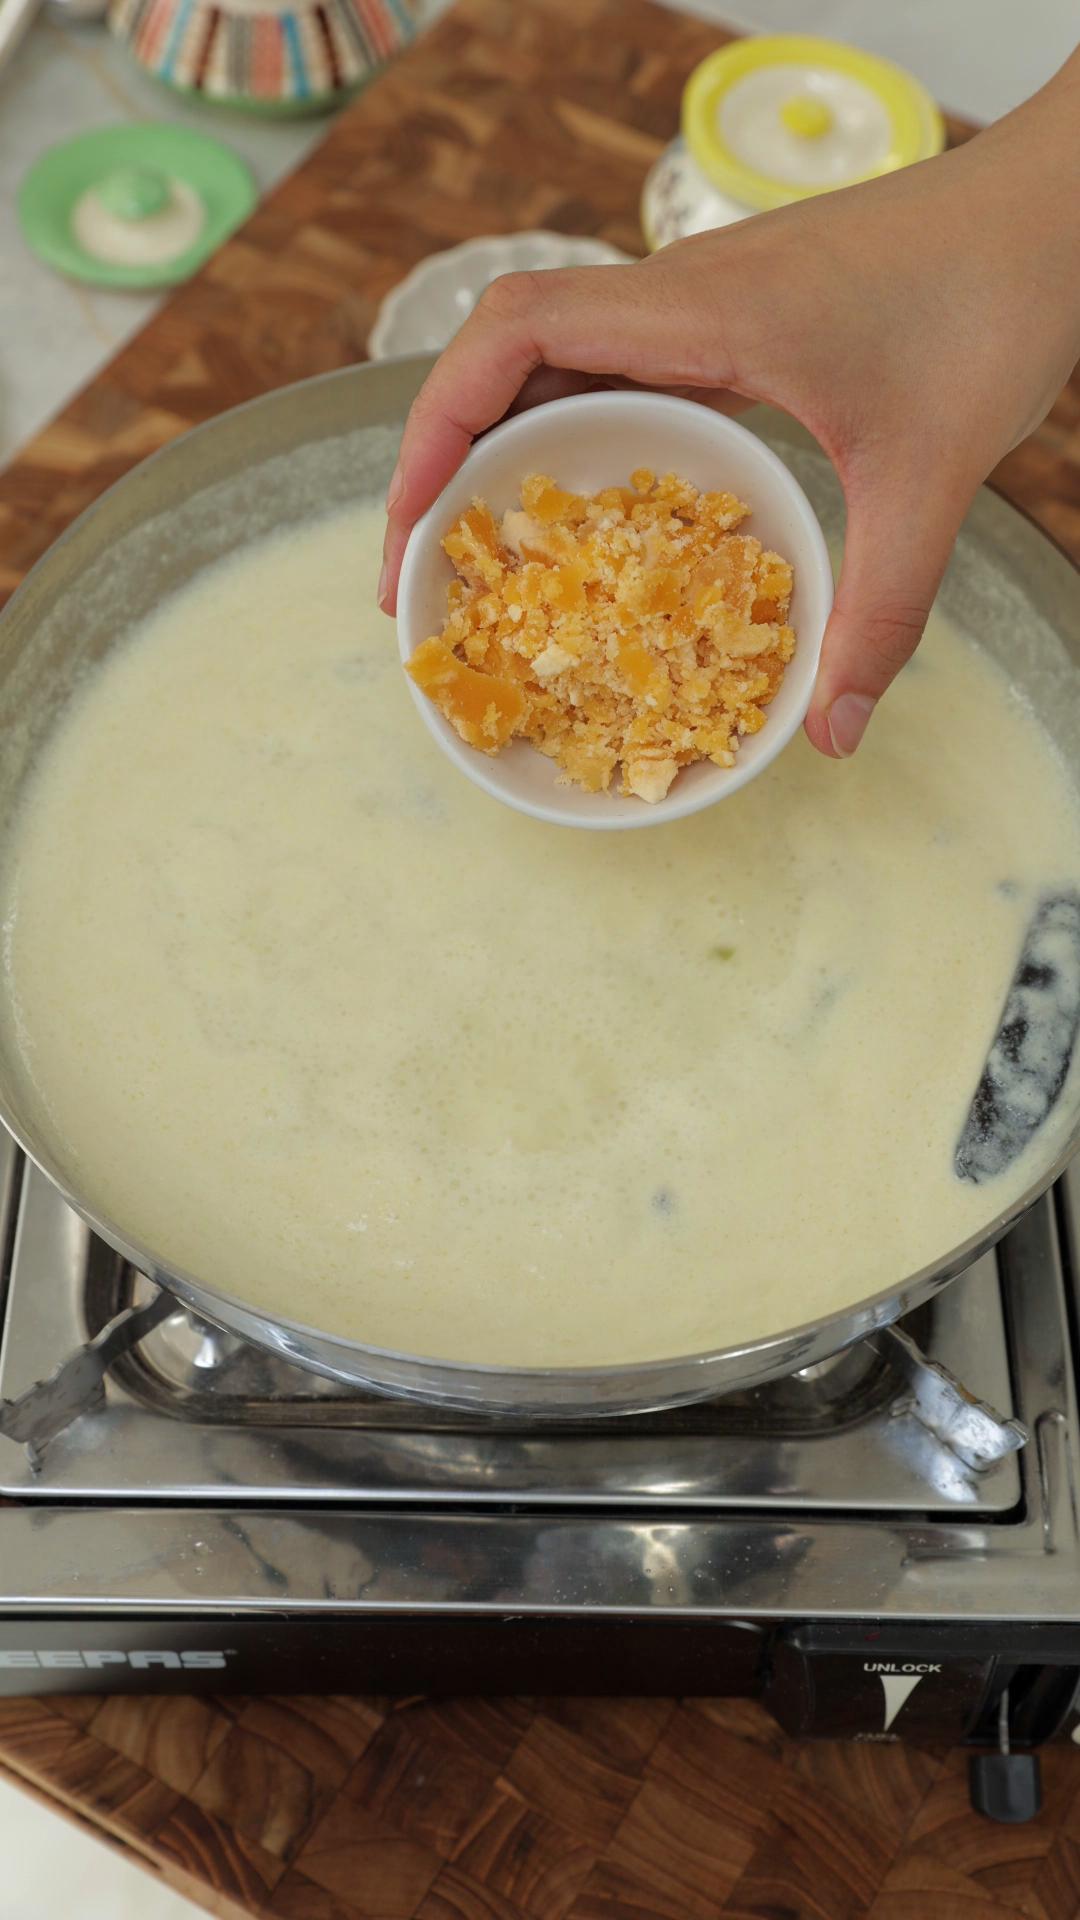
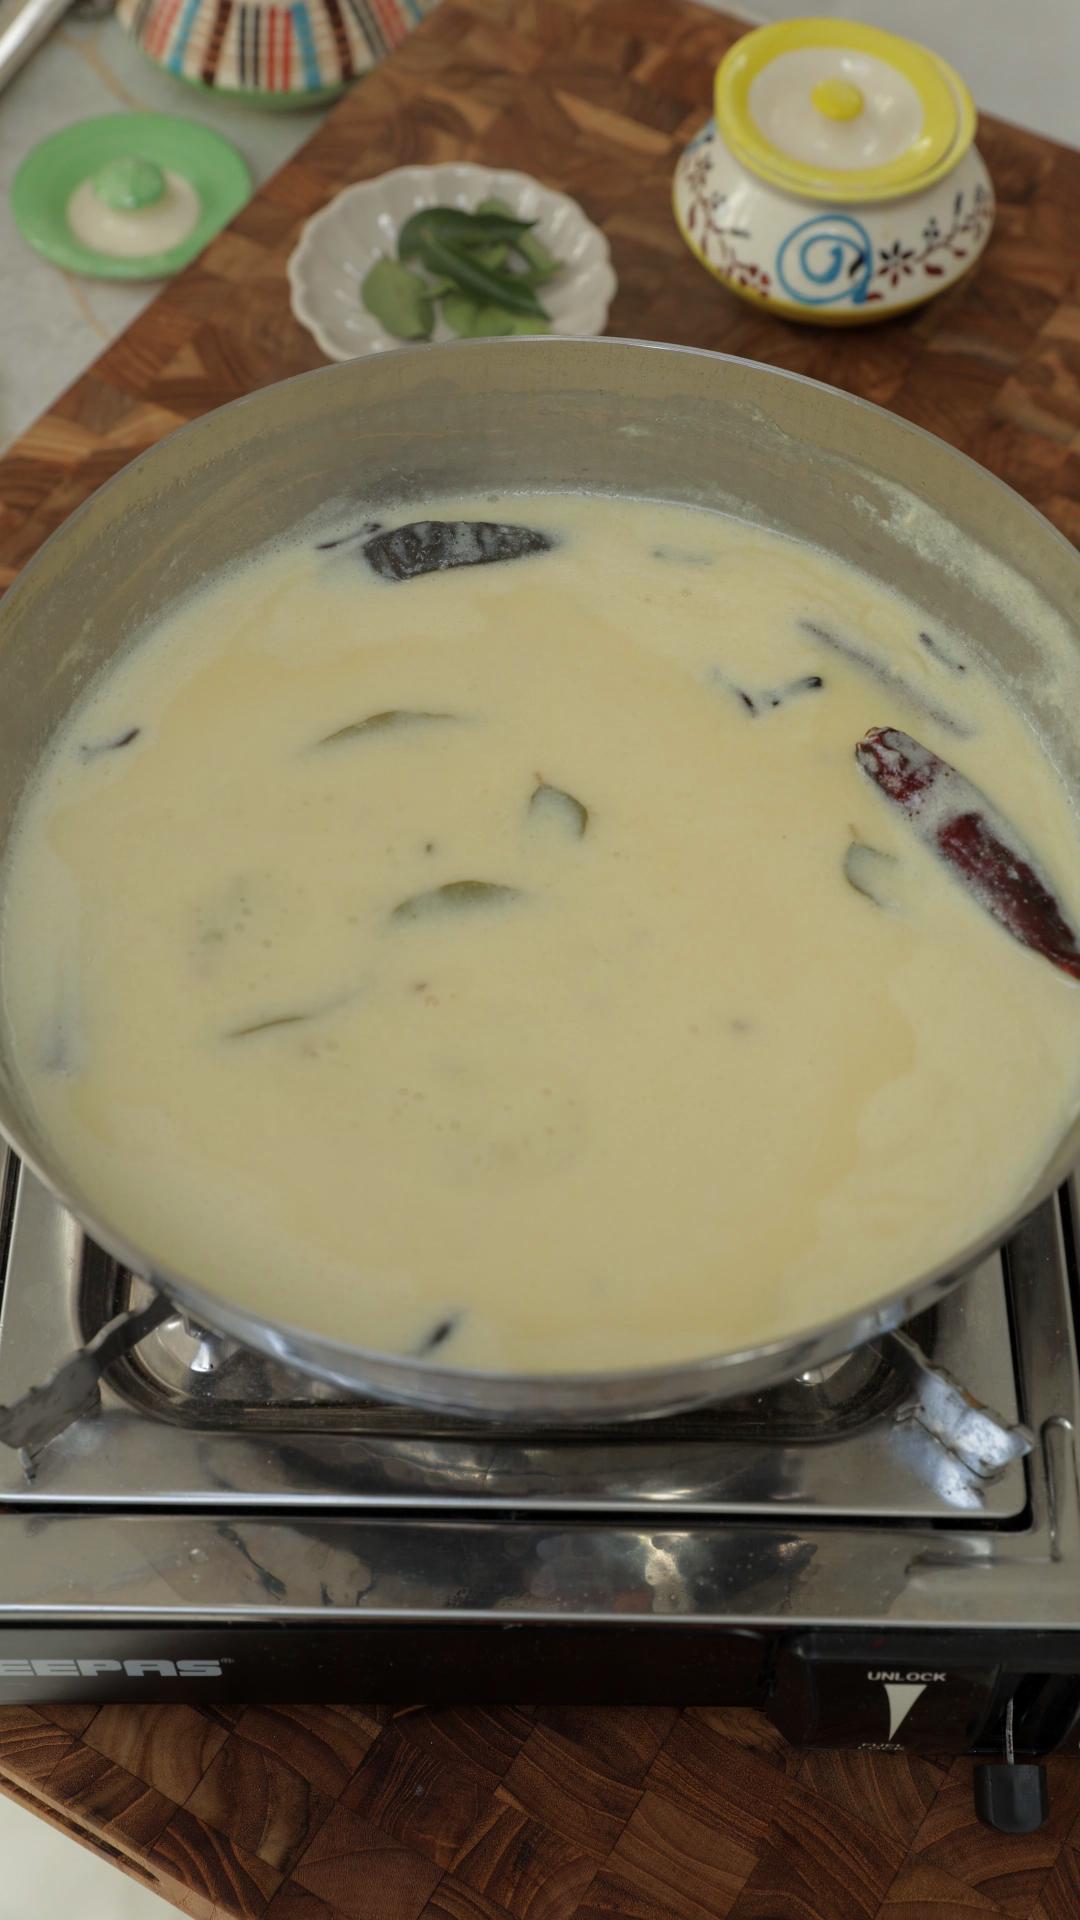
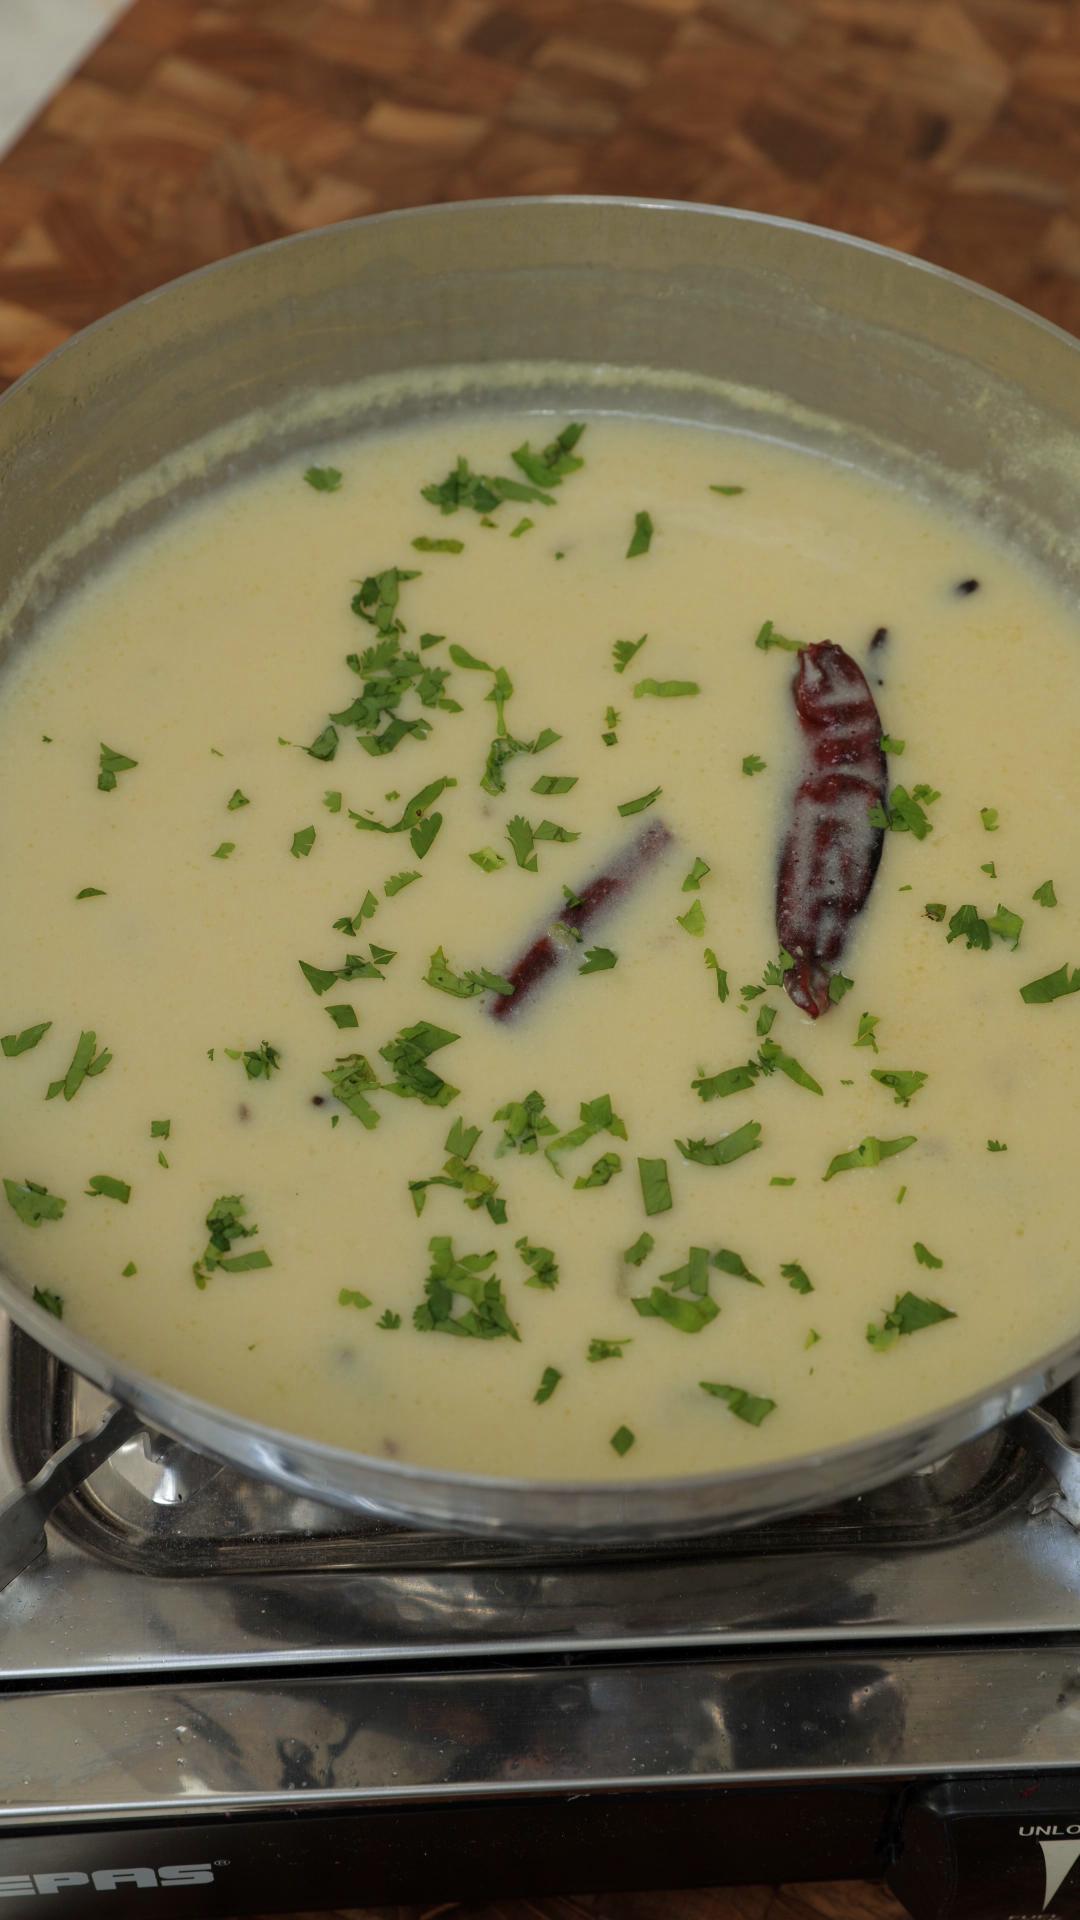
Pro tip
The main thing is to start with a smooth mixture.
Whisk the yoghurt, besan and water properly before heating.
Then cook gently while stirring.
Salt also helps stabilise the kadhi, so I add it early rather than at the end.
Do not blast the kadhi over high heat straight away.
Let it come up gently first.
Once it has thickened and looks smooth, it becomes more stable.
Gujarati kadhi is the ultimate comfort food with simple khichdi, plain rice or cumin rice.
I also serve it with in a thali with soft Gujarati rotli and a flavourful Gujarati shaak.
One of my favourite combinations is with rasawalu kala chana nu shaak or tuvar nu shaak. When in season, my Mum always makes bharela ravaiya or bharela bhinda!
It also works so well with Gujarati puran poli and mag ni chutti dal.
Gujarati wedding kadhi is a special part of the wedding thali, along with patra, surti undhiyu and shrikhand. It is often served with matar pulao as well.
Take it off the heat. Whisk a small amount of besan with water until smooth, then stir it into the kadhi. Return to low heat and stir gently until it comes back together.
Add a little more jaggery or sugar to balance the yogurt. Using full-fat mild yogurt also helps.
The besan was not whisked smoothly enough before cooking. Next time, whisk the yogurt and besan together first until smooth, then add the water gradually.
As always if you make this recipe, be sure to leave me a comment, rate this recipe and tag me on Instagram @jcookingodyssey or #jcookingodyssey. I love seeing all your photos of my recipe recreations!
Don’t forget to follow me on social media using the buttons below – I can't wait to see you all there!

PLEASE NOTE: Nutritional values are estimated by a computer and may vary based on ingredients and portion sizes. For personalised dietary advice, please consult a qualified healthcare professional.
Share on Facebook Pin This RecipeThese 3 ingredient vegan waffles are the perfect filling breakfast. Make with simple ingredients; oats, banana and plant milk, these vegan oatmeal waffles are one of the simplest recipes. Get perfect waffles every single time.

In this Mumbai Style Tawa Pulao cooked rice and vegetables are stir fried in butter, pav bhaji masala, chilli-garlic paste and with other spices and fresh coriander. It has the buttery, spicy flavour of pav bhaji, but in a quick dish using pre-cooked rice.
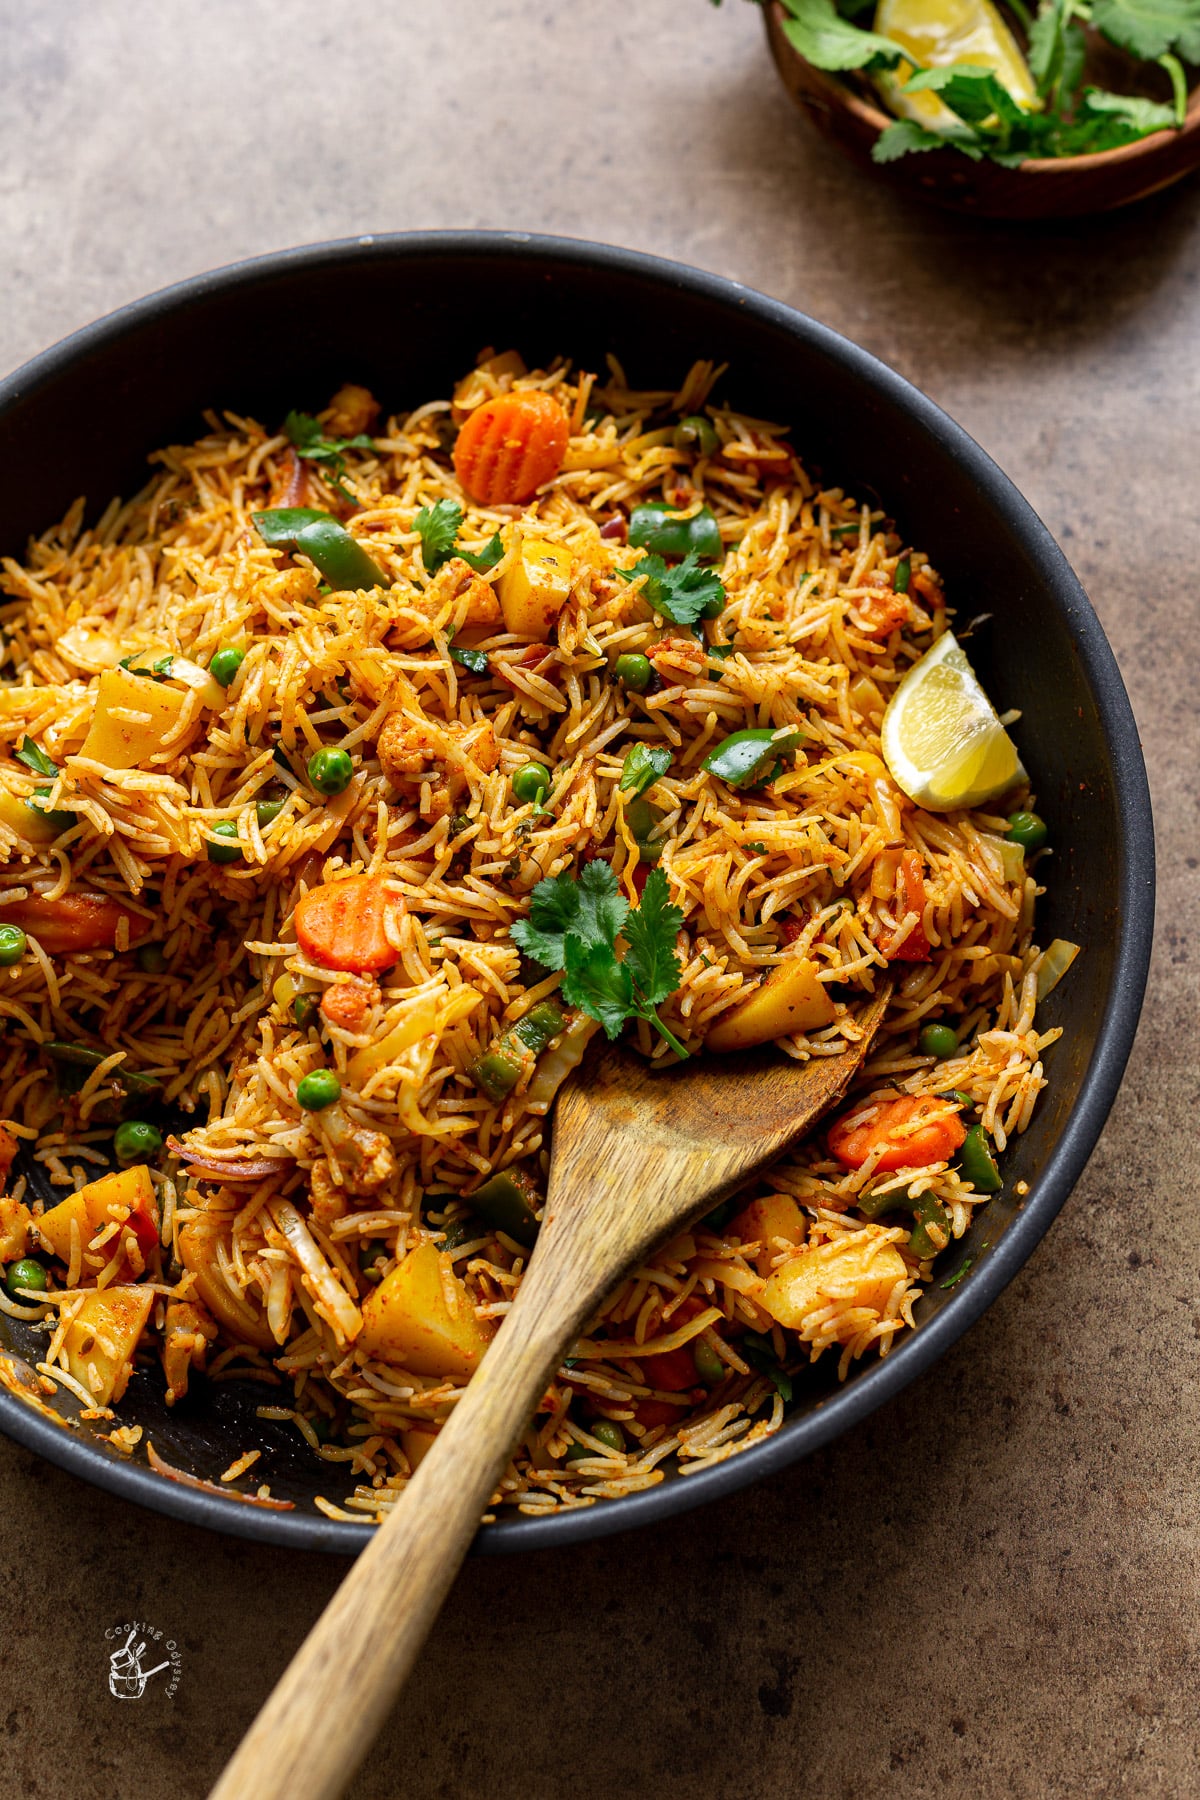
There is an even quicker method of making tawa pulao - simply tossing ready made pav bhaji with cooked rice.
However. I'm not a fan of this method.
Home cooked pav bhaji is quite heavy and strong. The ratio of gravy, vegetables and rice is all wrong so I much prefer making this dish from scratch.
This way, the vegetables retain their shape and colour, the spices are well balanced and the rice grains remain fluffy and separate.
To enhances the flavour and mimic the bright colour of street-style pulao, I add red chilli garlic paste made with kashmiri chillies.
In streets of Mumbai, you'll find street vendors preparing tawa rice on a huge flat tawa. At home, I simply use a wide frying pan or wok.
Full list with measurements in the recipe card below.
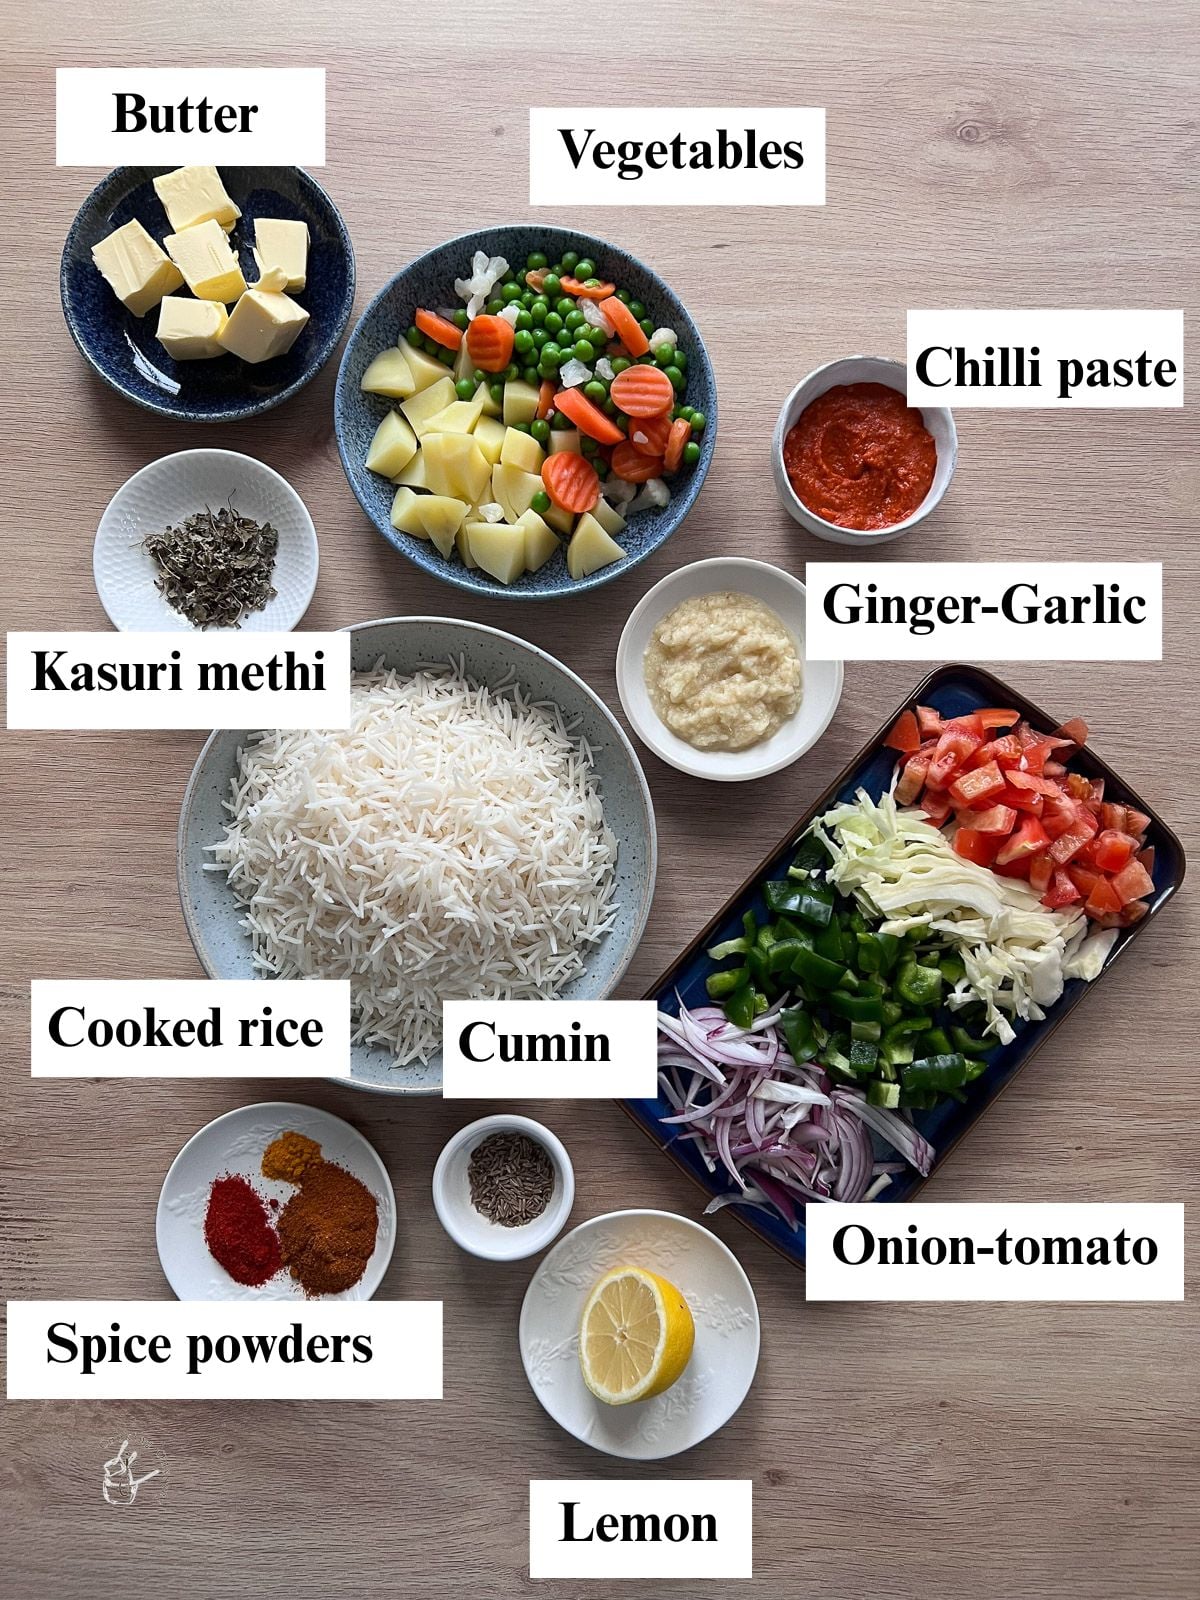
Rice - I like to use good quality sella basmati rice, which I also use in biryanis like my paneer vegetable dum biryani.
Sella rice holds it's shape well once cooked. If you don't have it, use any other basmati rice you have to hand. The important thing is to not overcook it and allow it to cool fully.
Vegetables - I have used carrots, green peas, onions, green bell pepper, potatoes, fresh tomatoes and cauliflower. Adjust depending on what you have.
Pav Bhaji Masala - this masala is non-negotiable for tawa pulao! I also use it in my tawa burger.
Butter - to achieve the same flavours and taste as Mumbai tawa pulao, loads of butter is necessary! Salted or unsalted works fine - just adjust your seasoning later.
A must for street style tawa pulao is a red chilli garlic paste prepared with soaked kashmiri chillies or fresh red chilies and garlic cloves.


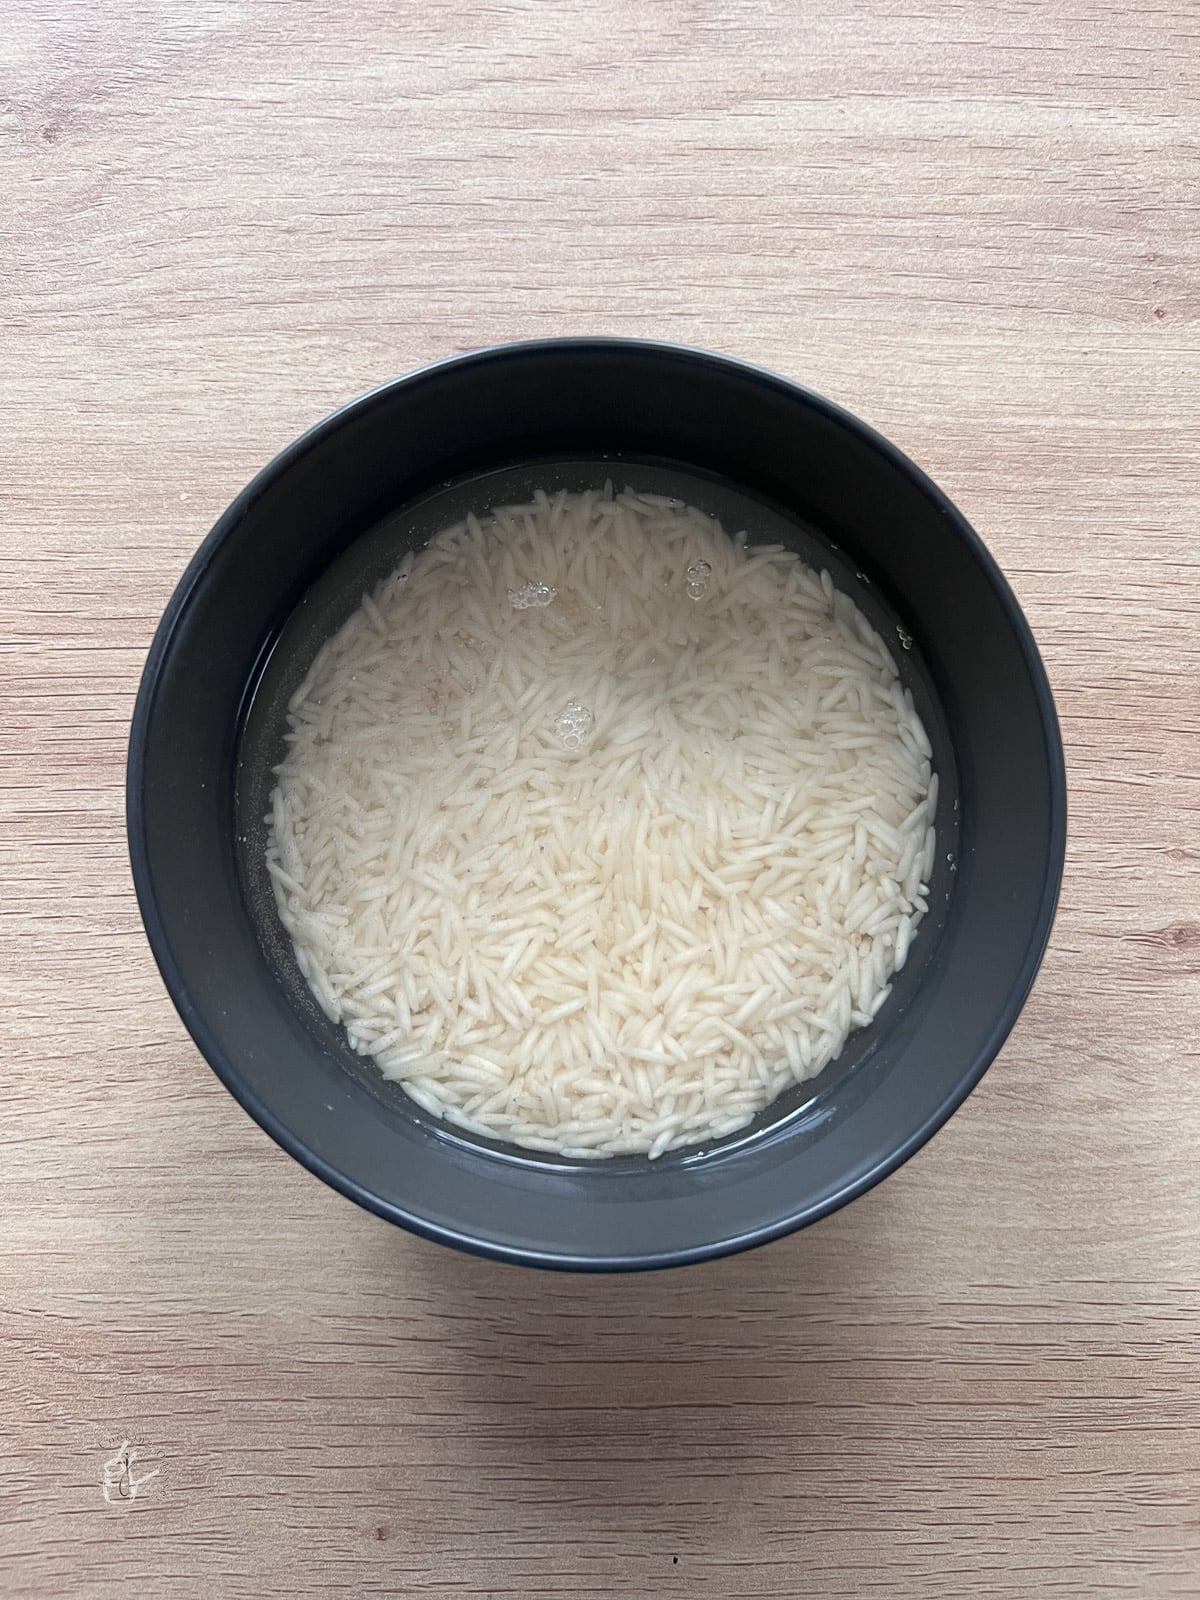
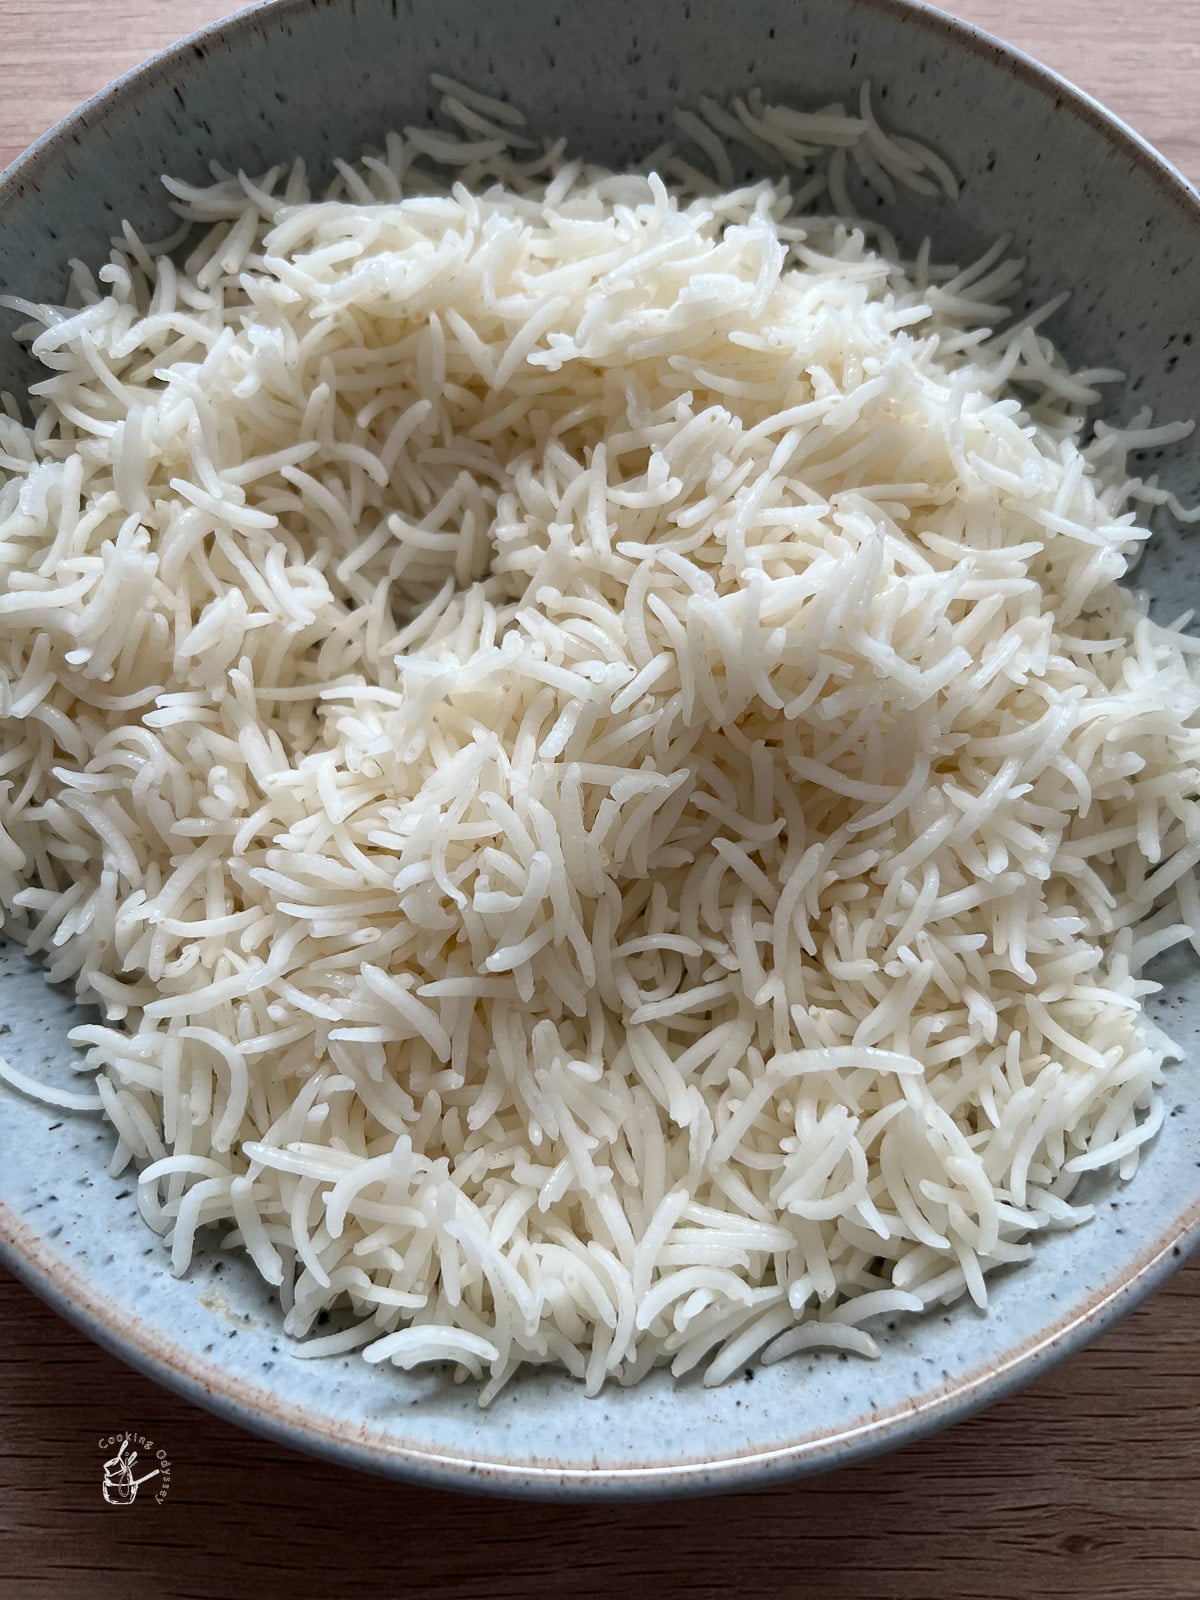
The cooking time depends on the quality and the quantity of the rice.
For Sella rice I needed around 5-6 minutes.
Pro tip
For the best results - ensure not to overcook your rice.
I personaly avoid using pressure cooker or instant pot. It is best to use an open pot to cook the rice. This way you can see how your rice is cooking and grains will remain separated.
A tip from my Mum is to add a few drops of oil and lemon juice to make fluffy rice.
If you have added too much water to cook the rice, cook rice until just al dente. Drain the water from the rice using a colander.
Let the rice cool completely before adding it to the sauteed veggies. For stir-fried rice dishes, I like I cook my rice a few hours before, cool completely and then store in the fridge until needed.
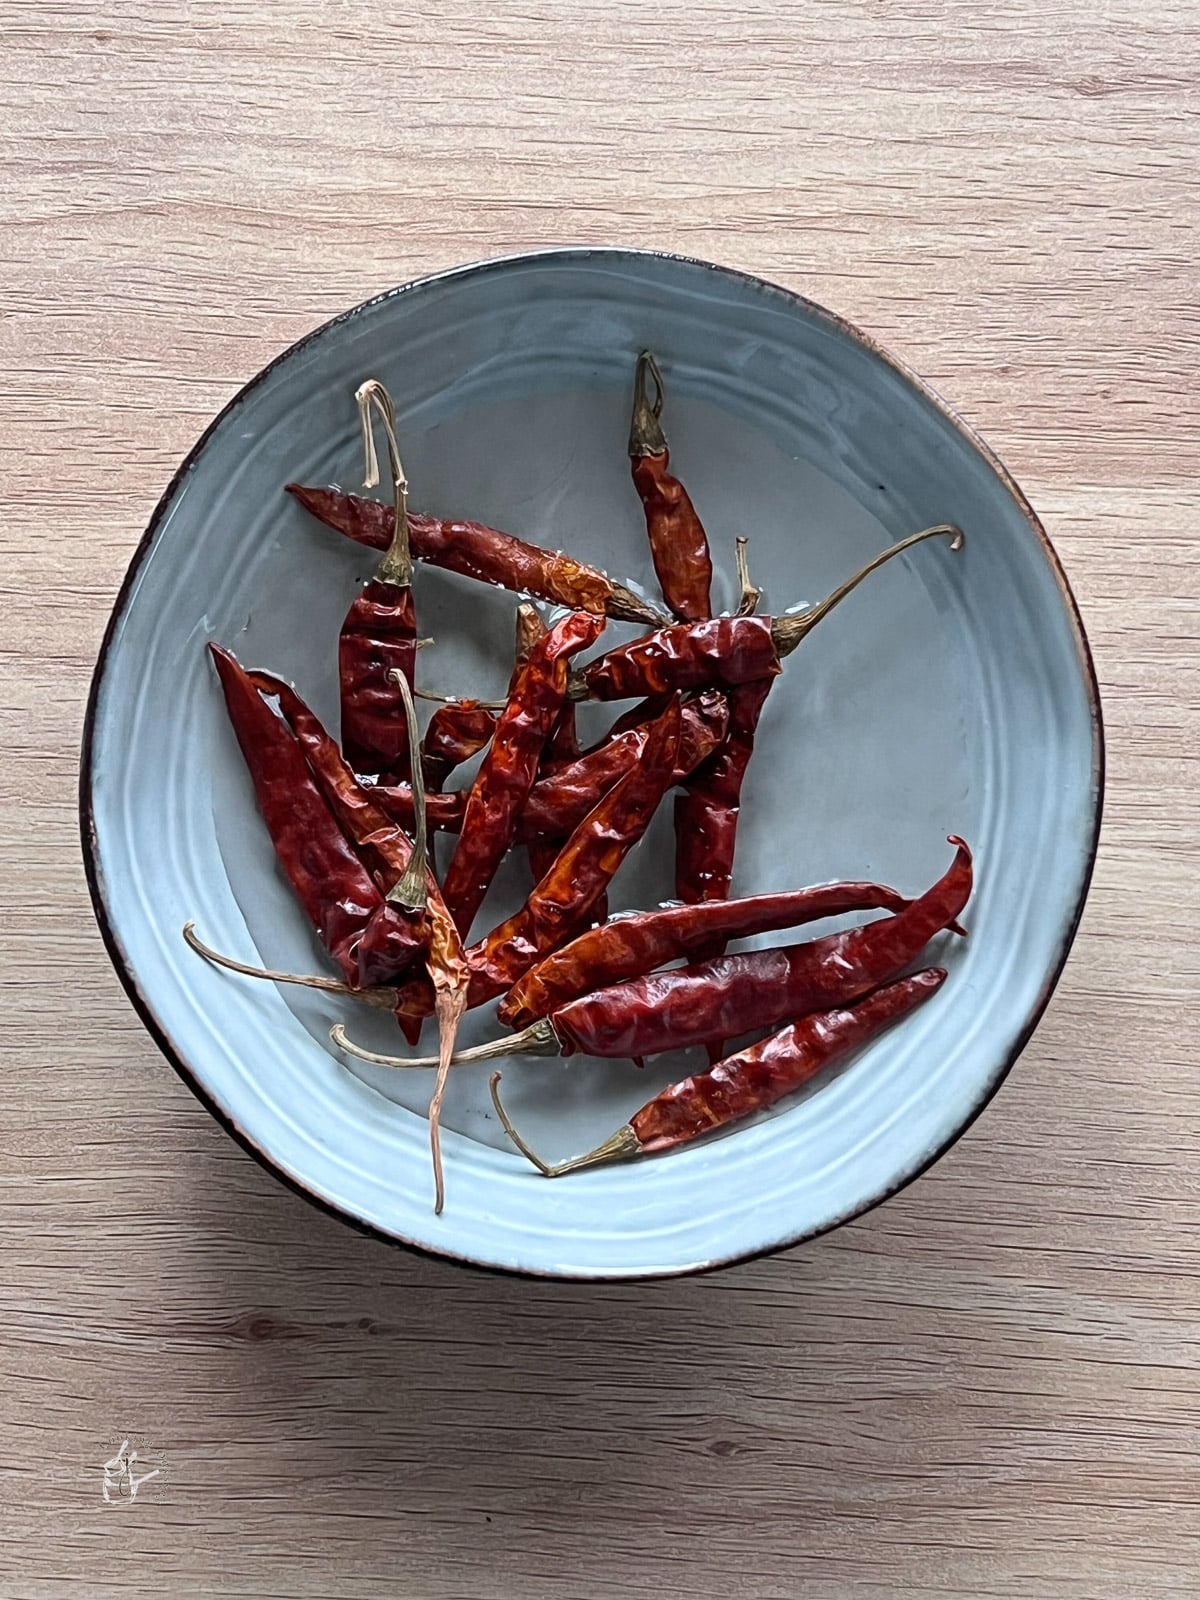
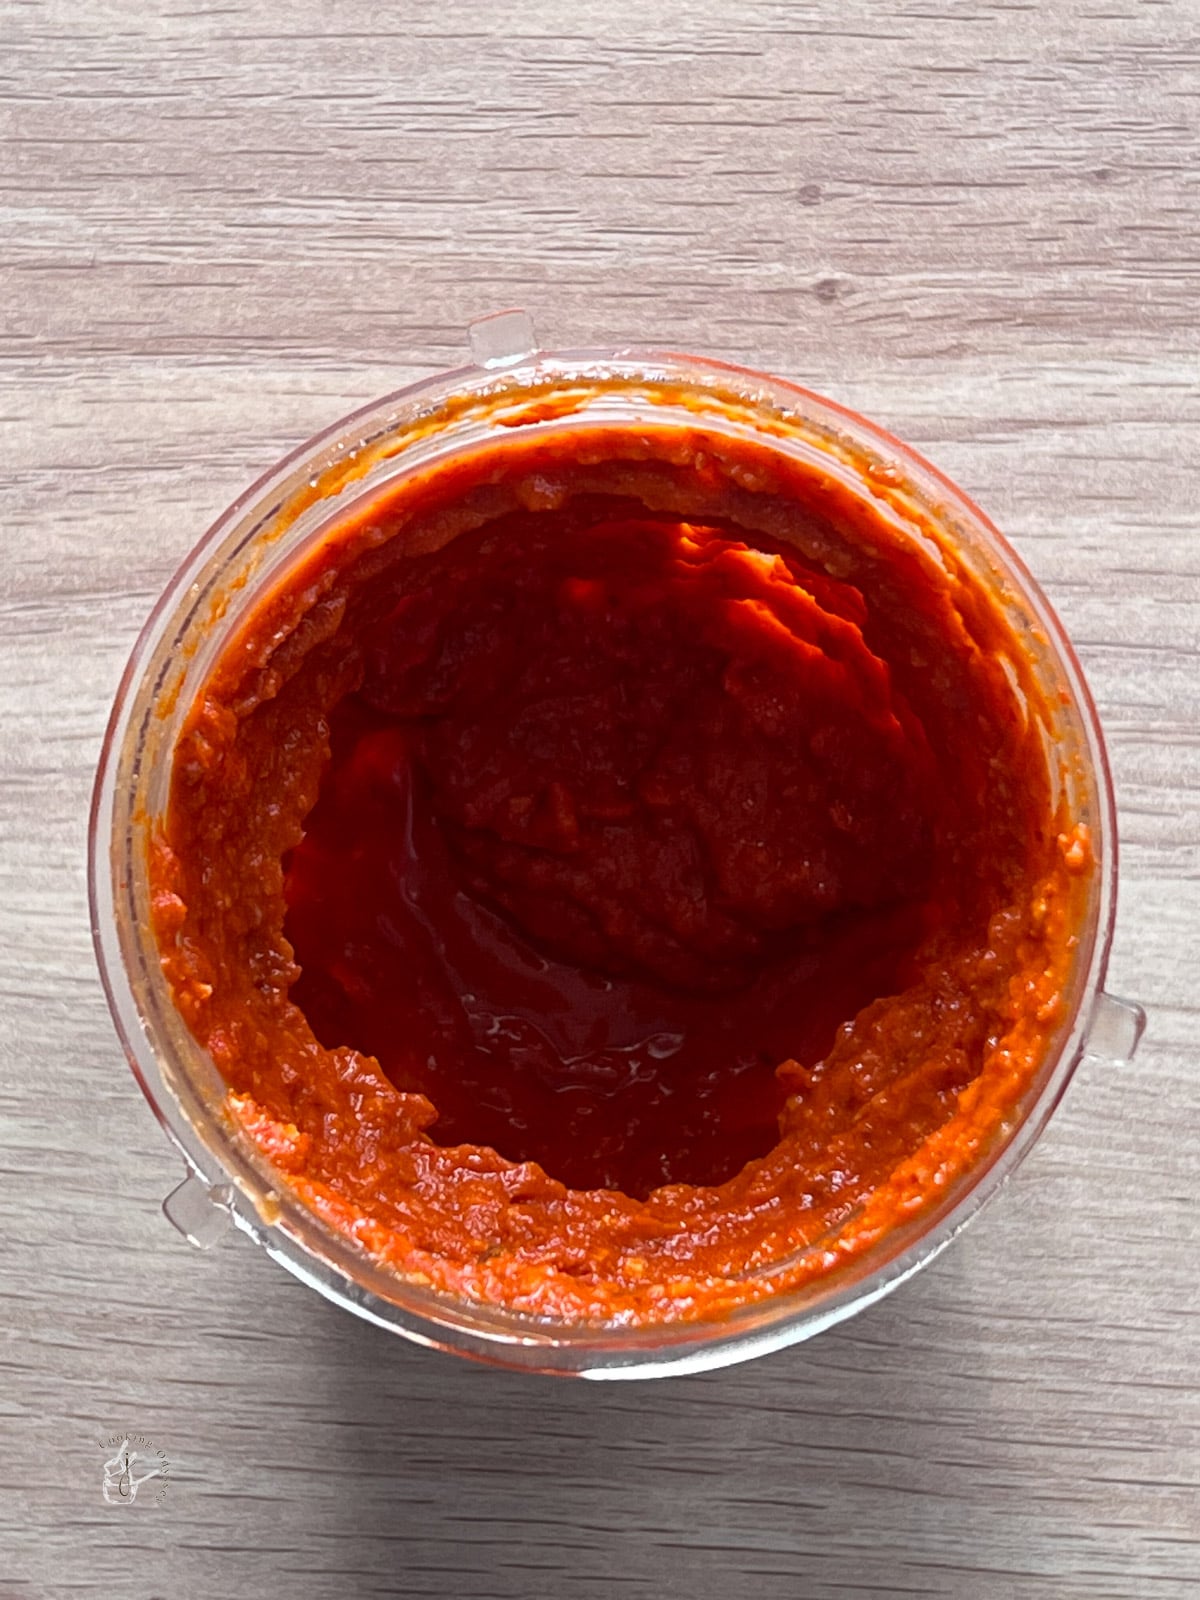
Do not add much water as we need thick paste. Blend or pulse until you have thick and smooth paste.
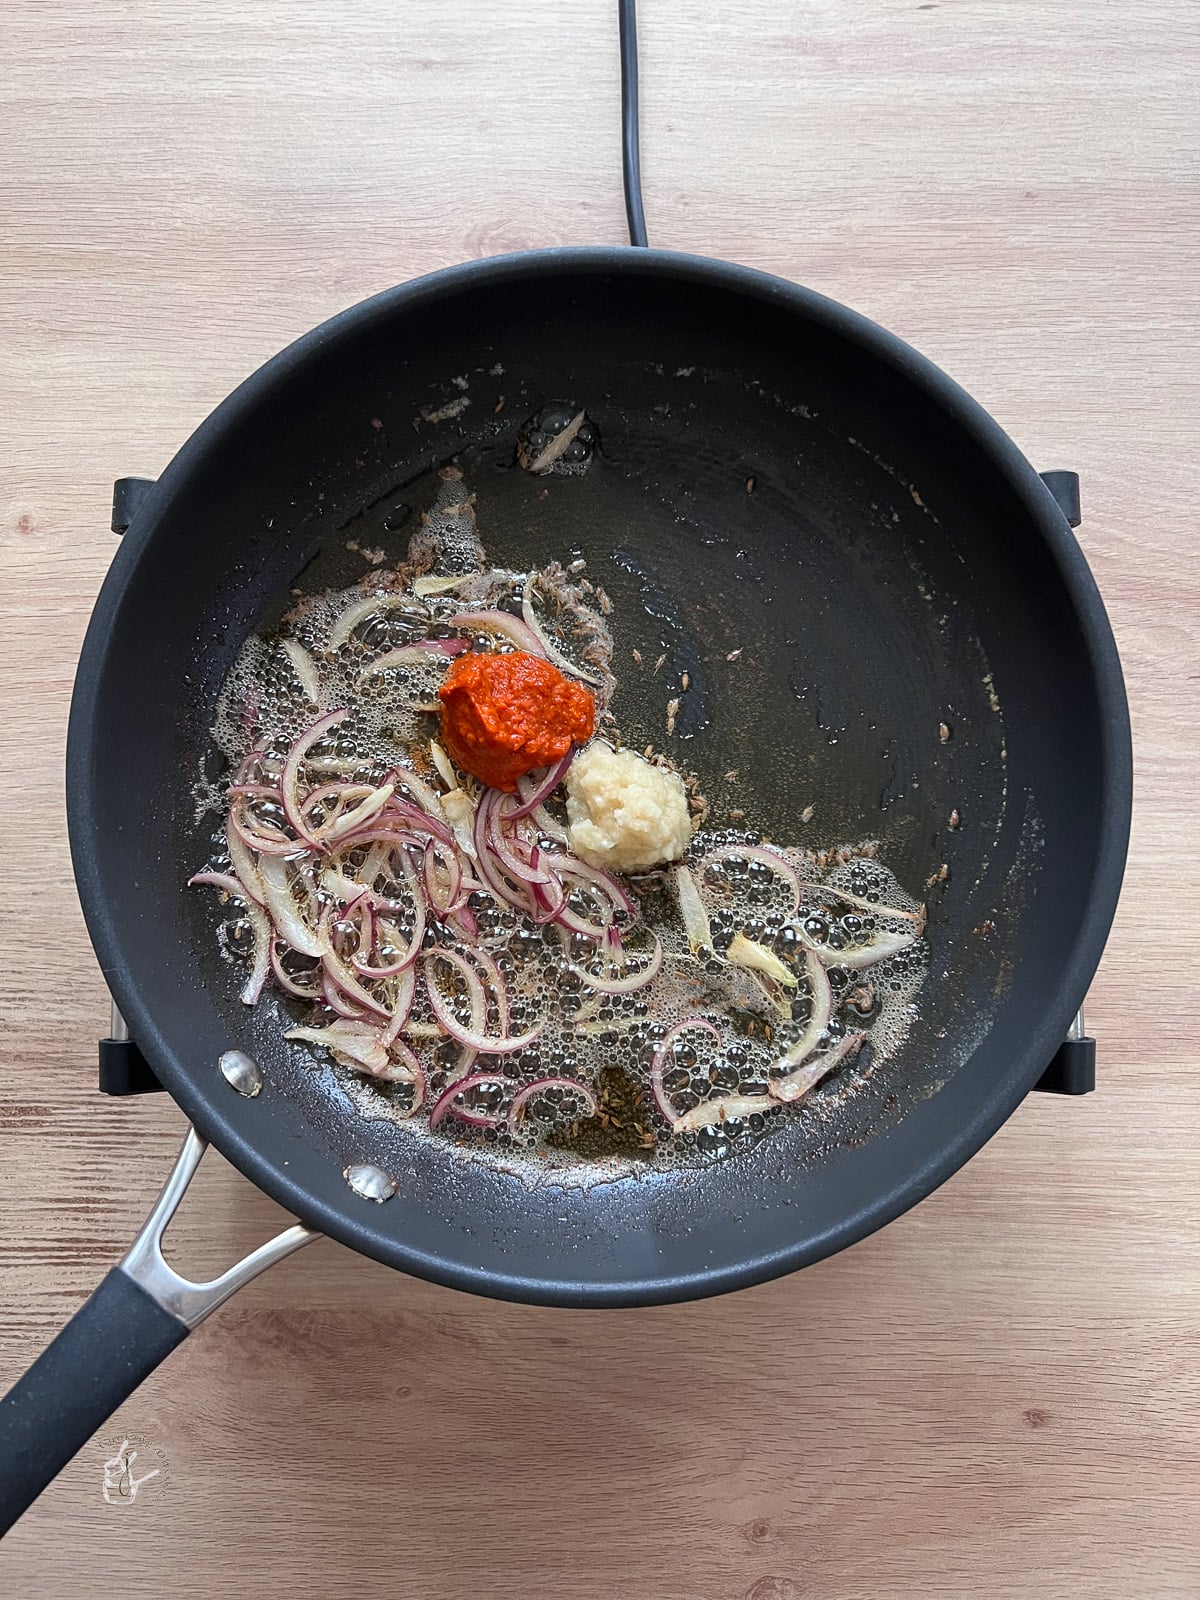
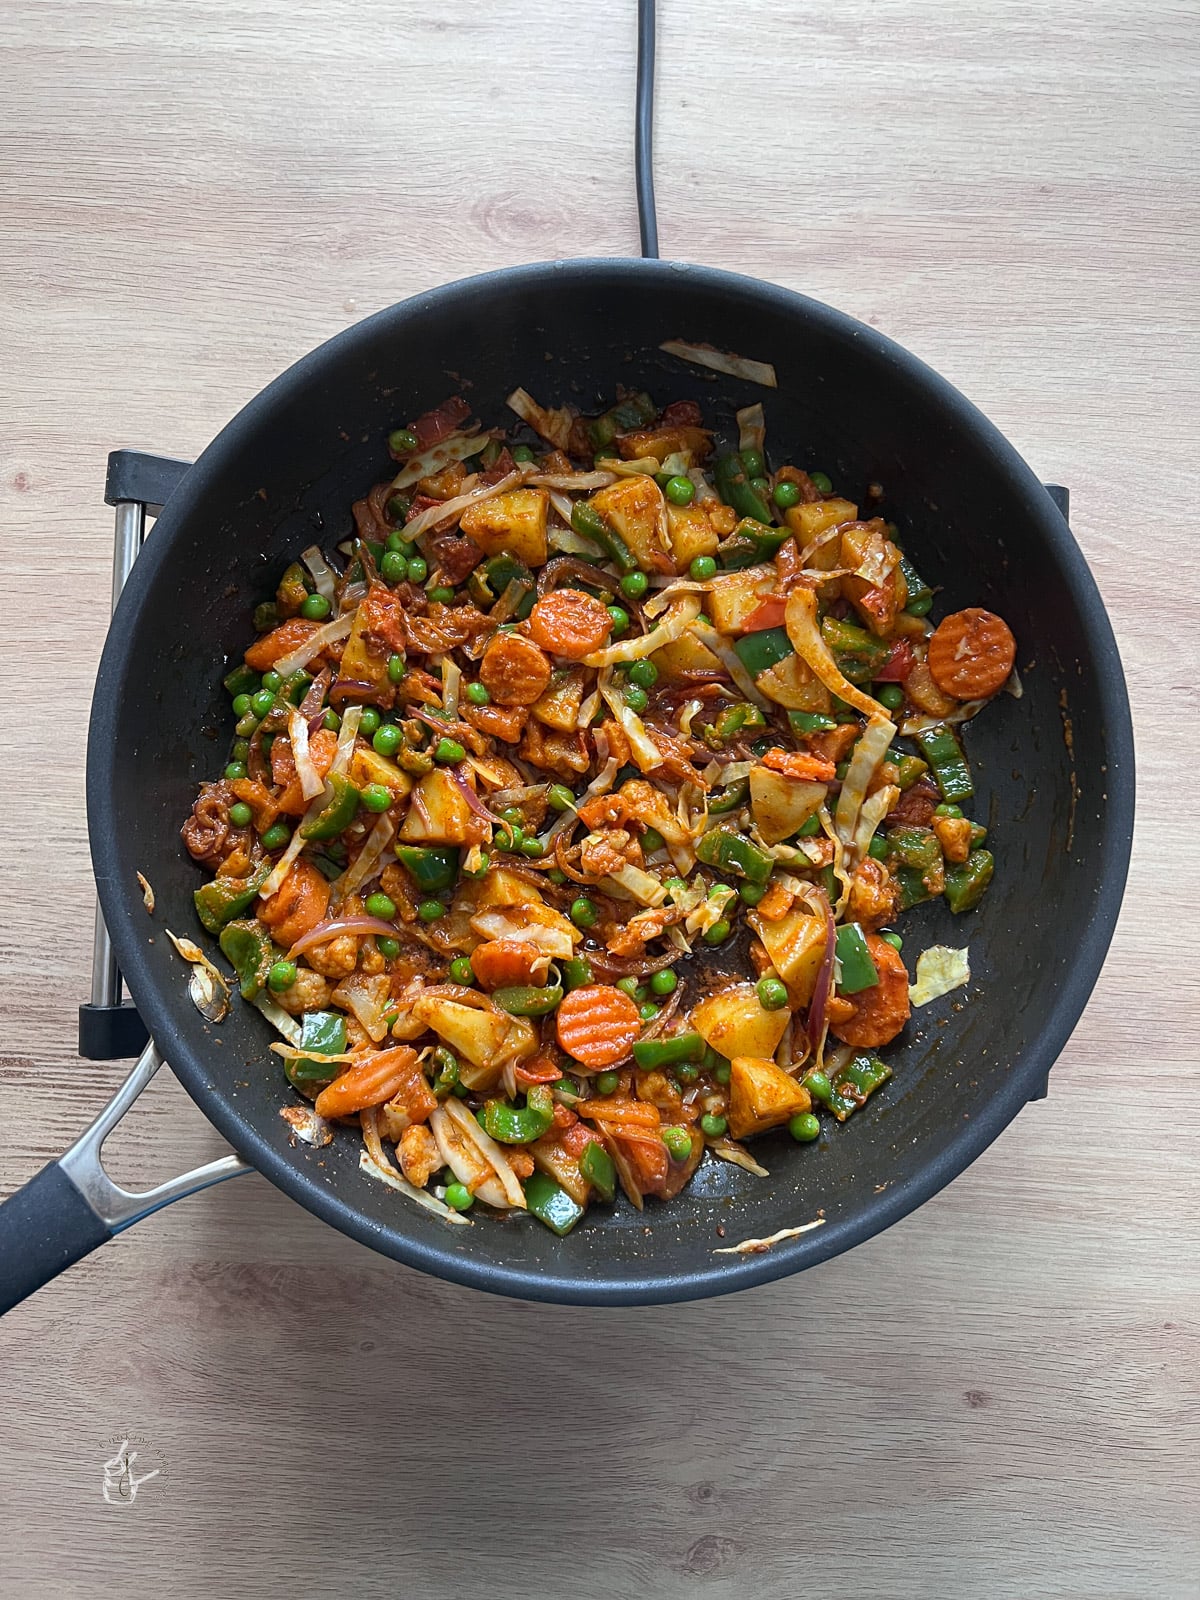
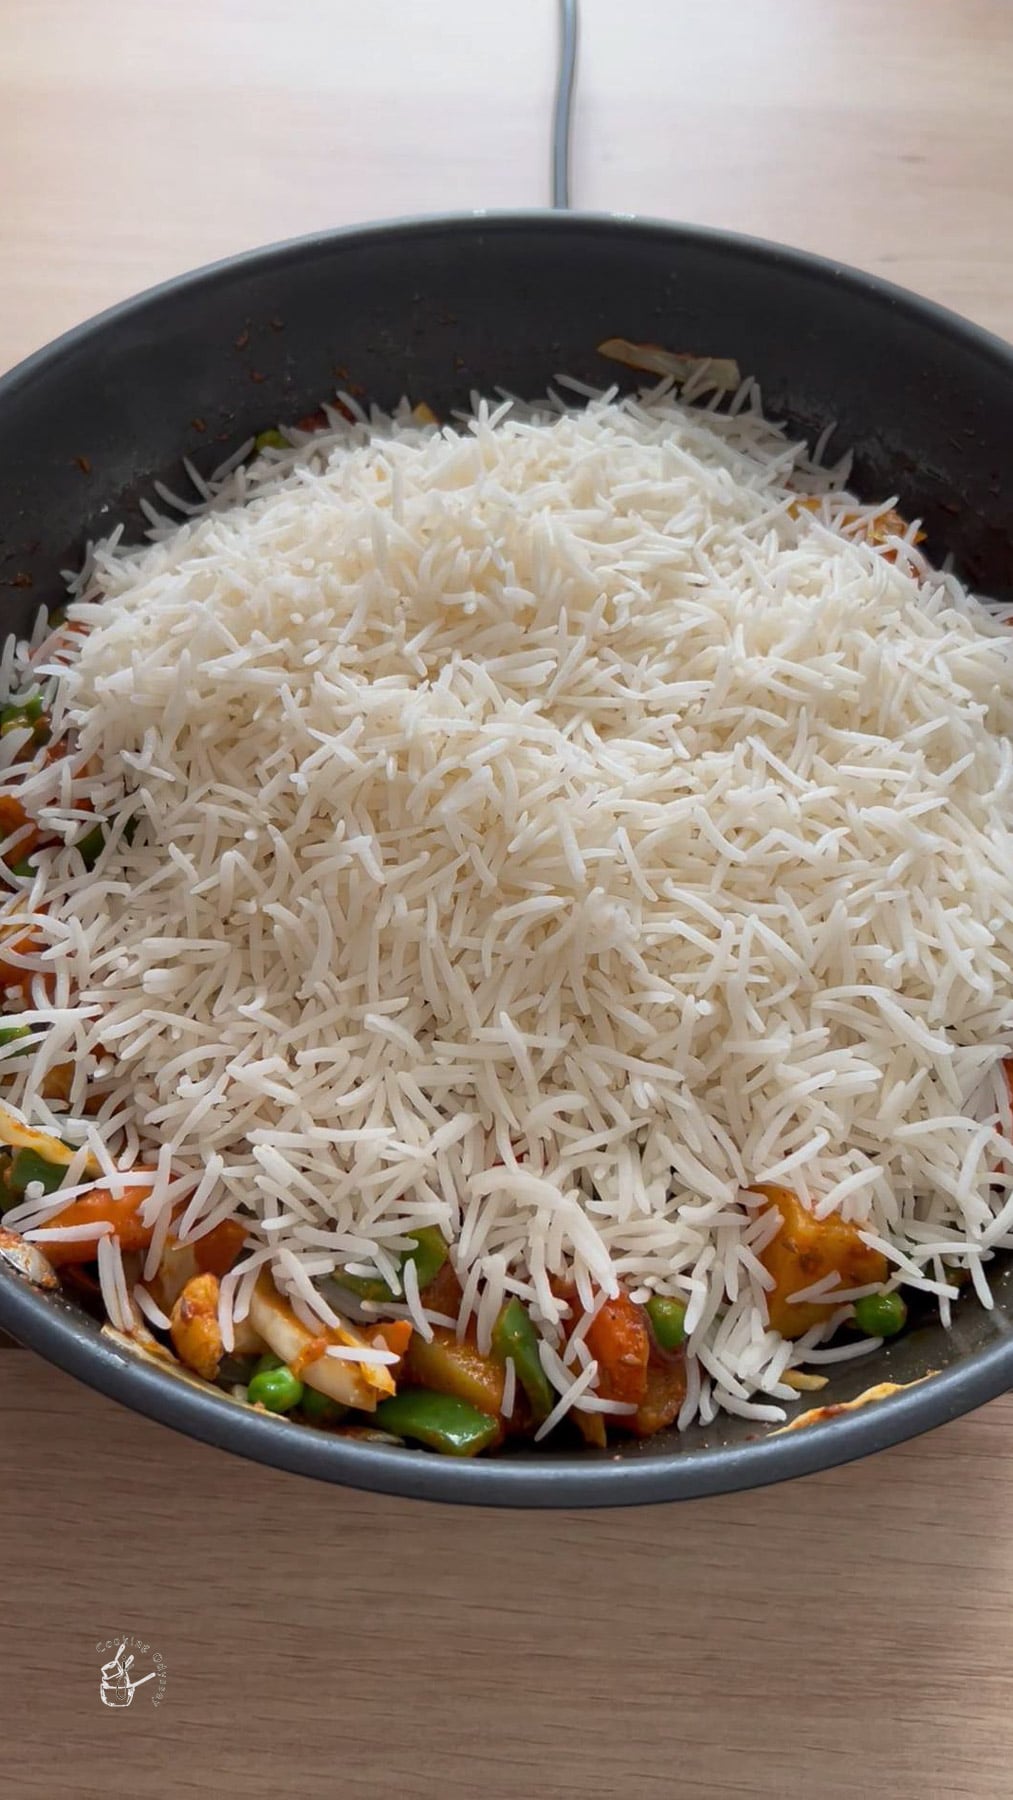
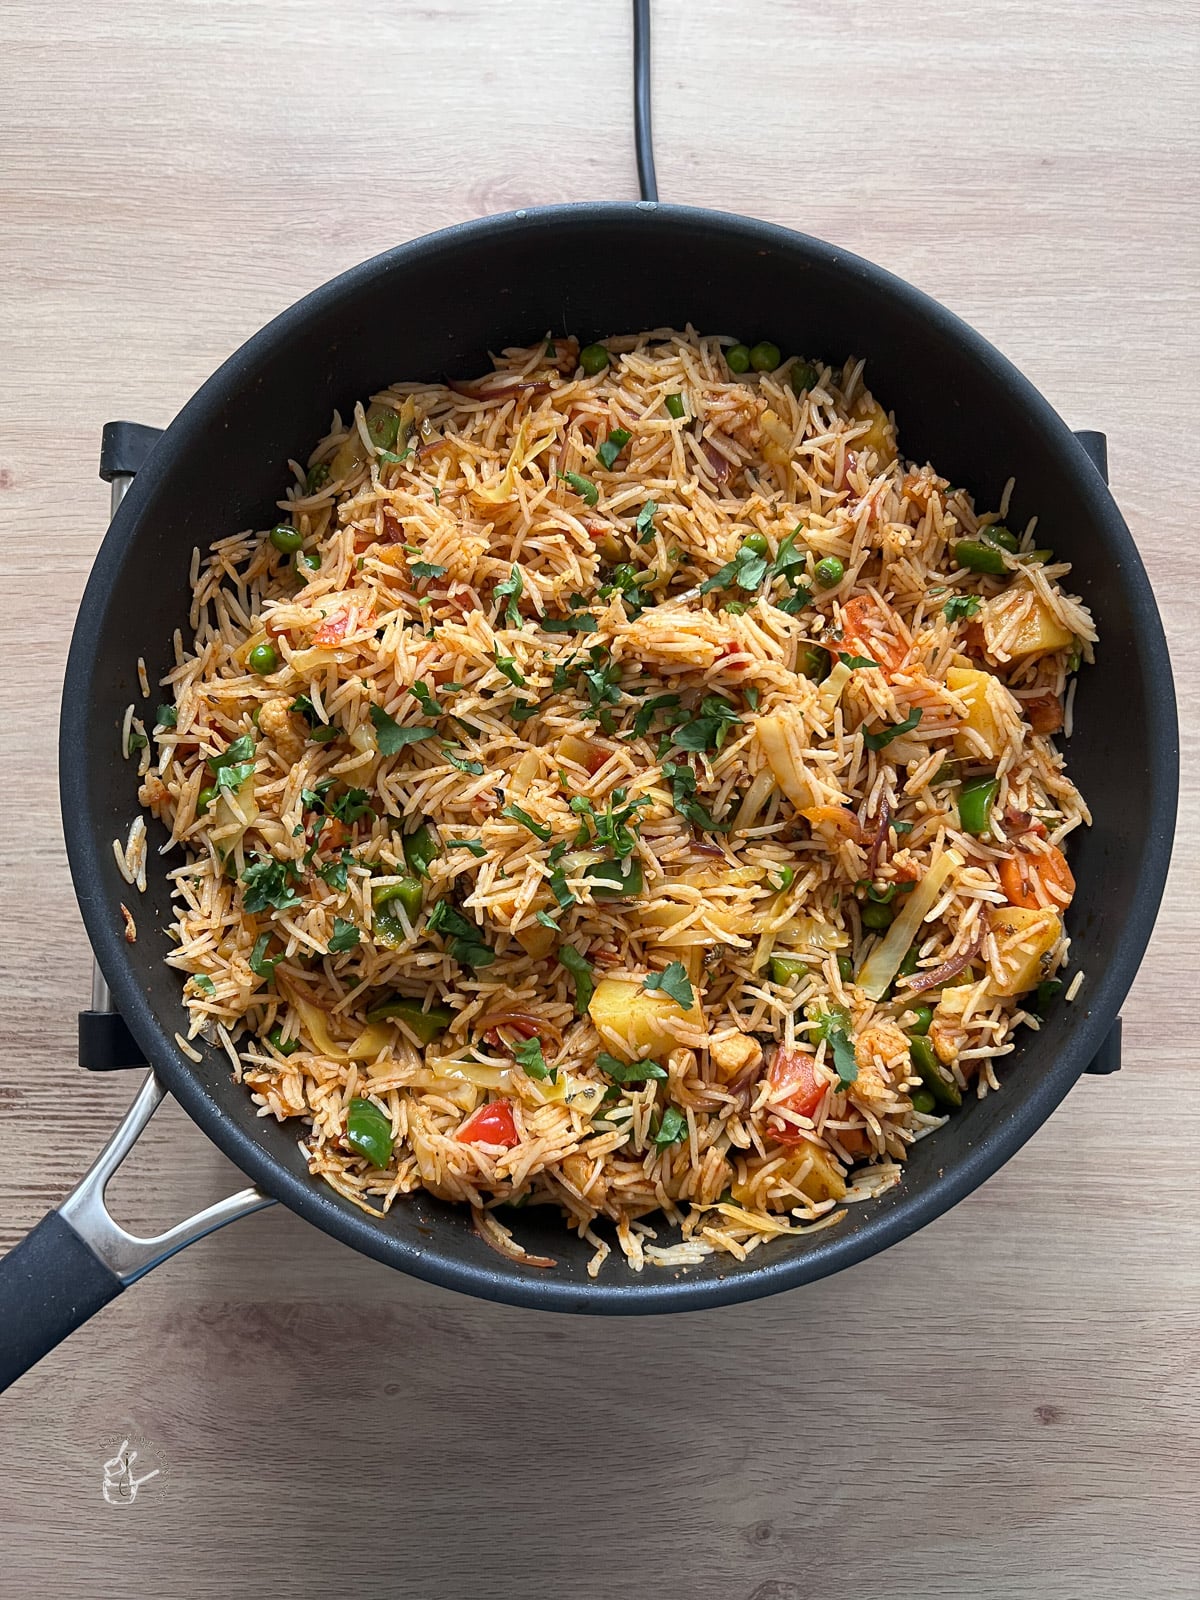
Add a little extra butter on top, especially if you want that street-food feeling.
Tawa pulao is best served with classic cooling sides such as boondi raita or cucumber raita. You can also try this roasted tomato yogurt raita dip for a delicious twist! I like something crunchy like Indian onion salad.
If going full street style, pair with a sweet mango lassi made with mango pulp, plain chaas or masala soda.
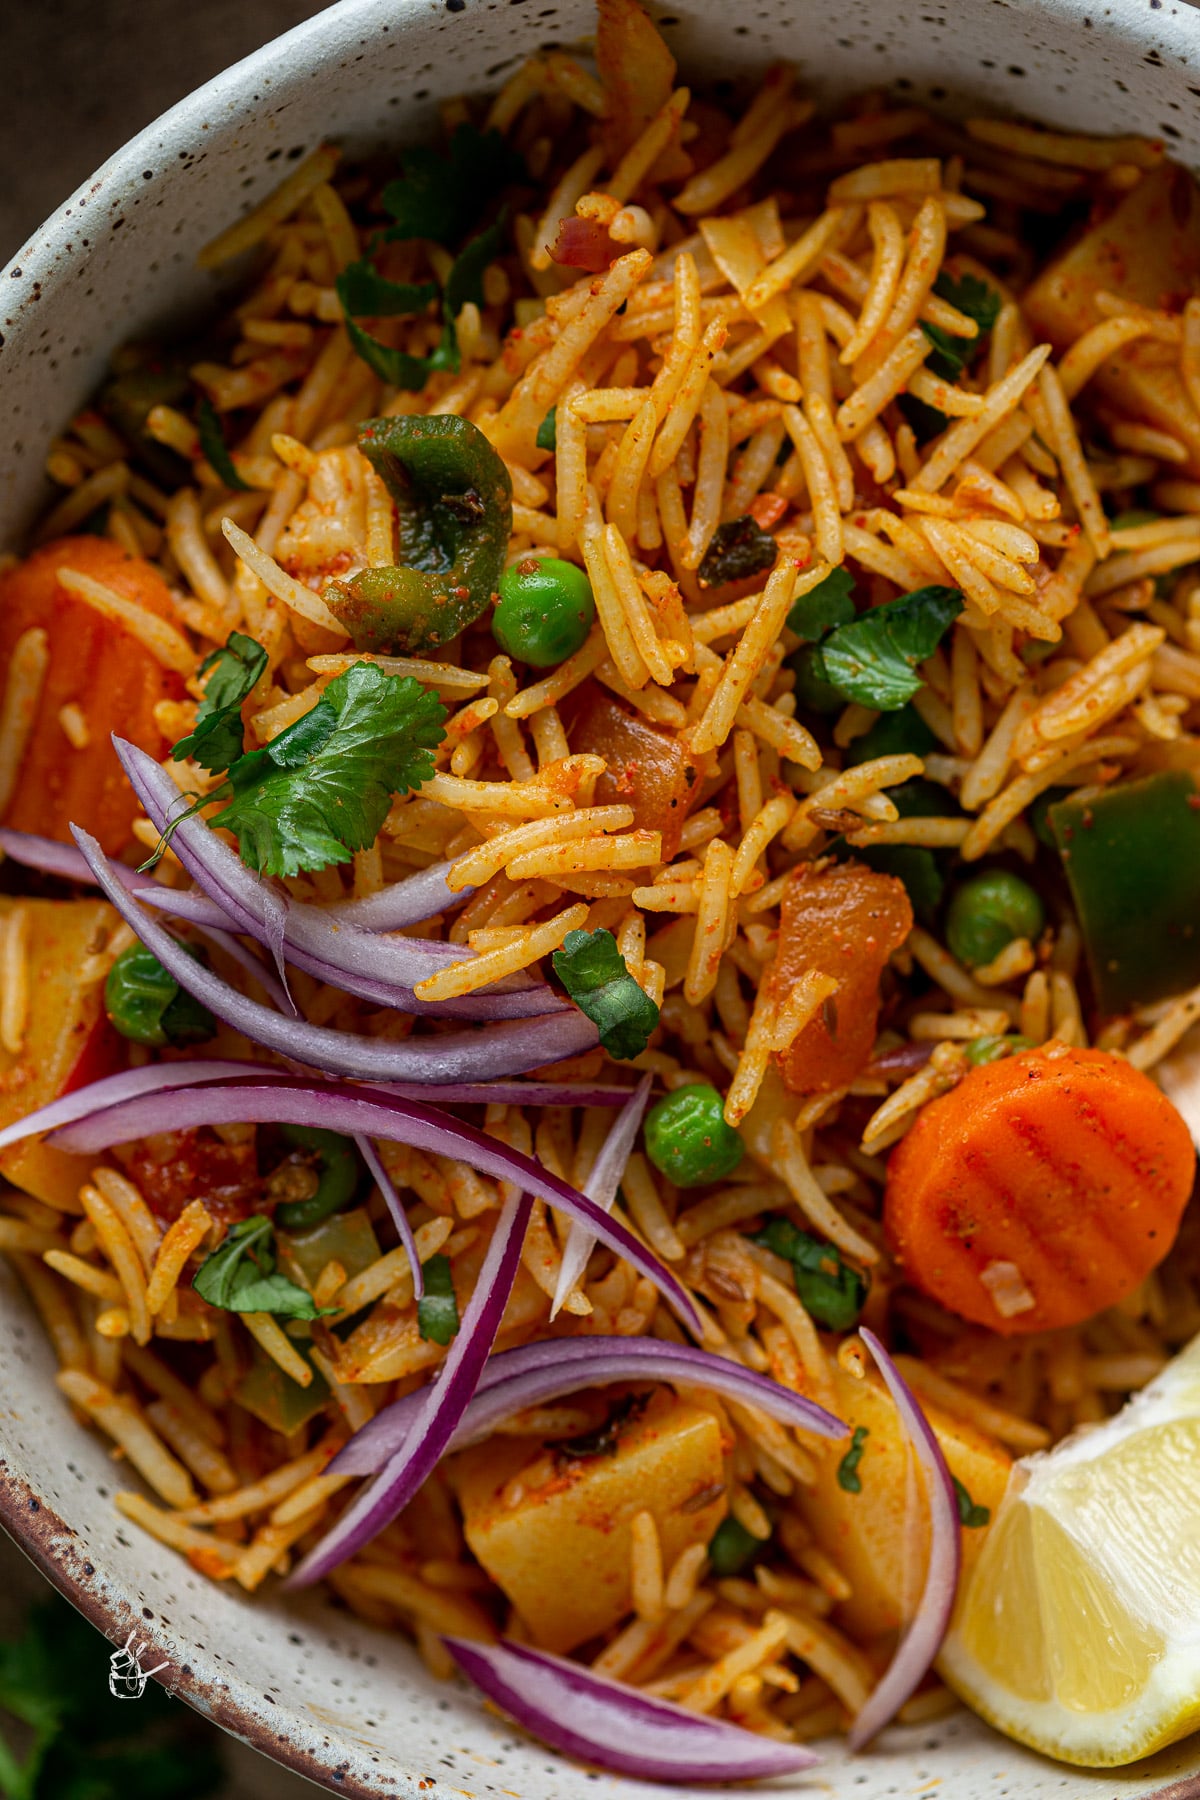
As always if you make this recipe, be sure to leave me a comment, rate this recipe and tag me on Instagram @jcookingodyssey or #jcookingodyssey. I love seeing all your photos of my recipe recreations!
Don’t forget to follow me on social media using the buttons below – I can't wait to see you all there!

PLEASE NOTE: Nutritional values are estimated by a computer and may vary based on ingredients and portion sizes. For personalised dietary advice, please consult a qualified healthcare professional.
Share on Facebook Pin This RecipeNote – this recipe was posted on our blog on 10th March 2012, since I have updated the post with new content and pictures.
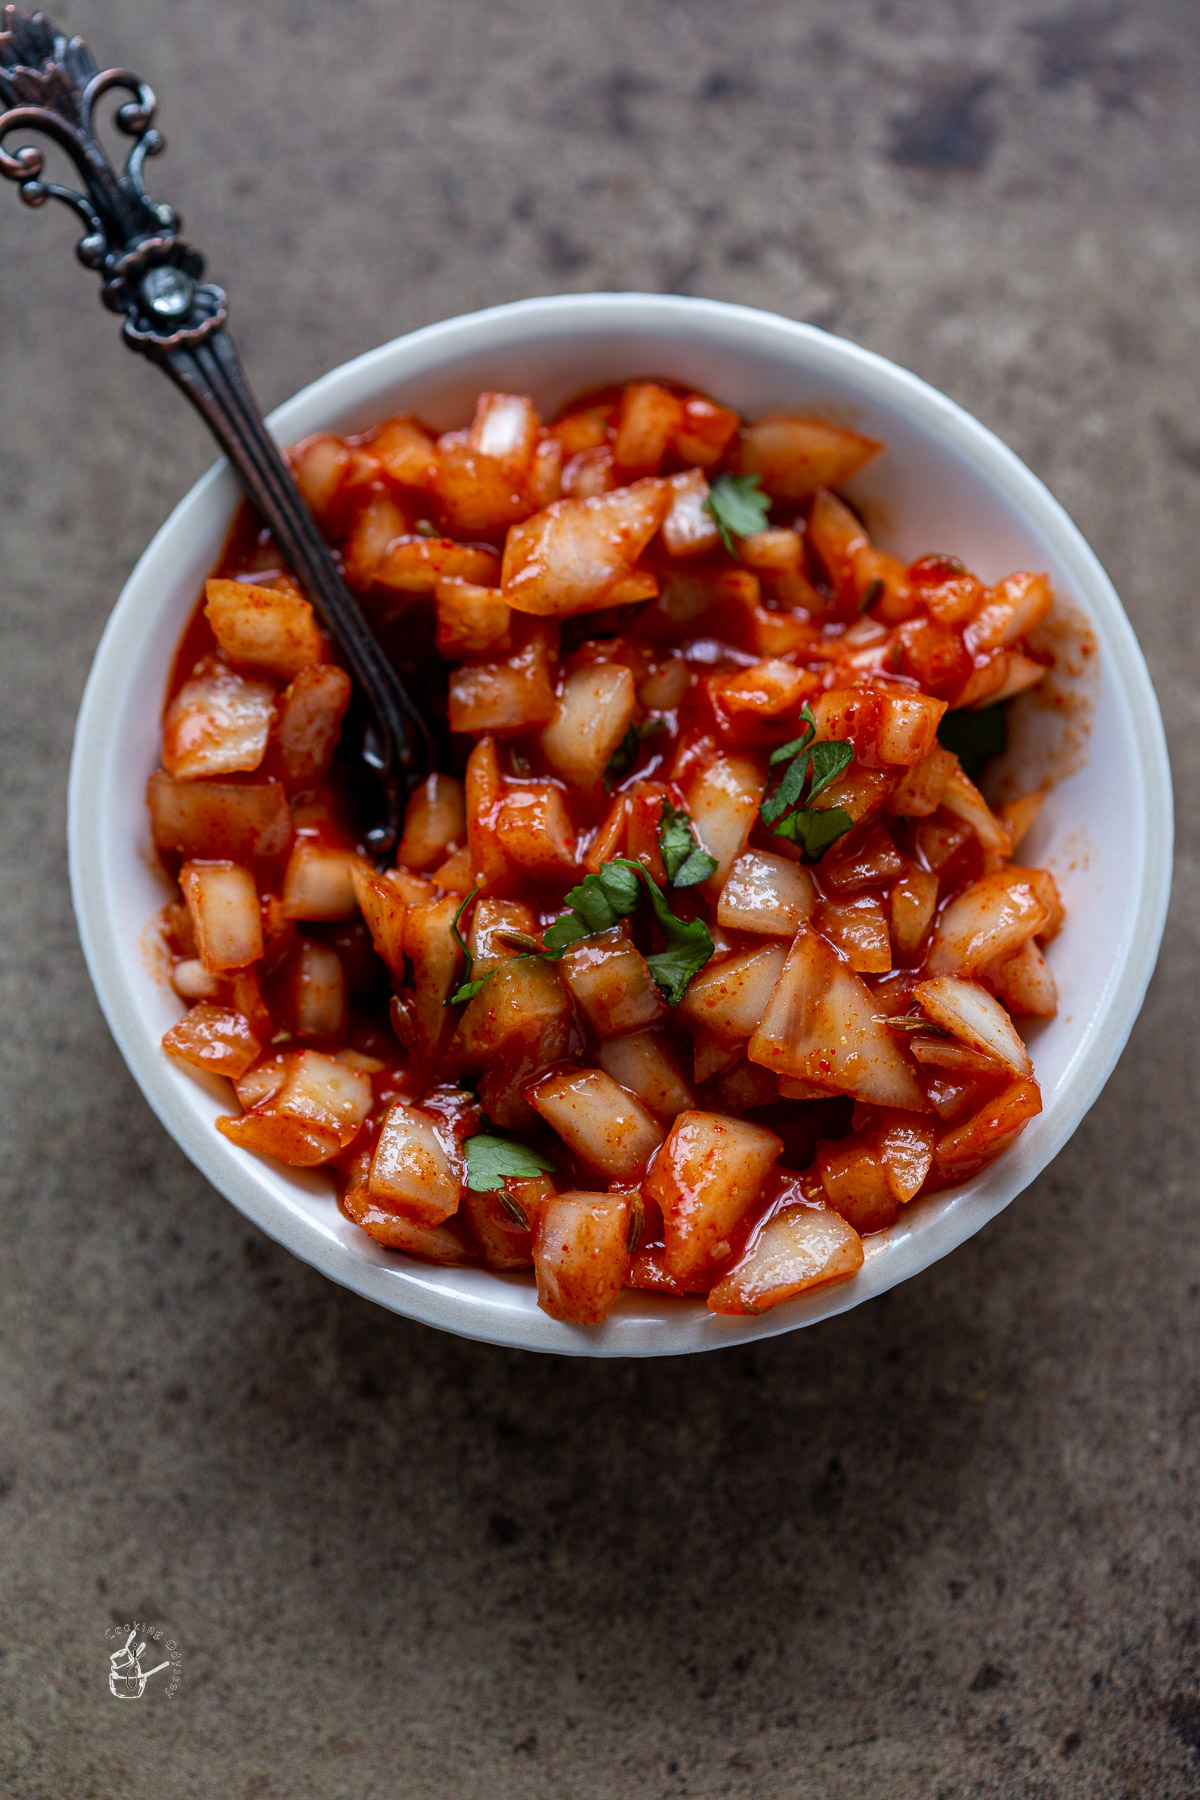
This raw onion chutney recipe is the same as the red cold onion chutney served in British Indian restaurants with poppadoms. It is a super easy chutney recipe as no cooking is required and can be ready within minutes.

Recreate takeaway style Indian onion relish that is served with poppadums as a starter in BIR or curry houses!
There are many different names for this chutney but they all refer to the same recipe: Indian onion chutney, Indian red Onion chutney, raw onion chutney, cold onion chutney, spiced onions, Indian onion relish for poppadoms, to name a few.
This easy onion chutney usually has a bright red color and sharp taste thanks to the spicy ketchup mixture that raw diced onions are mixed in with. The recipe is really that simple!
It is a great alternate side to Indian Onion Salad which is a simple recipe of raw onions that are flavoured with lemon juice, fresh coriander and various spices.
I love tangy chutneys alongside my crispy fried poppadoms and Indian appetizers. The classic trio of poppadom dips/chutneys include Indian mint sauce (sometimes mint raita), mango chutney and an Indian style salad of either onions or kachumber. A cooling boondi raita adds creaminess with slight crunch.
Have you tried this finger licking Indian Tamarind Sauce? It is perfect vegan dipping sauce to serve with your Indian snacks or Indian starters.
These Samosa Sauces recipes are guaranteed to elevate your samosa snacking experience!
It is worth noting that there is a variation to onion chutney recipes and this is the version served in South Indian cuisine known as Vengaya chutney in Tamil language.
It is made with regular onions, garlic cloves and dry red chillies which is cooked then ground to a smooth paste. In this particular version, the onion mixture is tempered in mustard seeds, curry leaves, urad dal (black gram) and chana dal (split bengal gram). It is sweetened with tamarind and jaggery.
South Indian chutneys are usually served as a side dish alongside hot idli dosa, neer dosa and medu vada - a staple in South Indian homes.
You can also find coconut chutney and tomato onion chutney served with South Indian food.
Naturally vegan and gluten-free
No-cook chutney recipe
Easy Indian onion chutney recipe
Can be ready within 5 minutes
Recreate Indian restaurant flavours at home
Full ingredients with measurements can be found in the recipe card below.
Onion - this is the main ingredient and you can use either white onions or red onions for this recipe. Dice the onion as finely as possible.
If you find raw onions too strong, you can soak the diced onions in cold water for around 15-20 mins.
Alternatively, pearl onions have a sweeter and more mellow flavour but are probably more difficult to get hold of.
For the red sauce:
Tomato ketchup - and/or you can use tomato paste to give a more vibrant red colour
Red chili powder - you can alternatively use paprika. Add this according to your spice preference.
Cumin seeds - you can either use cumin seeds or cumin powder. If you have the time, you can optionally lightly toast cumin seeds in a pan on medium heat for 1 minute to extract the flavour better.
Lemon juice - use either bottled or fresh lemon or lime juice to provide a slight tart flavor
Salt - a pinch to taste
You can add a pinch of sugar to the red tomato sauce mixture which will mellow down some of the tartness from the tomatoes
Why not mix in a little mango chutney in with the ketchup to make an Indian onion dip for your poppadoms.
Add a tiny pinch of Madras curry powder.
Full printable recipe in recipe card below.
Follow the step by step pictures for Indian onion chutney that is ready in 5 minutes!
Dice your onions finely - use a sharp knife for this step.

The next step is optional. If you are pressed for time, you can leave out this step.
Place the raw onions in a bowl of cold water with ice- this reduces the pungency of the onions whilst keeping them crunchy.

Meanwhile, mix tomato puree/tomato ketchup, chilli powder and cumin powder together in a bowl. Add lemon juice.


Drain the onions after 15 mins and ensure you pat dry with a clean kitchen towel to remove the excess moisture.
Mix the onions in the tomato mixture and add salt to taste. Note that ketchup is usually salty so you may not need to add it.

You can now keep this cold onion chutney in the fridge until serving time.
I like to serve the dip at room temperature but many like to serve it chilled. Do whatever you fancy!

Serve Indian Onion Chutney the original way with mango chutney and indian yogurt mint sauce alongside a basket of poppadoms. Why not add a side of cucumber raita?
You can also enjoy this cold onion chutney in different ways with pakora, samosas and other Indian finger foods.
I like Indian style spicy onions with my curries too! A feast with Peshwari Naan, Punjabi Matar Paneer, Indian Vegetable Curry and delicious onion chutney cannot be missed!
How about Restaurant style Brinjal Bhaji and Chana Saag along with Tarka Dal.
I find that this Indian onion relish is best served fresh so I prefer to make a small batch every time I want to serve it.
You can store leftover chutney in an airtight container for up to 2 days. I would consume the chutney by the next day as the flavours get quite strong and the onion becomes quite pungent as it sits.
If you have leftovers that you do not want to eat, you can add it into your curry when preparing the onion/garlic base.
Onion chutney served at Indian restaurants is made from finely chopped onions, tomato ketchup, red chilli powder, cumin and lemon juice. It is served with poppadoms and Indian starters.
Spiced onions keep well in the fridge for up to 2 days.

Gujarati Garlic Chutney - Gujarati Lasan ni Chutney
Date Tamarind Chutney - Imli chutney
Carrot Tomato Cardamom Chutney
As always if you make this recipe, be sure to leave me a comment, rate this recipe and tag me on Instagram @jcookingodyssey or #jcookingodyssey. I love seeing all your photos of my recipe recreations!
Don’t forget to follow me on social media using the buttons below – I can't wait to see you all there!

PLEASE NOTE: Nutritional values are estimated by a computer and may vary based on ingredients and portion sizes. For personalised dietary advice, please consult a qualified healthcare professional.
Share on Facebook Pin This RecipeThis Authentic Indian Mint Sauce is the same that you find in Indian restaurants served with your starter and poppadum. Easy Yogurt Mint Sauce is made with simple ingredients like yogurt, fresh mint and green chilies and is ready within 5 minutes.

Hands down, my favourite part of visiting Indian restaurants is because of the Indian appetizers and trio of poppadom chutneys.
By the time I've devoured poppadoms and Indian snacks with Indian onion chutney or mango chutney, date and tamarind chutney and yogurt mint sauce I'm usually full! Does this happen to anyone else?
This version is a duplicate of the cool, minty slightly sweet yogurt that you often find with Indian meals. Indian food such as onion bhaji, air fryer onion bhaji, tandoori snacks like paneer tikka or tandoori paneer galette goes great with this dip.
It has similarities to the green chutney (hari chutney) served with chaat. This cilantro mint chutney, or pudina chutney is made without yogurt.
You may recognise many of these ingredients from a mint raita recipe, however, mint raita usually contains cucumber too so is also known as cucumber raita.

Tastes just like Indian restaurant / takeaway
Takes just 5 minutes to prepare and is a no-cook recipe.
Uses easy to find ingredients - all available from a quick trip to your supermarket.
Can be made ahead of time - the green sauce retains its vibrant colour thanks to the lemon juice and yogurt.
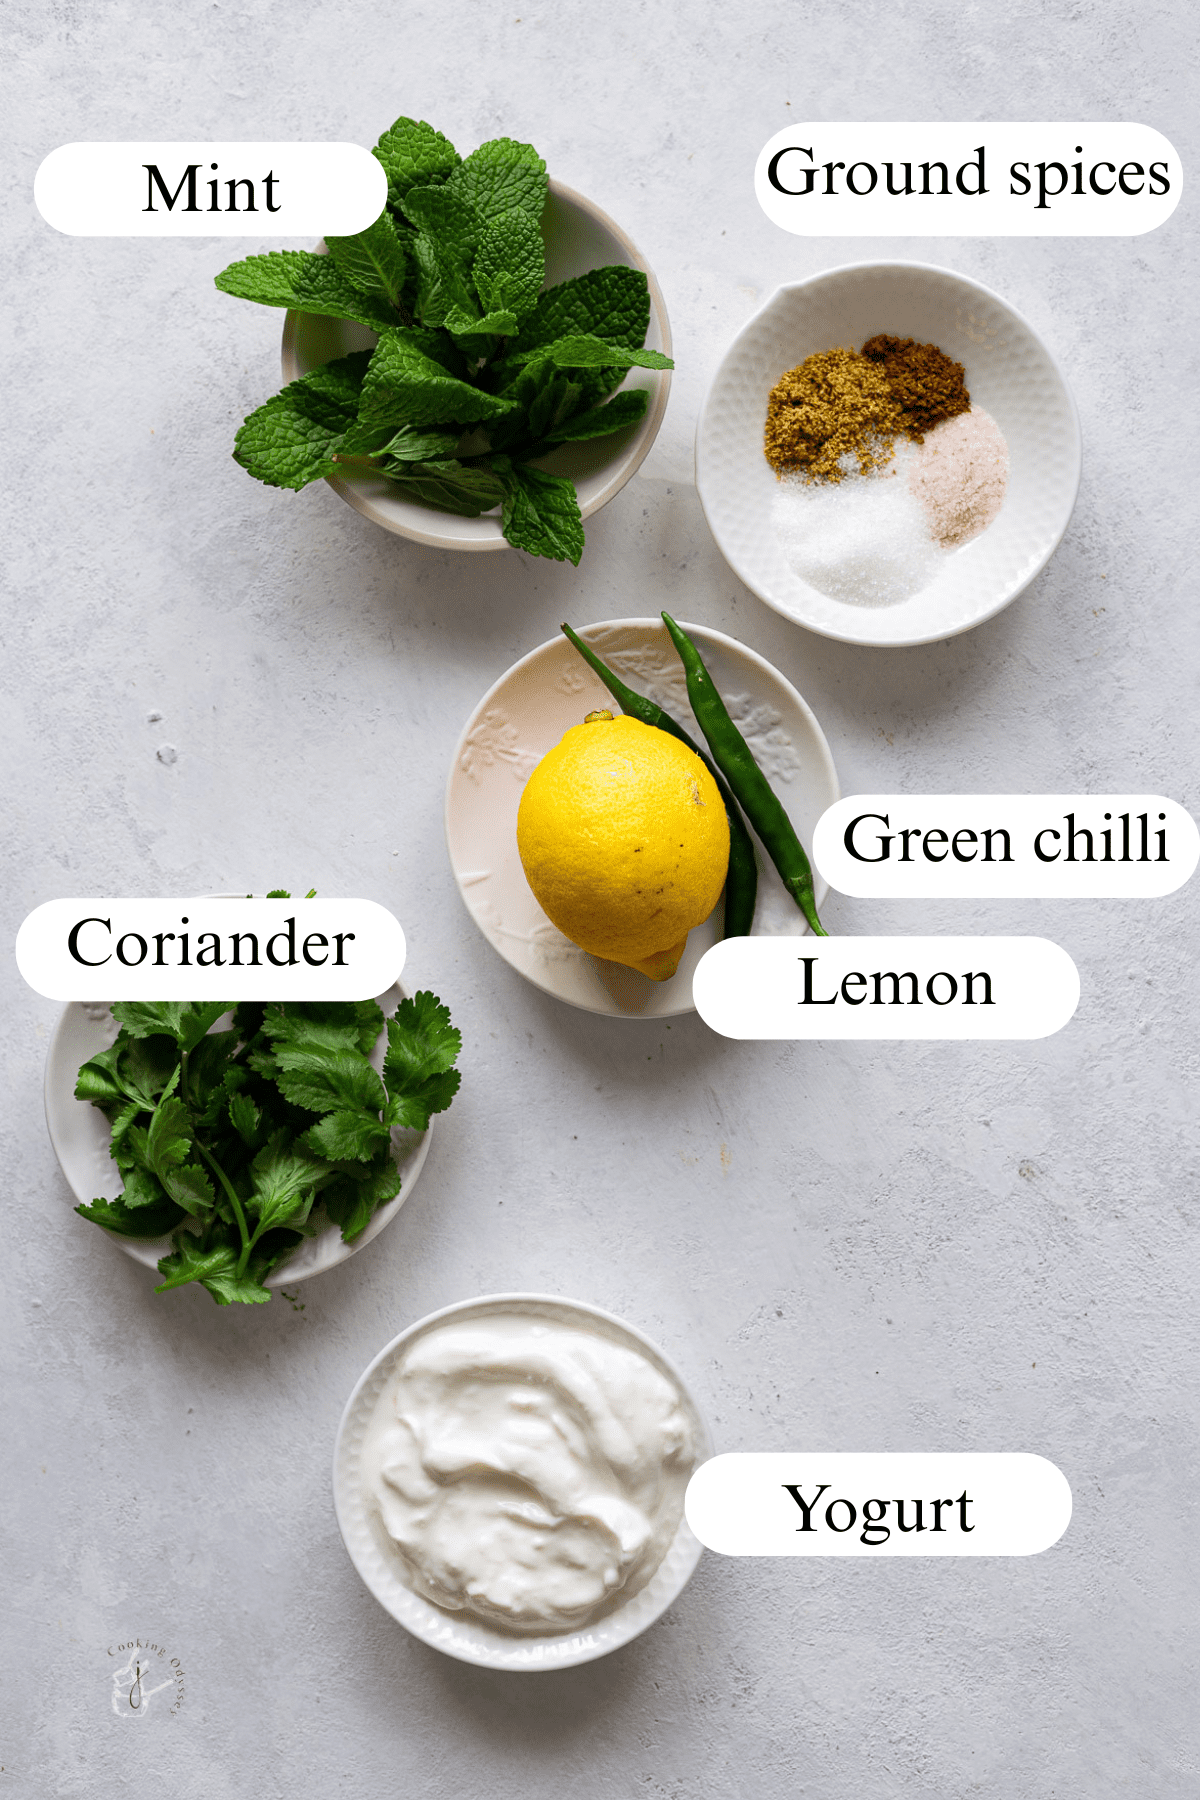
Full ingredients with measurements and method can be found in the recipe card below
Plain yogurt - for the best taste use full fat yogurt. You can make this with low fat yogurt, however the sauce will be tart.
Use a thick yogurt such as greek yogurt where possible. If it is not available, prepare hung curd or strain homemade dahi that is used in Indian yogurt shrikhand.
Fresh mint leaves - for refreshing and cool sauce fresh mint leaves are a must. Try to avoid dried mint as you will not get the same effect.
Fresh coriander leaves / cilantro - use fresh cilantro leaves with bright green leaves for the best results. Wilted leaves that are starting to darken will spoil the recipe.
Green chillies - a staple in Indian cuisine, you can adjust the heat level to your own taste. Add an extra green chilli for a spicy chutney. If green chilli not available, use jalapeno peppers.
Spices - a big pinch of ground cumin powder and garam masala works wonders in this Indian mint dip.
Optionally, you can add a small pinch of chaat masala but I find the flavours are zingy without it! Note, if you do not have cumin powder but cumin seeds, you can blend them along with the fresh herbs.
Sugar - a teaspoon caster sugar or regular sugar in this sauce makes a huge diffrence, especially if you want it to taste Indian restaurant style.
Lemon juice - alternatively use lime juice.
If its your personal preference, you can add a small garlic clove to give the Indian mint sauce a kick of flavour

To make this recipe vegan or dairy-free, simply replace the dairy yogurt with a plant-based vegan yogurt.
The quickest way to make this recipe is to use British mint sauce from a jar. Simply stir a spoon of mint sauce into 1 cup of yogurt and season to your taste!
This easy recipe can be ready in less than a minute ready to serve alongside other Indian snacks. The vinegar used in jarred mint sauce will provide a little tang which is addictive!
You can also use any leftover Mint and Coriander chutney that you made earlier and swirl it through yogurt.
First, you need to prepare an easy mint chutney that will be mixed in with the yogurt. You're looking to get a smooth paste which will blend in nicely.
Tip the coriander and mint leaves with the green chillies, and lemon juice into a food processor and blend until you have a smooth consistency.
Mix this cilantro chutney with yogurt and cumin powder, season with salt and add sugar to your taste. You may want to add more lemon juice.
It is easy to do a quick taste test and decide on any changes to the seasoning!

For mint chutney recipe use the freshest ingredients where possible, especially fresh herbs - wilting mint and coriander leaves will ruin the flavour.
Do not add yogurt to the blender whilst blending coriander and mint. The yogurt will become far too runny.
Use thick yogurt for a thick sauce as the green paste will thin out the yogurt.
Serve it British Indian Restaurant style with a trio of chutneys and a bowl of Indian kachumber or Indian Onion Salad on the side. You'll often see this creamy boondi raita in restaurants too.
Use it as a green chutney for paneer tikka or drizzled over chaat such as bhel puri or sev puri
Why not try it as a salad dressing in buddha bowls or other healthy recipes
It makes for a delicious dipping sauce for finger foods such as kenyan masala chips, samosas and kachori.
Keep some spicy condiments, like this red chutney, in a separate bowl so your guests can choose whichever they like!
I like to spread this Yogurt Mint Sauce onto a garlic and coriander naan bread. I then top with falafel and salad for a delicious lunch!
Check out these other Samosa Dipping Sauces for more inspiration!
Store leftover chutney in the fridge in an airtight container. It should keep well for 2-3 days. If it separates, give it a stir before serving.
You can also freeze this yogurt chutney. Spoon into an ice cube tray, once frozen, you can transfer into freezer bags and defrost as you need - note that it might be a bit more liquid when it defrosts.

It is also known as Yogurt Mint Sauce
Indian mint sauce will last up to 3 days in the fridge
Indian Mint Sauce is made from thick yogurt, fresh coriander, mint, green chillies, lemon juice and sugar.
Yes, Indian mint sauce is naturally gluten free.
No Indian mint sauce is not vegan as it is made with dairy yogurt. However, you can make Vegan Indian mint sauce at home using a plant based yogurt.
Simply add a pinch of turmeric powder to the yogurt and mix with green mint chutney.
Takeaway style Yellow Pilau Rice
As always if you make this recipe, be sure to leave me a comment, rate this recipe and tag me on Instagram @jcookingodyssey or #jcookingodyssey. I love seeing all your photos of my recipe recreations!
Don’t forget to follow me on social media using the buttons below – I can't wait to see you all there!

PLEASE NOTE: Nutritional values are estimated by a computer and may vary based on ingredients and portion sizes. For personalised dietary advice, please consult a qualified healthcare professional.
Share on Facebook Pin This RecipeEach mouthful of these buttery homemade Orange Cranberry Scones is packed with flavour thanks to the fresh cranberries, orange zest and cranberry jam. These are a copycat of the scones you find at Starbucks coffee and are perfect for the holiday season.

Lapsi is a traditional Gujarati sweet dish prepared with broken/cracked wheat, ghee and jaggery or sugar. Make my version of this festive fada lapsi in the Instant Pot or regular pressure cooker.

This Vegan Instant Pot Cauliflower Mash is an easy side dish. It is made by mashing a head of cauliflower with vegan butter, dairy-free sour cream and flavoured with fresh chives and garlic. It is a delicious side dish made from simple ingredients. It is the perfect low carb alternative to creamy mashed potatoes and can be prepared during busy weeknights.

These incredibly crispy Air Fryer Garlic Parmesan Fries are actually vegan! With minimal effort, you can make homemade garlic parmesan fries that are full of flavour. Included is a recipe using store bought frozen French fries for a quick and easy side dish.