These Air Fryer Parsnips with wholegrain mustard, orange and maple syrup is an easy side dish for your Thanksgiving or Christmas roast dinner. Ready within 15 minutes.


These Air Fryer Parsnips with wholegrain mustard, orange and maple syrup is an easy side dish for your Thanksgiving or Christmas roast dinner. Ready within 15 minutes.
These Air Fryer Doughnut Holes are a tasty treat for the whole family. This delicious recipe only requires 4 simple ingredients for a super easy dessert and can be prepared within 15 minutes! Hands down the easiest way to satisfy your doughnut cravings!

Rose Harissa Paste is a North African chili paste, originating from Tunisian cuisine. It is an easy recipe that will add a spicy kick to your meals. This no-cook Rose Harissa Paste recipe is so easy to follow - within minutes, you can make this homemade fiery paste! Rose harissa is naturally vegan and gluten-free.

Over the holiday season, enjoy this velvety festive hummus that is prepared with chestnuts instead of chickpeas! This easy dip is made with chestnuts, tahini, garlic and lemon juice. It is super quick to prepare, naturally vegan and gluten-free.
Included is a recipe for Instant Pot Chestnuts.

Say hello to my Besan Barfi that just melts in your mouth. In this Indian sweet, besan is roasted in ghee then sweetened with a sugar syrup. It has a smooth richness that you find in the best mithai shops, making it ideal for the festive season.

This Easy Vegetarian Instant Pot Bean Soup recipe is perfect for the whole family. It is a great option for any night of the week and is fantastic for meal prep. It is vegan and gluten-free and can be served within 1 hour.
Great with this Instant Pot Bread.

Making frozen empanadas in air fryer is hands down the best way to prepare them! Empanadas are perfect when served as an appetizer, light lunch or quick snack! For the best results, simply place uncooked empanadas in the air fryer instead of the deep fryer and they'll be ready in 10 minutes or less!

This is the easiest Instant Pot Apple Butter recipe that doesn't need peeling and has no added sugar! Smooth Apple Butter is vegan, gluten-free and is made with simple ingredients. You can spread it on toast, pastries or use as a breakfast topping.

Air Fryer Potato Slices make the perfect side dish or appetiser that is so easy and quick to put together. Potato slices in air fryer are naturally gluten-free, vegan and are a quicker alternative to deep frying. These are fluffy on the inside and so crispy on the outside!
Follow the step by step instructions on how to make crispy potato slices the best way then enjoy with sour cream and chive dip!
Recipe for the Bang Bang Sauce dip in the images is given below!

My vegan curry puffs are filled with Thai curried vegetables. Then, they are baked or air-fried in a shop-bought puff pastry for ease. The result is a flaky melt in the mouth pastry with a deep savoury filling.
Dangerously good.

This authentic chana masala recipe is the rich, thick chickpea curry I grew up eating and now make myself. Soft chickpeas simmer in a red-orange onion-tomato gravy with chana masala powder and kasoori methi until rich, comforting yet full of vibrant flavour. I serve it with fluffy bhature on special occasions or roti or paratha day to day.
Pair with Jeera Rice (Indian Cumin Rice).

My mum first learnt the basic ingredients for this chana masala from a Punjabi friend. Since then, we have made it multiple times a year, every year, until it became our own family version.
For me, the flavour is all about balance. The gravy should be thick, spicy and full of flavour, but not harsh. The chickpeas should be soft and creamy inside, but not mushy.
It is one of those curries that feels especially good in winter, with bhature for a special meal or with roti, paratha and rice at home.
I think of this recipe as chana masala, not dark Punjabi chole.
Chole is often deeper brown and may use tea, black cardamom, amchur or a stronger chole masala blend.
This chana masala has a more red-orange gravy from the onion and tomato base. I do not add tea here because that belongs more to chole, not this family-style chana masala.


Full ingredients with measurements are available in the recipe card below at the end of this post
Chickpeas
Dried chickpeas give the best texture. I cook them until they are creamy inside and easy to mash between my fingers, but not falling apart.
Tinned chickpeas work too, but they usually have a little more bite. Simmer them well so they absorb the gravy.
For my chickpea cooking method, see my instant pot chickpeas guide.
Onion, garlic, ginger and chilli paste
Blending these into a paste helps the gravy come together.
If the base is chopped instead of blended, the curry can still taste good, but the sauce will not thicken in quite the same way.
Tomatoes
I like tinned plum tomatoes, crushed tomatoes or passata here because they give better colour and depth than weak fresh tomatoes.
Cook the tomatoes until the moisture reduces and the base looks thicker.
Chana masala powder
This is essential for the flavour of this recipe.
I have used many brands over the years. The main thing is freshness. Once chana masala powder has been sitting in the cupboard for too long, the flavour fades and you may need to add more.
Kasoori methi
Kasoori methi gives the curry depth and a slightly restaurant-style aroma.
Crush it between your palms before adding.

Full printable recipe in recipe card below.
See video for step by step recipe.
Firstly, you need to prepare your chickpeas.
If you have dried chickpeas, you first need to soak chickpeas overnight. Simply place a cup of chickpeas in a large bowl and pour over cold, fresh water. Cover with a towel. Ensure your bowl is big enough as the chickpeas will expand. Using hot water at this stage does not make much difference in how well the chickpeas will soak.
Take the soaked chickpeas and place in a pressure cooker, See the Ultimate Guide to Instant Pot Chickpeas for more information and further instructions on cooking dried chickpeas in the Instant Pot pressure cooker.
Preparing the gravy
Using a food processor, blend the onions, garlic, green chillies and ginger to achieve a paste.
You can finely chop using a knife but the curry will not thicken as effectively.
Heat the oil on a medium heat and add the onion, garlic, green chilli and ginger paste. Continue to cook on a medium-low heat until the raw smell disappears and the mixture is changing colour.
This is a really important step as undercooking the onion-garlic also leads to a watery gravy.
Next, add the crushed tomatoes and keep the heat on low. Cook until the mixture has reduced and you start seeing oil appearing on the sides of the pan.
Add the ground spices - the red chili powder, turmeric, ground cumin and coriander and garam masala. Next add the chana masala powder and mix.
Let the spices cook for around 1 minute but not much longer - we do not want the spices to burn.
Adding the chickpeas
Tip in the buttery soft cooked chickpeas and add in a few cups of water. I usually add in the chickpea water. Add the salt and crumble in kasoori methi. This technique helps the kasoori methi release its aroma.
You may have to add in a little bit of water as the chickpeas cook.
I keep the lid off the pan and allow the water to come to a boil. Once it does, reduce the heat to a simmer and place the lid on the pan. You will need to cook the curry until the sauce has thickened and the onion masala and water have turned into a gravy.
If you can still see the onion mixture separate from the water, the curry is not cooked. You have to be patient with chickpeas - they take longer to cook than other beans recipes.
If you can see a lot of water still, mash a few of the chickpeas with the back of the spoon to thicken the sauce further.
Once the sauce is thick, remove from the heat.

It is possible to make chana masala directly in the instant pot however the flavour and texture will not be as good as cooking in the pan. Pressure cooking the gravy diminishes the flavour but this is handy if you want to make it a one-pot meal.
I already use my instant pot to cook the dried chickpeas but with this recipe, you can make the entire chana masala recipe in the instant pot using dried chickpeas that do not require cooking beforehand.
I would recommend you still soak the chickpeas beforehand as this reduces the time needed to pressure cook. Also, soaking legumes in advance makes them easier to digest.
You follow the same steps as the recipe above but when it comes to adding the cooked chickpeas, you will instead add soaked chickpeas. The curry will then need to be pressure cooked to allow the chickpeas to go soft and buttery.
For 2 cups of soaked chickpeas you will need to add 2 cups of water. Pressure cook for 40 minutes at High Pressure with Natural Pressure Release
If you have totally forgotten to soak the chickpeas, then I would add 3 cups of water to every 2 cups of dried chickpeas and Pressure Cook on High Pressure for 55 minutes with NPR.
I also love making this Indian Chickpea Salad and Chickpea Tikka Masala or chickpea and coconut curry in the Instant Pot.
In Indian homes, you will find that authentic chana masala is served alongside super soft rotlis or even tandoori style rotis. I also like to serve with Aloo Baingan that can be your vegan side dish.
On a lazy Sunday morning, for brunch we love to have Chana Masala with Bhathure (deep fried levened Indian flat bread) and Punjabi Sweet Lassi.
If you want to create a fake away, serve alongside some warm naan like these restaurant style garlic and coriander naans and Masala Poppadoms
Plain jeera rice made using basmati rice is a brilliant accompaniment. If you want to reduce the carbs of your meal then you could serve it with cauliflower rice.
Sometimes I serve with takeaway style yellow pilau rice too.
My personal favourite is a side salad of Indian Kachumber salad made with red onions, tomato, cucumber and chopped coriander.
You can also serve with Indian Onion Salad similar to British Indian Restaurants do.

You can store chana masala once it has reached room temperature.
Fridge - Store in an airtight container up-to 3-4 days away from the dairy produce to prevent smells from settling.
I love to use leftover chana masala in making Samosa Chaat
Freezer - Chana Masala keeps really well in the freezer. To completely revive it, do another tempering with oil.
Heat a tablespoon of oil, when its hot, add a pinch of garam masala or chana masala powder and immediately tip in the defrosted or thawed chana masala.
Allow it to heat until its piping hot throughout before serving.
Chana Masala can be watery for a few reasons. The gravy may just need some more time to cook - keep the lid off to allow the extra water to evaporate.
If the chickpeas are undercooked or still hard, the gravy can remain watery. If the chickpeas do not mash when you press them gently between your fingers, then they need further cooking.
You can thicken chana masala by turning up the heat and allowing the water to evaporate on a high flame.
Use the back of a spoon to crush some chickpeas against the sides of the pan. These mushy chickpeas will thicken the gravy.
Adding thickeners like corn starch will affect the flavouring of the curry so I do not recommend adding them.
Also note that the curry thickens naturally as it cools so you want to take it off the heat before you've reached the desired consistency.
No. Chana Masala powder is to be used as an addition to the basic Indian spices used. Even though chana masala powder does contain some of the same ground spices, the ratio will be off if you omit adding the basic spices.

As always if you make this recipe, be sure to leave me a comment, rate this recipe and tag me on Instagram @jcookingodyssey or #jcookingodyssey. I love seeing all your photos of my recipe recreations!
Don’t forget to follow me on social media using the buttons below – I can't wait to see you all there!

PLEASE NOTE: Nutritional values are estimated by a computer and may vary based on ingredients and portion sizes. For personalised dietary advice, please consult a qualified healthcare professional.
Share on Facebook Pin This RecipeNote – This recipe has been updated from our recipe archives with new images and content, but the recipe remains the same. First time published in March 2010.
This Gujarati Shakarpara recipe (Gor Na Shakkarpara) is made with jaggery. These Indian sweet diamond biscuits are perfect as Diwali snacks, for Holi but also make a great tea time snack throughout the year.
Follow this sweet shankarpali recipe which contains a certain special ingredient, to achieve a nice flaky texture that is a must for this delicious snack.

This easy Vegetarian Instant Pot Paella recipe is chock full with colourful veggies like red pepper, artichokes, mushrooms, green pea, green beans and cannellini beans. Honouring the traditional paella recipe, this Vegetable Paella cooked in the Instant Pot pressure cooker becomes a delicious one pot meal perfect for busy weeknights. It'll be on the table in under 30 minutes and is guaranteed to be a hit with vegans, vegetarians and those who eat meat.
This recipe, with step-by-step instructions, is easy to adapt to suit whichever vegetables you have lying around. I have also included instructions on how to achieve the unique crispy bottom of this traditional Spanish dish.

This is the best recipe for Vegetable Paella with Halloumi! A variety of colourful vegetables are cooked with Spanish rice and spices.
The best part? Crispy pieces of halloumi that create the most incredible bite!
It is perfect for gatherings but is also easy enough to make as a mid-week meal.

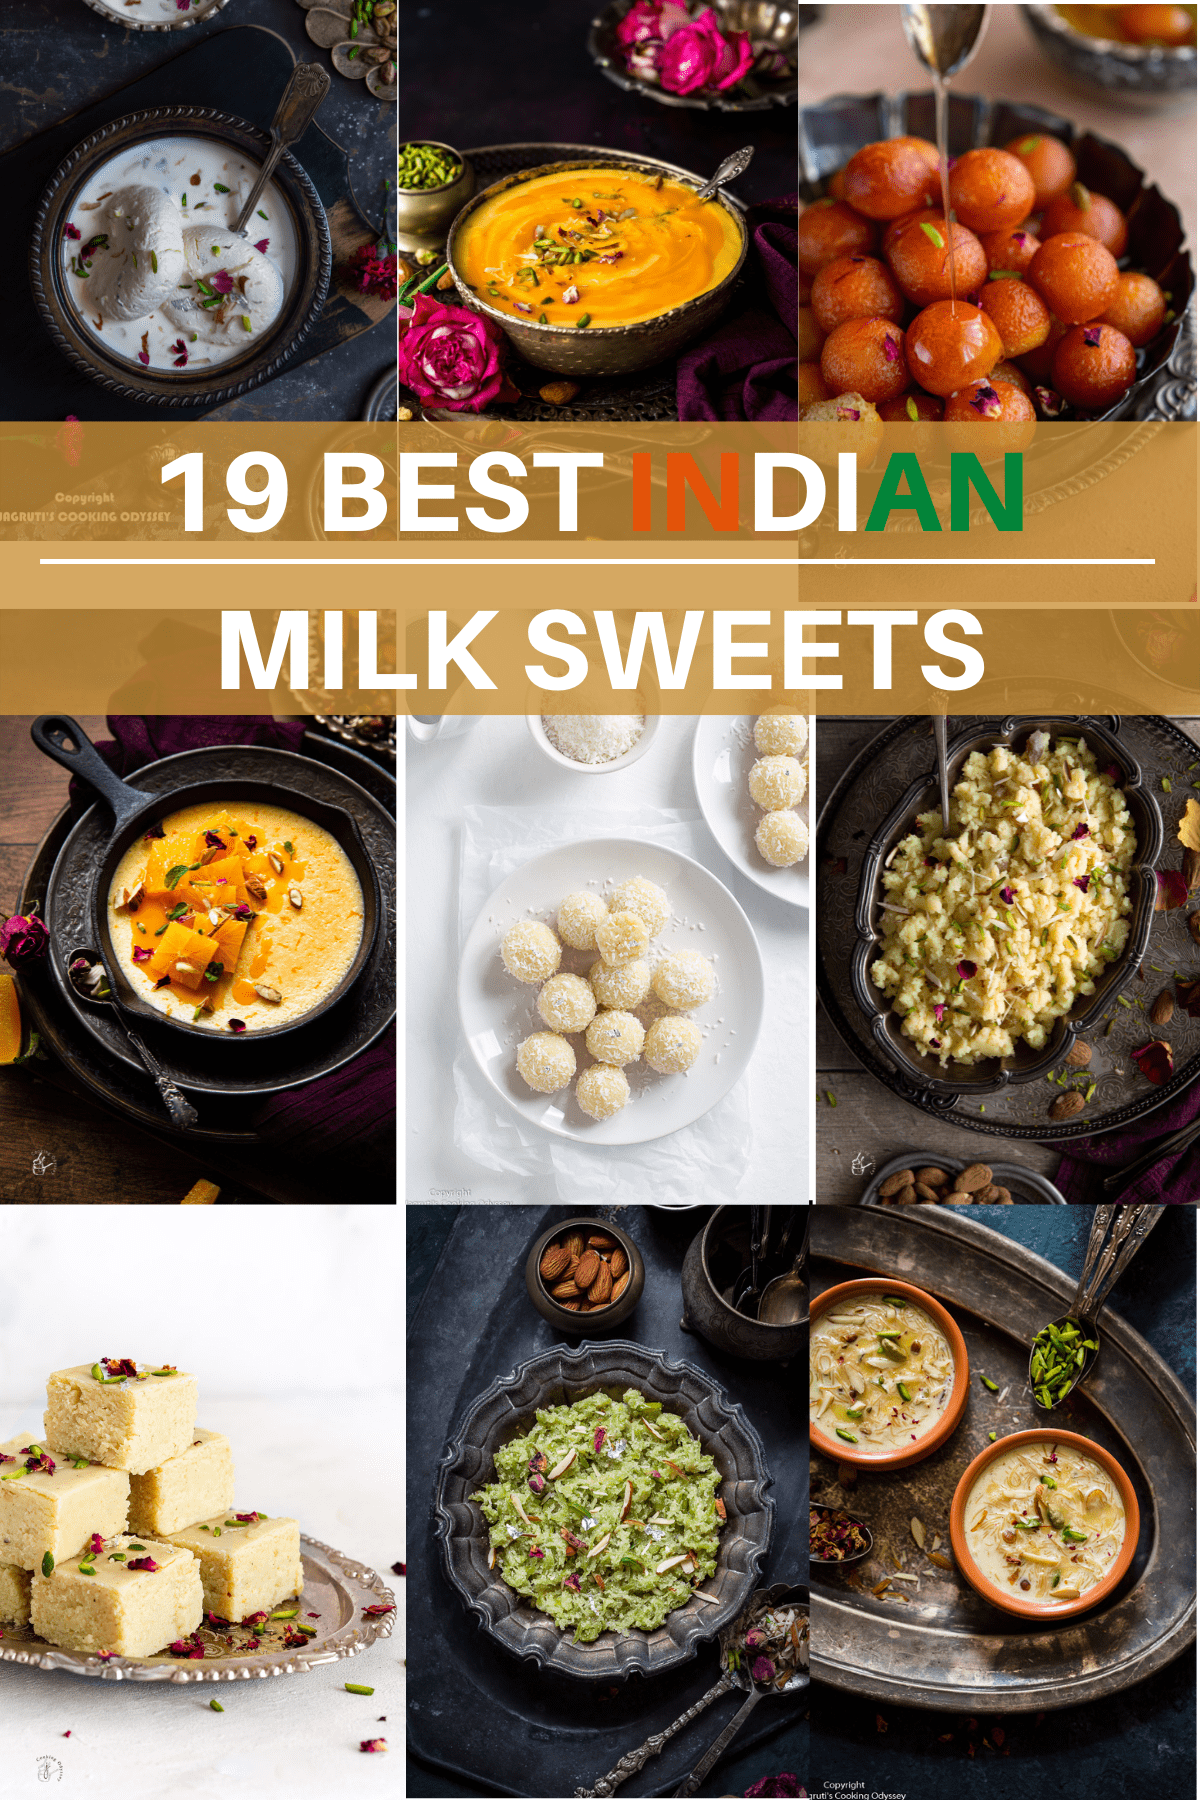
Indian milk desserts are some of my favourite mithai because they can be so different from each other. Some are chilled and creamy, like ras malai, rabdi and basundi. Some are soft and fudge-like, like peda and barfi. Others are proper celebration sweets that take a little more patience, but feel completely worth it once they are on the table.
This collection brings together my favourite Indian milk sweets and desserts, from classic kheer and gulab jamun to less common recipes like shakkar teti, garvanu, doodh poha and habshi halwa.
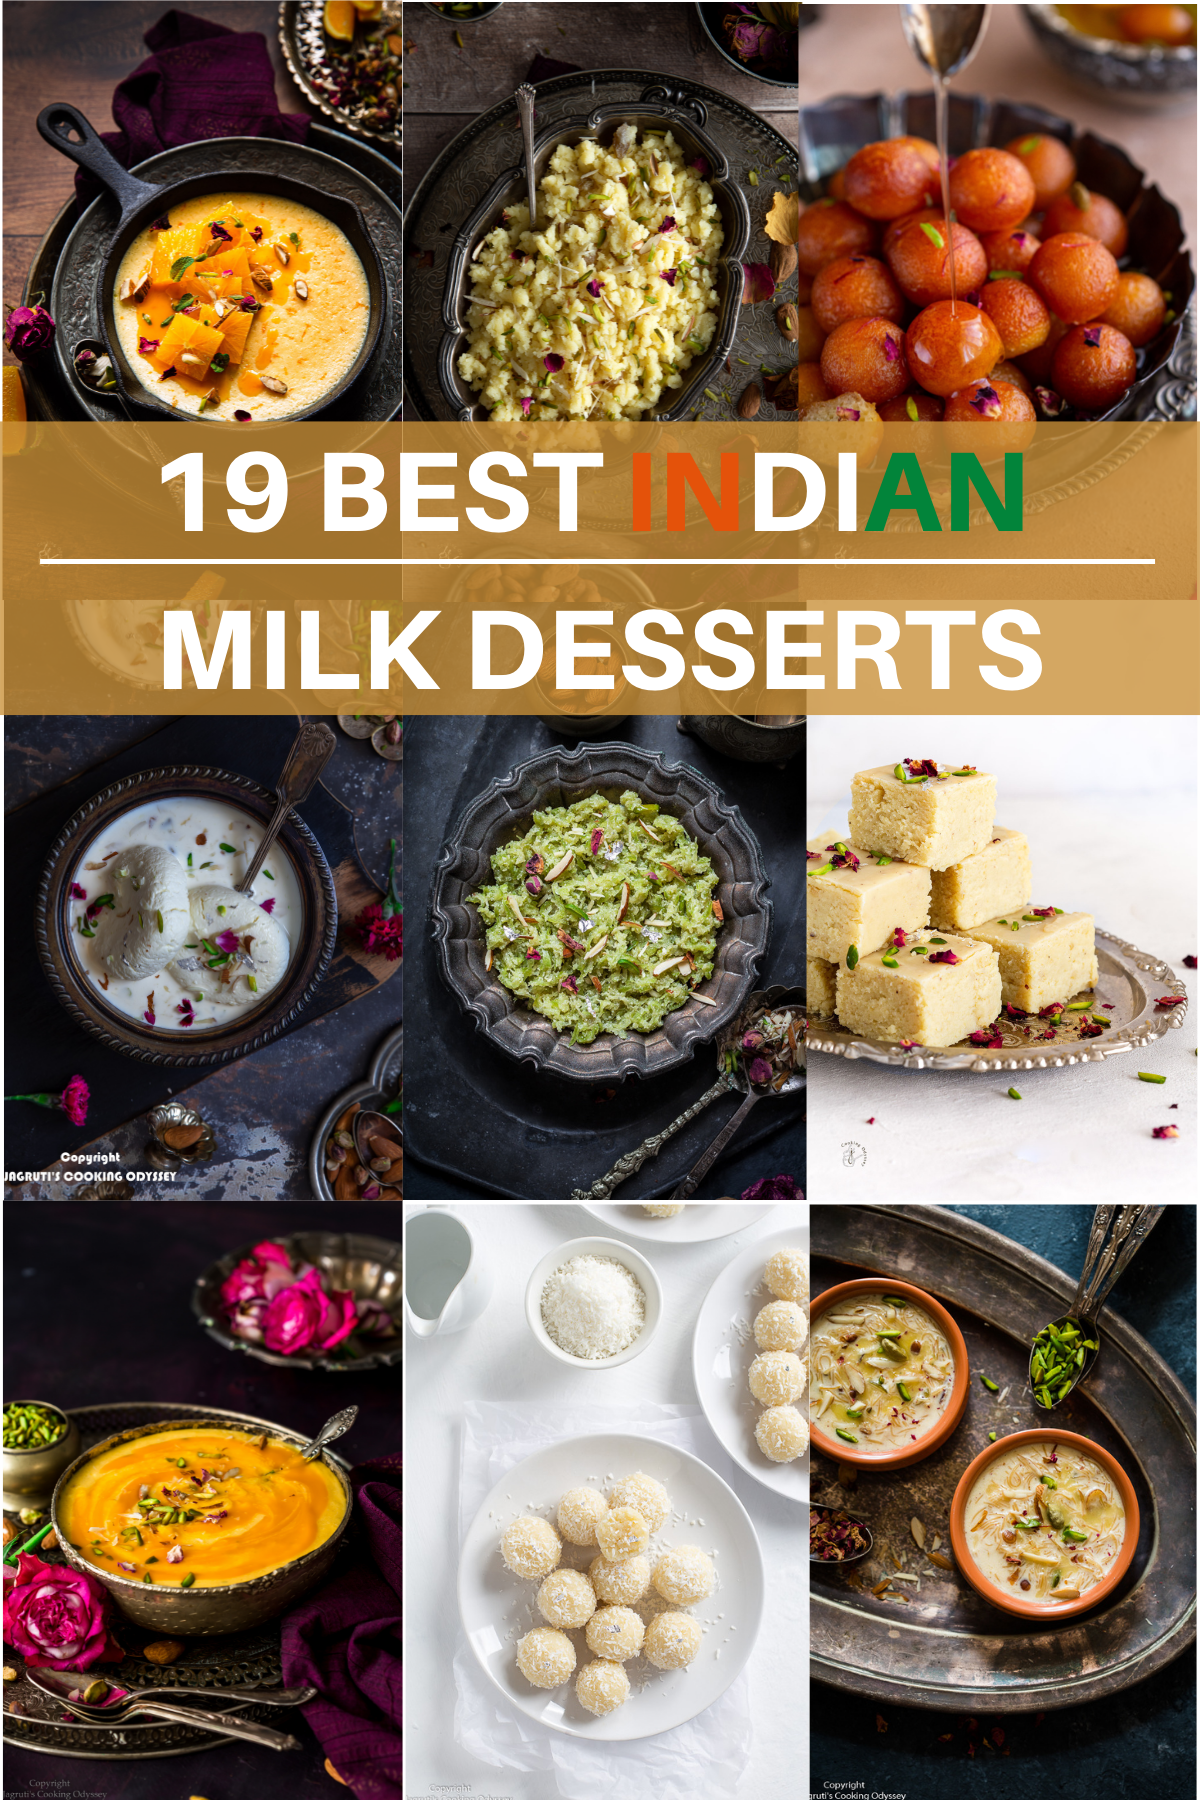
Indian mithai is enjoyed throughout the year, although they are a must at festive occasions and religious festivals.
Each region in India has their own style of preparing Indian desserts, adding their own unique flavour and texture. However, they will all have the classic Indian spices most associated with mithai.
See my 29 Easy Indian Dessert Recipes for Dinner Parties for more inspiration.
For recipes with a modern twist, check out Indian Fusion Desserts Recipes
To curate your own bespoke Diwali Dinner Menu, with starters, mains, sides, breads, dips, drinks and more!
Indian milk desserts are predominantly made in India but are enjoyed and loved worldwide. These Indian sweets are also known as Indian mithai and are made from a variety of different ingredients. This includes milk and milk based products.
These recipes are great for leftover milk - I often end up making a quick batch with spare whole milk!
Whether you want something chilled, quick, festive or giftable, these Indian milk desserts are a lovely place to start.
This is how I would usually decide which dessert to make based on the occasion.
I'm kicking off this list with the most widely known Indian milk sweets.
There is a reason Ras Malai is at the top of the list! This premium Indian dessert with milk can be found in Indian restaurant menus throughout the world though the recipe originates in Bengal.
At its core, ras malai is a rich dessert made with soft round paneer (Indian cheese) dumplings that are soaked in a lightly flavoured sweetened milk cream. This luxurious dessert is served chilled in a bowl.
Ras Malai is an Indian sweet that is reserved for special occasions as it takes some effort and care to make. The end results, however, are so satisfying and worth the effort.
Variation: Eggless Ras Malai Cake

Barfi is another classic, it is a melt in the mouth sweet with similarities to fudge. This version is plain white barfi which is made with milk, milk powder, sugar and flavourings. The end result is similar to that found in indian sweet shops or halwai.
Good barfi should be crumbly and slightly flaky, not smooth like peda. In my milk powder barfi recipe, roasting the milk powder helps remove the raw taste and gives a more mithai-shop-style texture.
Variation: Barfi can also be flavoured in a variety of different ways, this Barfi-Peda roundup delves deeper into these.

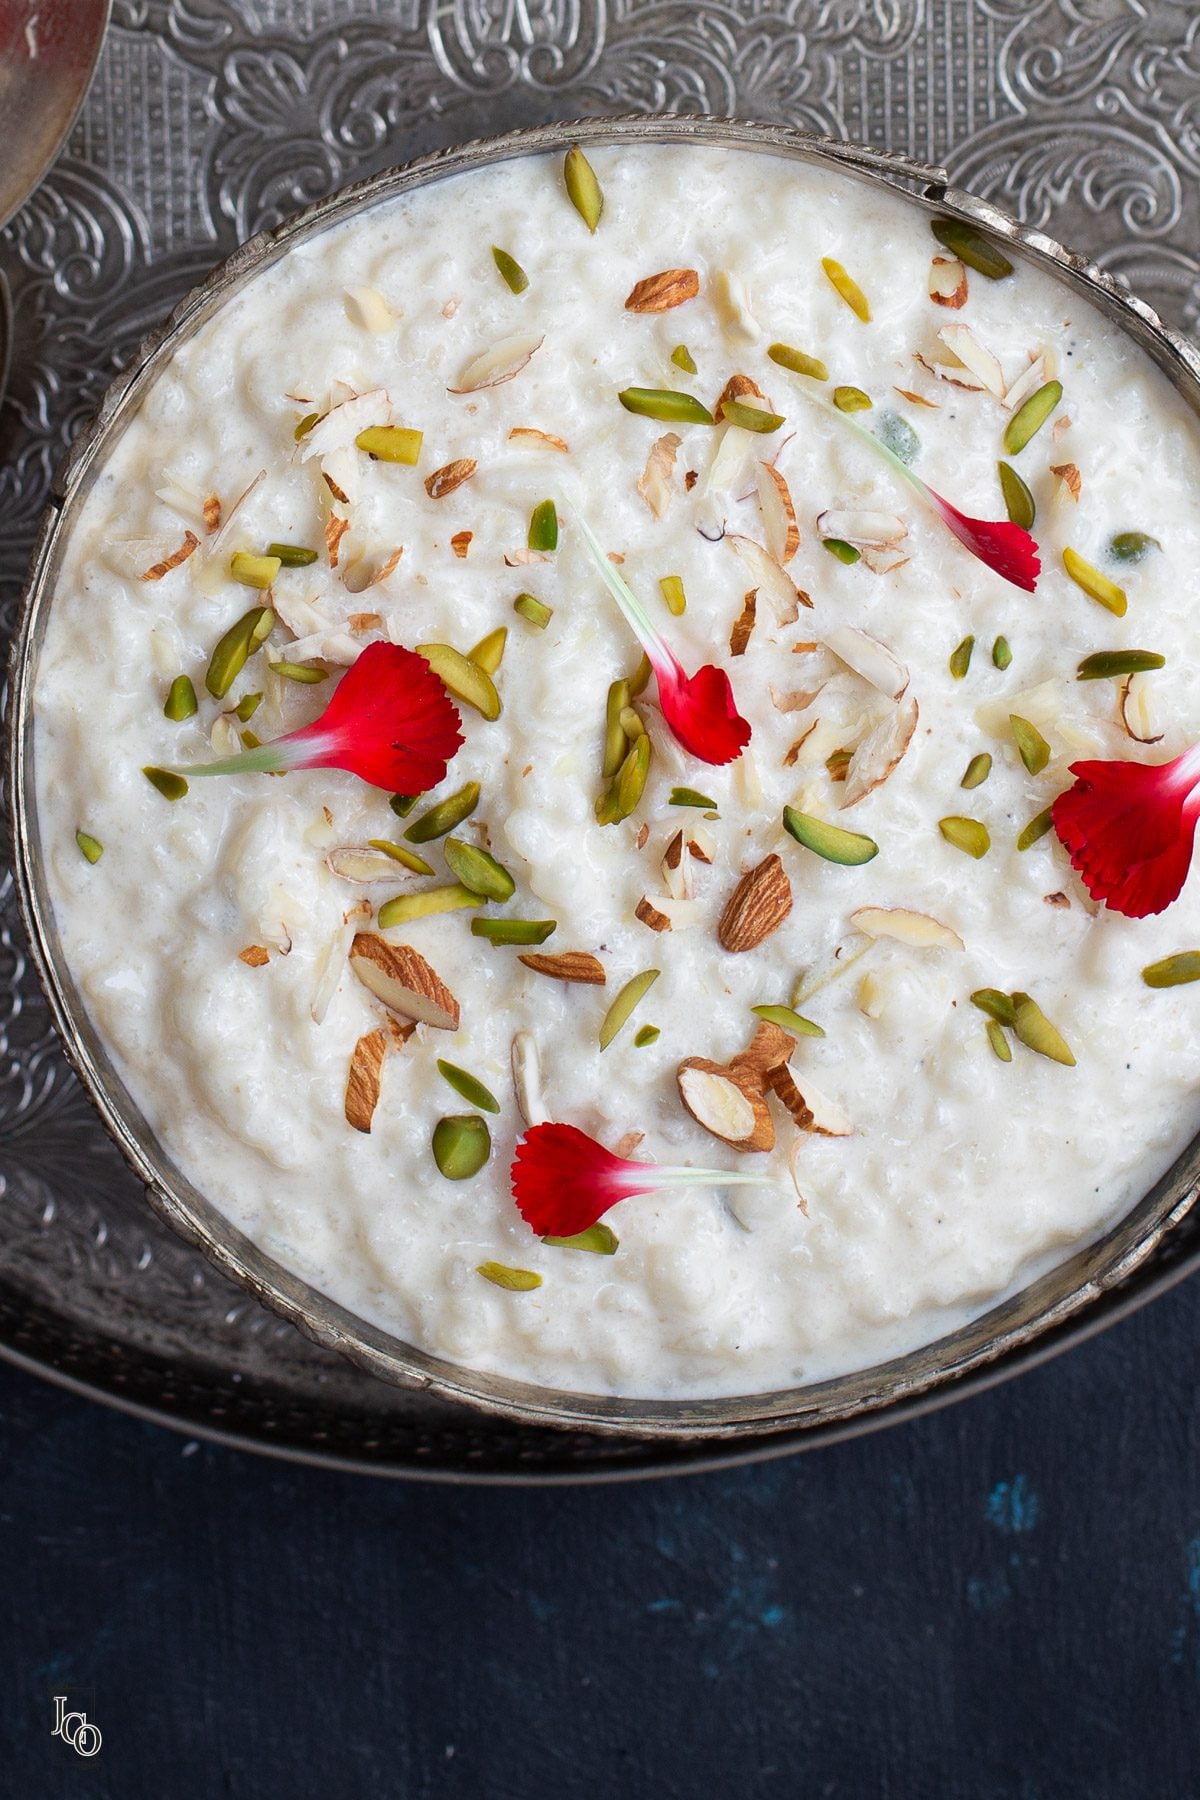
Another classic Indian milk dessert is kheer or Indian rice pudding. In this recipe, rice is cooked and milk then sweetened and flavoured with nuts and Indian spices. Kheer is commonly served throughout the year but also during Navratri, Sheetla Satam or Eid.
Optionally, I like to add extra cream or evaporated milk for extra creaminess.
Variations: Mango Kheer - silky mango pulp is added to finished kheer for a light summery treat or carrot kheer - made with grated carrots.

Milk is literally in the name for this exquisite Indian milk sweet.
This loose halwa is prepared with milk, condensed milk and yogurt. It can be served loose in a bowl or squashed and shaped into a "cake".
It has a juicy yet grainy texture that melts in the mouth once eaten. This recipe gives you similar results to sweet shop milk halwa but is prepared in the microwave for quick yet satisfying results.
Variation: Rose and Chocolate Indian Milk Cake

Shrikhand is a creamy dessert hailing from the states Gujarat and Maharashtra. It is prepared primarily with strained yogurt which is then flavoured with nuts and Indian spices.
In my version, I like to add whipped cream to make it extra silky and creamy.
You can find it served at weddings and is common during the summer months.
Variations: Mango Shrikhand - classic shrikhand but flavoured with aromatic mango pulp. This one is perfect for the spring/summer months when Indian mangoes are in season.

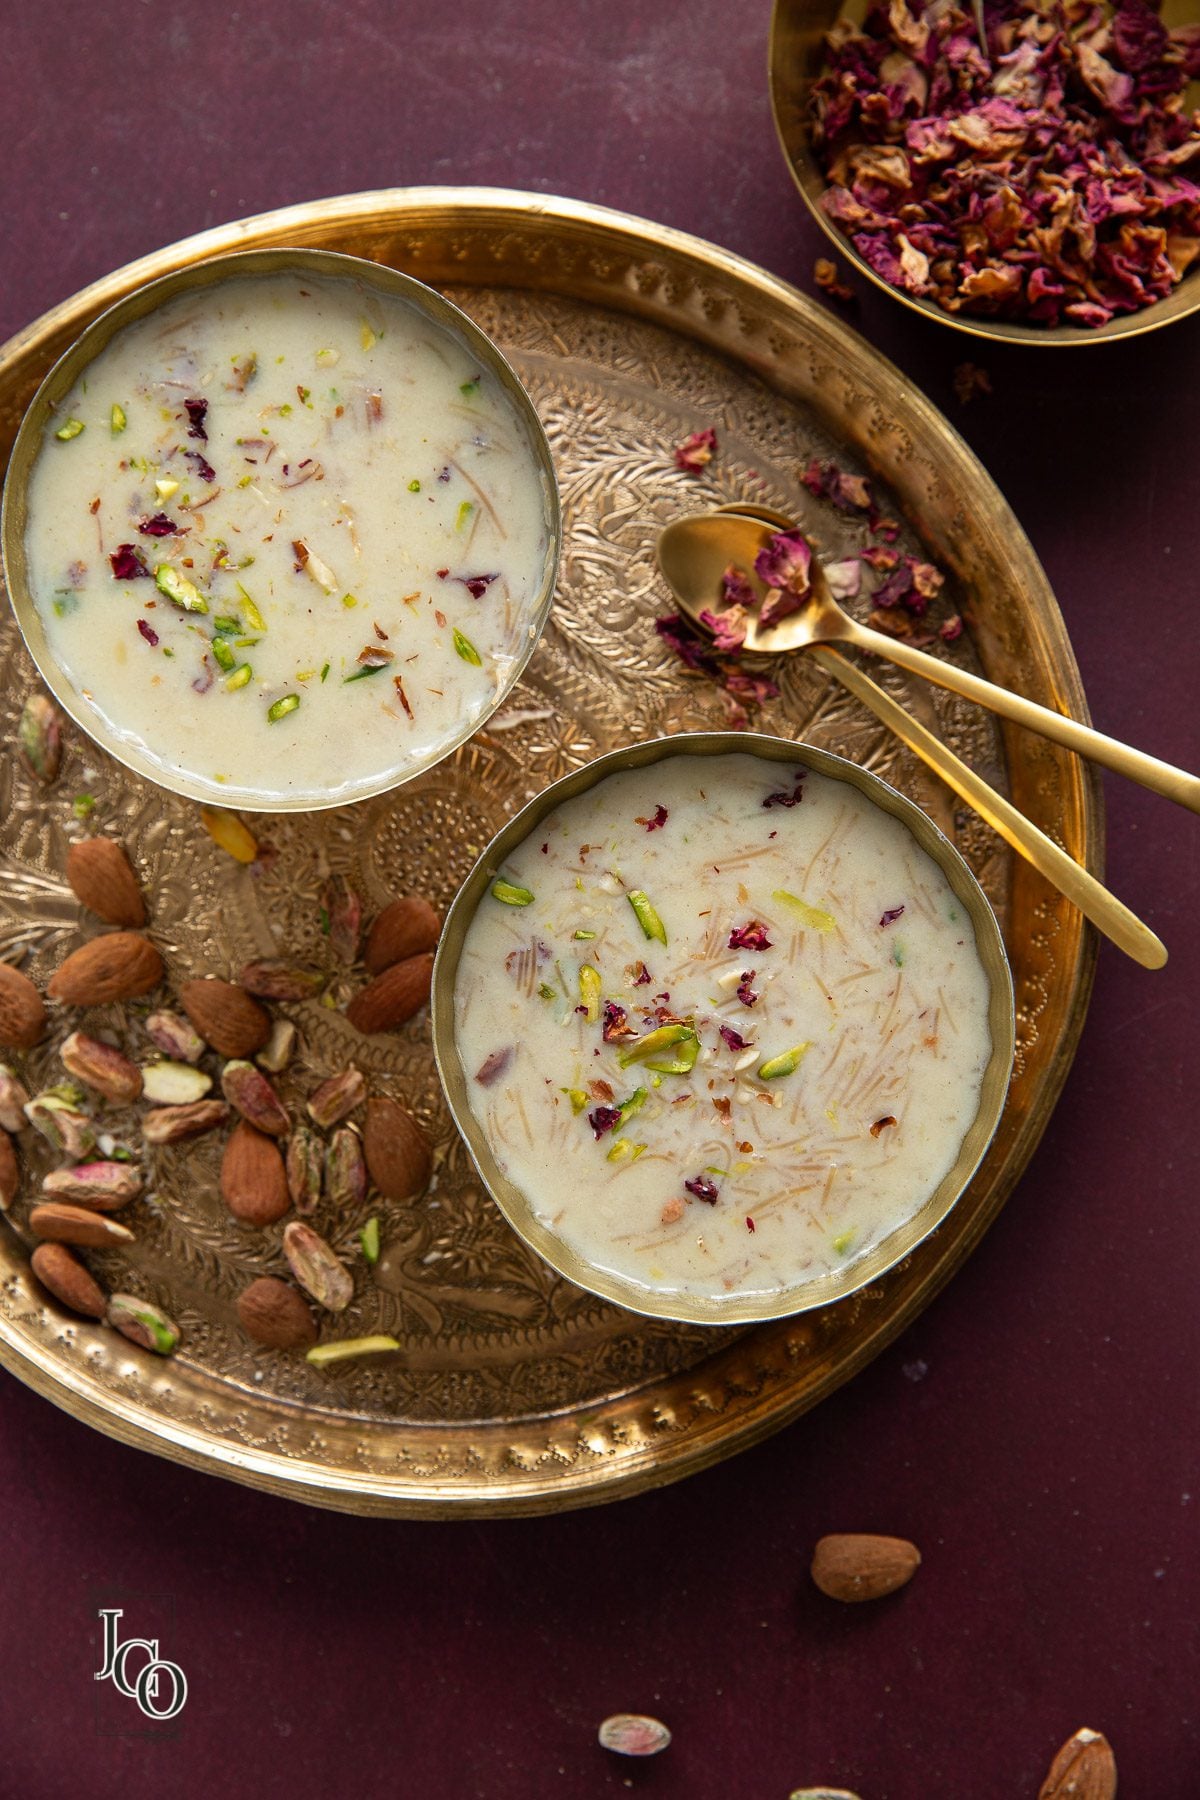
Also known as Semiya Payasam, this vermicelli kheer is a quick alternative to rice kheer. Lightly roasted vermicelli is cooked in milk which is sweetened and nuts are added.
Variation: Sheer Khurma - this vermicelli pudding also has similarities to seviyan but the preparation and ingredients are a bit different as dates and whole spices are added. It is mainly served during Eid.
Lachha Rabdi is purely an indian milk dessert because the recipe is made entirely from milk and sugar! The term "Lachha" refers to the texture of the milk skin or malai that appears as milk is heated.
The milk is heated until it reduces and comes thick. The milk is sweetened and flavoured giving it a condensed milk like quality.
A special technique, which is explained in the recipe post, is required to get perfect lachha rabdi with no risk of burning.
Lachha rabdi is enjoyed chilled as it is or is paired with malpua or jalebi.
Variations: Lachha Rabdi with Kesar - saffron threads are added to make the dessert even more opulent.

This is a royal dessert - it's even in the name! Shahi means royal and Tukda means pieces and here it refers to the bread pieces which are fried in ghee. The bread is then topped with sweetened milk or rabri.
Shahi Tukda is another Mughlai dessert and is often served during special occasions and festivities.

A royal alternative to rice kheer, paneer kheer uses crumbled paneer. The finished dish is luxurious, rich and very creamy. I usually reserve this recipe for the most special occasions.

If you've ever eaten at an Indian restaurant or Indian buffet, chances are you've eaten gulab jamun. Gulab Jamun waves the flag for Indian sweets all around the world.
Gulab Jamun is syrup-soaked, but the balls are made with mawa or milk powder, so it still belongs in a milk sweets collection.
It's most often enjoyed during celebrations and is delicious hot or cold.

Dudhi Halwa or Lauki Halwa is an awesome Indian dessert made from vegetables and milk! It hails from North India though is thought to originate from Moghul times. Lauki or Dudhi is the Indian name for bottle gourd.
Not to fret - you do not get a "vegetable" or "green" taste in this sweet, only creamy goodness!
Dudhi, milk, milk solids, sugar, ghee, nuts and spices are used in this recipe. It is often served in summer months as bottle gourd is a summer squash. I like to add mawa because it gives a rich, grainy texture.
Variation: In similar fashion, you can make Carrot Halwa or Gajar ka Halwa. This is an Indian sweet made from carrots and eaten in the winter when Indian carrots are in season.

White Semolina Pudding or Sooji no Siro (in Gujarati) is an everyday Indian milk dessert but is also prepared during Hindu religious observances.
Semolina is cooked with milk, sugar and ghee to create a fluffy and spongy semolina pudding that is delicious hot or cold.

Aka Indian Ice Cream! The authentic recipe of kulfi is to heat milk until it reduces down significantly. This is then sweetened and flavoured in a variety of ways and frozen. This treat is enjoyed at the end of an Indian meal and can be found in many Indian or South Asian restaurants.
This particular version is a quick kulfi recipe - I make it with milk powder and condensed milk for a quick frozen dessert. It is also flavoured with cardamom chai.

These pristine looking Indian style coconut truffles are everything you want from an Indian mithai. They're beautiful, have exotic flavours and are indulgent to eat.
Coconut Ladoo are a festive season favourite and luckily, the recipe is fairly straightforward!
I specifically avoid shortcut methods for my coconut ladoo to get perfectly soft results.

Basundi has some similarities with rabdi but plenty of differences that it is it's own dish!
It is also made with milk which is reduced slightly. Sugar is added along with sweet and warm spices like cardamom or saffron and topped with rich nuts like pistachio, almonds, and cashews.
Basundi remains smooth whereas in rabdi, particularly lachha rabri, we allow milk skin to form. Basundi is also runnier and eaten as it is at the end of a meal.
It is popular in Gujarat and Maharashtra. My version is topped with double cream for double the creaminess!
Variation: Dudhi Basundi is made with bottle gourd for a decadent milk dessert!

This sweet baked yogurt is also known as Indian cheesecake. Bhapa Doi is a Bengali milk based dessert and is made with yogurt, reduced milk and sugar.
My version eliminates the need to boil milk for a long time and is made with quicker alternatives. It is also flavoured with a spiced orange syrup.
Bhapa Doi is served chilled and can be served throughout the year.

This recipe has some similarity to rice kheer but is made from fox-nuts. It is often made during Hindu fasts. It is creamy, sweet goodness in a bowl!
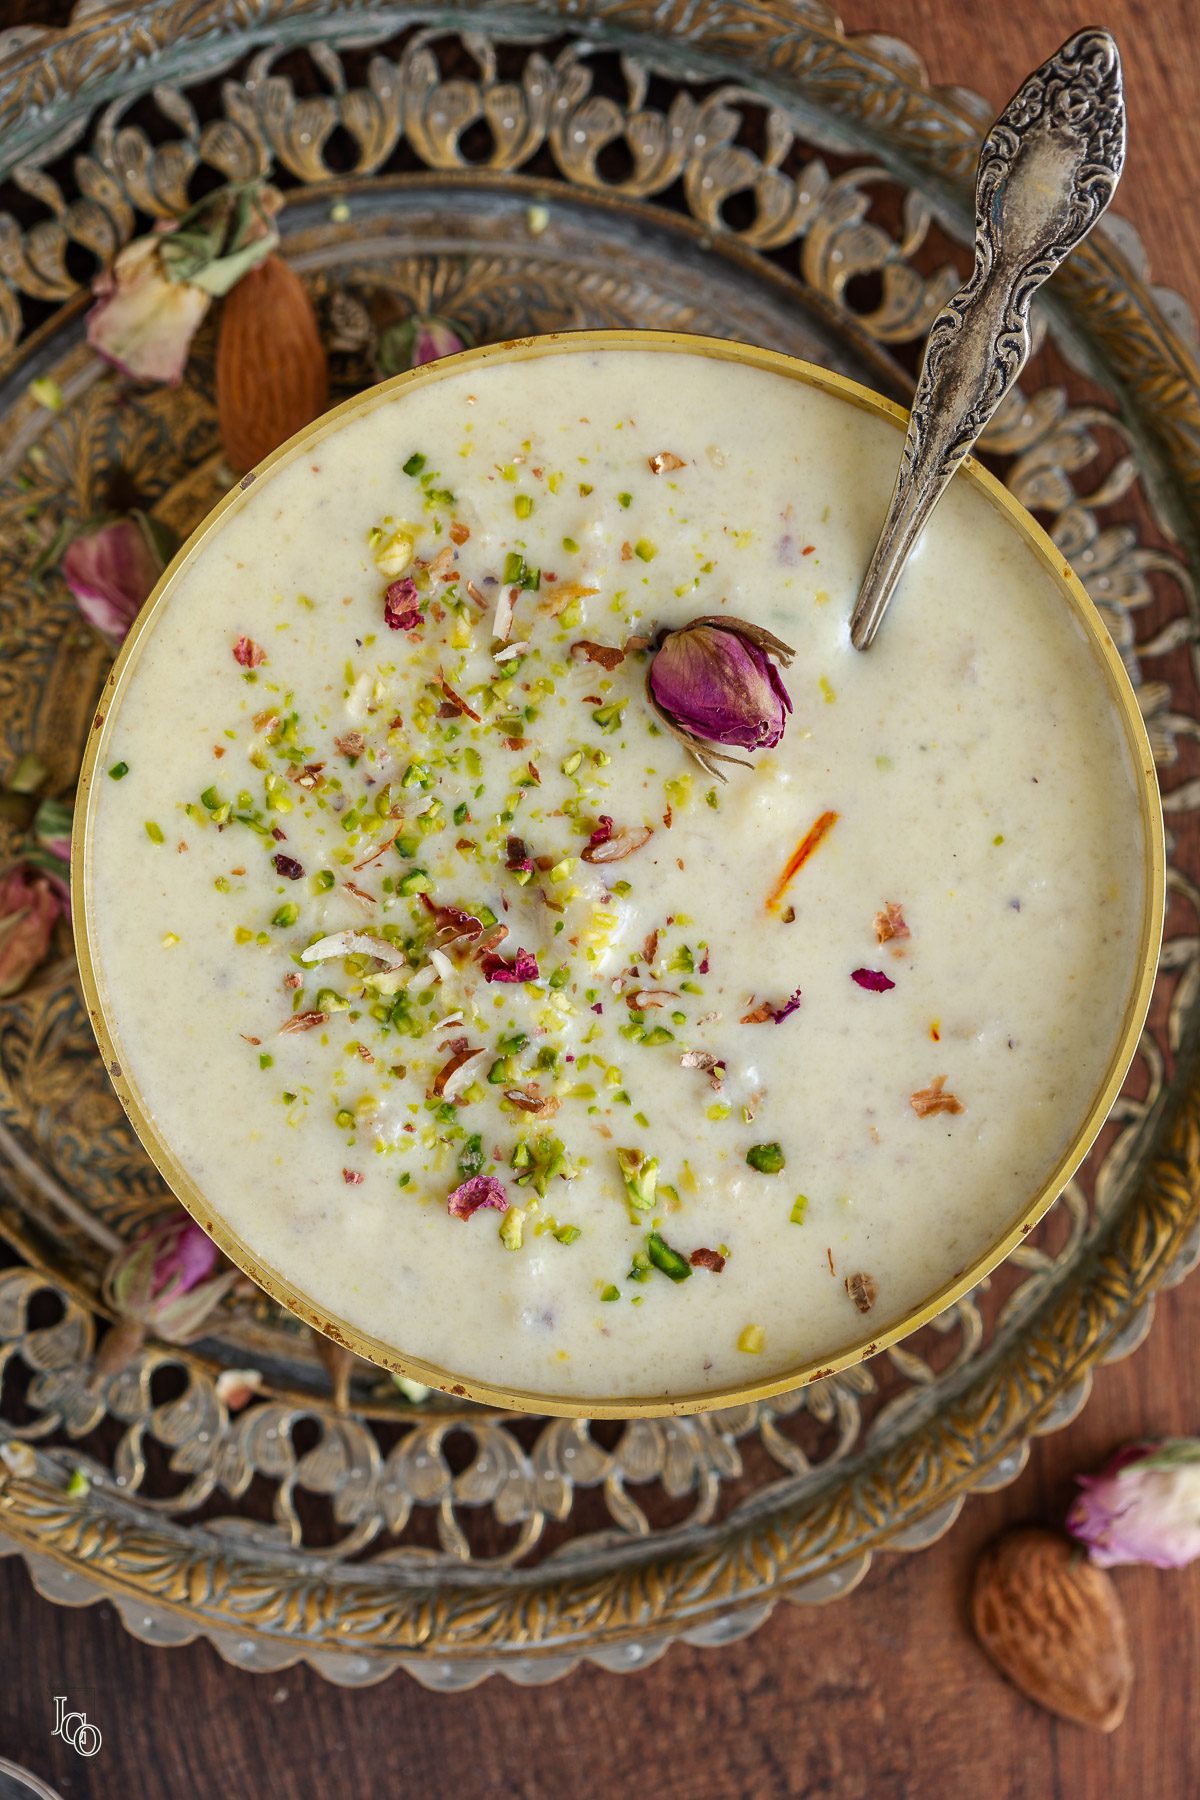
Both rice kheer and phirni are made from similar ingredients but the latter is made from ground rice. This indian milk dessert is often served during Ramadan or Eid.
My version is prepared a little differently - the sugar is caramelised making this a Caramel Phirni which is simply too good to miss!

This Gujarati recipe is also made from rice and milk. The difference with doodh paak and kheer is the ratio of rice to milk. In Doodh Paak, the dessert is mostly sweet milk with little rice.
Doodh Paak is eaten chilled and is served during Navratri, a Hindu festival.

This dessert has some similarity with dudhi halwa. Indian carrot pudding or gajar halwa is one of the most popular Indian desserts served during festivals, occasions and in Indian restaurants throughout the world.
It is made with basic ingredients such as carrots, milk and sugar and is flavoured with cardamom and nuts.
Although this Indian mithai is made during the winter season when red carrots are available in the market, it equally tastes good with orange carrots too.

This barfi is made from slow roasted mawa and a simple sugar syrup. It's rich with an irresistable grainy texture.

For something a little bit off the beaten-track, why not try these 9 Indian sweet recipes made from milk.
These peda are unique to Rajkot, Gujarat. They are made with only 2 ingredients - milk and sugar.
These peda are definitely a labour of love as they take a few hours to make! The results though will make you feel like a King or Queen! These are truly rich peda that should be reserved for the most special of occasions!

Habshi halwa is a dense Indian milk sweet made from sprouted wheat, milk, ghee, sugar, nuts and spices. It is rich, dark and extremely entrancing - making it one of my all-time personal favourites!
It has a nutty and sticky texture making it quite unique compared to normal halwa and barfi.
Make this Indian dessert for Diwali, Holi, Raksha Bandhan or parties.

Cantaloupe melon balls are served in chilled sweet milk. My Mum grew up with this dessert but it isn't one I've come across since! It is a light and refreshing summer dessert best enjoyed after a meal or as a snack or at breakfast.
This no-cook and easy dessert comes together under 10 minutes.

Another peda recipe but with a twist! This easy Instant Peda recipe uses ricotta cheese. This is an easy recipe because it is prepared with only 3 main ingredients!
This creamy and delicious dessert is perfect for any celebrations and is a make ahead sweet too.

Garvanu means sweet. This authentic recipe hails from South Gujarat, India. Essentially, it is a semolina kheer made with basic ingredients.
It can be served warm or chilled. Prepare it for Sheetla Satam - a day dedicated to the goddess Shitala.
Try this authentic Gujarati Semolina Kheer recipe that is quick, beginner-friendly and made with very basic pantry ingredients. It is truly delectable Indian dessert that is egg-free. Serve warm or cold, either way tastes so great!

Makhandi halwa is a simple and easy dessert recipe that has a unique caramel taste without using caramel!
It is hugely popular in North West Punjab, now in Pakistan. This melt in your mouth dessert is prepared with semolina, milk, ghee and sugar.
Make for your loved ones on a Sunday brunch with poori and chana masala or serve to a crowd!

Kalakand is a set Indian milk sweet made from fresh milk and paneer.
Enjoy this moist, juicy and absolutely delicious Indian kalakand sweet made using grated beetroots. The colour is an absolute showstopper and a unique way to enjoy kalakand.
It is indulgent, moreish and has a wonderful taste of aromatic cardamom in every bite. So perfect for festivals and celebrations!

This unique Gujarati dessert is prepared by Gujarati people all over the world on the night of the festival called Sharad Poornima.
It is simple and quick recipe made using milk, rice flakes (poha) sugar and flavoured with cardamom and nuts.
Variation: This creamy pudding can also be flavoured with mango and coconut or made as doodh poha with paneer.
More kheer! But this time with a double twist! Mango Paneer Kheer is a kheer made from paneer and flavoured with mango.
It is rich recipe with a delicious twist to traditional paneer kheer.
It is best enjoyed chilled during summer but can be made throughout the year by using canned or frozen mango pulp.

As always if you make this recipe, be sure to leave me a comment, rate this recipe and tag me on Instagram @jcookingodyssey or #jcookingodyssey. I love seeing all your photos of my recipe recreations!
Don’t forget to follow me on social media using the buttons below – I can't wait to see you all there!


PLEASE NOTE: Nutritional values are estimated by a computer and may vary based on ingredients and portion sizes. For personalised dietary advice, please consult a qualified healthcare professional.
Share on Facebook Pin This RecipeThese easy Air Fryer Indian Roast Potatoes are the tastiest side dish. You can also call these Air Fryer Bombay Potatoes thanks to the lip-smacking masala seasoning that is sprinkled after cooking.

Baklava Barfi is the perfect fusion dessert for special occasional such as Indian festivals, birthdays, Ramadan and more. Treat the baklava lover in your life with this stuffed milk powder barfi in which a tantalising ribbon of nut filling runs through layers flaky Indian sweet.

This Tuscan Bread Salad is a hot weather saviour! In this Italian-style recipe, ripe juicy tomatoes are combined with white beans, toasted bread and tossed in an aromatic tomato and white bean dressing.
At its core, Panzanella is a bread salad consisting of tomatoes, bread and basil but I have added some cannellini beans to make it more filling.

Whether you're looking for a Turkish Delight Ice Cream recipe or Turkish Delight Frozen Yogurt recipe, I've got you covered. This eggless rose ice cream recipe is fool-proof and a really easy way to enjoy the best flavours of Turkish cuisine.
Included in this post are recipes for a creamy rose flavoured ice cream made in the ice cream maker that is shaped into bars and a chocolate and rose frozen yogurt made with only 3 ingredients!

In this "dump and go" recipe, Instant Pot Baby Potatoes are steamed to perfection in the Instant Pot pressure cooker with a herby butter.
Baby potatoes are tossed in a delicious a garlic and thyme butter making them a wonderful side dish.

These Salt and Pepper Halloumi Fries are salty, spicy, cheesy and completely moreish. Think British Chinese takeaway-style salt and pepper chips, but with golden halloumi fries tossed through peppers, onion, garlic, chilli, spring onions, white pepper and Chinese five spice. They’re vegetarian, ready in about 25 minutes, and honestly good enough to eat straight from the pan.

I had a packet of store-bought halloumi fries and a sorry looking pepper sat in the fridge so I thought I'd experiment with them and make a salt and pepper version! I'm so glad that I did - the flavours all complement each other so well!
Thanks to the properties of halloumi, it doesn’t melt when cooked so holds its shape beautifully for these fries and for my BBQ halloumi and mushroom skewers and vegetable paella with halloumi.

Halloumi
I usually make these with a block of halloumi rather than ready-made halloumi fries. It tastes fresher, and by the time you open the packet and air fry the ready-made version, cutting your own does not take much longer.
Ready-made halloumi fries are still a brilliant shortcut if you want this even faster.
Flour coating
Plain flour, cornflour or rice flour all work here.
Cornflour gives a nice coating, just like I use in my dry chilli paneer. Rice flour adds a little extra crispness. Plain flour is the easiest option because most people already have it.
I do not worry about getting the halloumi super crisp because it gets tossed with peppers, onions and seasoning at the end. The aim is golden edges, hot halloumi and that British Chinese takeaway-style flavour.

Salt and pepper seasoning
The flavour comes from white pepper, Chinese five spice, chilli flakes, salt and a little sugar.
White pepper gives that proper takeaway-style warmth. Five spice adds the savoury Chinese-style background flavour.


I often eat these Salt and Pepper Halloumi Fries just as they are for lunch, while the halloumi is still hot and the peppers are crunchy.
For a bigger Chinese fusion fake-away, serve them with Indo-Chinese veg hakka noodles or schezwan fried rice. If you are making a party spread, add veg manchurian or air fryer spring rolls (cooked from frozen). No dip is really needed because the fries are already tossed with garlic, chilli, spring onions and salt and pepper seasoning.
As always if you make this recipe, be sure to leave me a comment, rate this recipe and tag me on Instagram @jcookingodyssey or #jcookingodyssey. I love seeing all your photos of my recipe recreations!
Don’t forget to follow me on social media using the buttons below – I can't wait to see you all there!

PLEASE NOTE: Nutritional values are estimated by a computer and may vary based on ingredients and portion sizes. For personalised dietary advice, please consult a qualified healthcare professional.
Share on Facebook Pin This RecipeYes, you heard that right! You can make easy Air Fryer Focaccia Pizza with a perfectly cooked base without needing a pizza oven. A focaccia base is topped with a delicious tomato sauce and loaded with cheese and fragrant Sicilian style herbs. Pizza night just became a lot more fun!

This vegan toasted ravioli is crispy and delicious, making it the perfect appetiser or snack. Thanks to the air fryer, toasted ravioli can be enjoyed guilt-free and is ready within 15 minutes (including prep time). Can you believe that only 4 ingredients are required. The coating is egg-free, so this recipe is great for vegans, vegetarian diets that avoid egg or you simply have run out of eggs at home!
If you do not have an air-fryer, included are baked toasted ravioli and deep-fried toasted ravioli options.

Sweet, crumbly and buttery eggless Pumpkin scones, filled with chai spice, are perfect for afternoon tea. Included is a recipe for Savoury Pumpkin Scones with a cheesy herby topping. Both are made with homemade pumpkin puree and then air-fried to flaky perfection.

These Mexican cheesy air fryer potatoes are flavoured with taco seasoning and cheddar cheese. Thanks to cheesy foil potato packs, this easy side dish with only 3 ingredients will be ready within minutes with the convenience and ease of no clean up.

This zippy mango, avocado and black bean salad with fresh Mexican flavours is perfect as a side salad or light lunch. Also known as guacamole mango salad, this easy salad is dressed in a lime, cilantro and jalapeno dressing.
It is vegan, gluten-free, and a free-from lettuce salad!

Perfectly crunchy on the outside and soft in the centre is how I like my Air Fryer Avocado Fries.
Included in the post are 5 handy tips for the best crunchiest avocado fries.

Grilled pineapple is a delicious fruity dessert that can be prepared within minutes and with few ingredients. You can use the air fryer to grill or roast the pineapple until it reaches caramel-ly perfection!
Included in this post are recipes for both sweet and savoury grilled pineapple.
You can enjoy BBQ style grilled pineapple all year long thanks to the air-fryer!

Air fryer Baklava is one of the best-ever air fryer desserts you'll come across! Layers of crispy filo are filled with assorted nuts and topped with salty sweet syrup. With this easy recipe, you can make perfect homemade baklava.
Surprisingly, the baklava isn't overpoweringly sweet and makes a stunning dish to serve to and impress guests.

You can make super creamy vegan pesto potato salad in the Instant Pot pressure cooker. This potato salad is bright, herby and full of flavour!
It tastes great chilled or at room temperature alongside your favourite summer BBQ favourites! It is naturally gluten-free, egg-free and plant-based.

This authentic Indian Onion Salad recipe is so quick and easy to make yet gives you the best results. The recipe is a copycat of the raw onion salad served in restaurants with poppadoms and green chutney.
You can make this easy Indian salad in under 5 minutes with a few simple/easy to find ingredients.

This summery Chickpea Salad with the creamiest lemon basil avocado dressing is packed with flavours and veggies.
Instant Pot Chickpea Salad is vegetarian, gluten-free and can easily be made ahead. It is perfect for occasions such as 4th of July BBQs, potlucks or cookouts.

Make the BEST vegan potato salad in the Instant Pot with wonderful Mediterranean Greek flavours. This Instant Pot Potato Salad is made with new potatoes, contains no eggs and no mayo.
You do not need any special equipment as this is one of the easiest ways to make potato salad - simply pressure cook the potatoes and add in all of the other ingredients. It is the perfect one pot meal!

This is the BEST recipe you will find for the creamiest Tapioca Pudding made in the Instant Pot. It is vegan - totally dairy free and egg-free and is flavoured with tropical coconut milk and fresh mango chunks.
You only need 3 main ingredients and less than 15 minutes to make this Tapioca Pudding that is perfect as a mid-week comforting sweet or a crowd-pleasing dessert.

Bottle the sweet taste of summer with the most amazing strawberry and rhubarb jam that is made in the instant pot pressure cooker with only 4 ingredients. It is made without pectin, without corn starch and takes under an hour and 3 steps to make.
Learn how to make easy homemade jam in your pressure cooker that is perfectly set.

Strawberry and rhubarb are a match made in heaven and complement each other so well as one is tart and the other is delicate and sweet.
In this instant pot jam recipe, fresh strawberries and rhubarb are cooked with sugar and lemon juice only - no pectin is needed as the lemon juice helps set the jam.
I'm guilty of buying way too much fruit especially when I go to a pick-your-own-farm. Rows and rows of fresh plump strawberries - I mean it's just too tempting! The only caveat to this is that the fruit spoils easily, leaving you in a mad rush to get it all eaten!
This jam is a great way to use up extra fruit as it preserves it. It is also a great way to use strawberries that are bought out of season and thus tend to be less sweet. Have you tried this Christmas Jam yet?
To qualify as jam, the total sugar content needs to be higher than 60% (sugar plus the natural sugar found in the fruit). Traditionally, jam is made in copper pots as copper is highly conductive allowing the maker to control the temperature.
The beauty of the instant pot is that less stirring is required and you can reduce the time it takes to make.
You do not need added pectin in this recipe because the lemon juice acts in the same way. Often using shop bought pectin makes it difficult to get the jam to set exactly right.
Frozen fruit is convenient and works well in making jam because you can make it any time of the year. You can easily buy fruit chunks in the frozen aisle of most supermarkets and are a handy way to cook with fruit that is out of season.
You will not need added pectin apart from that naturally in the frozen fruit and lemon juice. Simply follow the first step and allow the fruit to defrost with the sugar so that it macerates.

great gift idea
a great way to use up leftover fruit
no pectin
without corn starch - no need to make a corn starch slurry to thicken the jam
no need for specialist jam sugar
easy to customise - use whichever fruit you like or have to hand - all you need to do is adjust the amount of sugar as some fruit is sweeter than others
easily control the sweetness of the jam
better than shop bought
no preservatives
only 4 easy ingredients
easy to adjust the servings
vegan/naturally plant based
You will be amazed at how easily you can make homemade jam that does not require any special ingredients.

Strawberries - I have used Sweet British Strawberries at the peak of their season but you can use any strawberries both fresh or frozen.
Rhubarb - rhubarb can be tart and sour but red varieties are sweeter.
Sugar - I have used white granulated sugar
Lemon juice - preserves and helps set jam as it adds pectin as strawberries and rhubarb are a low pectin fruit. Do not worry, you cannot taste the lemon juice!
alternatives to lemon juice:
apple juice works well as apples are high in pectin
you can also use orange juice but this imparts its own flavour into the jam so is not as suitable
Optional:
Vanilla extract - add a few drops of vanilla extract or vanilla essence. I have added vanilla extract in this recipe for a subtle flavour but you can leave it out
You can absolutely make Strawberry Instant Pot Jam only if you wish or do not have rhubarb to hand - just three easy ingredients!
You may also add a few fresh Basil or Thyme leaves too (add them whilst the jam mixture is on sauté mode)
It is possible to make jam with no added sugar.
I should note when I say "sugar free" I mean no added sugar as the fruit will contain natural sugars but we are simply not adding extra sugar into the recipe.
Macerating the jam is really key here as it allows the natural sugars in the fruit to form a syrup.
Sugar free jam will not keep as long as the absence of sugar prevents preservation.
I use 100% natural sweetener erythritol and stevia. Other sugar free sweets include:
The first step is to macerate the fruit. Leave all ingredients in Instant Pot for 30 mins (cover with the lid at this point)
The longer you leave this stage the better as the sugar draws out a lot more juice and saves you having to stir loads later
Then put the vent on seal and pressure cook for 1 min on high pressure. Allow natural pressure release
Open the lid and select Sauté on Normal heat for 5 minutes. Crush the fruit slightly as you cook the jam.
Test the setting of the jam by putting on back of spoon
Tips:
It is important to macerate the fruit first as putting in dry sugar in the inner pot can lead to burning
Make sure the ring you are using for this recipe is free from any strong smell.
Wrinkle test. Place a plate in the freezer for 10 minutes. Once the jam is boiling, drop a small amount onto the cold plate. Allow it to cool and then push a finger through the jam. If it wrinkles, the jam is ready.
If it does not wrinkle, continue to saute for a bit longer.
Whilst you are waiting for the jam to cool, remember to turn off the heat as it will keep cooking
Spoon test. Once jam coats the back of a spoon (check in the video) turn off the Saute mode and remove the inner pot from the Instant Pot.
If after 48 hours your jam is still runny, add it back to the pot and heat for a few minutes. Run the jam set point test again.

Lets start with the obvious ... on toast!
Biscuits/Scones or maybe my Easy Eggless Lavender Scones! But the real question is...jam or cream first? Have your say in the comment below 🙂
Swirled in rice pudding - reminds me of my school dinners puddings!
In porridge/oatmeal
With plain yogurt
In peanut butter and jelly/jam sandwiches
Make Indian style chutney using Jam to accompany Indian snacks such Dabeli, Pakora or Samosa.
Macerating fruit is to soak it in sugar and/or lemon juice to soften it and release its juice. Fruit can also be macerated in balsamic vinegar or liquer.
Macerating fruit draws out the juices from the fruit which together with sugar makes a sugar syrup
Anywhere from 30 minutes to a few hours. The longer you do it, the better the results.
Jam sugar has added pectin and citric acid. When making jam using low-pectin fruit such as strawberries, often jam sugar is used.
Lemon juice contains pectin and so aids in the setting of jam, particular for fruit that is naturally low in pectin.
Yes, you can. As long as you do not fill the Instant Pot above MAX line. The cooking time will remain the same which is 1 minute on High. The SAUTE time may increase.
Yes, you can reduce the sugar in this recipe if you wish.
You can make strawberry jam any time of the year but the best fresh Strawberries in the UK are during late spring and summer.

Eggless Strawberry Pastel de Tres Leches
Black Pepper and Strawberry Kulfi
Strawberry, Goats' Cheese Crostini
Fresas Con Crema (Mexican Strawberries and Cream)
As always if you make this recipe, be sure to leave me a comment, rate this recipe and tag me on Instagram @jcookingodyssey or #jcookingodyssey. I love seeing all your photos of my recipe recreations!
Don’t forget to follow me on social media using the buttons below – I can't wait to see you all there!

PLEASE NOTE: Nutritional values are estimated by a computer and may vary based on ingredients and portion sizes. For personalised dietary advice, please consult a qualified healthcare professional.
Share on Facebook Pin This RecipeUpgrade your cheese and pineapple toasties by making these chilli cheese and pineapple puffs in the air fryer instead. They're the perfect vegetarian starter or canape that will be ready within minutes and easily made-ahead.
Great for entertaining, for on-the-go snacks and adding to lunch boxes. Just 4 ingredients, easy assembly, 5 minutes in the air-fryer and you're good to go!

Sweet and tart pineapple cubes, salty cheddar cheese and the tiniest dollop of chilli sauce is encased in a beautifully flaky puff pastry. Only four ingredients but when put together, something truly magical happens.
Cheese and pineapple is ultimately British and reminiscent of childhood parties. This recipe is perfect for entertaining whether it is a BBQ, garden party or sit down meal.
To make these "chilli cheese", I have used a little homemade Schezwan sauce but you can easily replace this with so many other options.

Air Fryer Punjabi Samosa Puffs
Tandoori Paneer Tarte au Soleil
Rose and Pistachio Puff Pastry Cream Horns/Cones
Eggless Mille Feuille with White Chocolate Saffron Yogurt Cream
Puff Pastry - for these puffs you will need puff pastry. I like to use ready-made puff pastry for convenience but you can absolutely make your own at home.
I prefer ready-rolled sheets to blocks as it saves me from having to roll out the pastry. Here, I have used a single roll of puff pastry 320g that when laid out flat is approximately 35cm by 23cm.
Pineapple - you can use either fresh pineapple or tinned pineapple. Make sure if using tinned that the pineapple is well drained otherwise it will make the pastry soggy.
Cheese - I cut mature cheddar into small cubes but you can also grate the cheese for the same effect as the cheese will melt.
Schezwan Sauce - this is what gives the "chilli" to the cheese. Add a small spoon of this sauce to the top of the pineapple and cheese or spread it onto the pastry before topping with the cheese and pineapple.
For the glaze - as an alternative to egg, milk or water and honey are suitable egg free glazes.

Follow these easy steps for perfectly flaky cheese puffs.
Prepare the filling by cutting pineapple into small cubes.
Now you want to prepare the pastry. Have it out of the fridge around 10-15 minutes before rolling it out flat.
Next, you want to cut the pastry into equal squares - I like to use a ruler for this. Here, I have cut the squares into 3x3 inches but you can make yours bigger if you prefer. 3x3 makes small bite-sized puffs.
I have used a pizza wheel but you can also use a sharp knife.


The next job is adding the filling. It is tempting to overstuff but please don't as you'll regret it later. Keep some space around the edges to allow the pastry to be folded.
Make sure your pineapple is fairly dry or else it will make the pastry soggy.
Now you want to make your parcels. Bring each corner of the square together to meet in the middle. Pinch the pastry together so that it sticks.
Brush some milk over the parcels as an egg-free glaze (not shown as a separate step here)
Place them gently in the air-fryer basket. You can use foil or parchment paper for the air fryer. You can also poke some holes into the foil or parchment to prevent it from flying around in the air fryer during cooking.
Keep a gap between the parcels to allow space to rise.


Air fry at 180 C for 5-7 minutes. You may need to adjust timings based on how your first batch turns out.
Remember to remove your basket from the air fryer once the pastry is cooked or else it will continue to brown.
Allow the pastry to cool slightly before taking off the parchment as some of the pastry make stick at the bottom.
Pre-heat the oven to 200C.
Follow the same steps as above.
Place the assembled puffs onto a baking tray lined with parchment paper.
Keep a gap of 3cm minimum between each puff as they will rise.
Place in the centre of the oven and bake for 15-20 minutes. You may have to turn the baking tray half way through cooking to allow all puffs to bake evenly.
Once the puffs are golden-brown, remove from the oven otherwise they will continue to cook in the residual heat.
These cute bite-sized puffs are delicious served warm but also taste fabulous cold/room temperature.
They'll look impressive loaded onto a large platter ready to be devoured during dinner parties or barbeques.
A cooling soft drink like this cardamom mojito is perfect to get the party started.
If you'd like to serve them with a sauce on the side, then this green coriander and mint chutney is great.
As always if you make this recipe, be sure to leave me a comment, rate this recipe and tag me on Instagram @jcookingodyssey or #jcookingodyssey. I love seeing all your photos of my recipe recreations!
Don’t forget to follow me on social media using the buttons below – I can't wait to see you all there!

PLEASE NOTE: Nutritional values are estimated by a computer and may vary based on ingredients and portion sizes. For personalised dietary advice, please consult a qualified healthcare professional.
Share on Facebook Pin This RecipeThis Vegan Burnt Basque Cheesecake is so creamy and silky with the perfect gooey centre and is flavoured with orange and sweet vanilla for a burst of spring-time freshness. It is light, creamy and made without dairy or nuts.
This eggless and dairy-free cheesecake is made with silken tofu and baked in the air-fryer to perfection. Just 5 main ingredients are required to make this crustless Spanish cheesecake.

These street-style Tawa Masala Burgers have undergone a vegan twist by using tofu instead of paneer or cheese. This delicious Indian burger recipe is made with vegetables and tofu then flavoured with pav bhaji masala and schezwan sauce.

If you're looking for the best Indo-Chinese starter recipe, you've found it. These vegan Schezwan Chilli Potatoes and stir-fried vegetables are coated in a finger-licking spicy schezwan/sichuan sauce. The dish is crispy, full of flavour, and easy to make! I like to speed the process by using a store-bought stir-fry kit that has all my veggies pre-prepared!

Spicy Indo-Chinese Schezwan sauce is a red chilli sauce made with dried red chillies, Sichuan pepper and soy sauce. It is used as a flavouring in a variety of fusion recipes due to its sharp, lemony and peppery taste. Sichuan pepper is commonly used in Chinese cuisine of China's southwestern Sichuan Province.
Although it is labelled as "spicy", the recipe can definitely be adjusted to be less spicy!
Use it in this Schezwan Fried Rice recipe.

Aate ka Halwa is a popular Indian sweet that is made with whole-wheat flour, ghee and sugar. We have added mawa/khoya in this wheat flour halwa for an extra luxurious Shahi touch. Just 4 main ingredients and 20 minutes are required to make this perfect atta halwa with a divine khasta and melt-in-the-mouth texture.

Make homemade wiggly vegan jelly that is perfectly set with only two easy to find ingredients. You can totally customise this recipe to whichever flavour you (or your kid) fancies! Homemade jelly that is gelatine-free has never been easier or stress-free!
