Busy weeknights call for this Instant Pot Chickpea and Coconut Milk Curry. It's a one-pot curry cooked directly in the Instant Pot using dried chickpeas. I skip the fancy spices and use easy curry powder for convenient yet delicious flavour.


Busy weeknights call for this Instant Pot Chickpea and Coconut Milk Curry. It's a one-pot curry cooked directly in the Instant Pot using dried chickpeas. I skip the fancy spices and use easy curry powder for convenient yet delicious flavour.


These Packed Potato Bhajias are a delicious East-African Gujarati delicacy. They can also be called Atom Bomb Bhajia and are aptly named! A special hot and sour masala with garlic, red chilli, coconut and coriander is stuffed in boiled potatoes, coated in batter and deep-fried.
"Packed" with flavour if I say so myself ...

Easy Masala Chips are an East-African Indian speciality. These Kenyan Masala Potato Chips or Masala Fries are made from frozen oven-chips for ease and use only pantry ingredients so that you can have a delicious meal ready in no time at all.

Plain White Milk Barfi is an Indian sweet made from milk powder and is prepared for special occasions. This Milk Powder Barfi Recipe has a crumbly texture just like the Barfi you would find in Indian sweet shops.
The special technique found in this recipe helps you get the best results every single time.

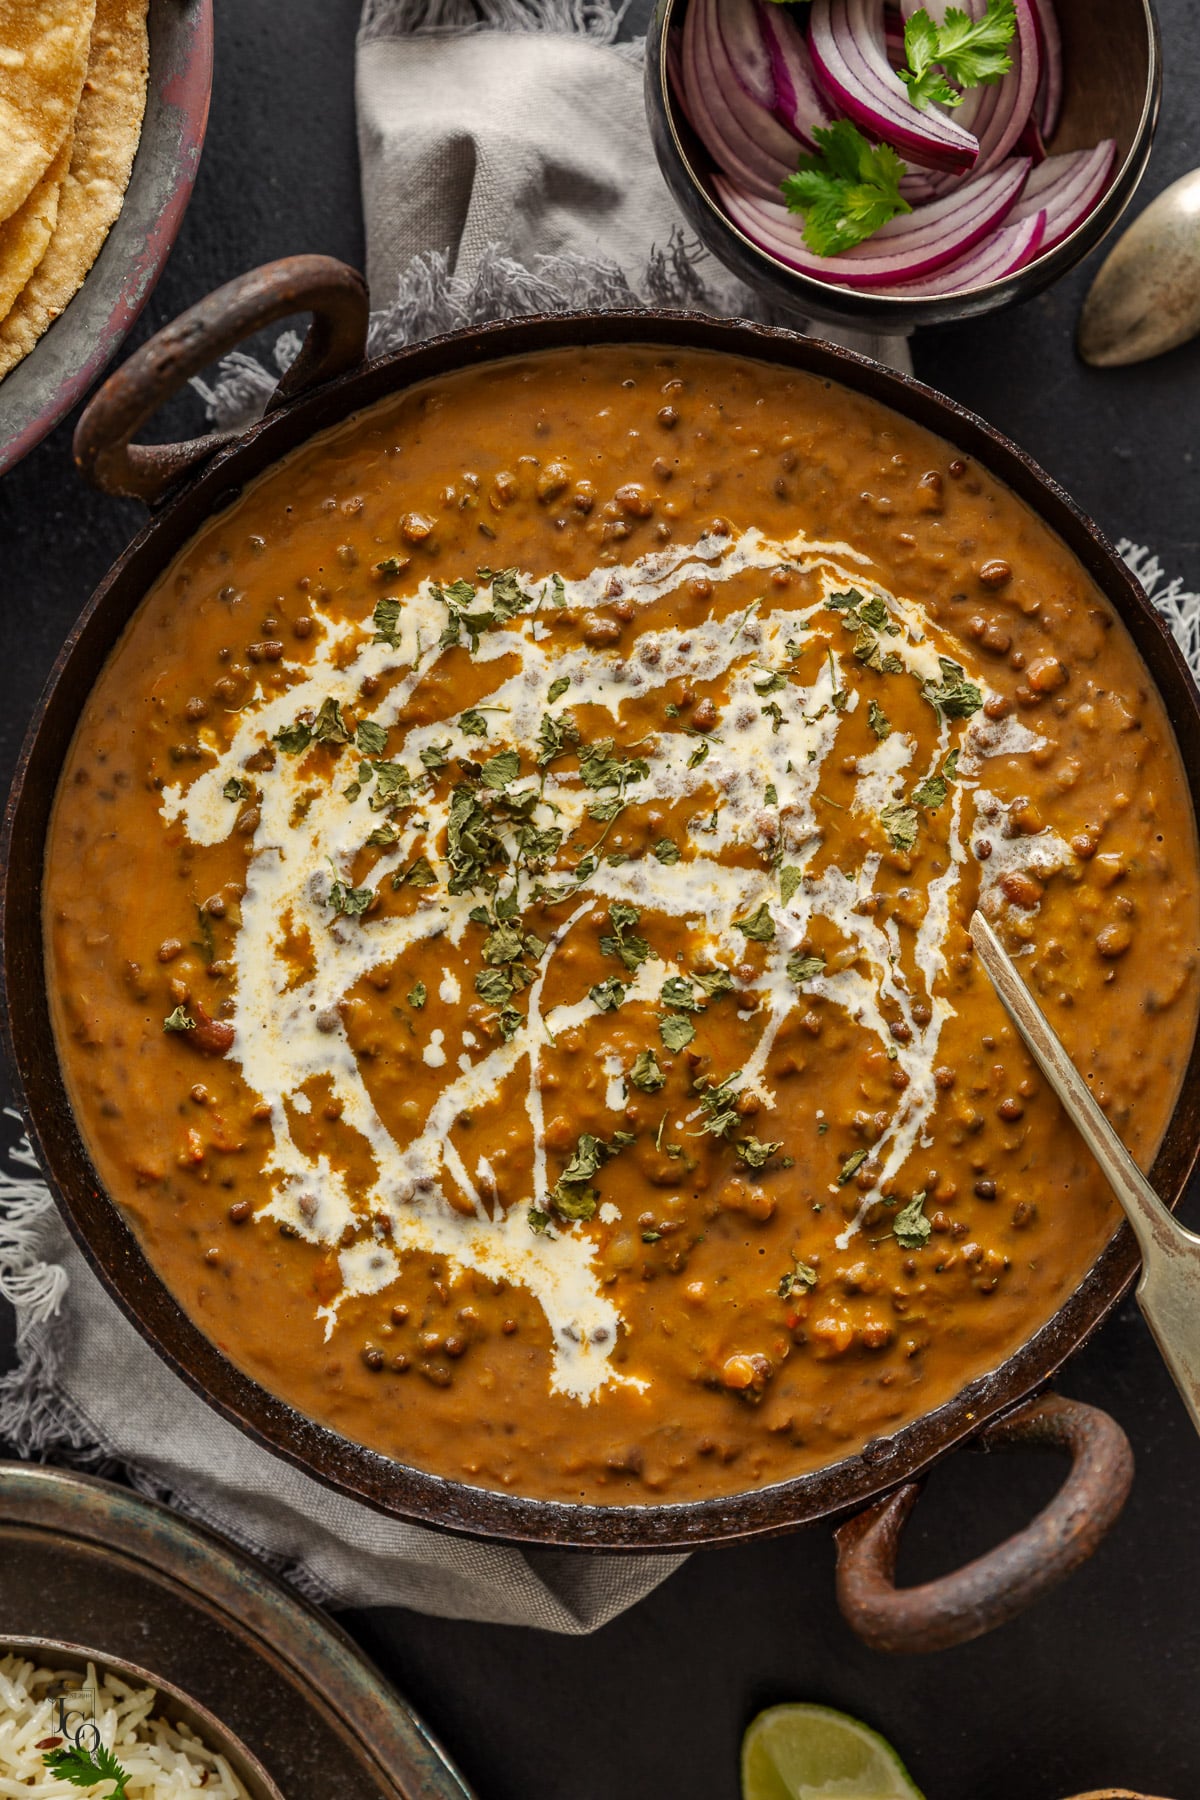
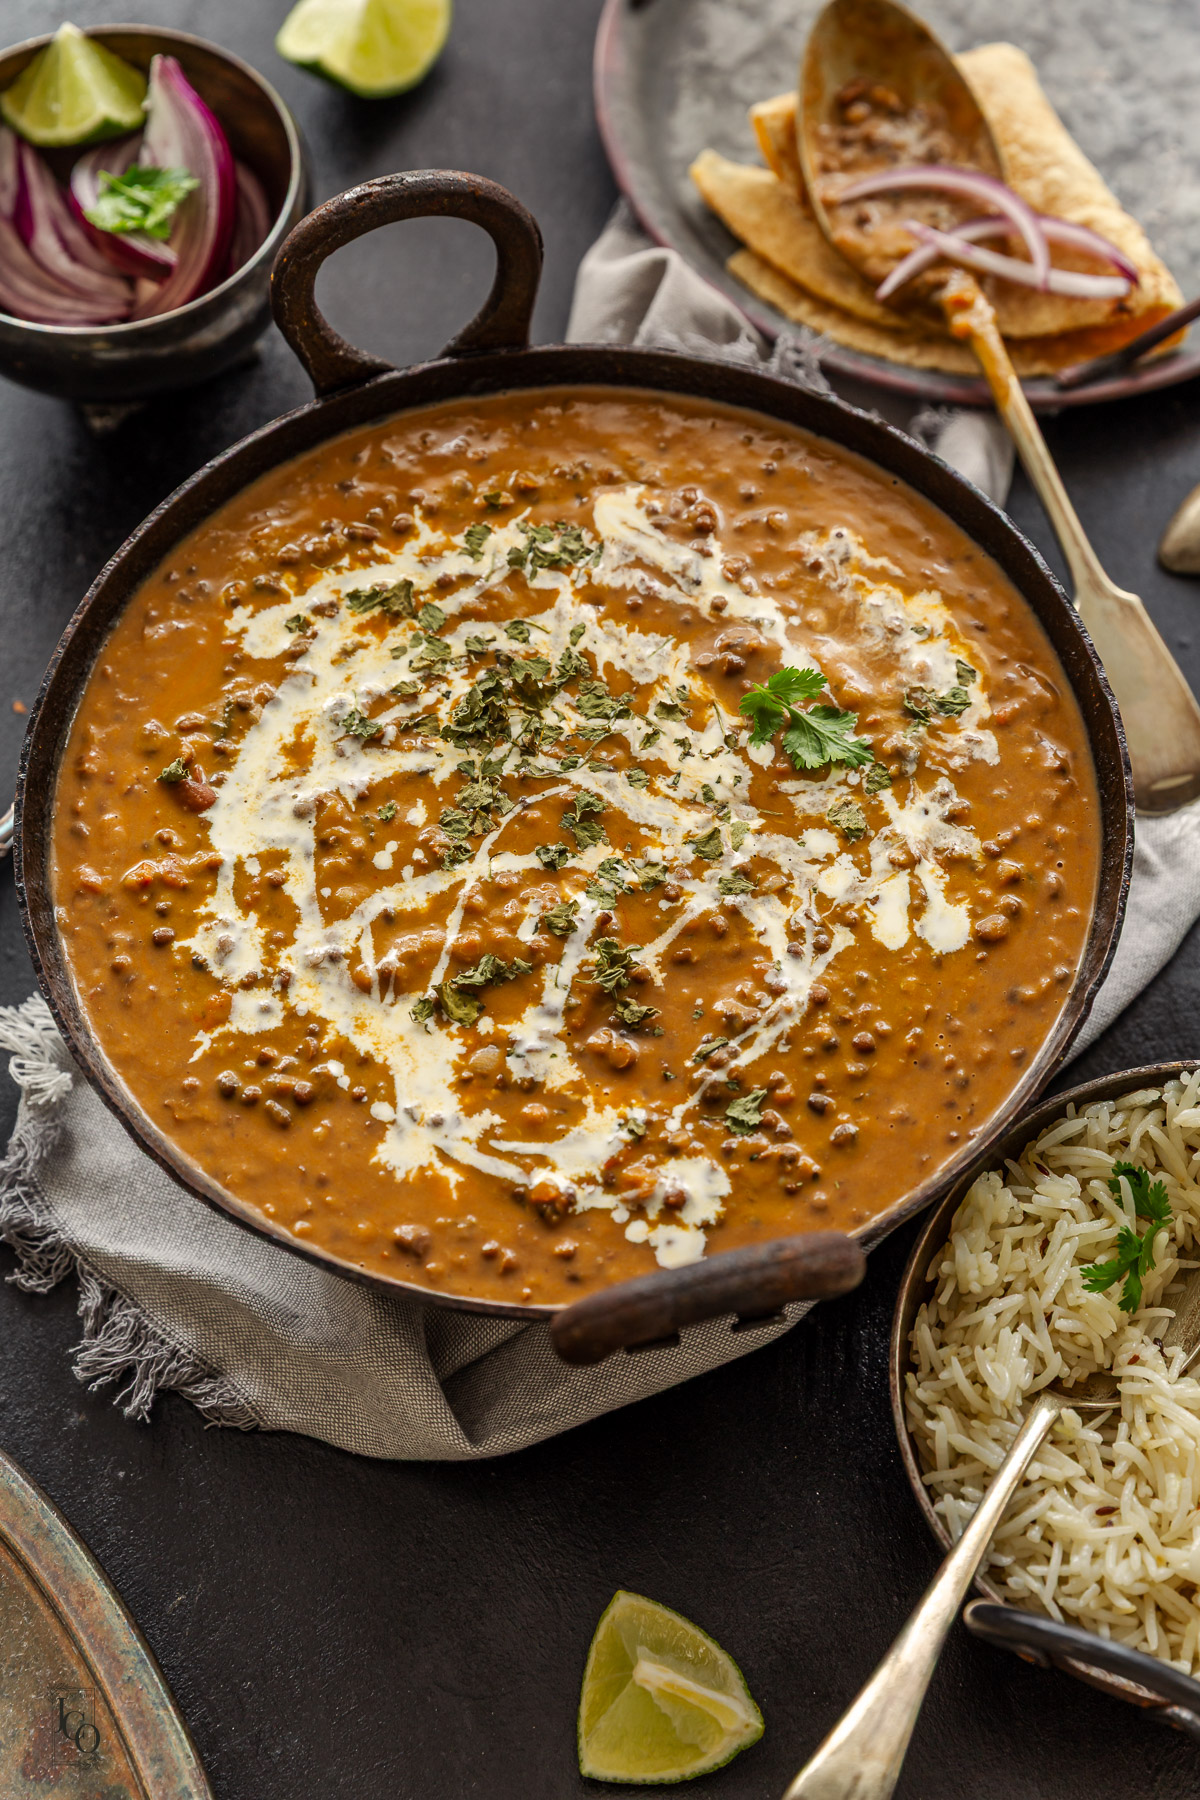
This Dal Makhani is rich, creamy and incredibly comforting. It's the kind of dal I crave for, along with hot garlic coriander naan and a full restaurant-style Indian meal. I cook the whole urad and rajma in the Instant Pot until completely soft, then simmer the dal on the stove with a buttery onion tomato masala until everything becomes thick, creamy and full of flavour.
SUMMARIZE & SAVE THIS CONTENT ON
I prefer using the Instant Pot to cook the lentils and beans quickly, then finish the dal properly on the stove. I find this gives the best balance of speed, control and flavour.
The most important thing to understand is this:
Creaminess starts with properly cooked urad. Butter and cream only take it further. If the urad is not soft enough before it goes into the masala, the dal will never become truly creamy.
Dal makhani is all about texture.
The whole urad needs to be cooked until it completely softens and breaks down. That is what gives dal makhani its natural creaminess.
Butter and cream make it richer, but they are not the main reason the dal becomes creamy.
If the cooked urad still feels firm or grainy, the finished dal will taste separate no matter how much cream you add.
That is why I pressure cook the soaked urad and rajma first until almost mushy, then simmer everything with the masala on the stove until the dal thickens and becomes one rich, creamy mixture.
Full recipe ingredients and measurements can be found in the recipe card below.
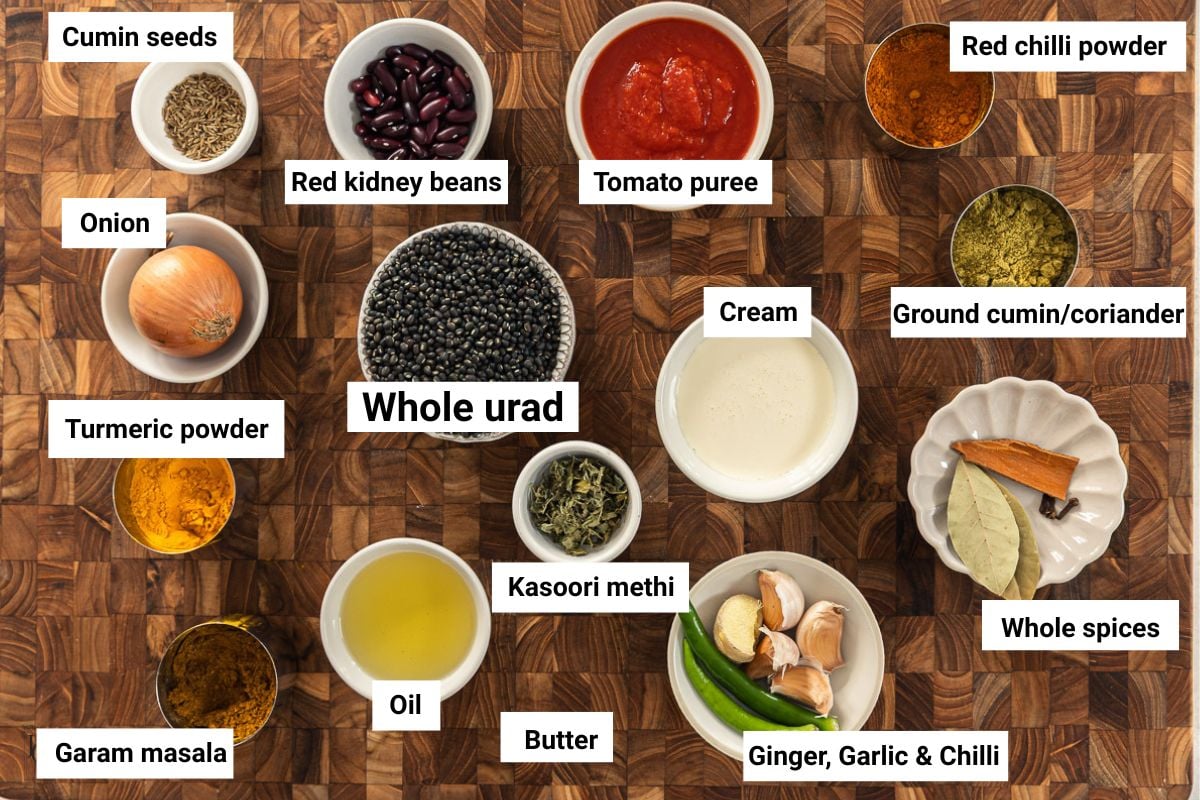
Whole urad and rajma
Whole urad, also called black gram or sabut urad, is the main ingredient in dal makhani.
It must be soaked and cooked until very soft. The creamier the urad becomes, the better the dal makhani will be.
I use mostly whole urad with a small amount of rajma. The rajma adds body and a little extra texture, but it should not dominate the dal.
I prefer soaking them overnight in boiling water. This gives them the best chance of cooking down properly in the Instant Pot.
A smooth onion, garlic, green chilli and ginger base gives the creamiest finish.
Very finely chopped onions can work, but large pieces will not melt into the dal properly.
Passata works really well here because it is smooth and gives a consistent sauce. I find crushed tinned tomatoes also work beautifully.
Butter and cream
This is my restaurant-style version, so I use a mix of butter and cream.
They make the dal richer and more luxurious, but remember: the real creaminess starts with the soft urad.
Kasuri methi
Kasuri methi gives dal makhani that North Indian restaurant flavour. Crush it between your fingers before adding it at the end.
If the urad is not quite as soft as I want, or if I want extra creaminess without relying only on cream, I mash or blend a small portion of the cooked dal and stir it back in.
This helps thicken the dal naturally. It is especially useful if your urad is older and has taken longer to soften.
You still need to simmer the dal on the stove afterwards so everything comes together properly.
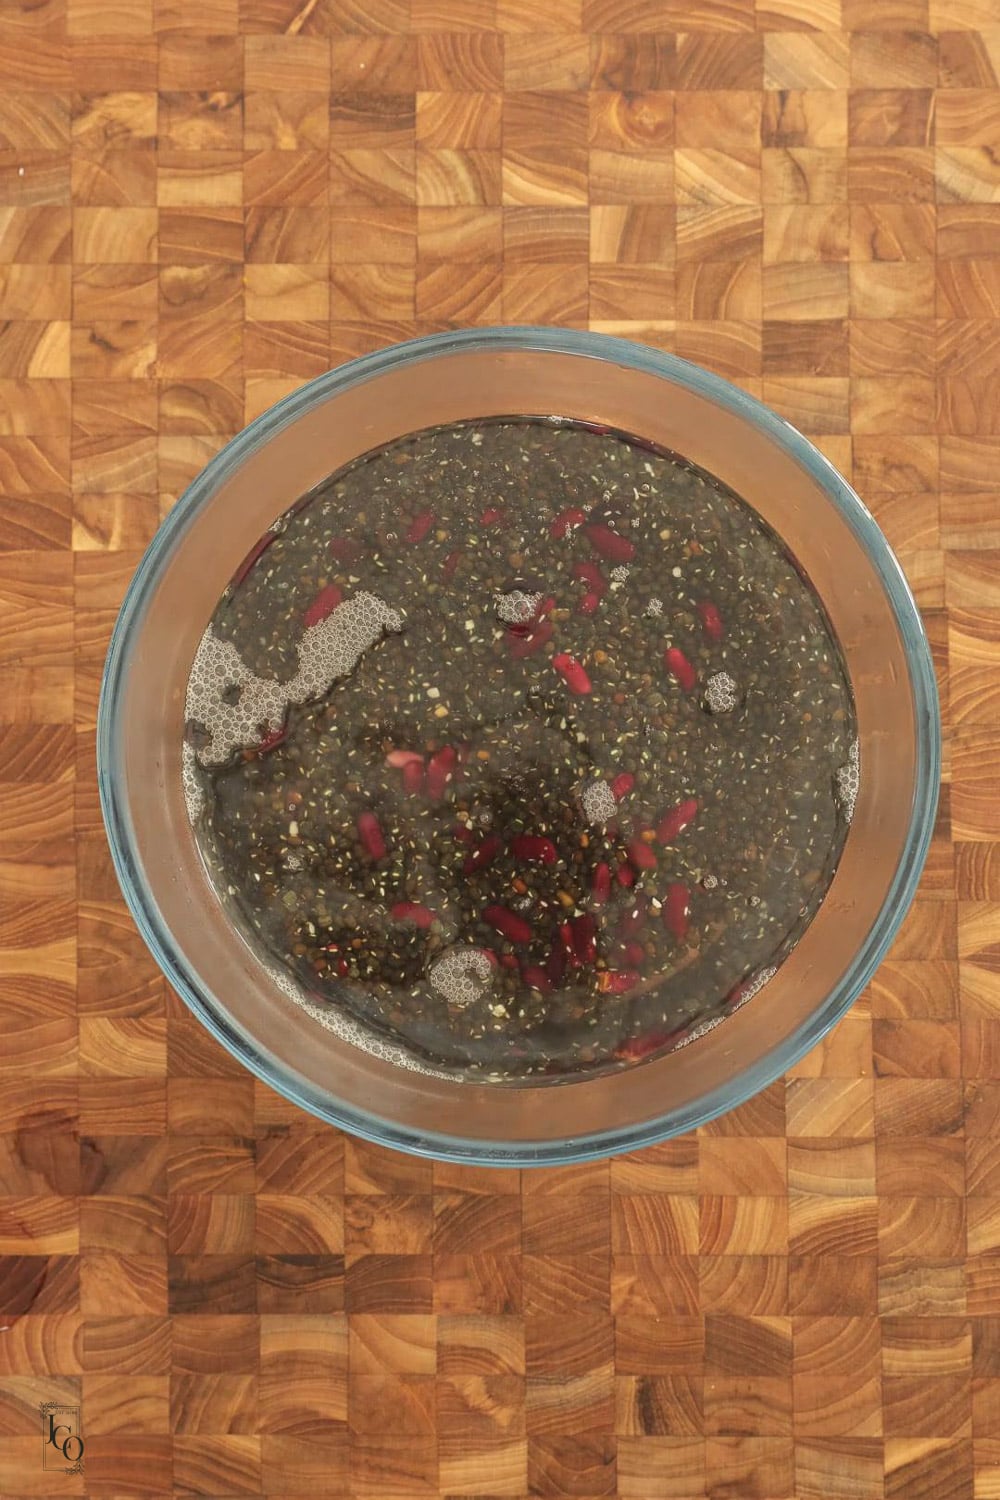
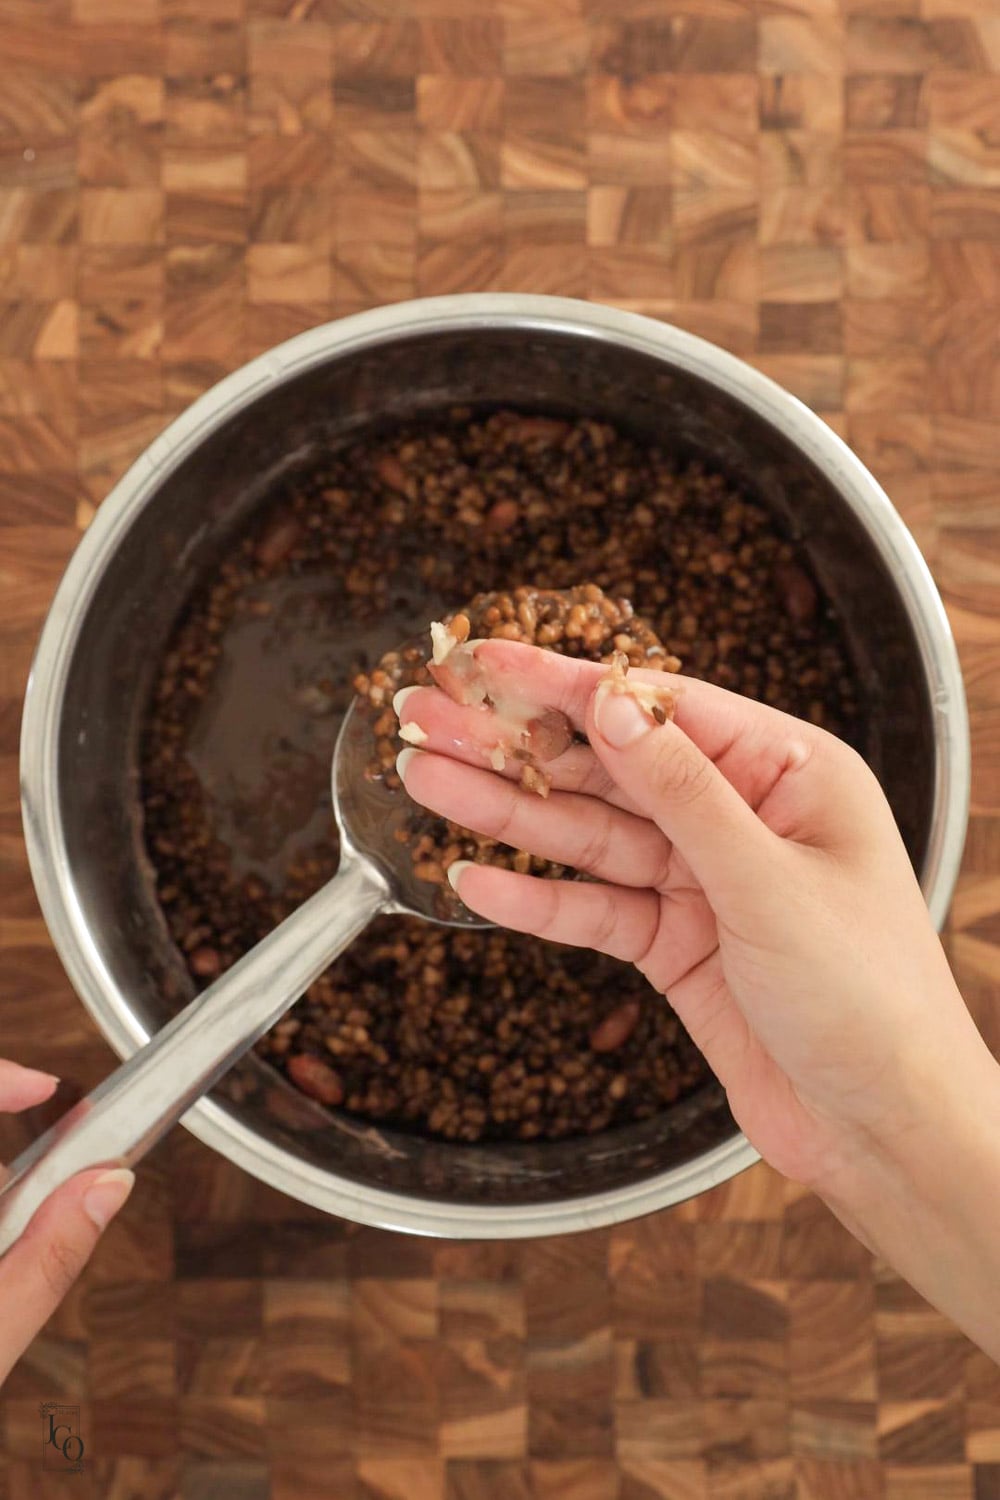
Add the soaked urad and rajma to the Instant Pot with fresh water.
Pressure cook for 30 minutes, then allow the pressure to release naturally.
The urad should be extremely soft.
Check by pressing a grain between your fingers or against the side of the pot with a spoon. It should mash completely.
If it still feels firm, pressure cook for a little longer.
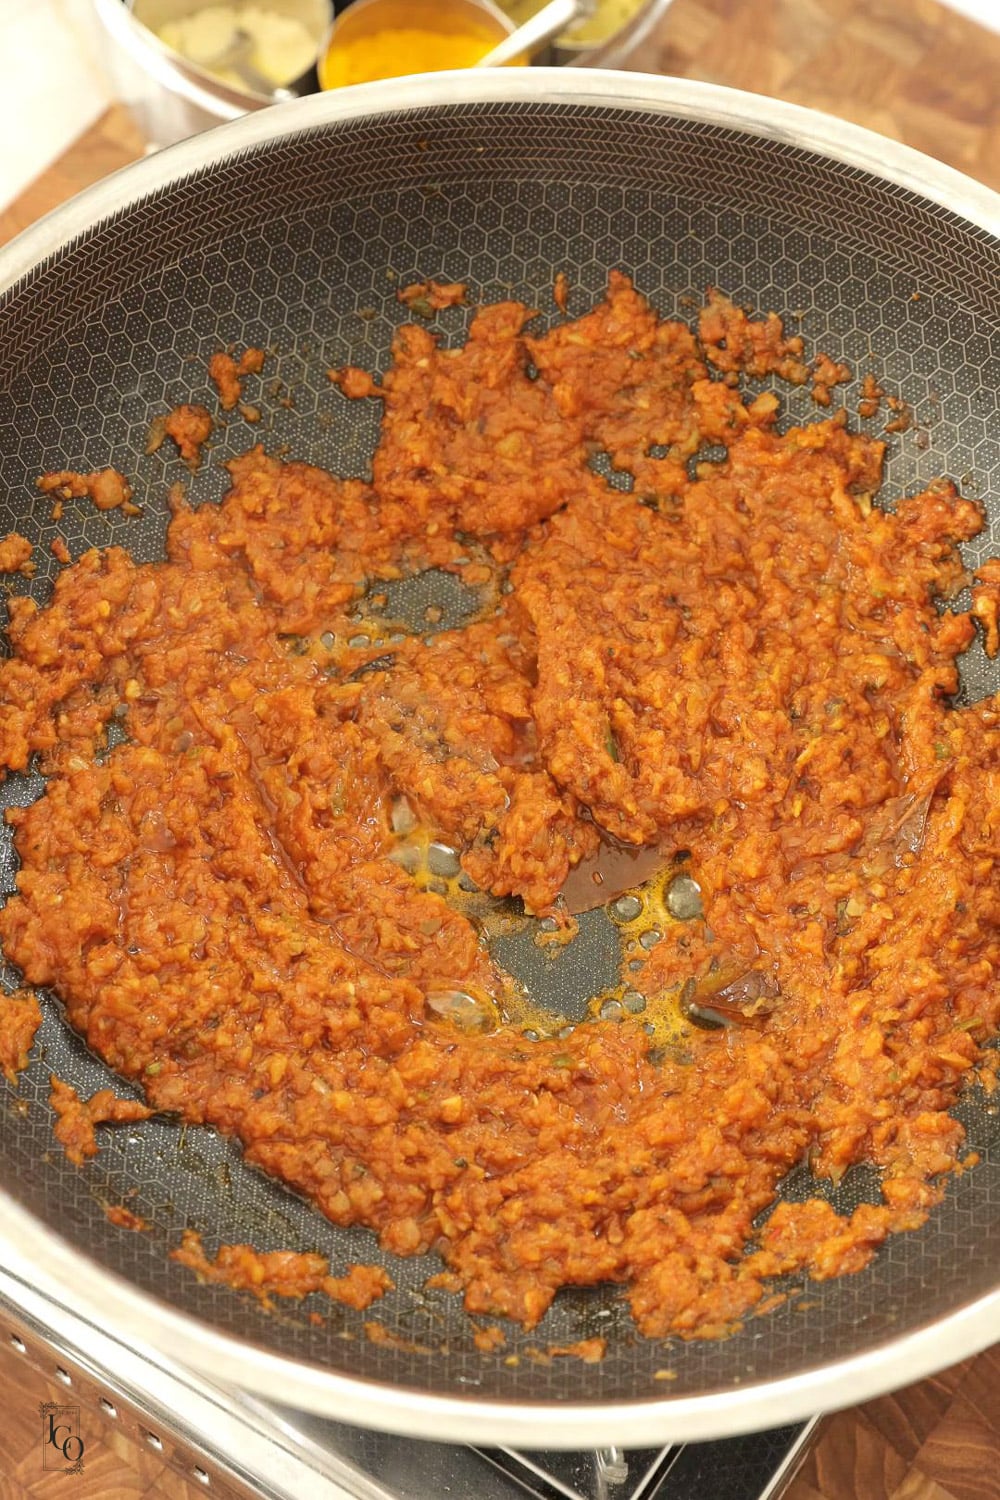
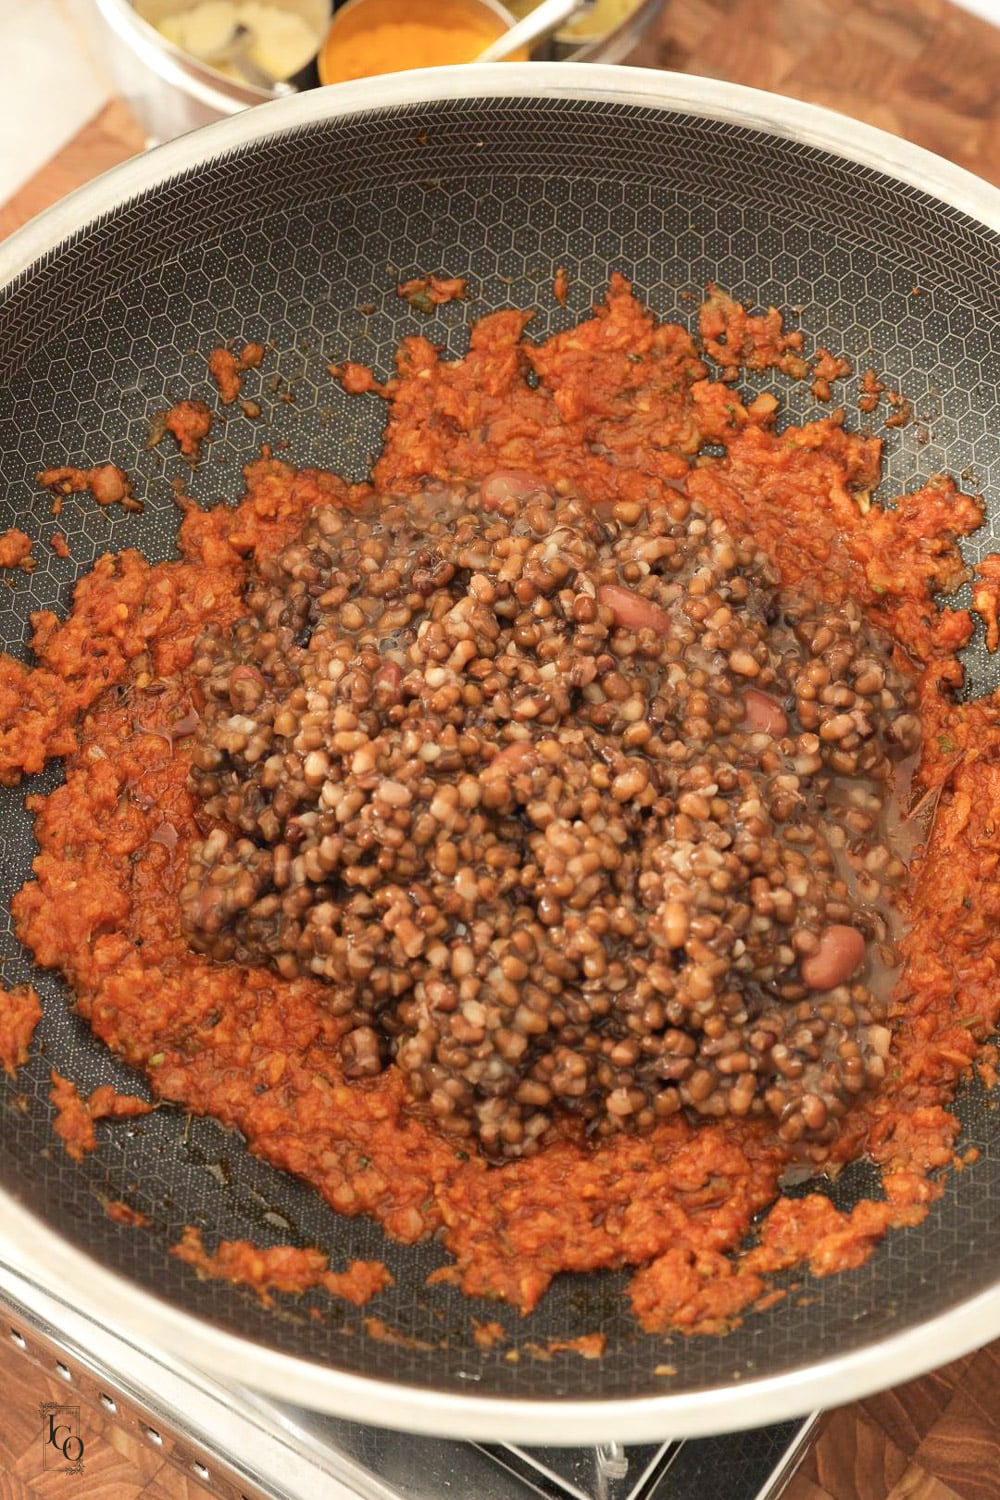
Cook the tomato masala until it thickens and the oil/butter begins to separate at the edges. This step builds the flavour of the dal.
Add the pressure-cooked urad and rajma to the masala, along with the cooking liquid. At first, the dal may look like lentils and water sitting separately in the pan.
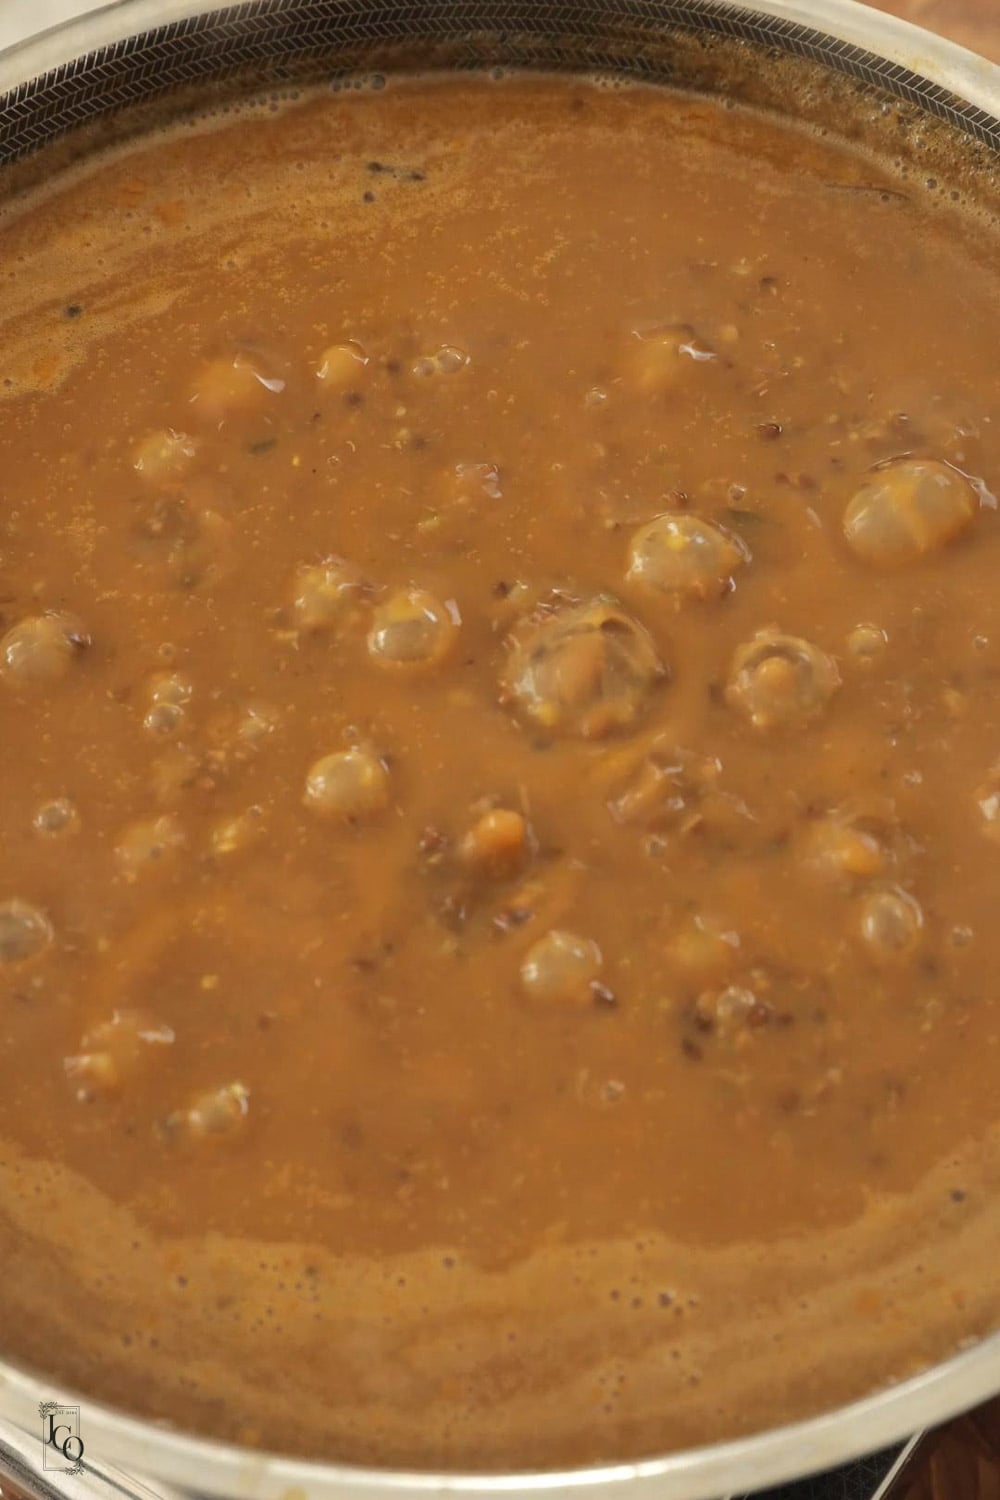
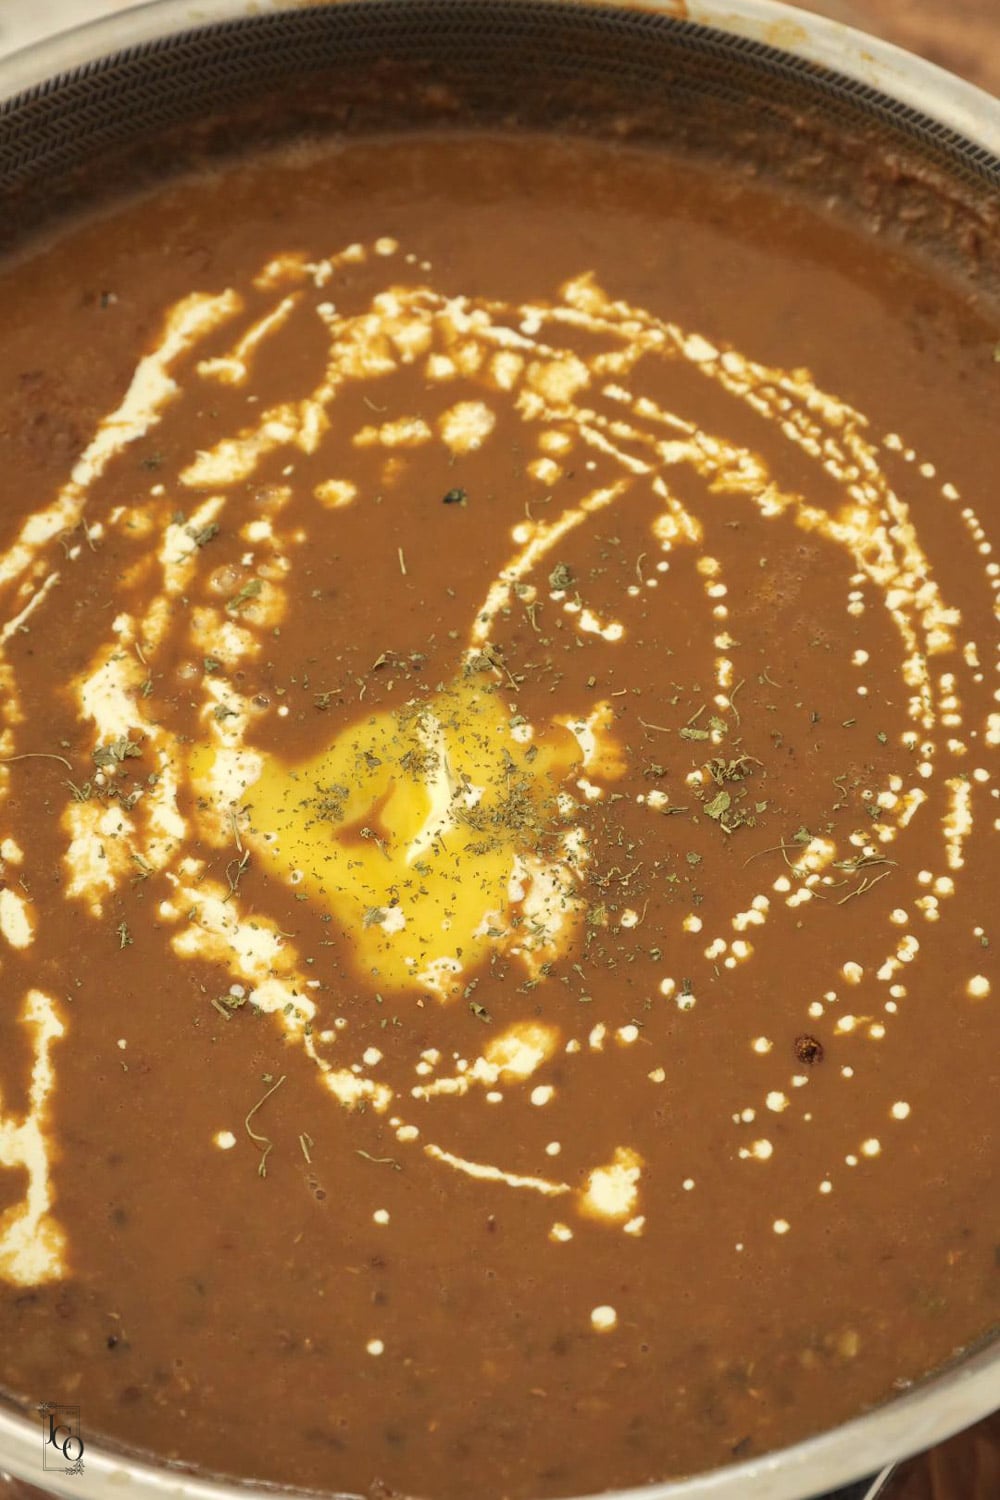
Simmer on low heat for at least 30 minutes, stirring regularly. As it cooks, the urad will break down further and the dal will become thicker, creamier and more unified.
You are looking for the dal to become one creamy mixture, not water and lentils floating separately. After simmering, the dal should look thick, creamy and fully combined.
Once the dal is thick and creamy, add butter, cream, garam masala and crushed kasuri methi.
I love serving dal makhani with hot naan, especially garlic and coriander naan.
It also works beautifully with jeera (cumin) rice or tandoori-style breads.
When I want a restaurant-style meal at home, I serve it with matar paneer or palak paneer, bombay potatoes, Indian kachumber salad or laccha pyaaz and cucumber raita.
For more rich dal recipes, try my shahi dal maharani or Dishoom black dal.
For a simpler everyday dal, my tarka dal is always a good one to have in your rotation.
Dal makhani is excellent for making ahead. The flavour improves as it sits, and the dal often tastes even better the next day.
Reheat gently on the stove, adding a splash of water if it has thickened too much in the fridge.
Add a little fresh cream or butter at the end if you want to revive the restaurant-style finish.
Store leftover dal makhani in an airtight container in the fridge for up to 3 days.
Reheat until piping hot before serving.
You can also freeze dal makhani for 1 month.
The urad should mash completely when pressed between your fingers. This is the most important step for creamy dal makhani.
You can, but this version is my restaurant-style dal makhani, so I finish it with cream and butter. The dal should still become naturally creamy from the cooked urad before the cream is added.
Yes. You can cook the soaked urad and rajma in a pressure cooker or on the stove until completely soft. The key is that they must mash easily before being added to the masala.
As always if you make this recipe, be sure to leave me a comment, rate this recipe and tag me on Instagram @jcookingodyssey or #jcookingodyssey. I love seeing all your photos of my recipe recreations!
Don’t forget to follow me on social media using the buttons below – I can't wait to see you all there!

PLEASE NOTE: Nutritional values are estimated by a computer and may vary based on ingredients and portion sizes. For personalised dietary advice, please consult a qualified healthcare professional.
Share on Facebook Pin This RecipeCrumbly, nutty, and loaded with homemade ghee – just how I love my Besan Ladoo which are inspired by Halwai or Mithaiwalas. Elevate your festivities and celebrations with the most melt-in-mouth Besan ke Laddu which only needs a few easy ingredients like gram flour, ghee and sugar. For perfect ladoo, try this easy fail-proof recipe!


It is hard to beat a good rice dish, and this one is no exception! So light and yet has a delicious touch of citrus. I love how the coconut milk is not overpowering at all in this recipe as we have only used a small amount. Instead, it lends a little sweetness which is balanced out by lemony and floral coriander.
This rice is:
✓Suitable for vegans
✓Gluten-free
✓Goes well with Mexican, Indian and other cuisines
✓Instant Pot recipe - ready in 1 minute
✓Get fluffy rice - every. single. time.
✓Easy to find ingredients
✓Easy to make ahead of time
✓We love serving ours with Mexican Chilli and guacamole.
I'll admit, I have only recently converted to the Instant Pot trend but I can already see its benefits. We recently made a Vegan Coconut and Pineapple Thai Fried Rice in the Instant Pot and the results were phenomenal!
For the rice that we use at home (a good quality basmati rice), we have found that 1 minute on LOW PRESSURE gets us perfectly fluffy rice.
This may not be the same for you as each rice cooks differently. We once bought basmati rice from a different supermarket and they didn't have our usual brand. When I tried cooking it my usual way, it just didn't cook and took so much longer! Only then I understood why there are so many different methods and timings for rice out there.
The only way to get it right is to try it out for yourself. My tip would be to start on Low Pressure and build up the minutes each time. At least you won't be ending up with mush, wasted money, and a hungry tummy.
I also find that soaking the rice for even 5-10 mins helps in getting even fluffier rice. You can though, add the washed rice straight into the Instant Pot as well without any worry.


Rice - we have used basmati rice
Coconut Milk
Coconut Oil
Olive Oil
Fresh coriander
Vegetable stock cube - if you haven't got this, you can leave it out. I just found it adds extra flavour
Lime - zest of a lime and its juice
You will probably have leftover coconut milk if you open up a tin. These are some of our favourite coconut milk recipes for you to try so that you don't have a tin sitting around for too long:
Mains:
Red Kidney Beans and Coconut Curry
Sweets/Desserts:
Instant Pot Eggless Mandazi/Mahamri
Or you can also freeze coconut milk by pouring it into a freezer-friendly container as soon as possible after opening. Let it defrost naturally and mix thoroughly as it may have separated a little.
The problem with buying herbs is that they come in huge bunches. Doesn't help that they do not stay fresh for very long either.
To combat this problem and to get fresh-looking and tasting herbs, place the stems of the herbs in cold water. In about 30 min-1 hour, you will get bright herbs again.
Fridge - As soon as the rice has cooled, place in the fridge and eat within 2 days.
Freezer - this rice can be frozen easily. Allow to defrost naturally to keep the texture of the rice.
We have some of this rice and Garlicky Moong Daal with Carrot Tops left in the fridge so we ate the two together without much thought into how they would taste. But oh my god, it was so good! I reckon I'll be making this rice a lot more to go with Indian daals and curries too now!
Instant Pot:
If there is a time on your hand, wash and soak rice before cooking, it will save time and energy.
Place the inner pot in the instant pot.
Select SAUTE mode for 5 minutes, add oil.
Add washed and soaked rice, stock and coconut milk.
Close the lid, and choose LOW PRESSURE for 1 minute, turn the valve to sealing position.
Let the pressure release naturally.
Using fork fluff up the rice.
Add lime zest, juice, coconut oil and freshly chopped coriander and mix.
Serve.
Stove Top:
Wash the rice and keep it aside for 15-20 minutes.
First heat oil in a thick bottom pan Picture 1
Add soaked rice Picture 2
Now pour vegetable stock Picture 3
Tip in coconut milk Picture 4

Let the first boil come Picture 5.
Cover the pan with a lid and cook the rice for 7-8 minutes. Picture 6.
Once the rice is done, add lime zest. Picture 7.
Add lime juice Picture 8.
Stir in coconut oil. Picture 9.
Add freshly chopped coriander or cilantro, mix and serve. Picture 10


🖶 Recipe Card
As always if you make this recipe, be sure to leave me a comment, rate this recipe and tag me on Instagram @jcookingodyssey or #jcookingodyssey. I love seeing all your photos of my recipe recreations!
Don’t forget to follow me on social media using the buttons below – I can't wait to see you all there!

PLEASE NOTE: Nutritional values are estimated by a computer and may vary based on ingredients and portion sizes. For personalised dietary advice, please consult a qualified healthcare professional.
Share on Facebook Pin This RecipeHere is my family's recipe for East African style plain mogo chips. Cooked mogo chips are simply tossed in red chilli powder, lemon juice and salt then served with imli khajur chutney. I've included deep-fried, air fryer and oven baked options using frozen cassava.


We love using our Instant Pot to prove the dough for bread, naan and doughnuts.

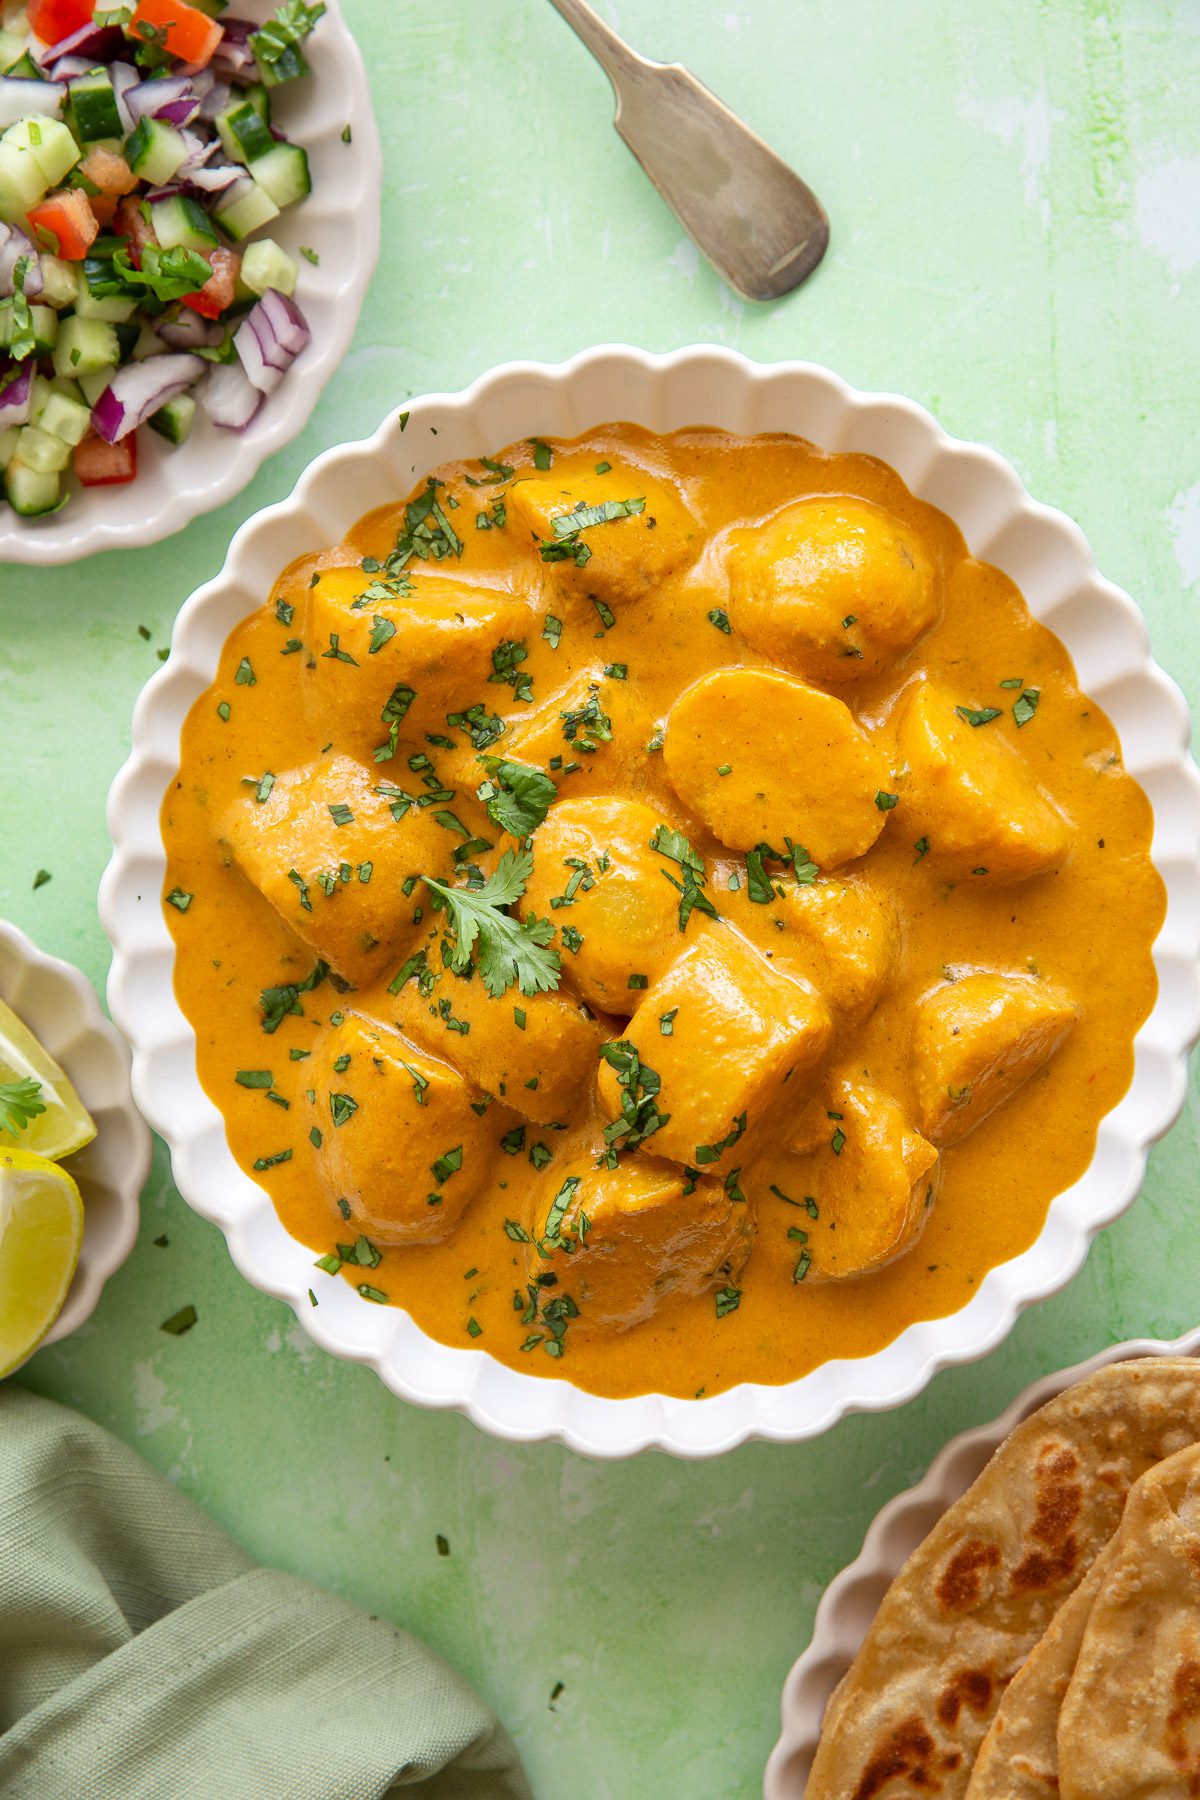
My Aloo Butter Masala is a vegetarian potato curry with a luscious and silky makhani sauce. I like to use baby potatoes which hold their shape in the thick gravy. It's my version of the classic paneer butter masala.
My family loves it with indulgent restaurant-style garlic coriander naan for scooping up the sweet and creamy sauce.

This Vegetarian Mango Panna Cotta is a layered panna cotta that combines exotic Mango and silky cream. Warm summers and Mango go hand in hand and this surprisingly light and airy pudding is the perfect recipe.

The batter is made in a high-speed blender and fermented in the Instant Pot.


Note - This is not the traditional method of making Sheer Khurma. This is the quick (and modern) version of making Sheer Khurma so that your precious pots, pans, and hob space can be used to make more dishes!
This Instant pot version, can be prepared in just a few minutes and you have a decadent Seviyan kheer in a moment. So prepare this dessert without any worry of stirring or spilling. Just add the ingredients, stir, lock, pressure cook and enjoy!
However, I can guarantee you that the taste and flavours are still authentic!
Sheer means "milk" and Khurma means "dates" in Persian. Sheer Khurma is a sweet dish hailing from Persia, enjoyed throughout the world. It is usually prepared during Eid.
This separates Sheer Khurma from Seviyan Kheer. Seviyan Kheer is sweet vermicelli and milk-based pudding from the same part of the world but does not contain dates.
In Sheer Khurma, nuts and dates are first fried in ghee and the dish is then topped with a second tempering of ghee with clove or cardamom.
We love Seviyan Kheer and Meethi Seviyan (which is made without milk)

Eid recipe - This delicious Hyderabadi dessert served on a Islamic religion festival Eid Al-Fitr, which marks the end of Ramadan season.
We have also included a STOVE TOP traditional method below so you can use either.
We have an extra step of adding a little water to the seviyan before adding the milk. The toasted vermicelli will soak up the water meaning that when pressure-cooking, the vermicelli will not soak up as much of the milk (risk of burning)
Add more milk than you usually would - keep the seviyan runny to prevent burning - it will thicken as it cool.
Select PORRIDGE mode for 1 minute only on low-pressure. Honestly, that is it!
Add the evaporated milk after the seviyan is cooked - it is already cooked milk so there is no need to heat it again
➀ Vermicelli - I have used very thin variety, that is easily available from supermarkets or any south Asian grocery stores. But feel free to use normal size seviyan as well. If any of these not available use Mexican thin noodles known as Fideo noodles.
➁ Whole milk - full fat or whole milk is good for the creamy sheer khurma. Fresh milk is best for this recipe, however long life tetra pack milk also works well too.
You can use skimmed or semi-skimmed but the sheer khurma will be less creamy.
➂ Dates - we have used Medjool dates but you can use any other. Certain dates are sweeter than others so you may have to adjust the sugar. The best way to check - eat one before using! 😉
➃ Nuts - a mix of almonds, cashew, pistachios, and charoli*
➄ Sugar - granulated white sugar is best.
➅ Raisins - known as kishmish or sultana, - we don't like in milk-based desserts, so we have not added.
➆ Evaporated milk - because we have added water to prevent burning, using evaporated milk thickens the sheer khurma and makes it more creamy. You can also add double cream, half &half or condensed milk.
If using condensed milk, then use less sugar. However, I have found that the creamiest pudding comes from using evaporated milk - there is just something special about the flavour!
* Charoli
Charoli is the Indian name for the seeds of the Buchanania lanzan plant. They can also be called chironji and have an almond-like flavour.
These lentil-like seeds are added to Indian sweets or ground and added to sauces. My Mum says that she has seen my grandma using charoli in sweets for years so she has fallen into the same habit.
No, original or authentic Sheer Khurma recipe is not suitable for gluten-free dietary needs. In this recipe vermicelli added, which is made using wheat flour.
To prepare totally gluten-free vermicelli use gluten-free vermicelli that is easily available in the market.
Authentic recipe of sheer khurma made using regular white sugar, however if you want you can use condensed milk or milkmaid as an alternative sweetener. Use one tin/can (397g) of condensed milk for 2 litre milk, skip sugar totally.
If eaten in less quantity or in moderation everything is good for health, however if you prefer healthy version of Sheer Khurma recipe swap some of the ingredients.
Use skimmed or toned milk instead of whole milk, by using less fat content milk you will not only cut down the calories from this dessert but lowering the saturated fat too.
You may add cashew nut paste to make this dessert creamy and rich. It also helps in to thicken the milk.
Add naturally sweet dates and skip sugar totally to make refined sugar free desserts. To make diabetic friendly dessert use naturally derived and calorie-free sugar substitute such as stevia which we have used in our sugar-free shrikhand
Instead of desi ghee, add canola oil for sheer khurma recipe. According to health experts, canola oil is a healthier oil. It contains less saturated fat.
Top your delicious sheer khurma with lots of nuts such as almond and pistachio.
To make vegan sheer khurma or vermicelli kheer swap regular dairy milk for coconut or almond milk. Instead of ghee, use canola oil or vegetable ghee.
Choose sugar that is suitable for vegans. You may use vegan condensed milk or agave syrup instead of sugar.
Add cashew paste for extra rich and creamy sheer khurma and to thicken the dessert too.
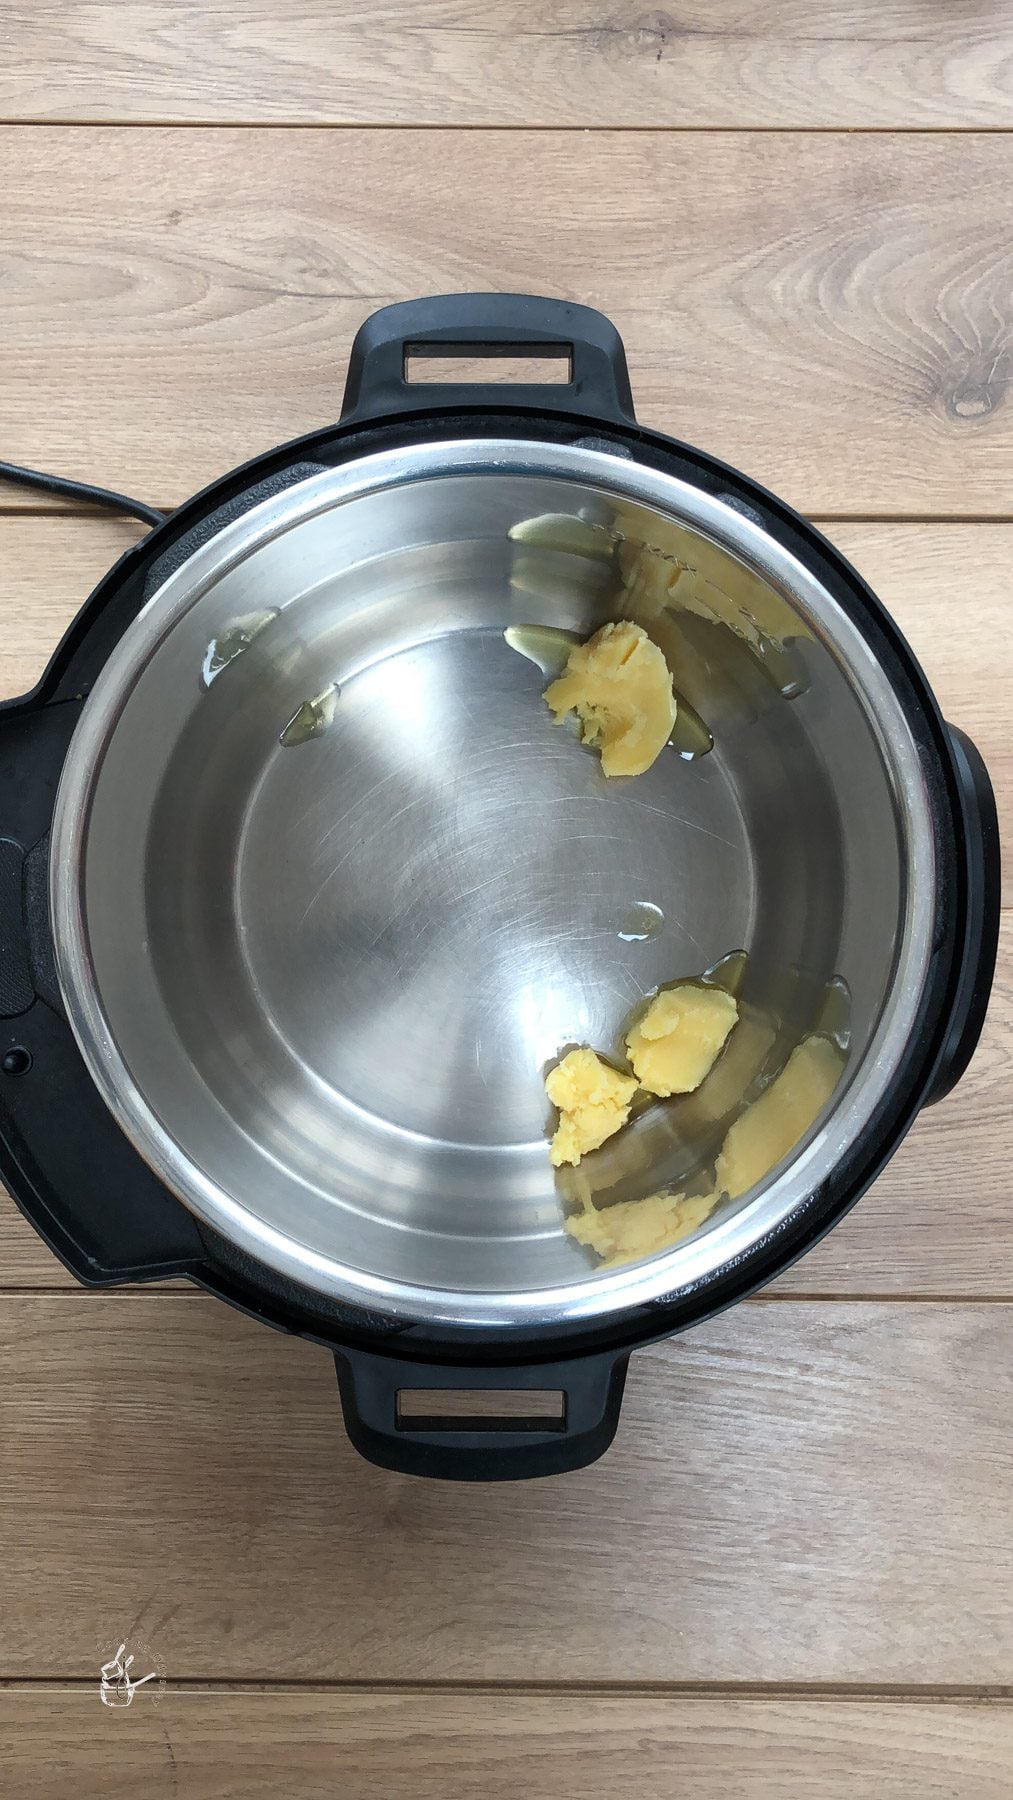
First set an instant pot and it’s inner pot.


To enjoy delicious sheer khurma you don't need to rely on a pressure cooker, you still can enjoy just it will just take a few minutes more and needs constant attention.
1. Heat ghee in a heavy-based pan or kadai, and add nuts and raisins one by one and fry few seconds, remove and keep it aside.
2. In the same pan add seviyan and roast for a couple of minutes or until it goes light golden and releases the roasting aroma. Remove and keep it aside.
3. In the same pan add milk, cardamom and saffron and bring it to boil, turn the heat low and simmer for 5-6 minutes. keep stirring the milk.
4. Add roasted nuts, dates and seviyan along with sugar.
5. Cook the mixture for another 5-6 minutes or until turning little thicker and pinkish.
6. Turn the heat off, in another pan heat some ghee add whole cardamom or clove and pour it over the delicious sheer khurma.
Fridge - this can be made in advance. Store in an airtight container away from strong-smells in the fridge.
Ideally, use the dairy shelf of the fridge. As an extra precaution, cover tightly with cling film and then place the container lid on top.
Freezer - If any leftover, (I highly doubt there will be), store it in a freezer-proof container and freeze for 4-6 weeks.
Thaw in the refrigerator before gently reheating on stove.
Before you start cooking in an Instant pot, please check that the pot and seal are free from any odours and is thoroughly cleaned.
For traditional sheer khurma, use fine variety vermicelli also known as nylon seviyan.

Kesar, Badam, Elyachi Balushahi
As always if you make this recipe, be sure to leave me a comment, rate this recipe and tag me on Instagram @jcookingodyssey or #jcookingodyssey. I love seeing all your photos of my recipe recreations!
Don’t forget to follow me on social media using the buttons below – I can't wait to see you all there!


PLEASE NOTE: Nutritional values are estimated by a computer and may vary based on ingredients and portion sizes. For personalised dietary advice, please consult a qualified healthcare professional.
Share on Facebook Pin This RecipeThis savoury seviyan is a vegan breakfast recipe without onion or garlic. Seviyan or vermicelli upma is quick to prepare and is a deliciously mild and filling meal. This upma is Gujarati-style and has really fresh sweet and sour flavours.

Rotlis or phulka rotli are an essential part of a Gujarati thali. Rotli are Gujarati style pillowy soft flatbreads are made on the stovetop to accompany a variety of Indian dishes. They are characteristically thin and puffed up directly on the stove.
First, I will show you how to make a chapati dough through step by step instructions and then how to make soft and round chapatis Gujarati style.

Rotli is basically an unleavened instant flatbread made using wholewheat flour and water.
When served, a generous amount of ghee is spread on top.
Gujarati rotlis are thin, softer and smaller compared to Pakistani or Punjabi whole wheat chapati.
These chapatis are half cooked on a griddle and half directly on the open flame, thus they are also called 'Phulka Roti' too as they fluff up just like a balloon.
Once you get hang of making these rotlis, try our Padvali Rotli (two-layer), and enjoy with Gujarati style Keri No Ras.

Atta - aka chapati flour. It's the same flour used to make Aate ka Halwa with Mawa.
There are many varieties of chapatti flours available in the stores, such as white, medium brown, brown, wholemeal and chakki aata, also known as fine durum whole wheat atta-which is always used in India but recently made it to UK stores.
There is no hard and fast rule to which atta is best for making chapatis. The only reason that you should choose atta is based on what sort of taste you prefer for your rotlis.
The only true way of achieving soft and round rotlis is to keep practising until you find a method that suits you.
Lukewarm water - this is especially important for those making chapatis in cooler climates.
Oil - I use any neutral flavoured oil.
Try this spinach roti for a flavour variation.
Big and wide plate known as Parat or Trasak, to make it much easier when kneading the dough. If not any deep bowl or cake mixer bowl will work too.
A Tawa (in Gujarati it is known as Tavi or Lodhi) or flat crepe style pan
A rolling pin - In Gujarati households long and thin rolling pin is used. We have always used thinner wooden rolling pins (see video or step-by-step) as they aren't too heavy and you can more easily adjust the pressure you apply when rolling out the dough.
Patlo or Chakla - flat circular and smooth board either wooden, stone or metal. However, you don't have to have it, you can make rotis on your kitchen worktop too.
Tongs to flip the chapatis - or you can just use your hands (don't burn yourself though)

I can't stress enough that no one can make the best rotli in the first go, so don't be disheartened if it doesn't turn out good a few times. The only thing you can do is practice, practice, and practice!
Here are some tips and tricks from my Mum so the whole process is less tedious and easier for you:
1. Always use fresh flour as possible and do not add any other flour such as plain flour to make rotis.
2. If you are living in a cooler climate, use lukewarm or warm but not boiling water.
3. Don't add all the water same time, but add it gradually.
4. Kneading is the key, if the dough is kneaded properly, rotis will be softer and fluff up.
5. The dough should not be hard or not too soft, once the dough is done, it should not stick to your fingers. (check the video)
6. Let the dough rest covered with a damp cloth for a minimum 15 minutes but if you don't have time, go ahead and make it, still, it will be good enough.
7. While rolling it, do not roll with too much pressure on, or it will stick to the worktop.
8. Try not to use too much dry flour, it will make rotis hard and crispy and the flour will burn while roasting.
9. Cook rotis on medium flame, not on low. Low heat will make Rotis chewy and not soft.
With above all tips and tricks, I am pretty sure you can make soft and round Rotis, you just need some patience and practice.
The dough may not be kneaded properly and not rested long enough.
The dough may be too hard and so needs some more water.
The rotli may have been rolled with too much pressure or has uneven thickness.
Add oil to the dough before kneading, so they stay soft and fresh for a couple of days.
If you are making them in advance, allow to cool before closing the lid of the container as the condensation may make the rotlis soggy.
To be honest fresh dough is much better for rotlis, however, if you are pressed for time prepare the dough as usual.
Apply generous amount of oil and store in an airtight container and place in the fridge for 24 hours.
Yes, you can freeze rotli dough. Roti dough can freeze in two ways.
1 - put the dough in a freezer-proof container and keep it for a month. When ready to make rotli, thaw the dough by just leaving the container in the refrigerator. Once fully thawed, knead the dough again using a little oil then make rotli.
2 - roll out the rotlis, stack them in a group of 4 to 6 with a wax or butter paper placed between each roti.
Wrap each stack with aluminium foil, then place in the freezer bag and squeeze out any air from the bag and seal it. Store no more than a month.
Whenever you want to cook the roti, you can directly cook frozen or thaw in the fridge then cook on a hot NONSTICK pan.
Mainly, Gujarati rotli are served with Indian vegetarian curries and dal recipes.
My brother loves them if served with Stuffed Okra with Coconut & Coriander and Trevti daal.
My Dad's personal favourite is Kobi Bateta Nu Saak (cabbage & potato dry curry) or aloo baingan and Gujarati Tuver Daal.
Mum, loves her soft and pillowy to scoop creamy Daal Makhni, Punjabi Saag Paneer or Baingan Bhatinda.
My favourite combo with roti is Sweetcorn and Peanut Curry, Zucchini Curry or Dill sabji.
Rotis are not only tasted great with curries and daal but pair so well with Instant Stuffed Red Chilli Pickle, Instant Carrot and Chilli Pickle or Instant Green Chillies with Five Spice pickle.
Rotis are not just limited using for Indian cuisine but can be used making Schezwan Paneer Wrap, Tandoori Cauliflower and Chickpea Taco or Sweet Potato and Black Bean Quesadilla.
There is a special container you'll see in every Indian household called 'Garmo'. It is made of stainless steel. However to keep chapattis warm nowadays insulated containers have arrived in most of the kitchens.
On worktop- store chapatis in a container at room temperature for 8-10 hours.
Refrigerator - store in an airtight container and place in the fridge. They may harden a little so to re-heat, spread a little oil and warm on a non-stick pan or tavi on both sides.
Freeze it - allow roti to cool completely. Stack them in 6 placing wax or butter paper between each of them.
Then wrap the stack in an aluminium foil and place it in the freezer bag or big container.
Ensure that the rotis are laid flat so they don't lose their shape.
I can guarantee that in most households there are at least 1 or 2 leftover chapatis - leaving us with the question of what to do with them.
For a delicious sweet treat, why not try Churma Ladoo - recipe for leftover chapati ladoo is further down in the post.
Or for another fun and easy sweet treat, add some ghee or butter to a warm chapati and sprinkle some granulated sugar, then just roll up and eat!
Cut up into strips, deep fry and sprinkle salt and chilli powder - my grandma made this a zillions times for my Dad when he was little.
Or avoid deep frying by just roasting in a frying pan with a teaspoon of oil and enjoy with Masala Chai or Karak Chai.
One of my favourite recipes is rotli no chevdo, which we love to devour with Mango Lime Lassi.
(Note- Follow this step by step instructions, full printable recipe card with the exact measurement is at the bottom of this post)
1. Take flour in a plate.
2. Add water gradually.
3. Knead the pliable dough.
4. The dough is ready.

5. Cover it with a damp cloth.
6. Apply oil.
7. Make round balls.
8. Roll the ball.
9. Roll with gentle pressure.
10. Rotli is ready to roast.
11. Put it on heated flat pan.

12. Cook halfway through on direct open flame.
13. Let it fluff up.
14. Spread ghee - optional.

As always if you make this recipe, be sure to leave me a comment, rate this recipe and tag me on Instagram @jcookingodyssey or #jcookingodyssey. I love seeing all your photos of my recipe recreations!
Don’t forget to follow me on social media using the buttons below – I can't wait to see you all there!

PLEASE NOTE: Nutritional values are estimated by a computer and may vary based on ingredients and portion sizes. For personalised dietary advice, please consult a qualified healthcare professional.
Share on Facebook Pin This Recipe


It is a beautifully refreshing and summery starter or side that is so light. Serve at lunch or alongside a barbeque with Hibiscus, Rose and Basil Seeds cooler.

Make a delicious meal by pairing it with soft and fluffy round and soft gujarati rotlis.
Piyush is a chilled, creamy dessert-drink from Gujarat and Maharastra. It's made with blended shrikhand, milk or buttermilk and fragrant nuts and spices. My version is beautifully smooth and indulgent thanks to a little extra fresh cream.

A rich, velvety drink that sits somewhere between a dessert and a drink. A little research told me word piyush means “nectar” or “amrit” in Sanskrit. Basically something divine and indulgent, which I think fits the drink perfectly.
Thanks to the saffron, and cardamom, piyush is luxurious with a gentle tang from the creamy yogurt. It's a bit like sipping melted shrikhand. Yum!
You'll find it served after a meal in Maharashtrian restaurants. I love it after a spicy dish like chana masala or a rich palak paneer kofta curry.
Hayley x
At first glance, Piyush and Lassi seem to be the exact same drink. However, Piyush is a rich creamy drink made from shrikhand and is thicker and sweeter than lassi.
Sweet lassi is a Punjabi speciality and is made purely from yogurt, sugar and milk. Lassi can then take on many different flavours, such as caramel lassi, a pink rose lassi, fruity mango lassi, just to name a few!
This is a version without ready-made shrikhand, but if you already have some leftover, then you just need to blend the shrikhand with whole milk and add a little extra cardamom and saffron. Mango shrikhand can work here too.
Be sure to check out the full recipe and exact ingredient list below in the recipe card.
1. Full fat greek yogurt (or hung curd) - I tend to use Greek yogurt as it's naturally thick and creamy. Hung yogurt works too.
2. Double cream - optional but I like to add it to give extra richness when serving at dinner parties or special occasions.
3. Whole milk - optionally use buttermilk (plain chaas) to thin out the drink
4. Nuts - such as almond and pistachio flakes
5. Saffron strands (kesar) which provide a light yellow colour and flavour
6. Cardamom powder - always a wonderful addition to Indian sweet recipes.
7. Sugar - you can adjust this to suit your taste. Piyush is meant to be sweet in taste.
Here I am essentially making my own shrikhand first before adding in extra milk to thin out.


PLEASE NOTE: Nutritional values are estimated by a computer and may vary based on ingredients and portion sizes. For personalised dietary advice, please consult a qualified healthcare professional.
Share on Facebook Pin This RecipeThis Kashmiri Dum Aloo, without onion and garlic, is easy to make and comes together in less than half an hour. Shallow fried golden baby potatoes are cooked in a hot red chilli and whole spices dum aloo masala and yogurt gravy.


This Chaat Masala Hummus is an Indian style hummus and is so much better than shop-bought! Tangy chaat masala takes this chickpea dip to new heights! Make your own hummus with easy to find ingredients and only in 3 minutes!


This is the Best Sooji Gujiya recipe you will ever make, with step by step recipe pictures. These Gujiya are stuffed with sweetened roasted semolina or rava, coconut and nuts and are flavoured with cardamom and nutmeg. They are like Indian style sweet empanadas.
They are crispy yet flaky on the outside and melt in your mouth inside. A must-try recipe for any festive season, make sure whenever you serve don't forget to brew a big pot of Karak Chai to accompany with.

We know that chaat is not just food for Indians, it's a feeling. In our quest to find more chaat recipes, this Sabudana Vada Chaat hits the nail on the head.
Crispy Sabudana or Sago vada is complemented wonderfully with our much-beloved chaat toppings to make a wonderful snack. The recipe is best made with leftover Gujarati Sabudana Vada.

Sabudana Vada or Sago Vada are popular during Hindu fasts. These deep-fried crispy sago fritters are made with the addition of sugar and lemon juice to give that authentic Gujarati taste. We love eating them during Mahashivratri, Navratri and Janamasthmi and serve them with piping hot sweet Masala Chai.

Bhel Puri is a popular Mumbai street food snack prepared using crispy puffed rice, puri or papdi, vegetables, sev (gram flour vermicelli) and three types of chutneys. This street style bhel recipe is a quick and easy recipe tasting similar to the bhel puri recipe found in the streets of Mumbai.
This delicious Indian chaat recipe can be made at home in less than 30 minutes, if you have all the ingredients ready!

Kick-start your day with these 5 ingredients Eggless Buckwheat Pancakes. The end result is a soft and fluffy pancake that can be topped with whatever you fancy! Treat yourself to a Ruby Chocolate Latte while you're at it.

Green chutney or hari chutney is a vibrant, smooth accompaniment made with fresh mint, coriander, green chillies and lemon juice. I love it because it's no-cook and can be ready in 5 minutes, with just 5 ingredients. I pair it with chaat recipes, samosas and khatta dhokla, but why stop there? Let your imagination run wild!

It takes just 2 minutes to prepare this 2 ingredient red garlic chutney. I sometimes use garlic powder instead of fresh garlic to make it even quicker. Add it to chaat recipes for an explosion of flavour!

Cardamom Mojito Mocktail - a refreshing non alcoholic drink made with a homemade cardamom simple syrup, fresh lime, soda and plenty of mint. Who knew this combination would taste so good!


