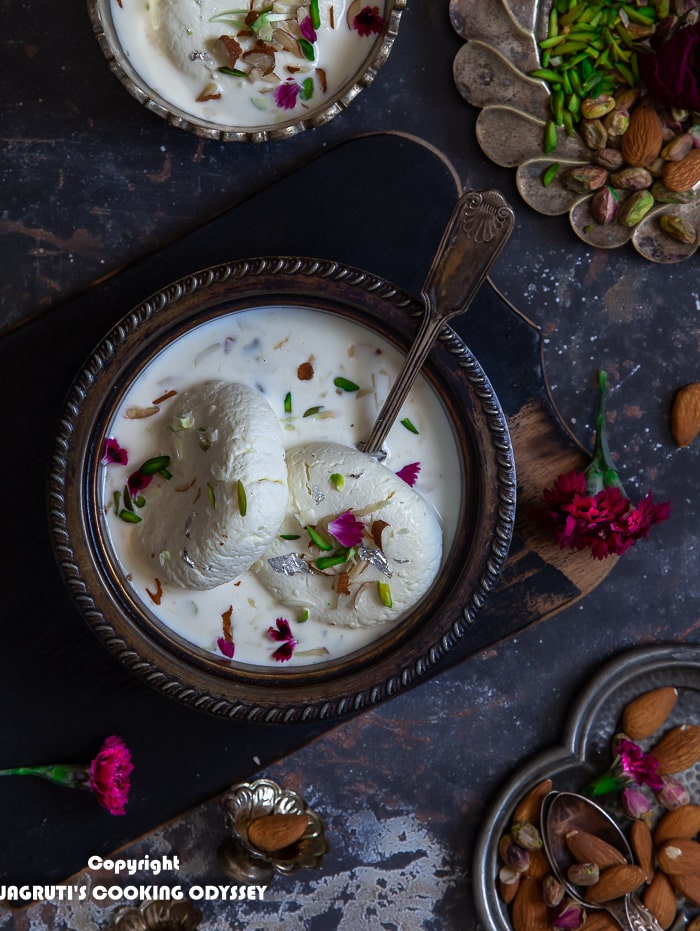
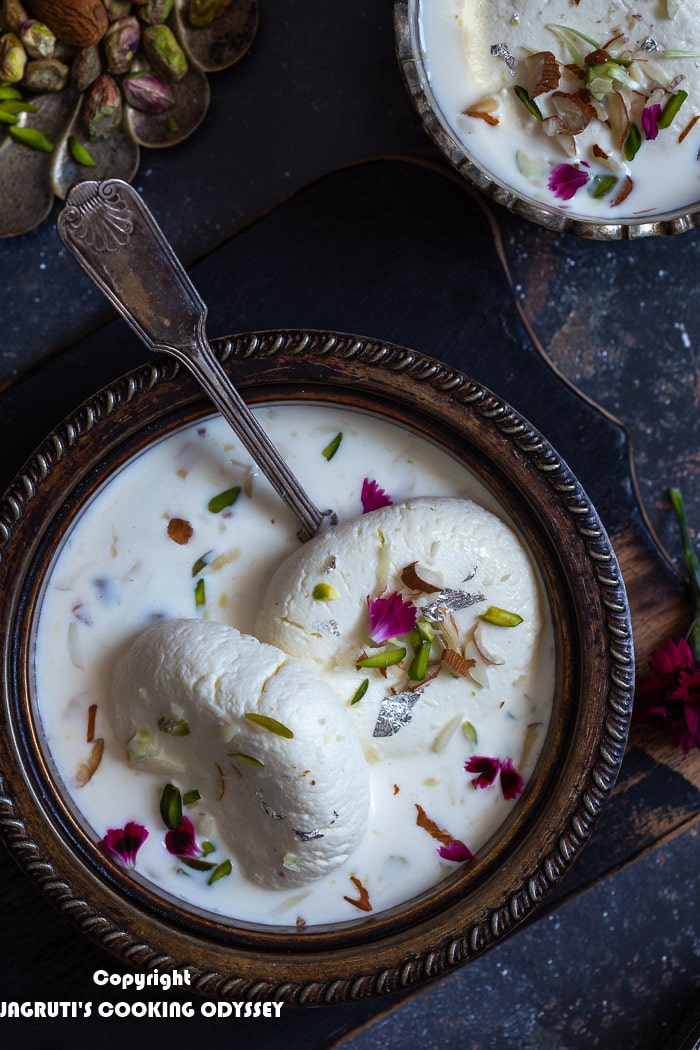
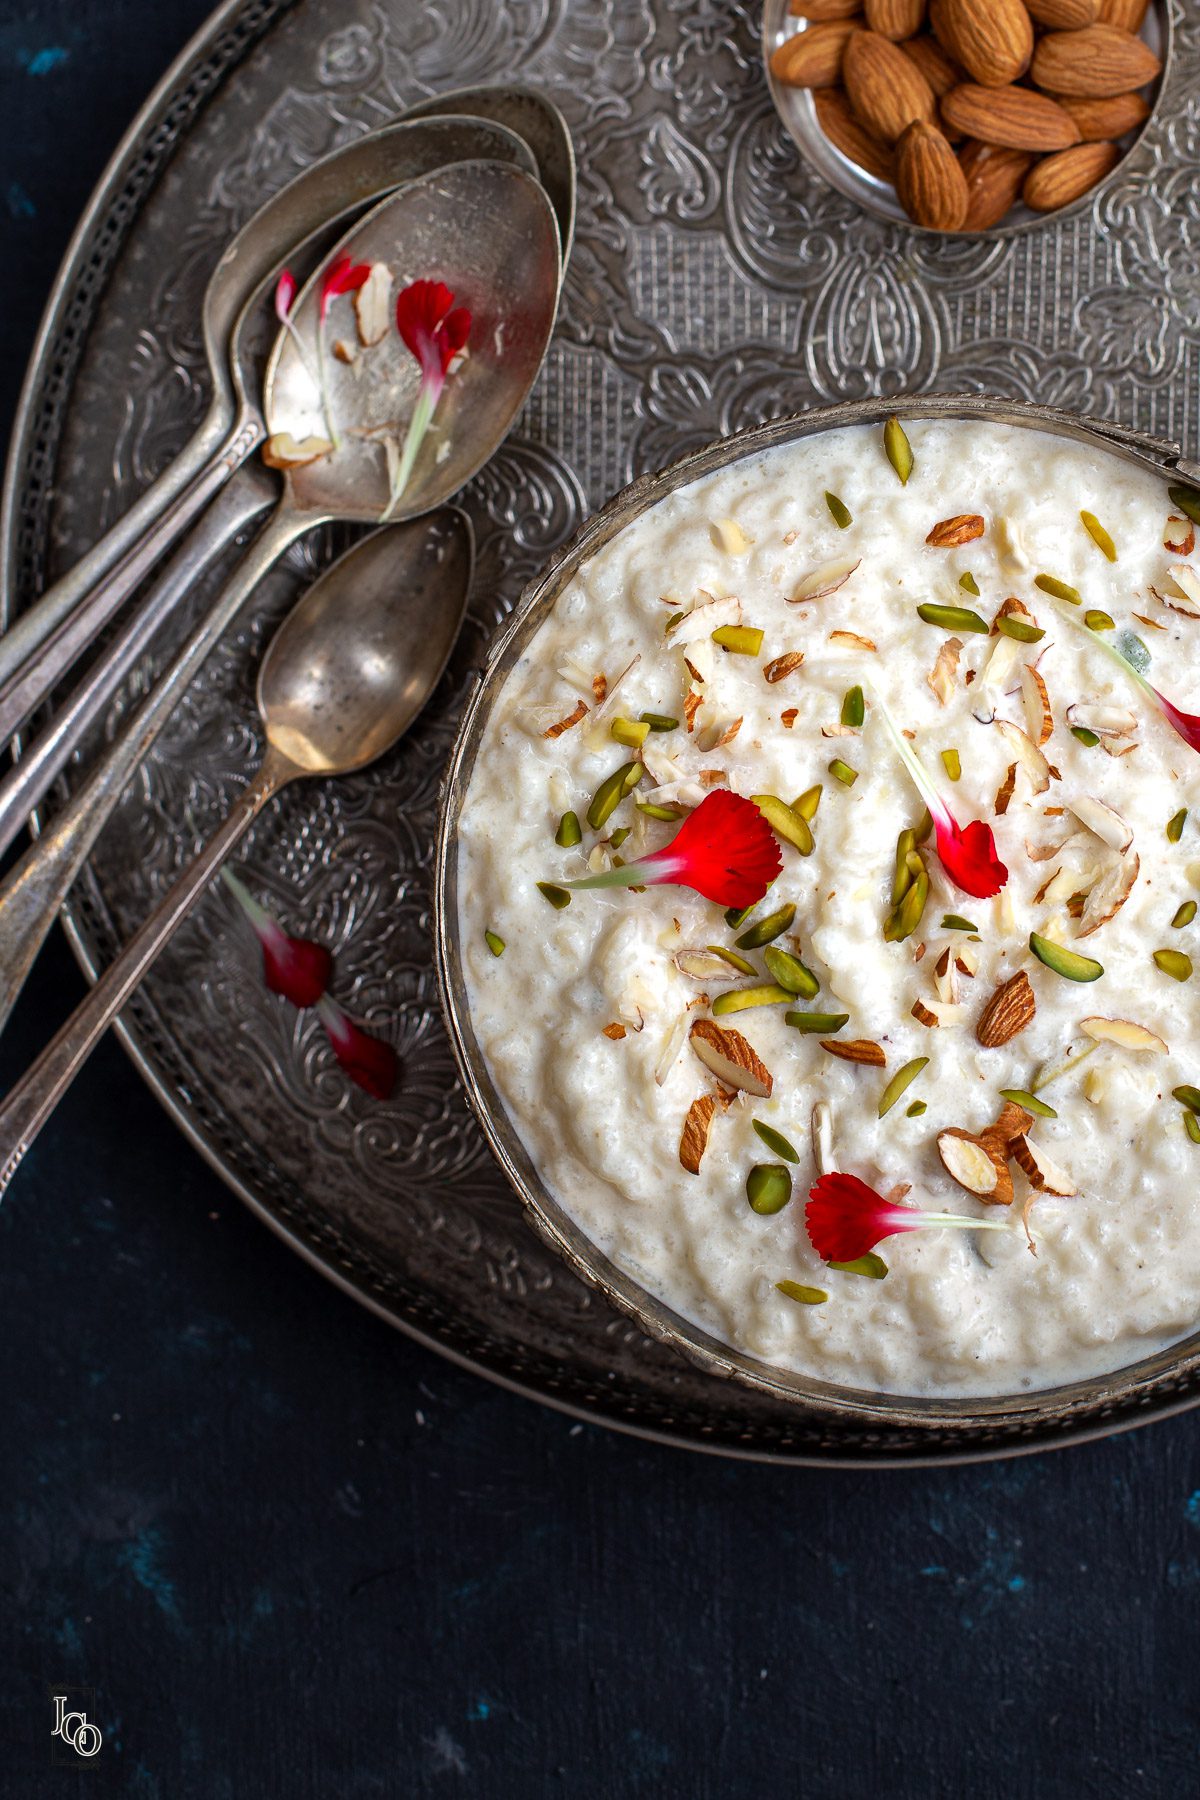
Achieve premium quality soft Ras Malai at home. Soft and spongy paneer patties are immersed in delicately flavoured milk cream. Ras Malai is the flagship Indian mithai that is loved and savoured all around the world during special occasions and festivals.
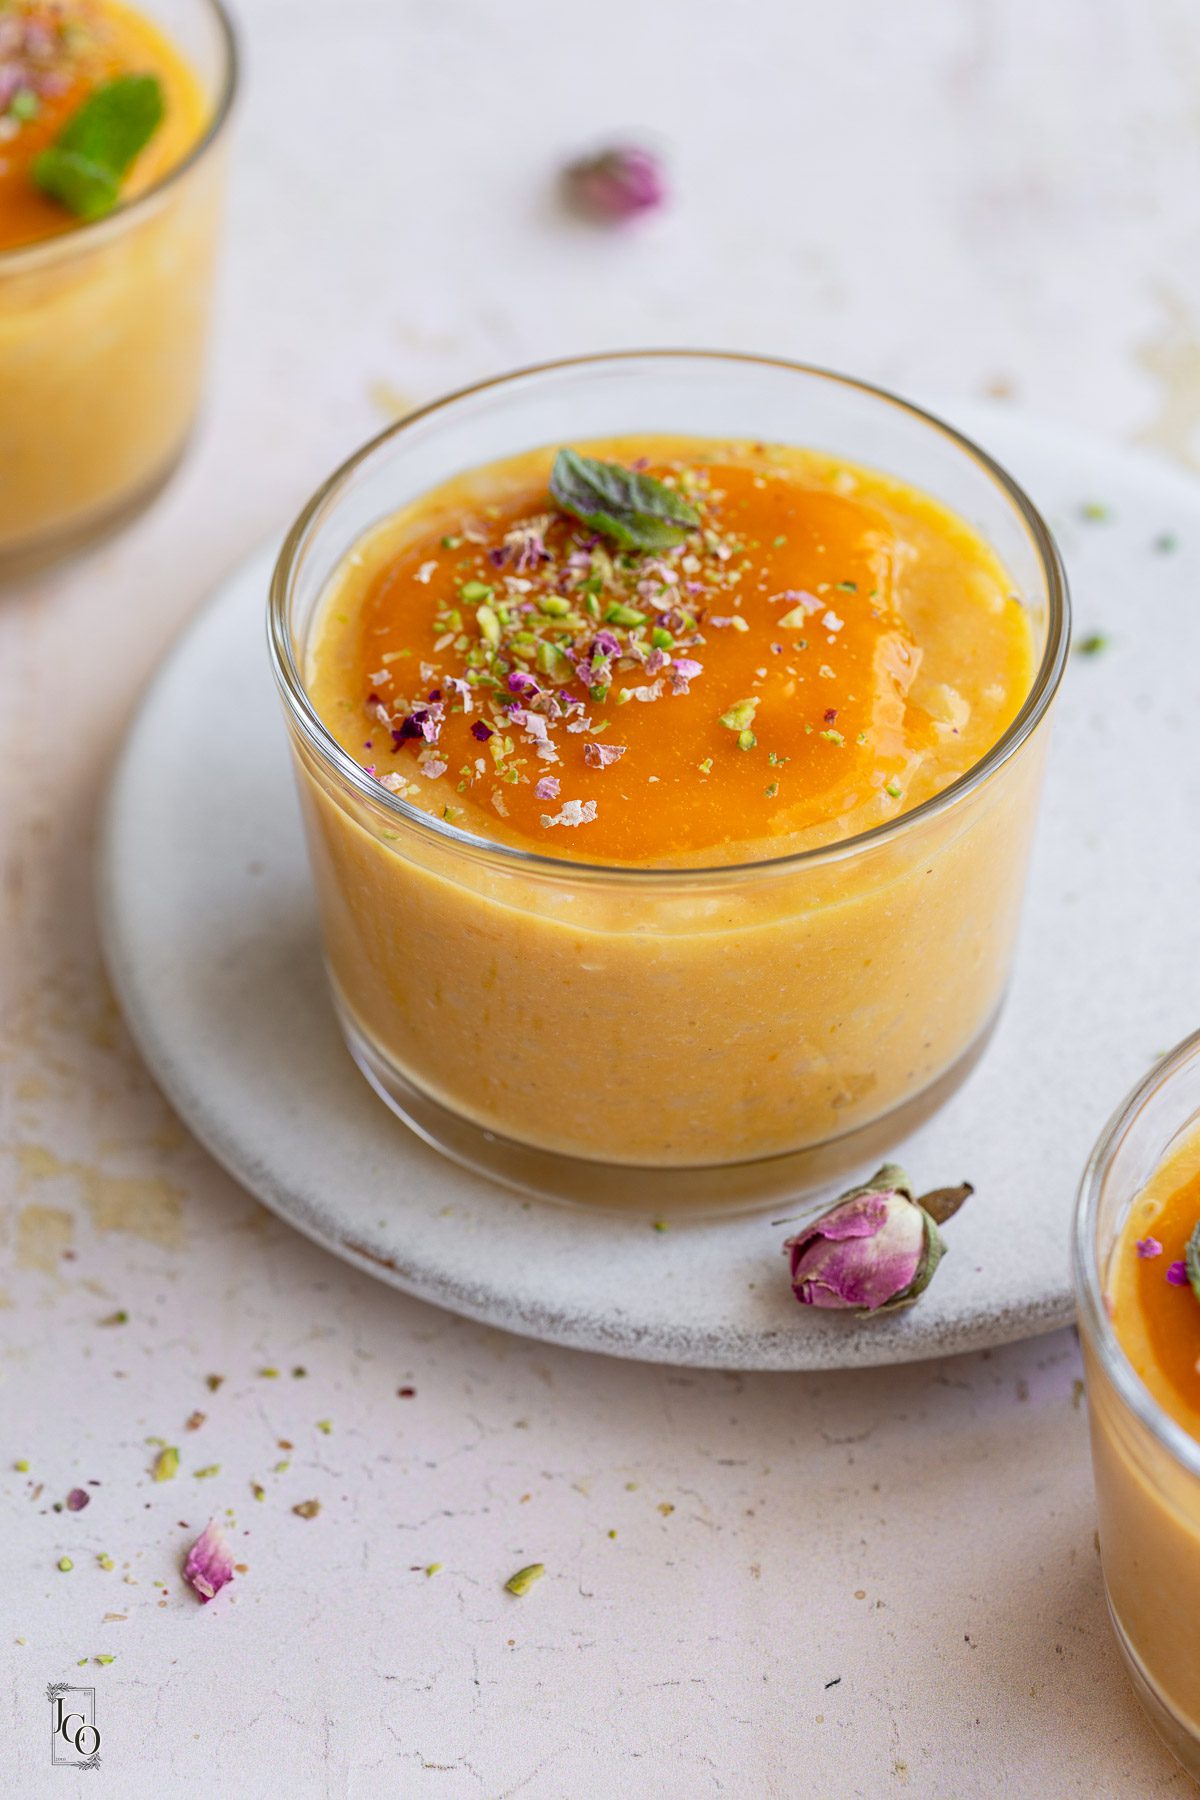
Use homemade rasmalai to make Mango Rasmalai.

Ras Malai is an Indian sweet or mithai that originates from Bengal. In Bengali, it is known as rossomalai. It has a close resemblance to rasgulla which are also a Bengali sweet made from homemade paneer.
Ras Malai's unique selling point is the super soft and spongy paneer patties or balls that are also known as chhena. Homemade paneer is kneaded and shaped into thick disks, then cooked in a light sugar syrup. As they cook, they magically expand in size and become spongy.
The ideal texture of these balls should be super soft but also hold their shape without crumbling as they are dunked and left to infuse the aromatic milk cream.
The milk cream is made by gently heating and reducing full cream milk, sweetening and adding aromatic Indian spices. We like to add a special ingredient to our milk cream, like many of our other Indian sweets, for extra creaminess.
Ras Malai can either be white or creamy/yellow. White ras malai does not have saffron or kesar whereas the yellow version does.
We prefer to prepare our Ras Malai without saffron. This way, the milk cream and the balls stay white and the flavour of the other spices comes through rather than the saffron. We add white sugar, nuts and cardamom powder to our Ras Malai only.
We love Milk-Based Indian Desserts and often make Lachha Rabdi, Dudhi Basundi, Seviyan Kheer, Shrikhand with Cream
You can take inspiration from the authentic ras malai to make this Eggless Ras Malai Cake
Ingredients
For the chhena:
● Full fat milk - in the UK, we get 3.7% cow's milk which is sufficient to get perfect moist chhena.
● Distilled vinegar - the vinegar is required to split the milk. You can use either lemon juice or vinegar here, they both have the same desired effect
● Cornflour - cornflour or cornstarch is required when preparing the dough to help keep the shape of the balls.
● White sugar - required to make the sugar syrup that the paneer balls will be cooked in. White refined sugar ensures that the balls stay white and do not loose their colour.
● Whole green cardamom pods - you will need only a few whole cardamoms to flavour the sugar syrup
Do not use a shop-bought paneer for this recipe. The chhena must be made fresh at home.
For the milk cream:
Essentially, what we are making here is a Basundi which is what the balls are placed in. We want a smooth milk that has not formed any malai (or milk skin) on the surface.
● Full fat milk - we have used full fat 3.7% cows milk
● White sugar - use refined white sugar as the sweetener for the cream
● Slivered nuts - we have used chopped pistachios (we buy ready chopped pistachios that are extra green for colour) and chopped almonds
● Ground green cardamom - we use shop-bought fine cardamom powder
● Double or Heavy cream - this is the secret ingredient! Double cream adds an extra layer of creaminess which is so delicious. Adding double cream means that you do not have to boil the milk for a long time to achieve the same thickness when reducing the milk.
Equipment
Heavy bottomed pan - you need a heavy-bottomed, non-stick pan to heat the milk without it sticking
Muslin cloth - a muslin cloth is needed to separate the solids from the whey when making our homemade paneer.
Colander - to strain the paneer from the whey
A large flat pan - the pan where we cook the chhena in sugar syrup needs to be flat so that the balls are not crowding on top of each other. A wider base means that the chhena have plenty of room to expand sideways
Measuring cups, jugs and spoons
Method
There are a few steps required to make the balls.
- Firstly, we have to make a homemade paneer
- This paneer is then kneaded to form a smooth dough and shaped into balls
- These balls are then cooked in a thin sugar syrup until they double in size and become spongy

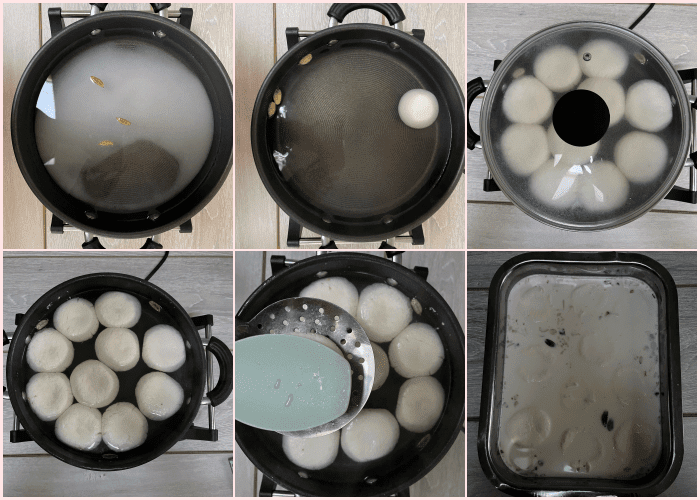
Ensure your heavy bottomed pan is perfectly clean and free from other smells. Rinse the inside in cold water before adding the milk. I have found that this step prevents milk from sticking to the pan and burning.
Continuously stir the milk as it comes to a boil.
Once it reaches a rolling boil, add a few drops of either lemon juice or distilled vinegar. Wait to see if the milk has split. If not, add more drops.
Switch off the heat immediately after the milk has split
Place a muslin cloth over a colander that is sitting in a large bowl.
Pour the solids and whey into the colander. The muslin cloth will catch the solids and the whey will be collected in the bowl below.
Wash the solids or chhena well under cold water to remove the smell and taste of the vinegar/lemon juice
Squeeze as much liquid from the muslin cloth as possible before tying the cloth tightly over the chhena. Use a heavy weight to push out more liquid.
Do this for around 20-30 minutes. We do not want to completely dry out the mixture but retain a little of the moisture. If the mixture is too dry then the chhena will end up chewy and will not come together as a mass.
(during this step, begin preparing the sugar syrup)

The next step is to knead the paneer. Add a spoon of cornflour to the paneer before kneading.
Use the heel of your palm and knead for approximately 10 minutes to make the dough smooth and grain-free.
Use a spoon or mould to accurately measure out the same amount of paneer to form equal balls.
Shape the balls into thick disks.
Prepare thin sugar syrup in a large flat bottomed pan.
Place the balls into the boiling sugar syrup and cover the pan. This is an important step as we want the balls to steam in the sugar syrup. Keep the heat/flame on high.
If you feel that the syrup is becoming thick, add more water to the syrup. Thick sugar syrup will make the balls hard.
The balls will swell and increase in size.
Do this step for approximately 10-12 minutes once you've covered the pan. Once the balls have cooked, keep them in the syrup for a further 15 - 20 minutes.
Do not overhandle the balls because they will break.
The balls are now ready to be placed in the milk cream once gentle pressure has been applied to squeeze out some of the sugar syrup.
You have now basically made Rasgullas!
How to know if you have kneaded the paneer enough
We've mentioned that over kneading the dough will cause the chhena to become hard and chewy - so how do we know when to stop kneading?
You will notice that the dough starts to become shiny and if you feel it between your fingers, it will not be grainy but smooth. One way to test is to take a lump of dough and form a round ball. If the ball has many cracks and does not smooth evenly then it still needs some kneading.
Why your ras malai balls are hard
There are many different reasons why the balls may be hard or chewy. There are different points during the cooking process that can cause this to happen.
Firstly, do not completely dry out the chhena when removing the moisture. Retain a little so that the dough can easily be rolled into balls without many cracks.
Do not store chenna in the refrigerator, make balls from the fresh chenna.
Ensure you knead the paneer thoroughly so that it is grain-free however do not over-knead (see tip below). Over kneading can also cause the balls to become hard.
Make sure you add balls in hot and boiling sugar syrup. Do not let go temperature of the sugar syrup low at any point.
Add one ball at a time to maintain the temperature of the syrup.
The sugar syrup should have a thin consistency - a ratio of 1:4 sugar to water. During cooking, if the sugar syrup thickens, add more water to keep it thin
Do not overcrowd the pan when cooking the balls in the sugar syrup
Why do your ras malai break
The chhena balls can break due to a few reasons. If the chhena mixture was too dry, it will be crumbly and not form perfect balls. These balls can disintegrate when cooked in sugar syrup.
However, if the mixture is too soft, it will again not form balls that can disintegrate in the sugar syrup.
What to do if your ras malai is too hard or chewy
If you do find yourself which Ras Malai that has become too hard, there are a few things you can do.
Take a thin toothpick and piece small holes into the balls. This will allow the milk to soak through more effectively and can soften the balls after a few hours.
Making the milk cream:
Making perfect chhena seems to be everyone's focus with ras malai but making sure that the milk cream is perfect too is just as important.
We want a generous amount of milk cream for Ras Malai as the balls will continue to soak up the milk. A common mistake is making the milk cream too thick. The balls will not absorb the milk over time and this will make them become hard.
No malai should form over the milk. We are not trying to make a thick laccha rabri here. Essentially, what we are making is a plain smooth basundi.
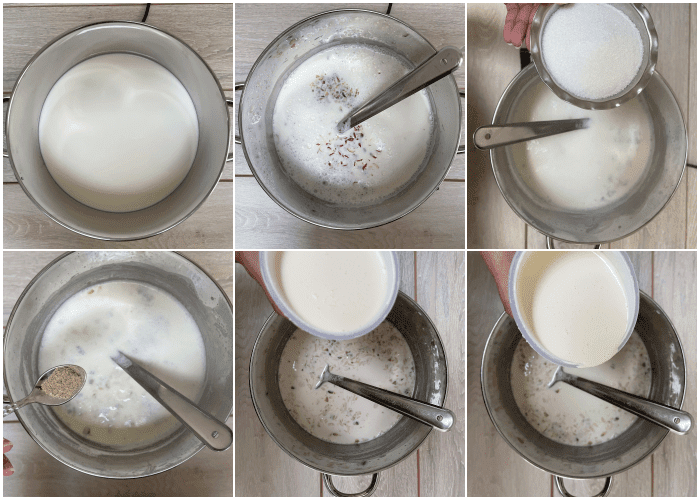
Firstly, rinse a heavy-bottomed pan with water and then pour in the milk.
Heat the milk gently over a medium flame whilst continuously stirring. When stirring, ensure you keep stirring and scraping the bottom and sides of the pan.
The milk will eventually begin to reduce and thicken
At this point, add your slivered nuts and ground cardamom.
Add your sugar and continue cooking. The sugar will release moisture and temporarily thin out the milk but it will thicken.
Add cream and cook a little further.
Once you have achieved the correct consistency (see below), keep stirring the milk every so often as it cools.
You can add the balls, or Rasgullas once the milk has reached room temperature.
Correct Consistency of milk cream
For Ras Malai, we do not want a thick milk cream. This is because we want the chhena balls to soak and sponge up the lovely milky goodness and flavours.
The consistency of the Basundi should reflect that of half and half milk or it should be thinner than English single cream.
Serving Suggestion
Ras Malai is often served during special occasions and festivals.
Due to its demanding method of cooking and its show-stopper finish, Ras Malai isn't one of those sweets that is made "just because". It is mostly always for a celebration of some sort.
Once the Ras Malai is prepared, it is placed in the fridge for a few hours ideally to help all of the flavours infuse and settle. The chhena will further swell as they soak up the milk.
Ras Malai is best eaten chilled as it is.
Storage
Ras Malai can easily and safely be stored in the fridge. Make sure the Ras Malai is stored flat without any of the balls piled on top of each other. Use clingfilm liberally to keep any odours of the fridge out!
Ras Malai is not suitable for freezing.
Ras Malai should be eaten in the first 3-4 days.
IF YOU LIKE THIS RECIPE
...you might also like our other Indian sweets recipes:

HOMEMADE SOFT RAS MALAI
Ingredients
- 12 cup - whole milk 3 litre
- 3 tablespoon vinegar or lemon juice
- 1 tablespoon cornflour/starch
- 1 ½ cup sugar 300g
- 6 cup tap water 1.5 litre
- 12 cup whole milk 3 litre
- 500 ml double/heavy cream 2cup
- 1 ¼ cup sugar 250g
- ½ tsp. cardamom powder
- 3-4 tbsp. almond and pistachio slivers
- 1 paper Silver varq
- 1 Slivered nuts almonds and pistachios
- 1 Dried flower petals
Instructions
- Firstly, rinse a heavy-bottomed pan with tap water and then pour in the 12 cup of milk.
- Heat the milk gently over a medium flame whilst continuously stirring. When stirring, ensure you keep stirring and scraping the bottom and sides of the pan.
- The milk will eventually begin to reduce and thicken.
- At this point, add your slivered nuts and ground cardamom.
- Add your sugar and continue cooking. The sugar will release moisture and temporarily thin out the milk but it will thicken.
- Add double/heavy cream and cook further 2-3 minutes.
- Once you have achieved the correct consistency, keep stirring the milk every so often as it cools.
- Cover the pan and leave it aside.
- Heat milk in a pan.
- Continuously stir the milk as it comes to a boil.
- Once it reaches a rolling boil, add a few drops of either lemon juice or distilled vinegar. Wait to see if the milk has split. If not, add more drops.
- Switch off the heat immediately after the milk has split
- Place a muslin cloth over a colander that is sitting in a large bowl.
- Pour the solids and whey into the colander. The muslin cloth will catch the solids and the whey will be collected in the bowl below.
- Wash the solids or chhena well under cold water to remove the smell and taste of the vinegar/lemon juice
- Squeeze as much liquid from the muslin cloth as possible before tying the cloth tightly over the chhena. Use a heavyweight to push out more liquid.
- Do this for around 20-30 minutes. We do not want to completely dry out the mixture but retain a little of the moisture. If the mixture is too dry then the chhena will end up chewy and will not come together as a mass.
- The next step is to knead the paneer. Add a spoon of cornflour to the paneer before kneading.
- Use the heel of your palm and knead for approximately 10 minutes to make the dough smooth and grain-free.
- Use a spoon or mould to accurately measure out the same amount of paneer to form equal balls.
- Shape the balls into thick disks.
- Mix water and sugar in a wide and flat bottom pan.
- Bring it to a boil, add one by one paneer tikkis into the sugar syrup.
- Cover it with the lid and cook tikkis 10-12 minutes.
- Once the balls have cooked, keep them in the syrup for a further 15 - 20 minutes.
- Pour milk cream into a flat tray with little height, such as a roasting tray.
- Gently squeeze out extra sugar syrup from the paneer tikkas using a perforated spoon and spatula.
- Place them in the milk cream, make sure they are submerged in milk.
- Sprinkle slivered nuts.
- Cover the tray with the cling film and keep it in the refrigerator for a minimum of 2-3 hours to develop flavours and chill.
- When serving apply silver varq, extra slivered nuts and dried rose petals.
Notes
Nutrition
PLEASE NOTE: Nutritional values are estimated by a computer and may vary based on ingredients and portion sizes. For personalised dietary advice, please consult a qualified healthcare professional.
Share on Facebook Pin This RecipeNote - This Ras Malai post has been updated from the recipe archives with new images and content, first published on 26th January 2011.


Unknown says
looks so gorgeous and yumm..
chef and her kitchen says
Love this sweet...Belated b'day wishes 2 ur kid..
rasmalai looks really tempting..
Pushpa says
Rasmalai looks stunning and delicious.
Unknown says
Happy Birthday to u'r daughter!!Rasmalai looks irresistible
Panchpakwan says
Happy rebulic day. Rasamalai looks so yummy, wish I could have some.
Happy B'day wishes to your princess. God bless her.
swapna says
Wish ur daughter a very happy birthday...
A creamy and delicious rasmalai!!
Priya Suresh says
SOo tempting and delicious rasmalai, Happy Republic day and my hearty birthday wishes to ur daughter..
Krishnaveni says
rasmalai looks so pretty, perfect treat, love it
Unknown says
Rasmalai came out very good dear.....looks yumm!
Happy Birthday to ur daughter!!
Savi-Ruchi says
My birthday wishes to your loving daughter! God bless her. Happy Republic Day. Wish I could get those rasamalai :p
Archana says
Yummy Rasmalai.Republic Day Greetings and a Happy Birthday to ur daughter!
Sanjeeta kk says
B'day wishes to your daughter. The Rasmalai looks just the right sweet to celebrate the occasion. Lovely clicks, Jagruti.
Harini says
Blessings to ur lil angel !! Ras malai is my fav too!!
Jeyashris Kitchen says
very yummy rasamalai. looks creamy.Happy republic day and wish ur daughter a very happy birthday
Finla says
Wishing her a very Happy Birthday .
And Rasmalai just look so so good no wonder this is her favourite dessert.